navigating to the product
Firstly, navigate to 'Product Information' where all your products will be located.

And select the product to which you wish to add your user instructions to.
If you’re yet to add a product, head over to ‘adding a product’ to learn how to add your product.
toggles
Toggles are tablets that serve a function that allows you to hide work from a supplier or external stakeholder while you get to work on completing it.
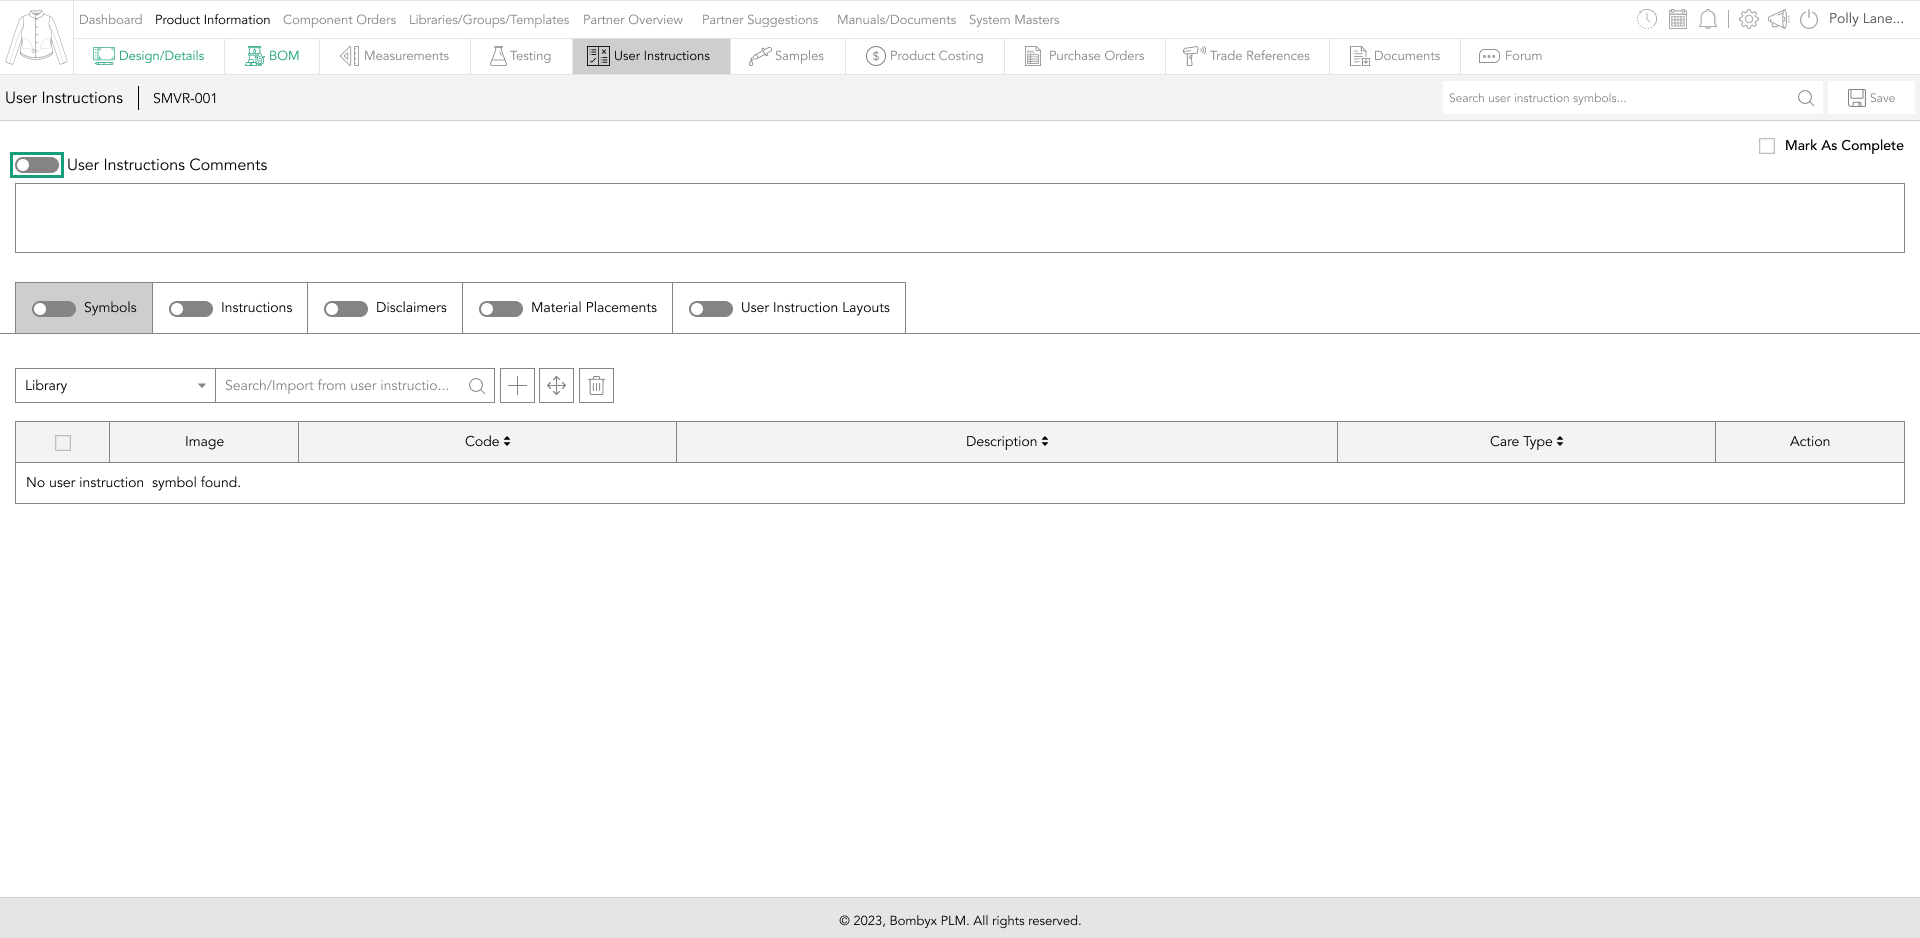
If you turn the toggle on by tapping it, you’ll be able to showcase the upload on the Bombyx platform as well as in the PDF file which you’re able to submit to collaborators.
comments section
At the top of the page is a field for general instruction comments you wish to share with your collaborators, whether that be your internal team or supply chain.
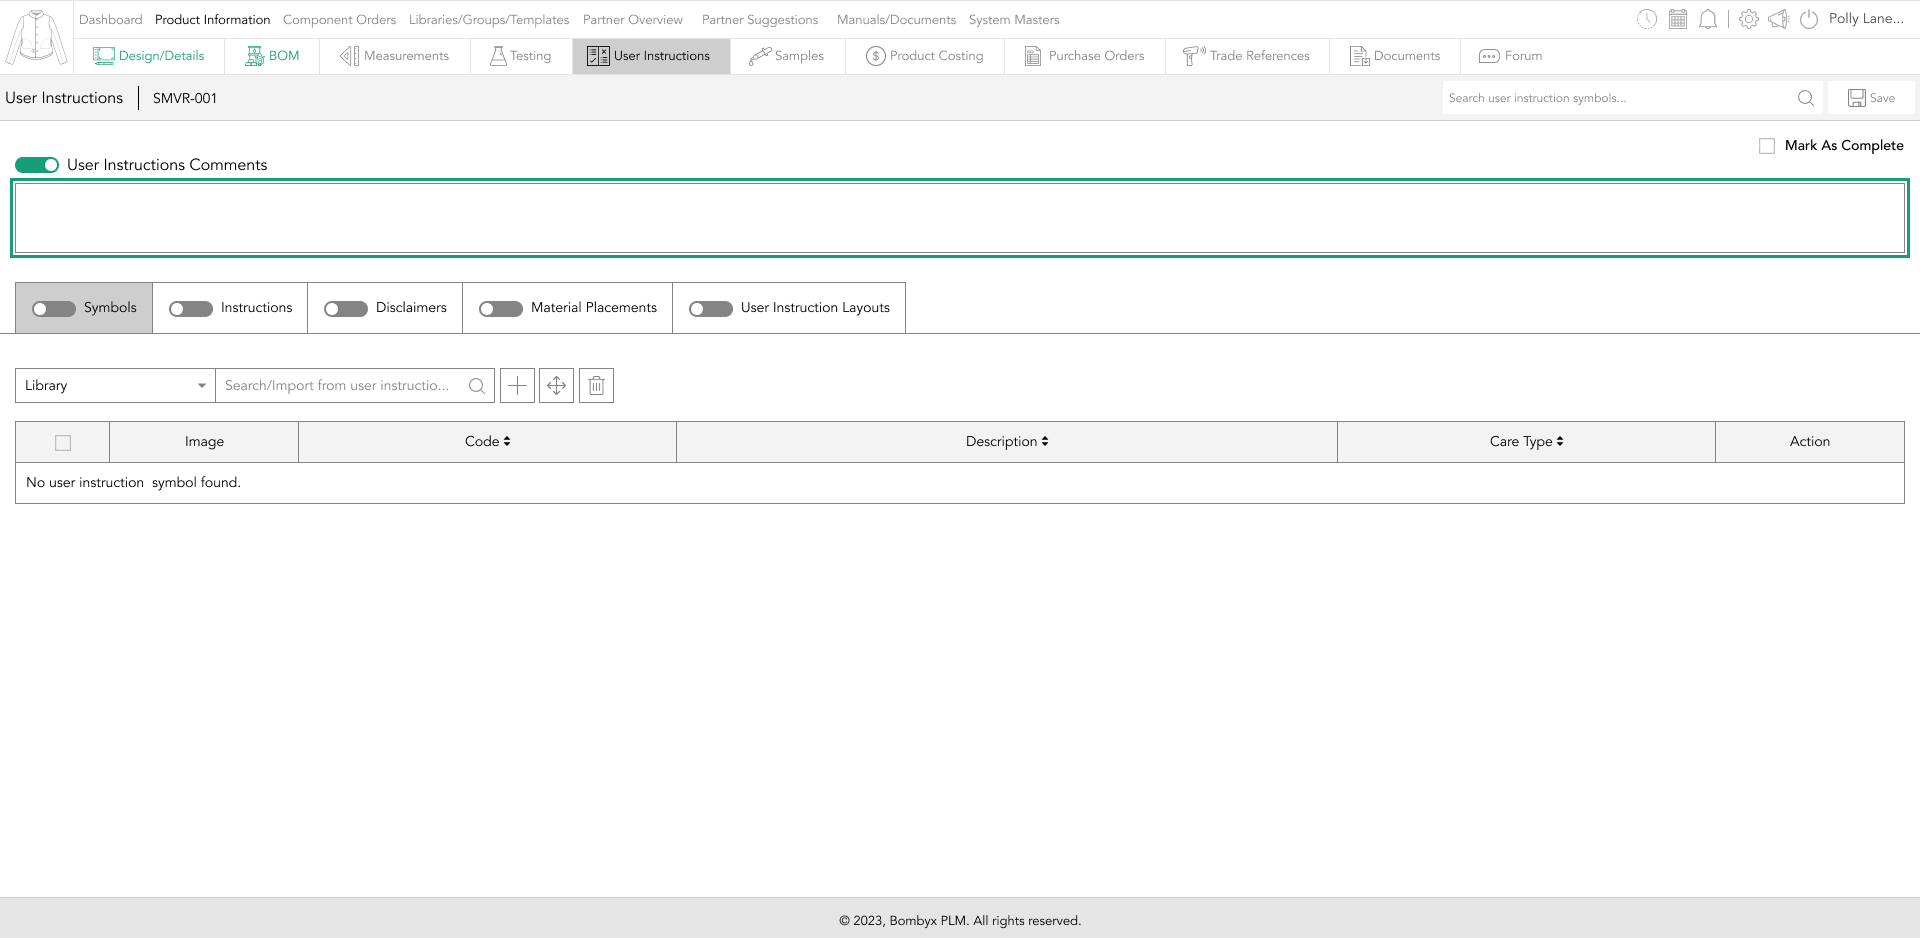
All you have to do to make it visible outside of your organisation is to turn the toggle on (green), and your suppliers will also be able to see those comments.
importing from the library
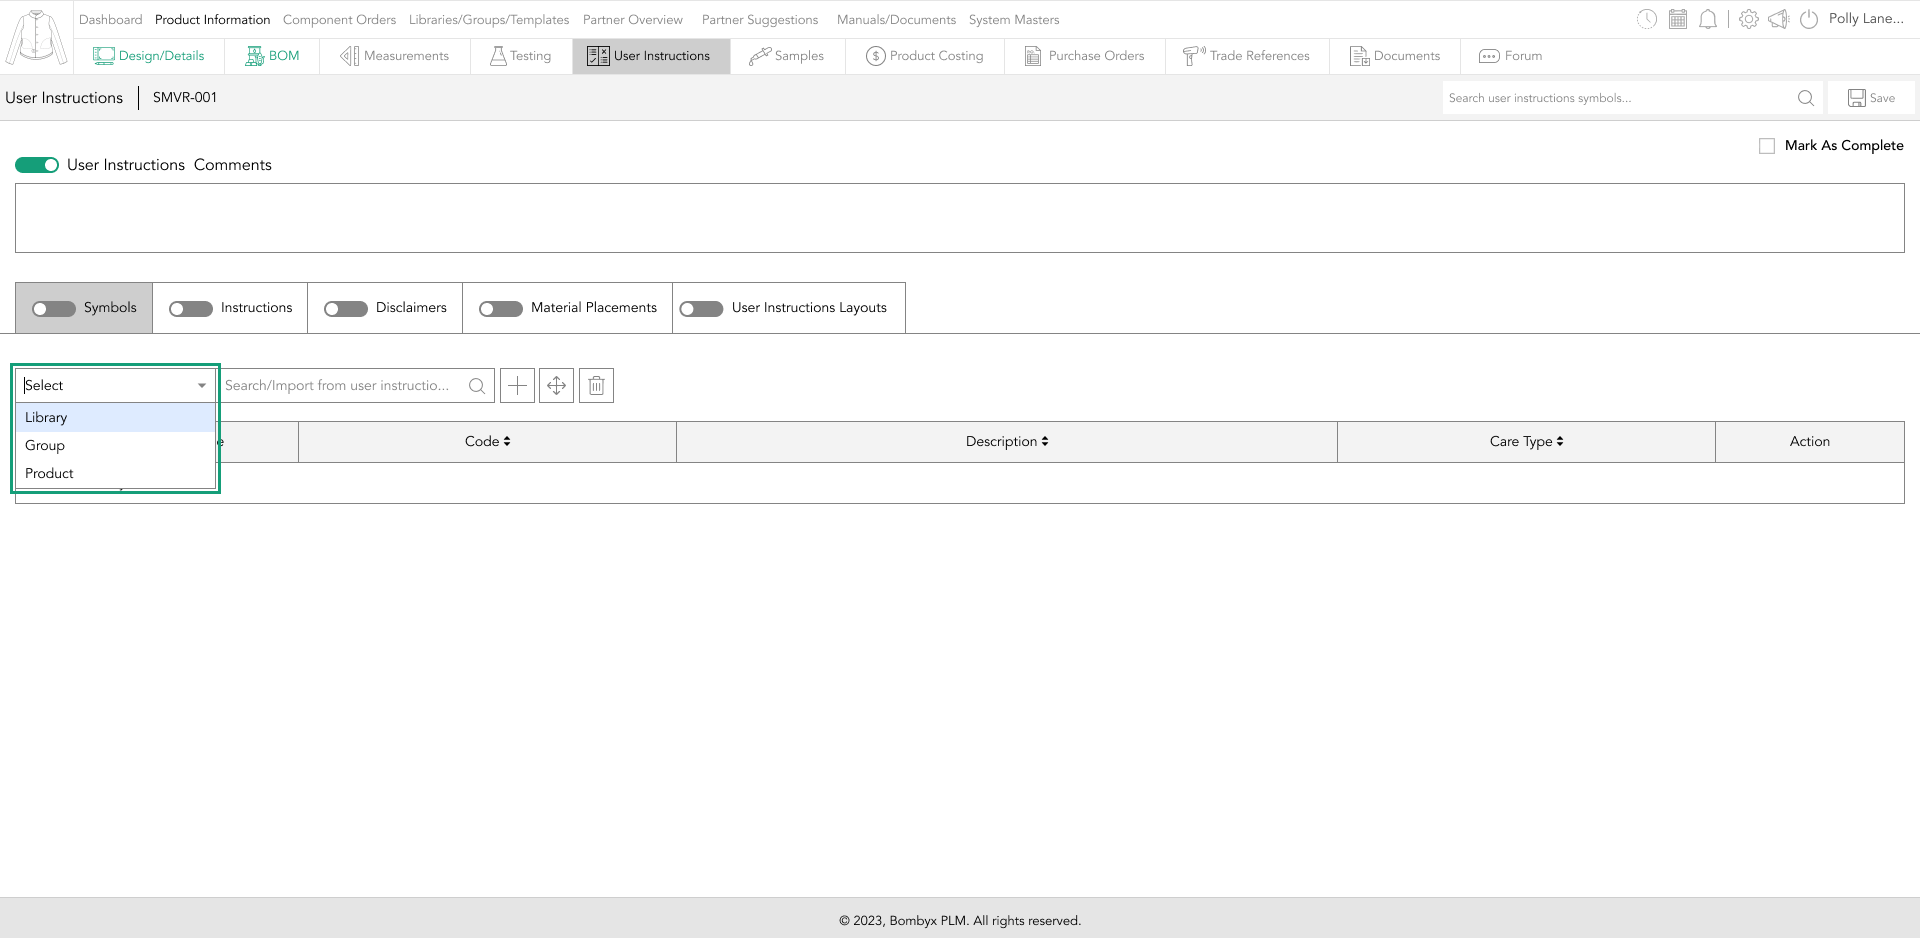
The library is the default selection, meaning that the item you’re importing is coming from the library.
In the search bar, as you start typing, Bombyx will start to filter out the results based on your search.
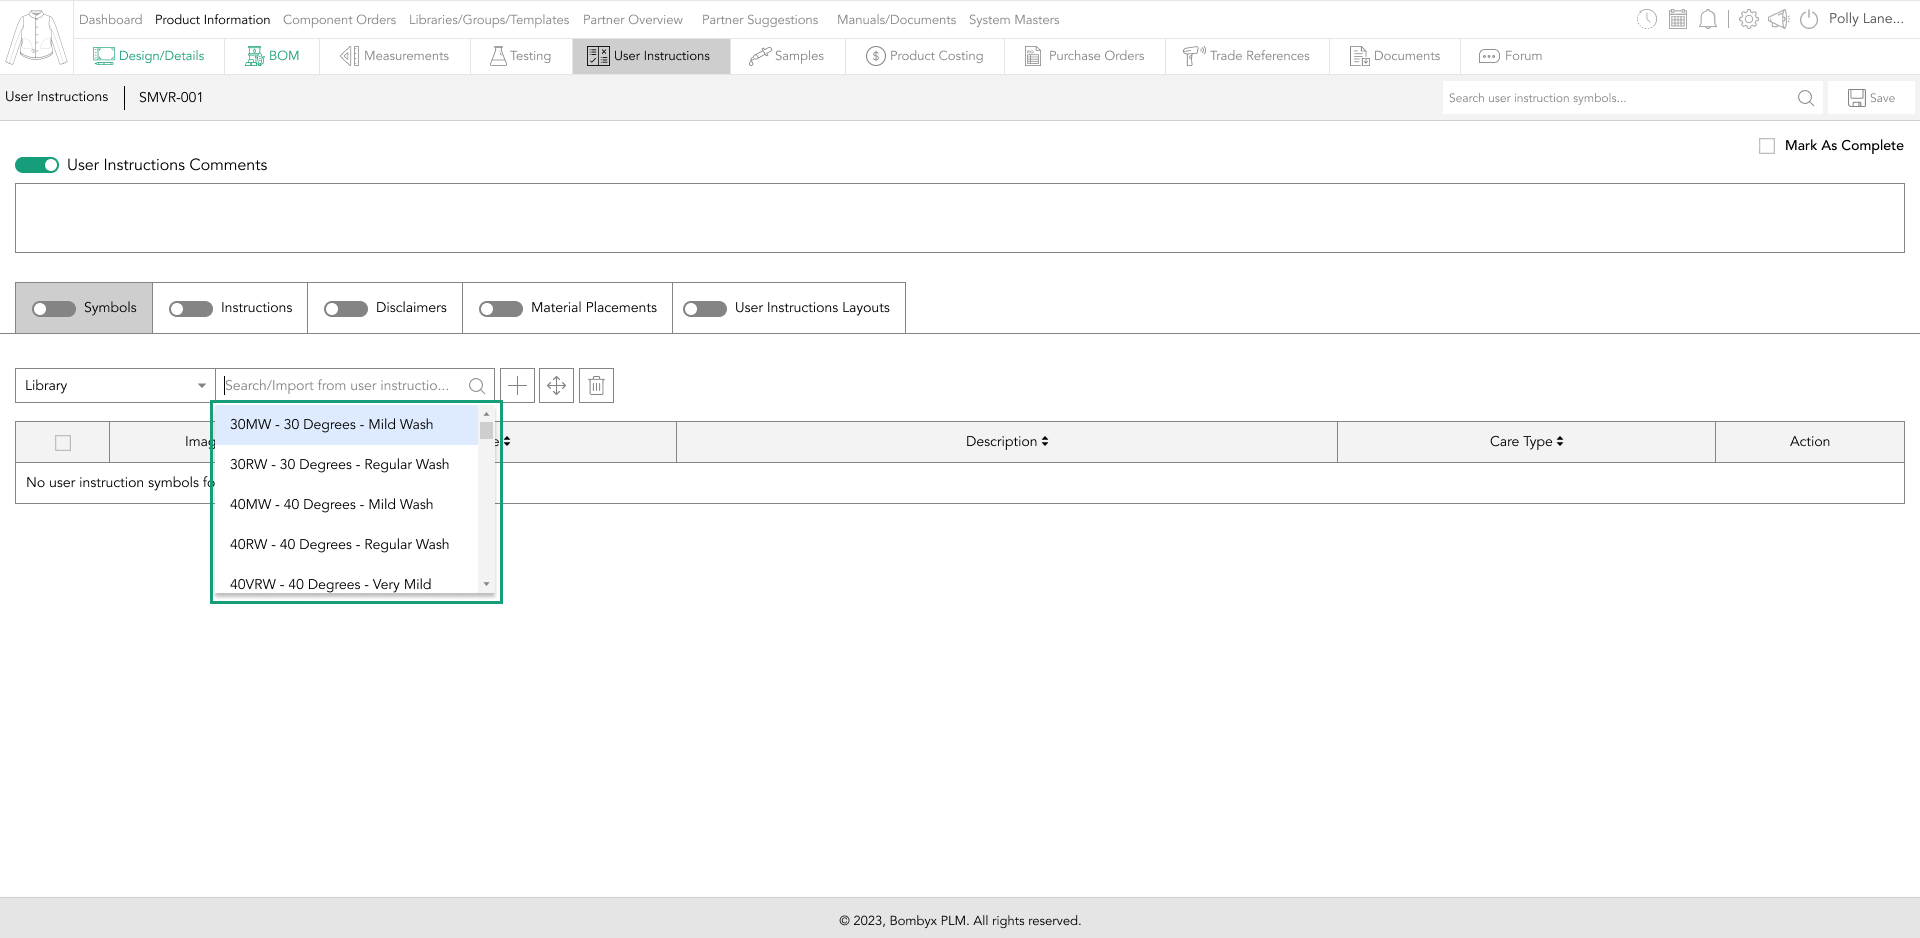
Once you’ve found the instruction you want to import into the product, tap the selection and your selection will appear.
import from a group
To import all the user instructions added to a group, select the dropdown to the left of the search bar that has the default selection as ‘Library’ and change the selection to ‘Group’.
Start typing in the search bar the instruction group name and select it from the dropdown that will filter results based on what you’ve typed.
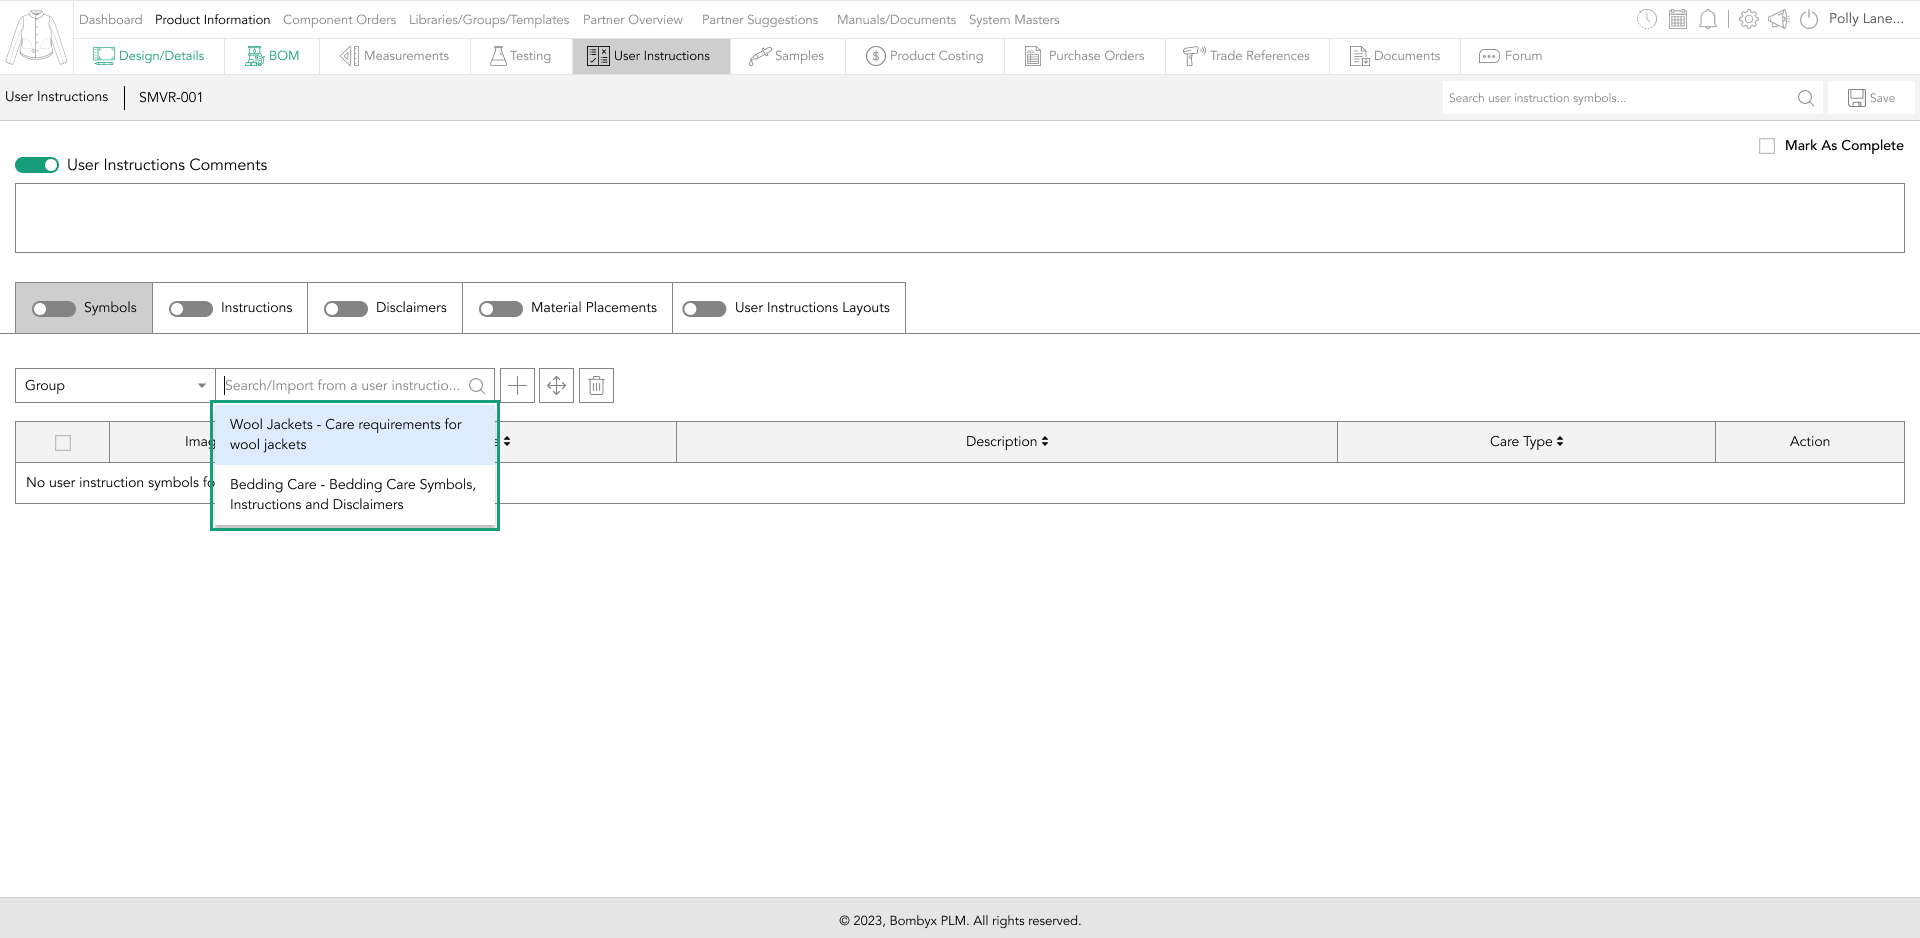
Once the required group is located from the search results dropdown, tap the group, for that instruction type.
import from a product
Importing from a product allows you to reuse previously created data from a previously created product.
This saves time when working on upgrading a product or developing something similar to the previous product as all of the components can be imported, allowing you to then edit the components and delete any that are not necessary for this development.
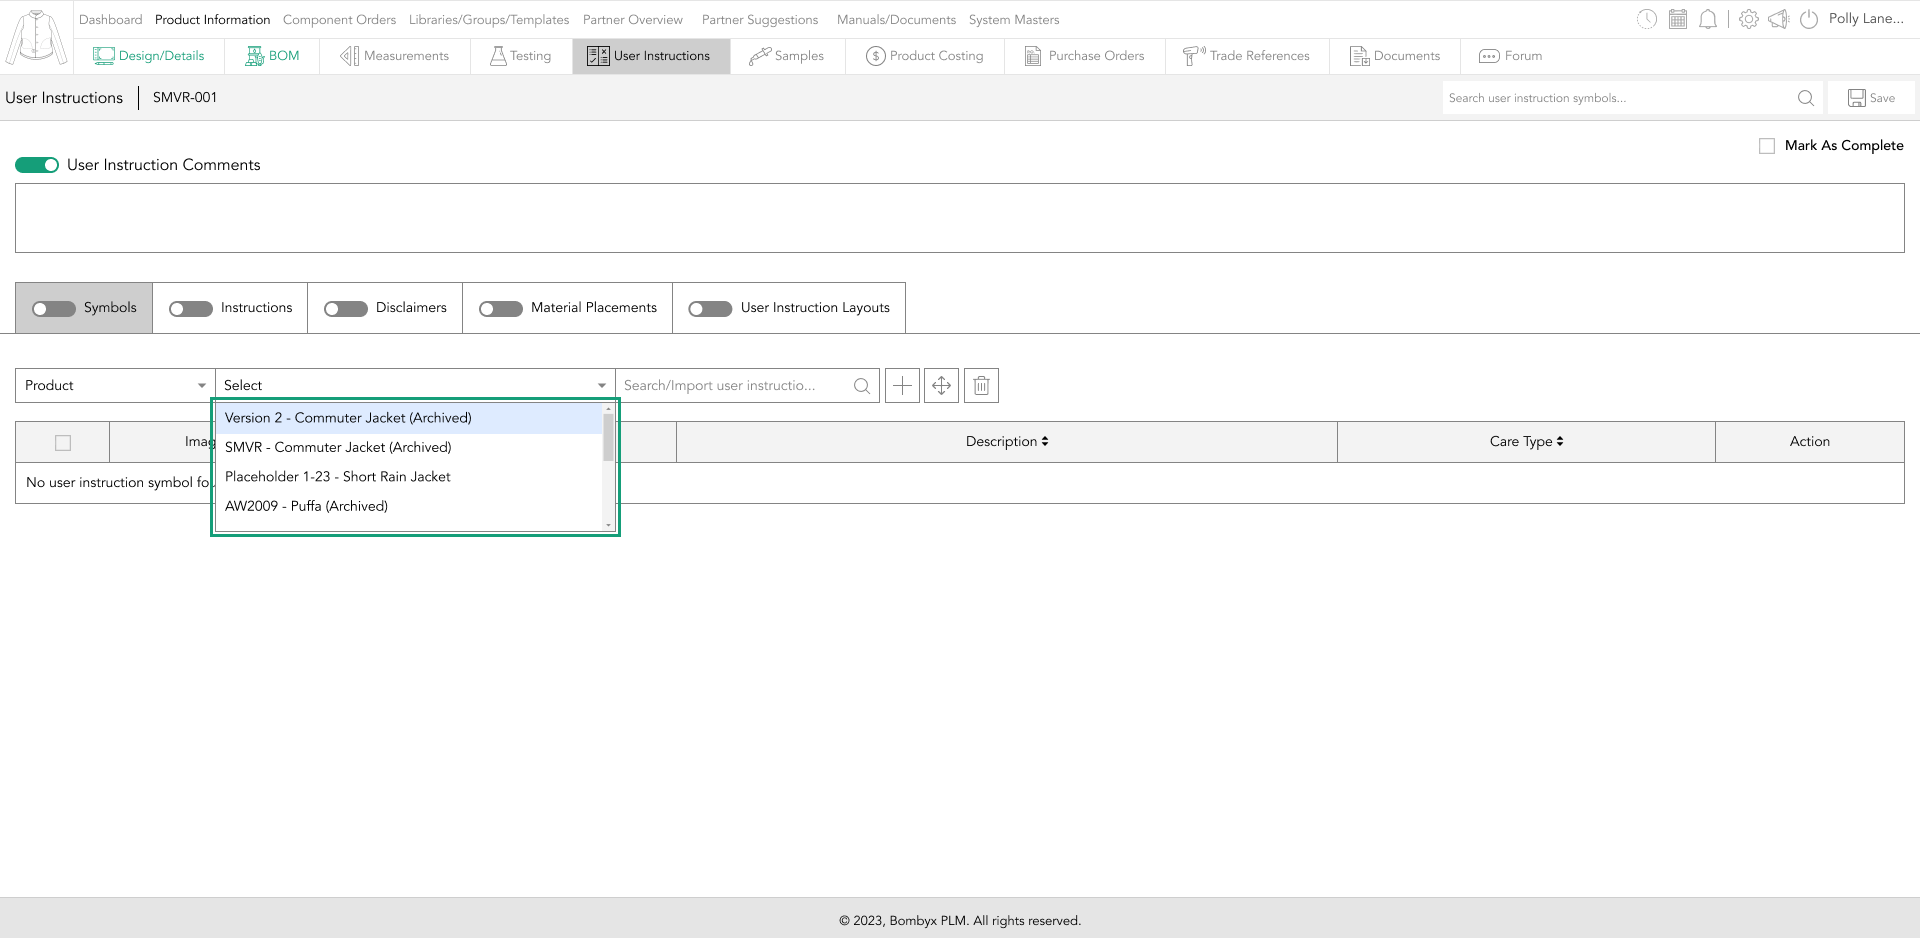
To import the instructions assigned to a previously created product, select the dropdown to the left of the search bar that has the default selection as ‘Library’ and change the selection to ‘Product’.
Start typing in the search bar the product name and/or description of the product you’d like to use.
adding symbols
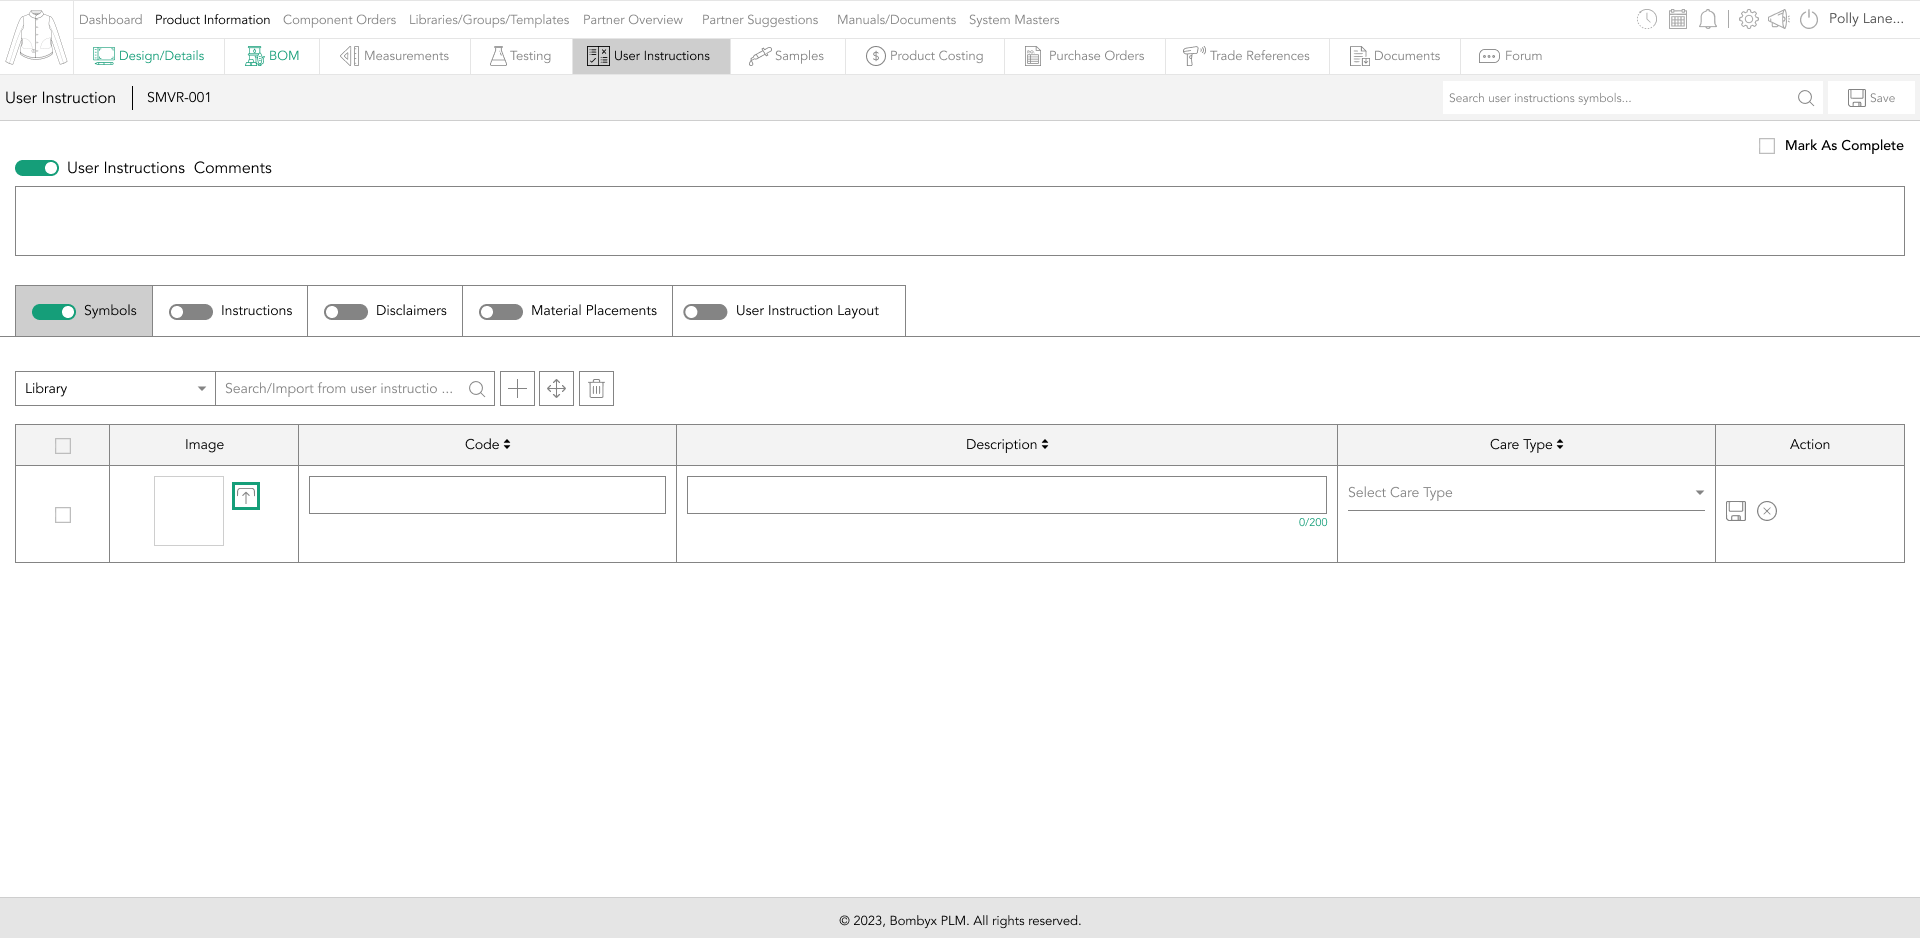
To add a new user instruction for the symbol section you will need to click on the plus icon that can be found next to the search bar function.
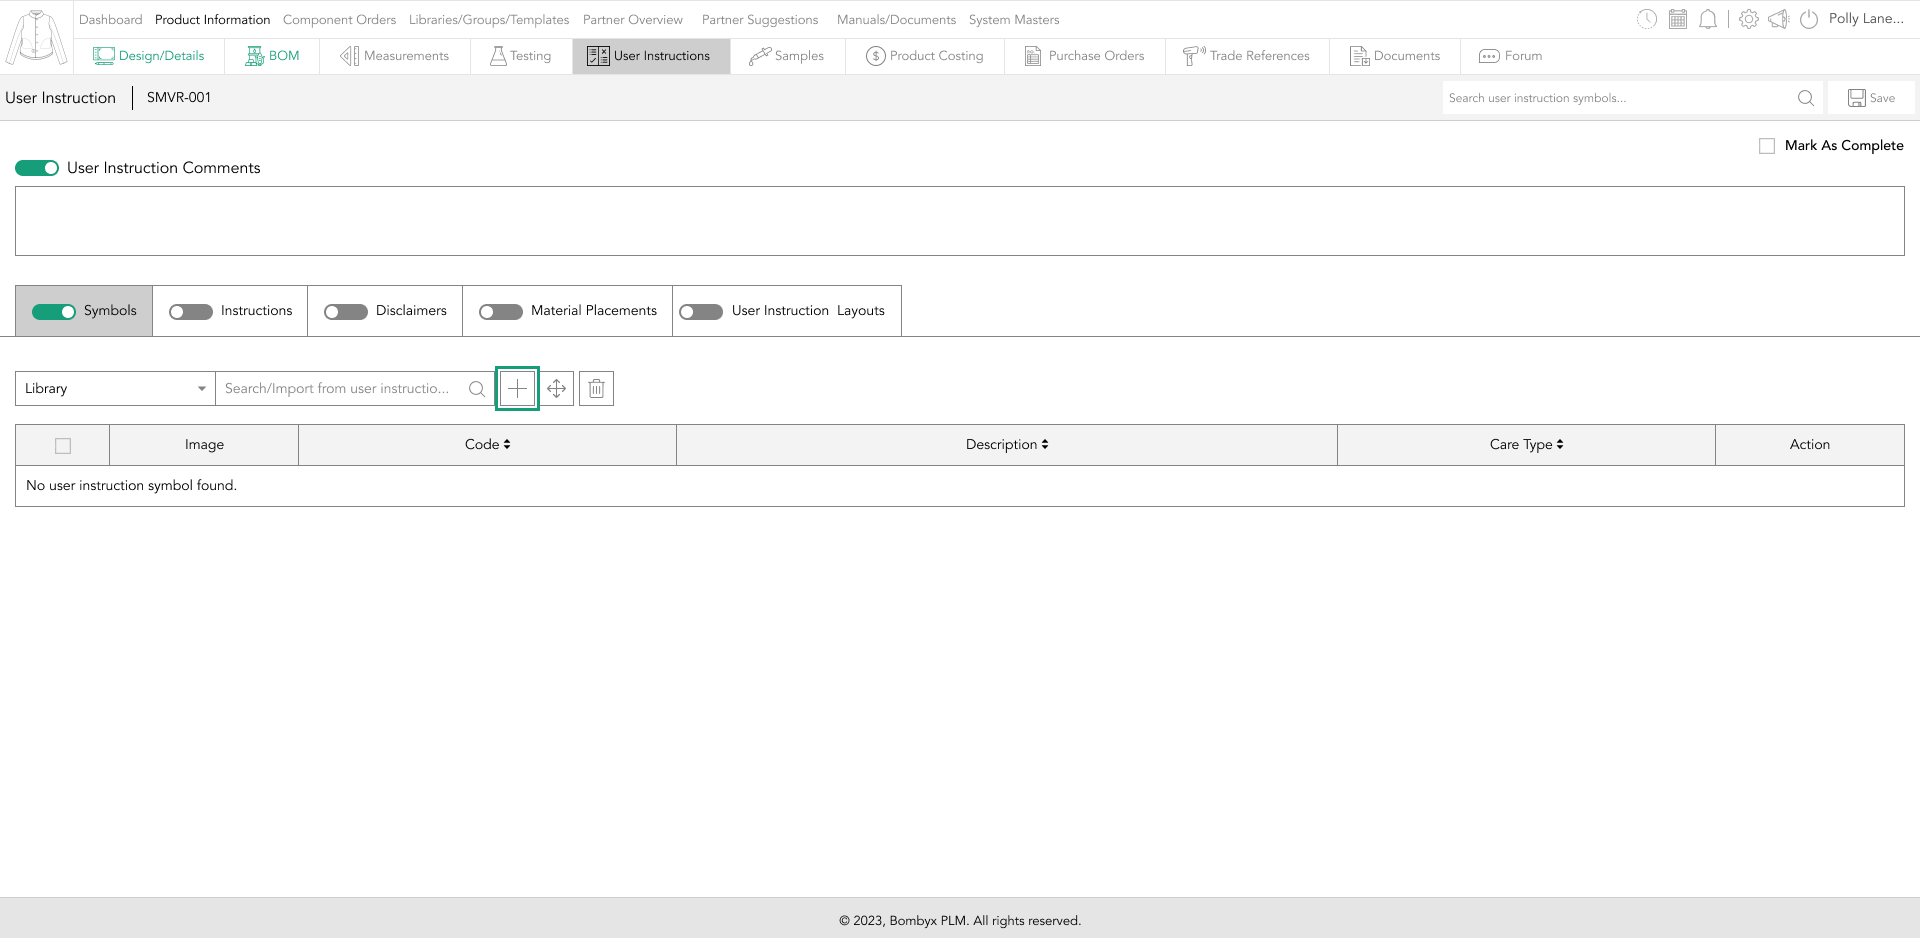
When clicked a row will appear in the table for you to fill in the relevant information, this includes the code, a description for someone to know what this code is, and a drop-down box to select the type of care.
You can also upload an image with the little icon that can be found next to the image. Once everything has been filled in at the end of the row you will see a save and cancel button if everything is correct you will click the first icon.
If the code you have typed out and saved already exists you will be unable to add this. To know this has happened you will get a message to alert you that this code already exists so you may need to edit the code.
editing symbols
To edit the information, tap the edit icon that is located at the end of each labeled row.
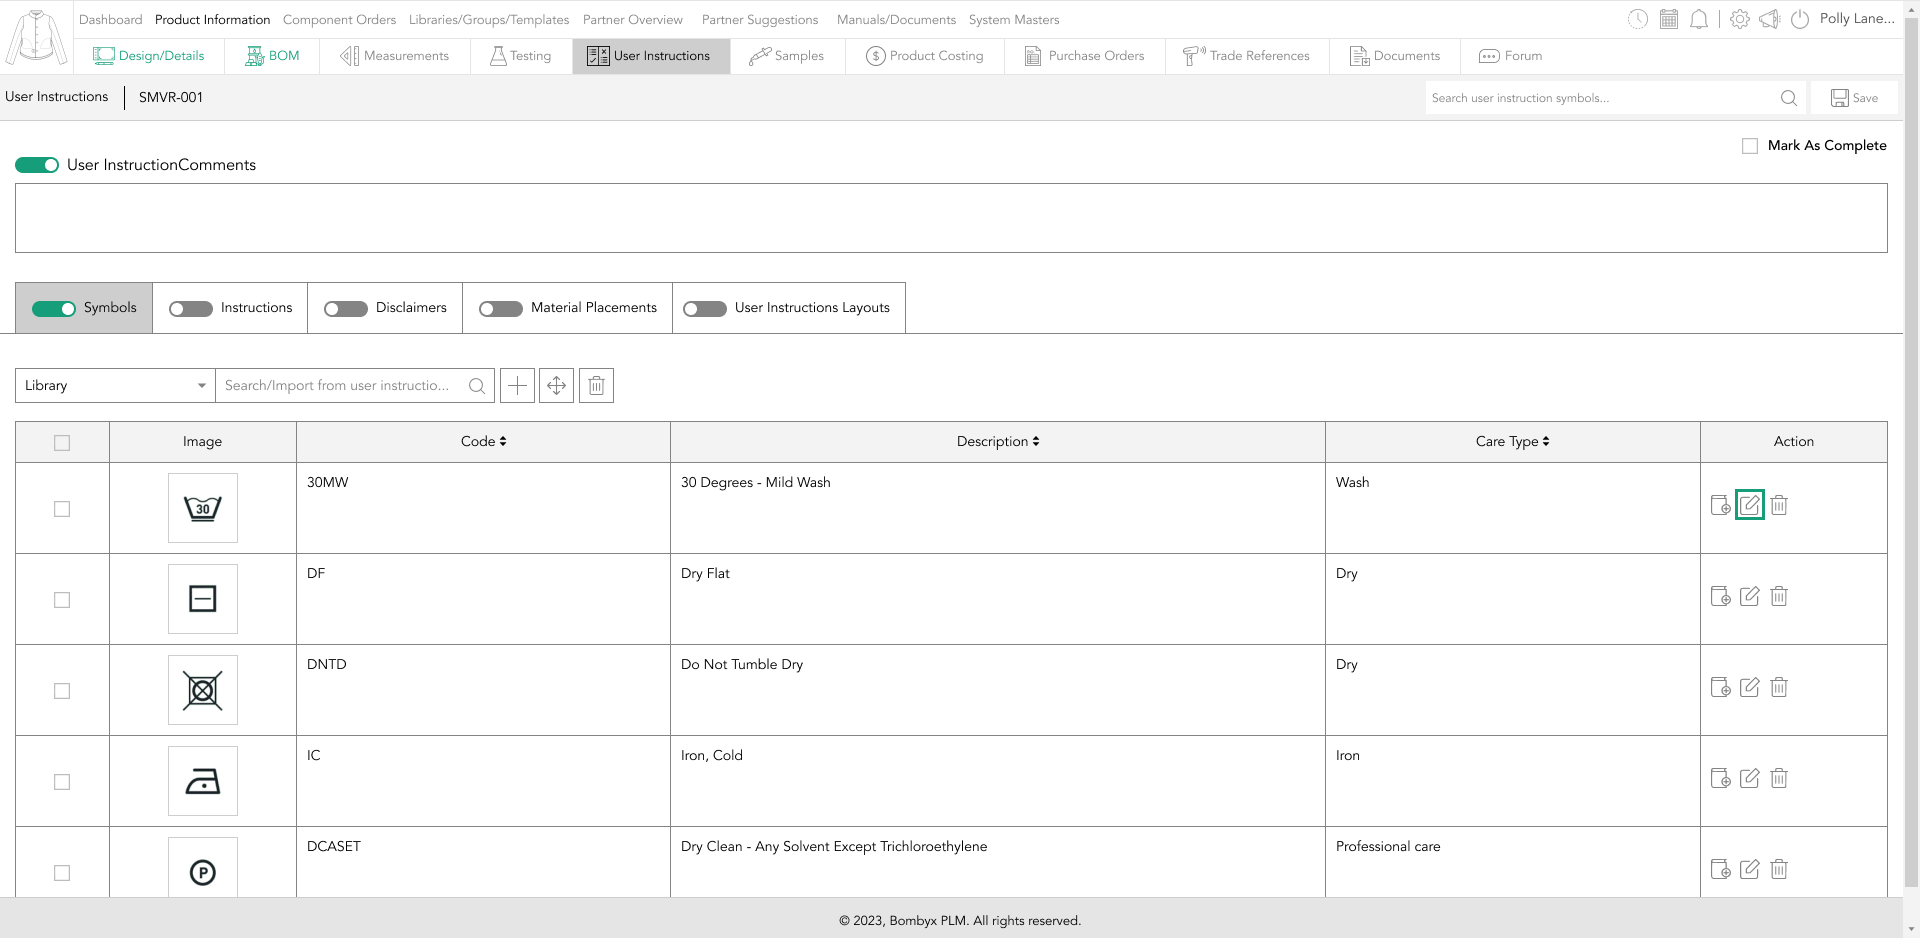
The table will become visible for you to edit/update the information.
add/update to library
To add/update the symbol to the library, tap the add/update to library icon, which is at the end of the row under the action panel.

A popup will appear where you can add a new reference code for that symbol, once done tap yes to update.
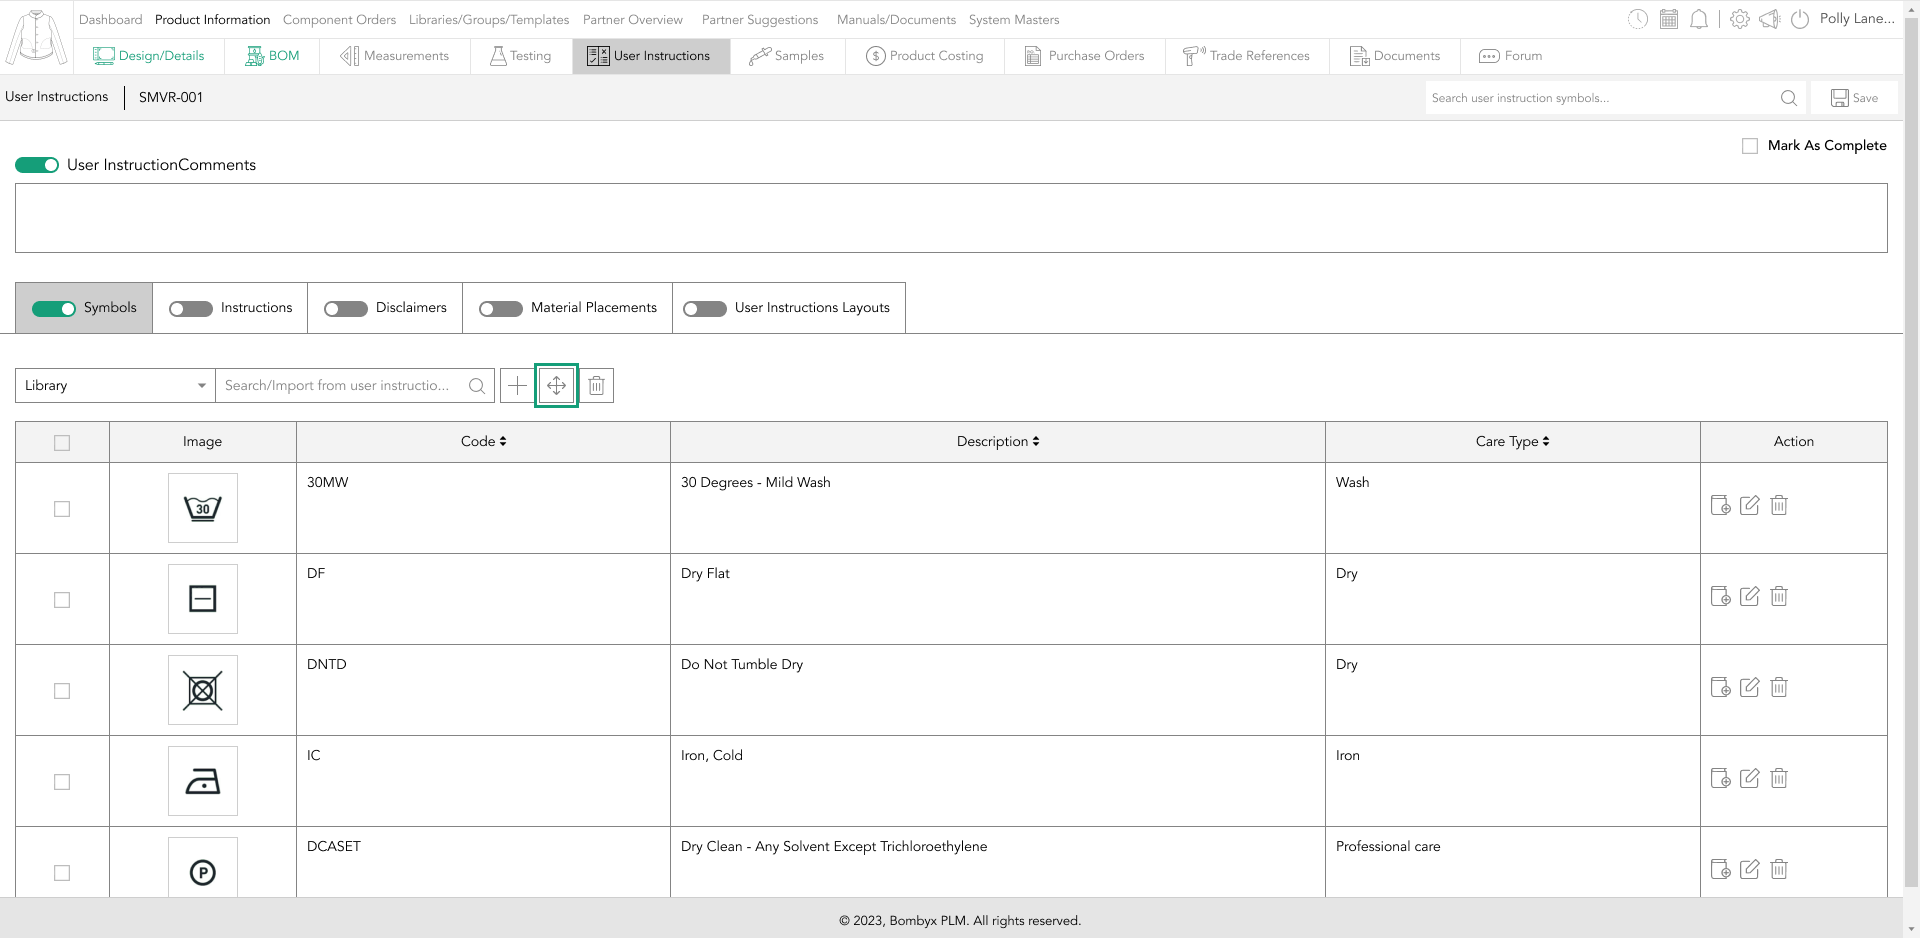
rearranging symbols
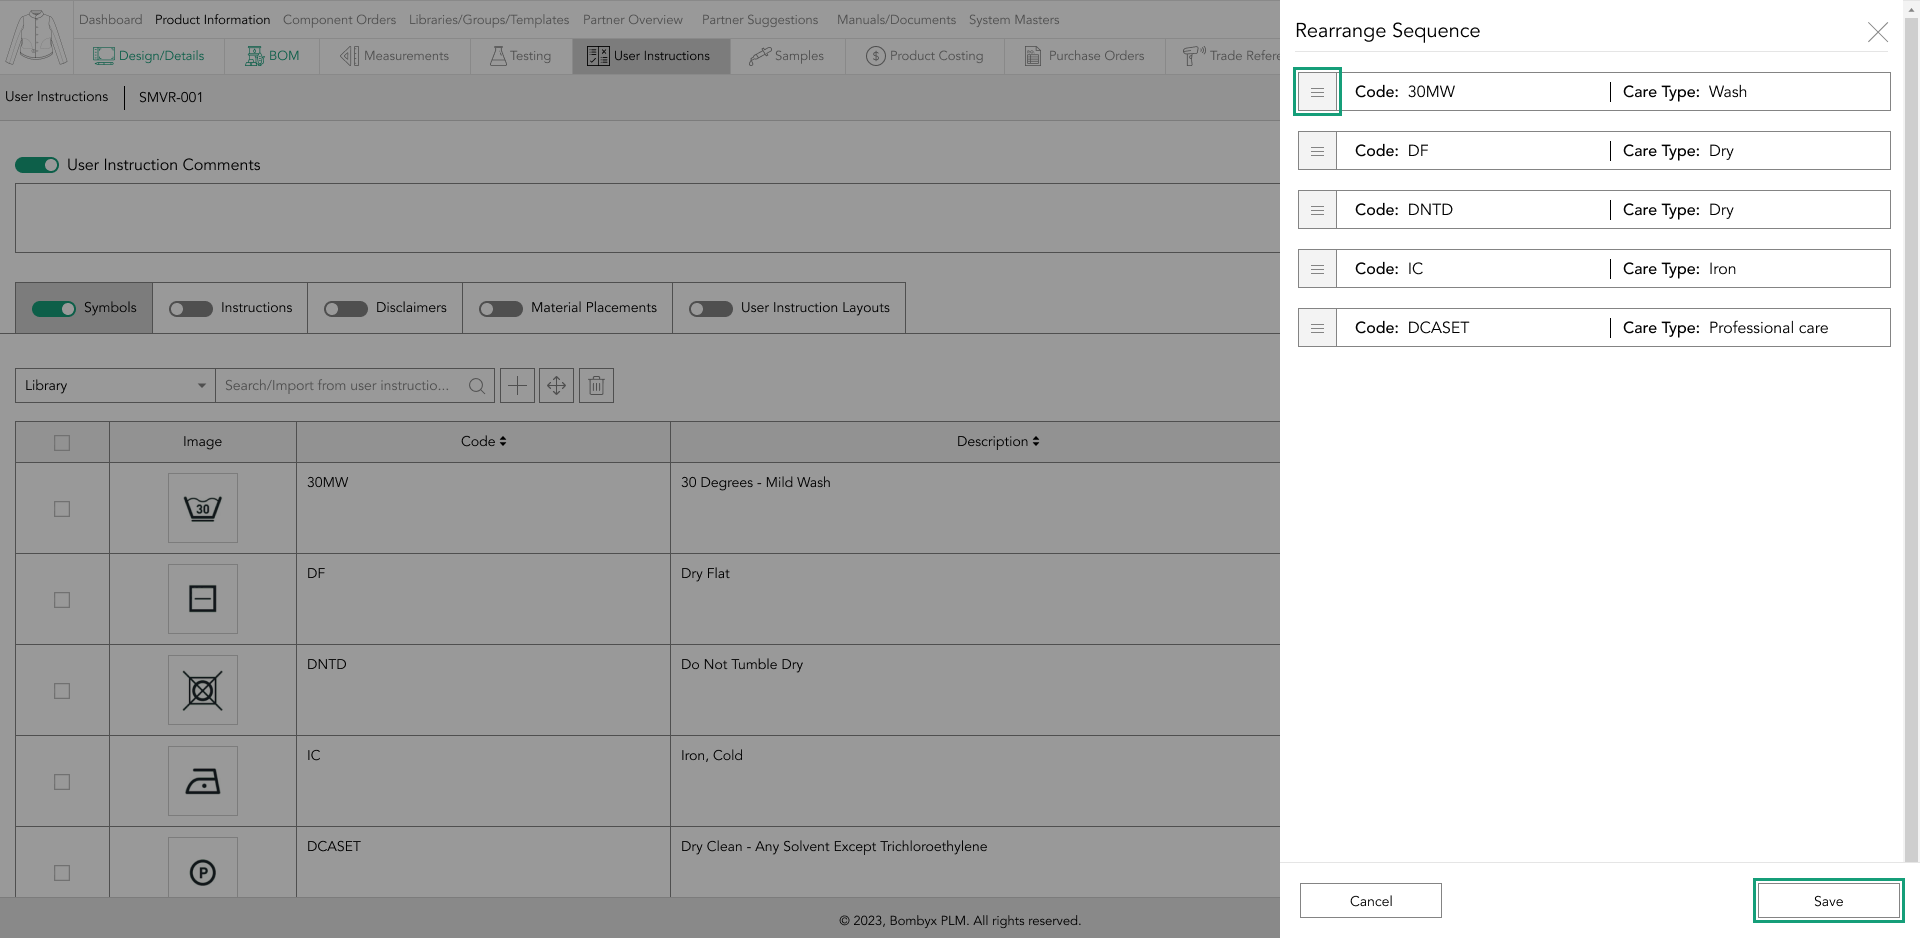
To rearrange the order of the symbols tap the ‘rearrange’ icon, and on the right-hand side a panel will appear with a list of all the symbols…
Simply drag and drop the items into the order that you’d like. Once you are happy tap the ‘save’ button.
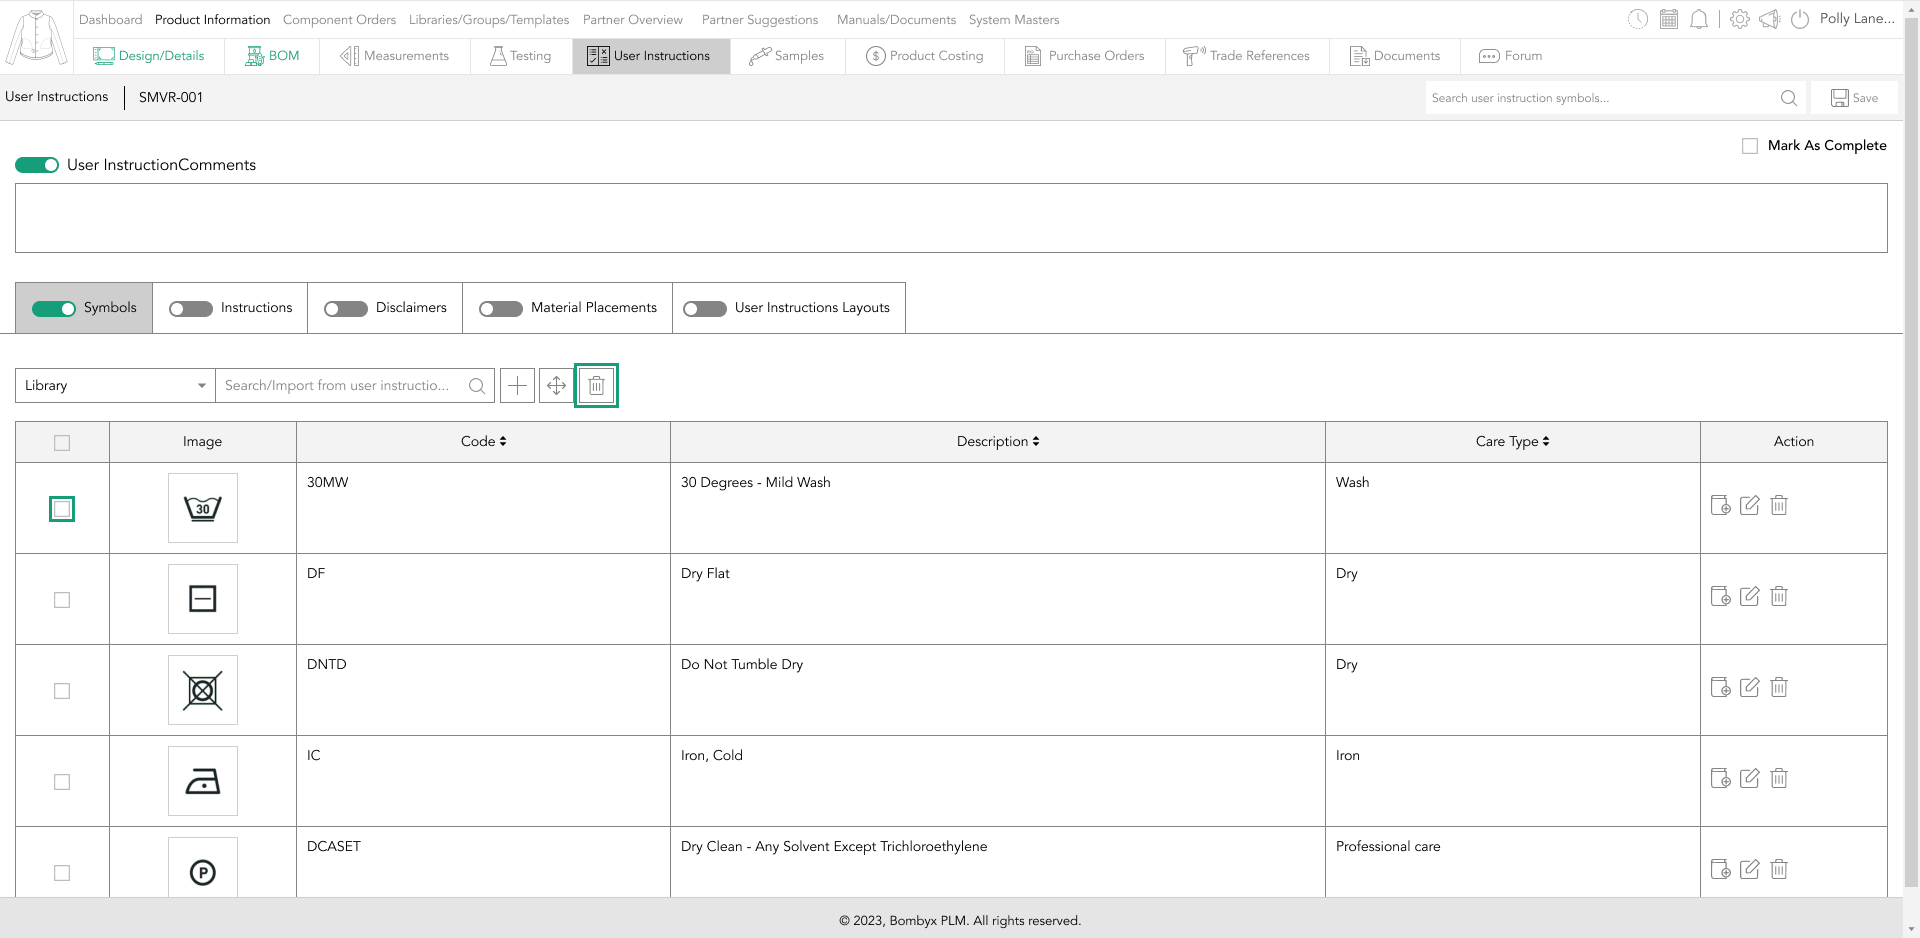
deleting symbols
To delete a single symbol, locate the bin icon in the action panel row. Once tapped a popup will appear asking you if you are sure you want to delete the selected user instruction symbol.

To delete multiple, tap the checkboxes to the left of the image, then click the delete button positioned next to the search bar.
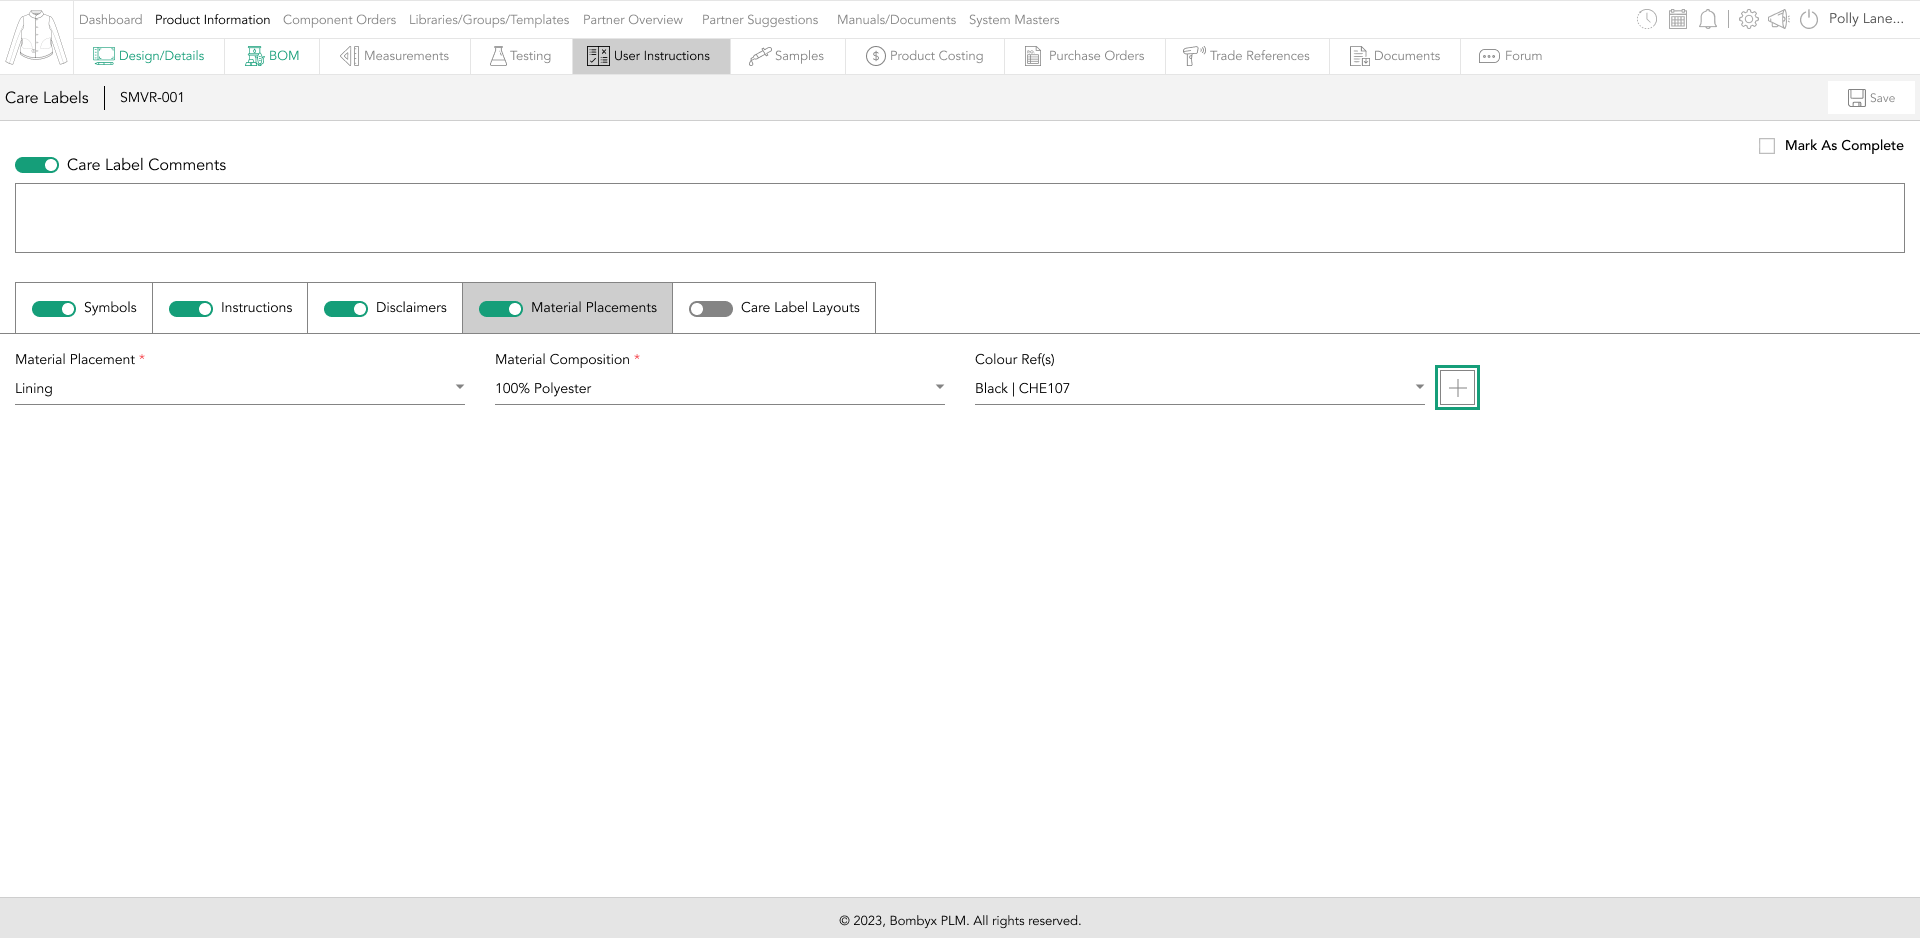
material placements
These are an array of dropdowns and text boxes. You’ll notice a red * along with the first three fields. In order to create a material placement, these fields will need to be filled before you’re able to tap save.
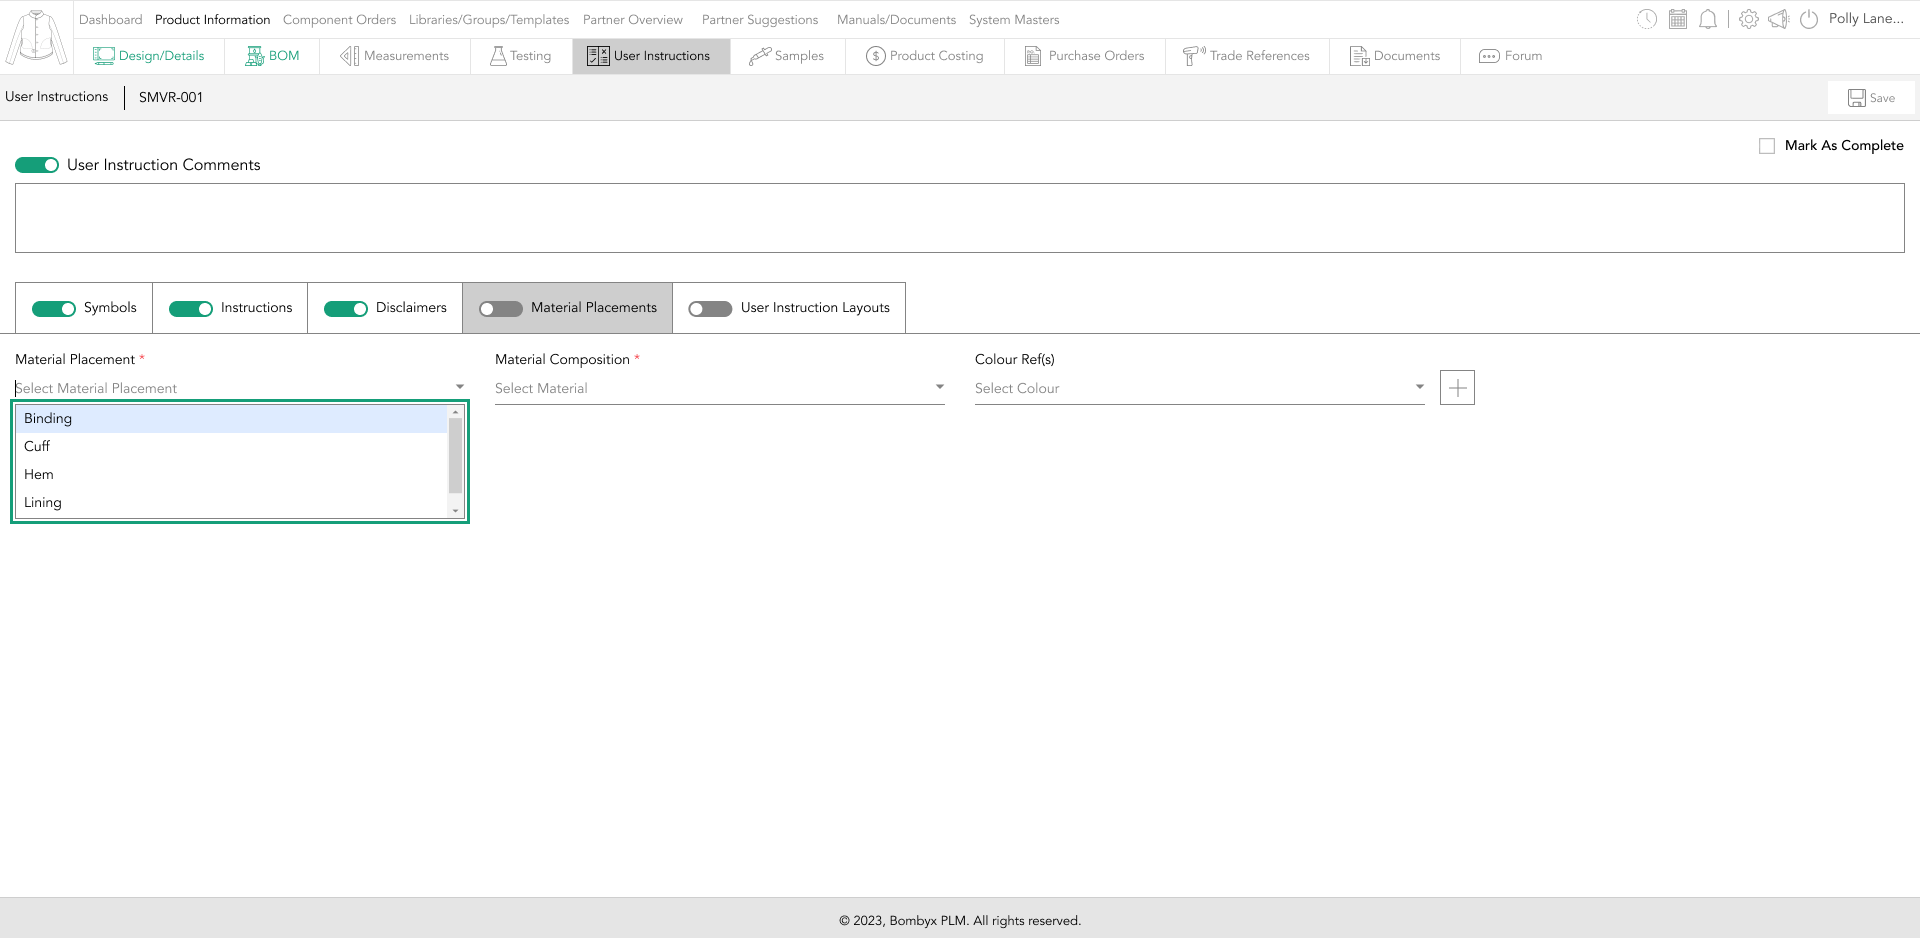
If you need to add multiple fields tap on the + icon that will be next to the colour ref field, if you have made a mistake, all you have to do is tap on the bin icon to remove any material placements.
user instruction layouts
Tap on the ‘upload’ icon, this will be the first icon next to the search bar function.
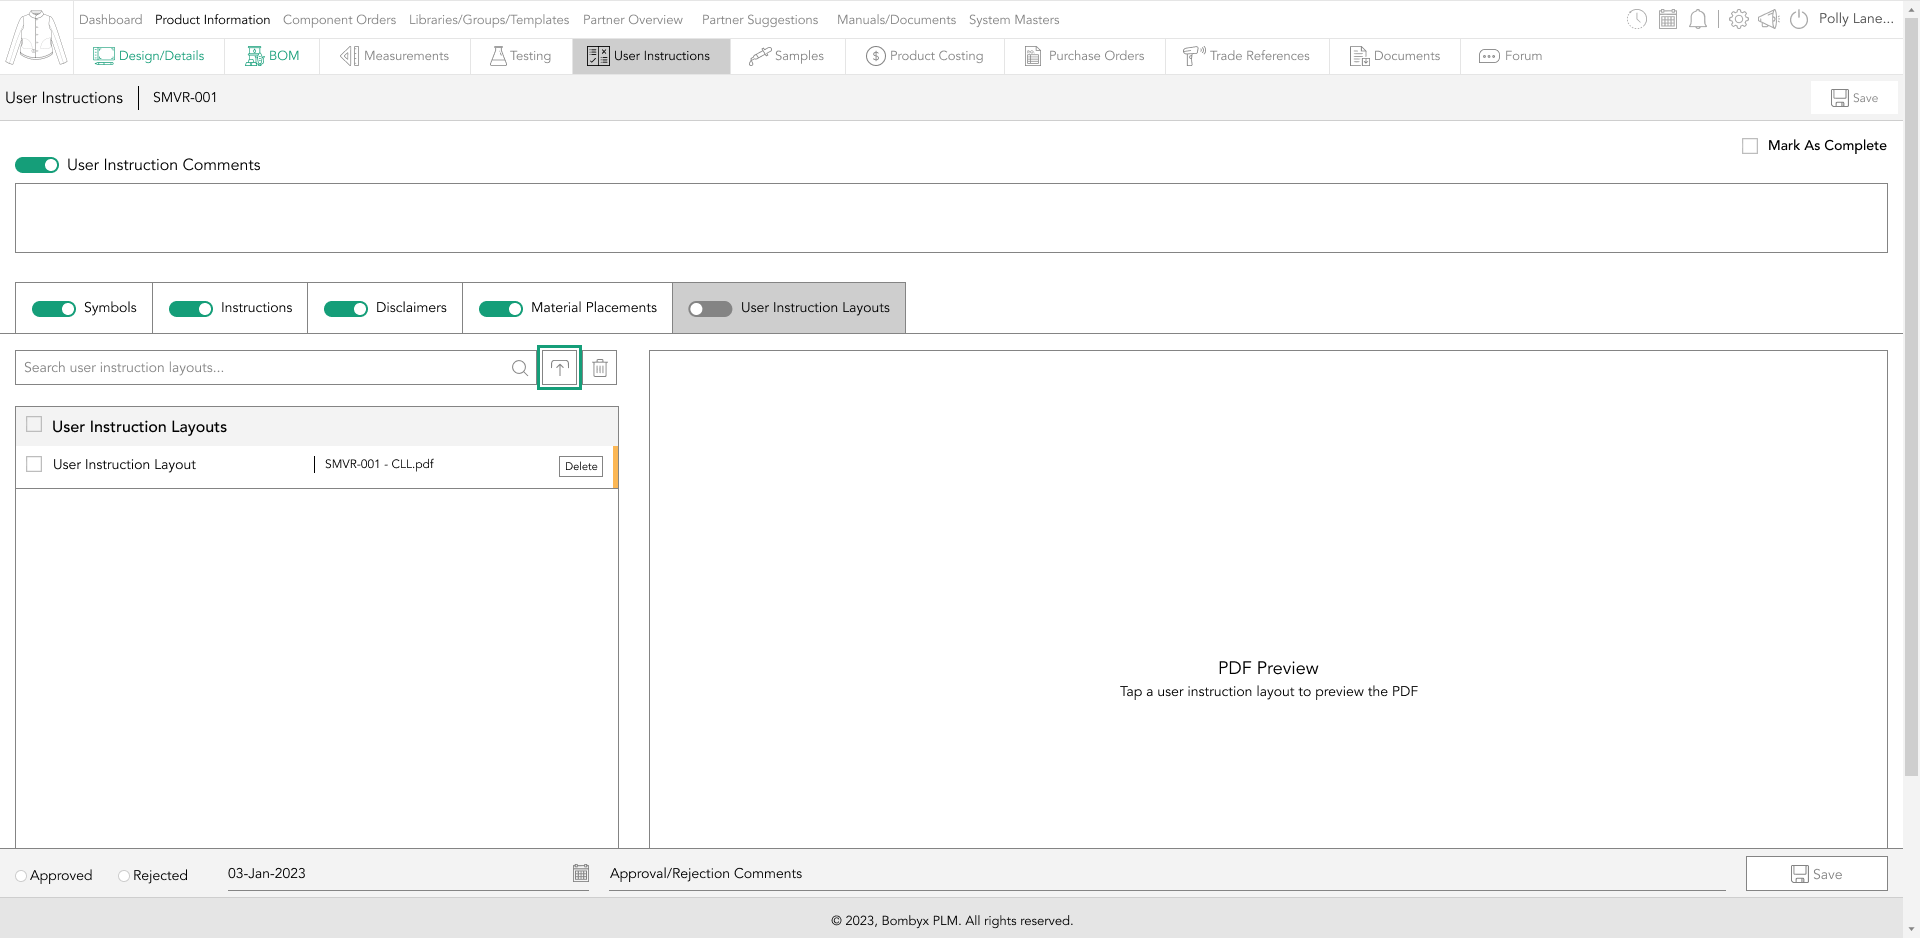
A popup will appear where you can either drag and drop the file or upload it by tapping on the upload icon.
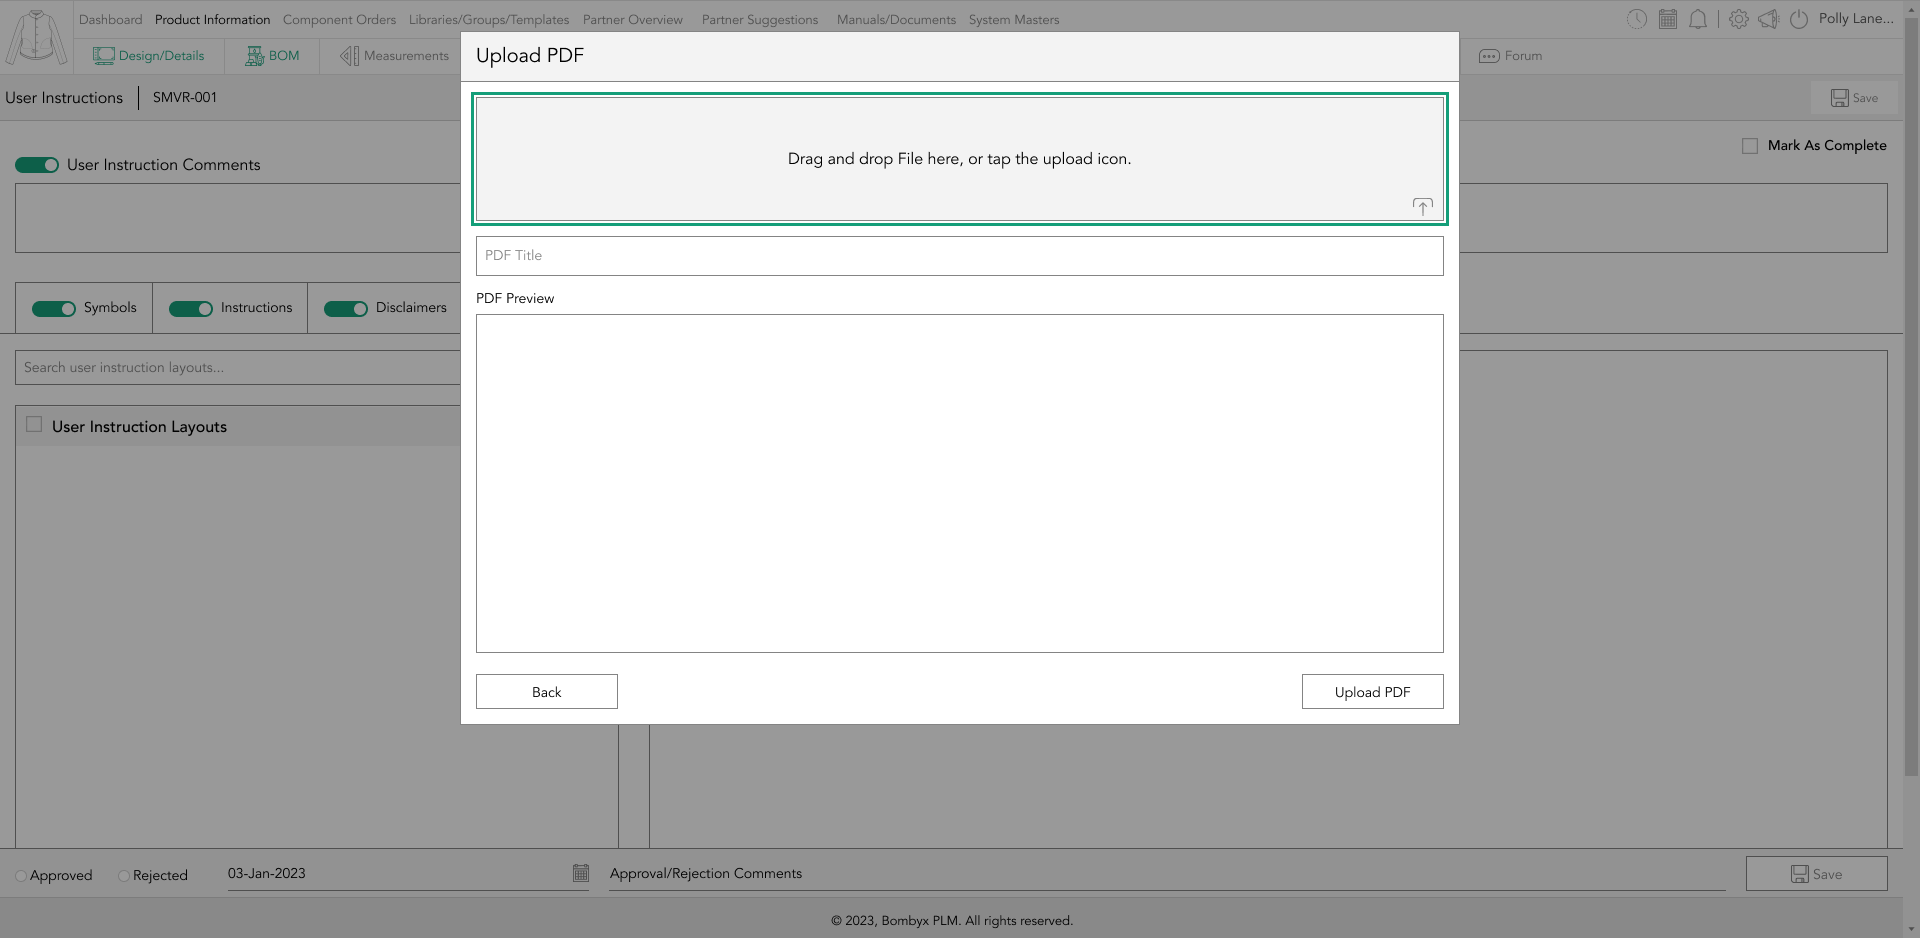
Then you can enter a title for the pdf file, once you are happy tap the ‘upload PDF’ button to save.
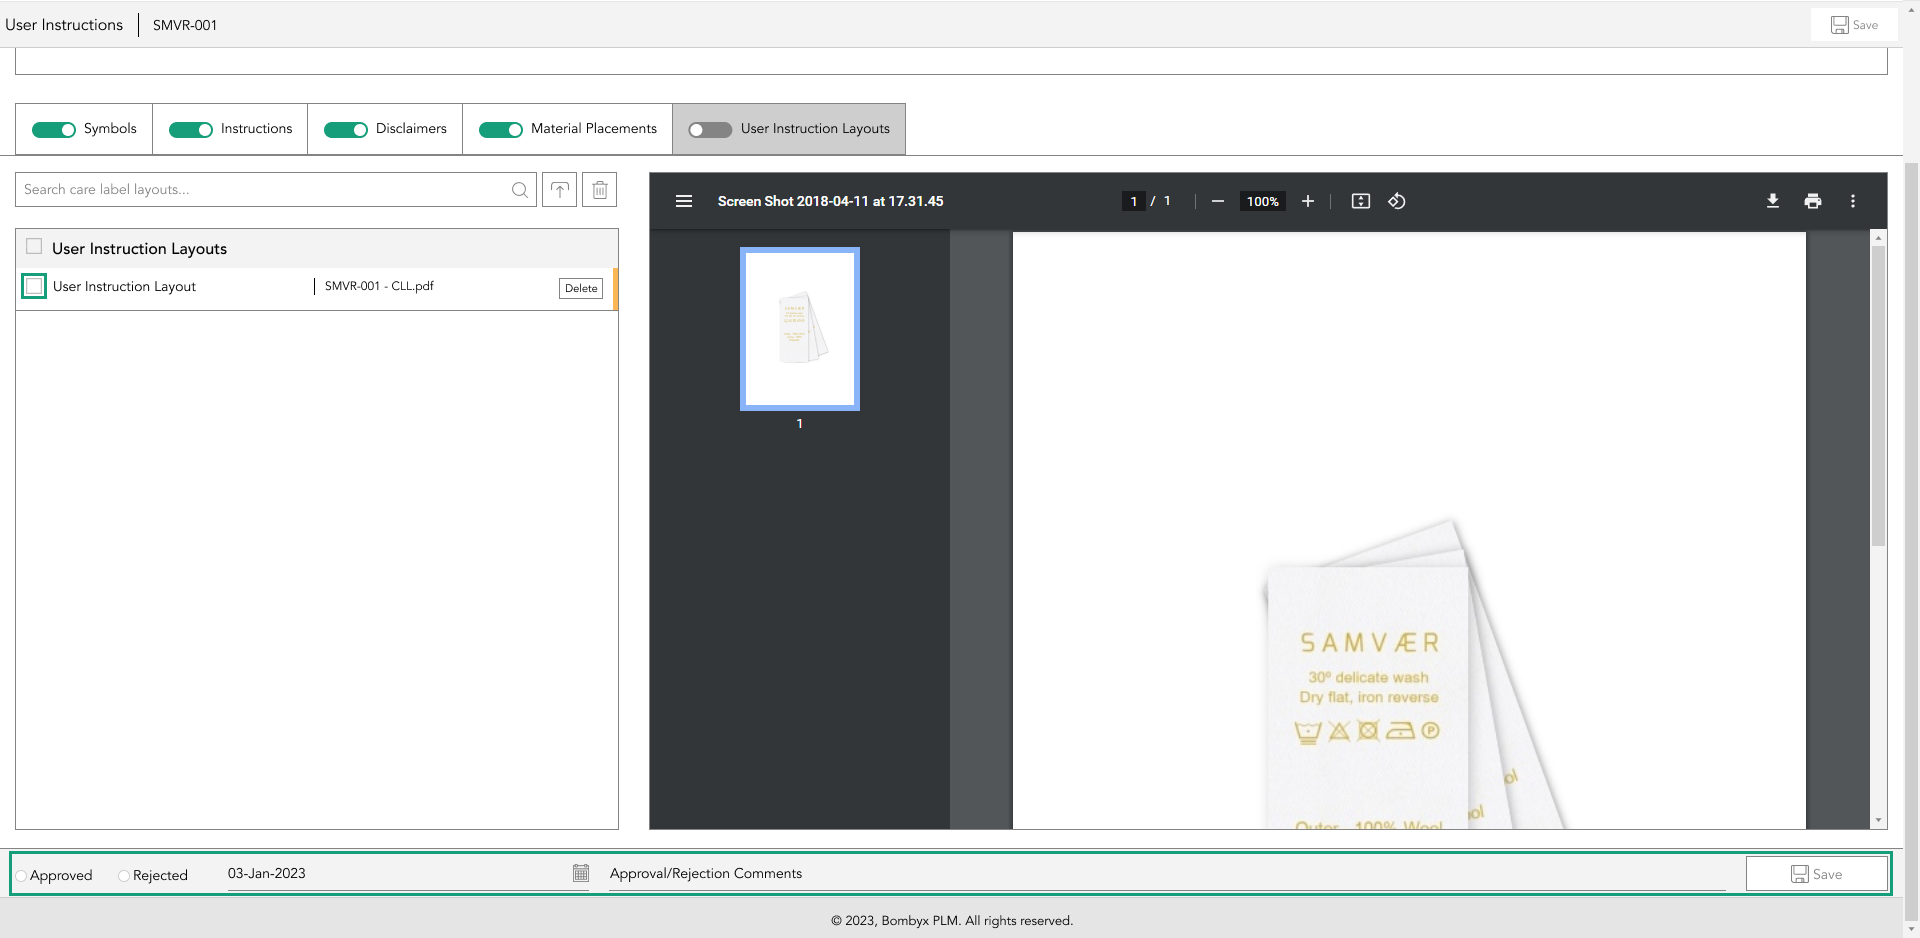
approve/reject user instruction layout
To approve or reject user instruction layouts, select the checkbox. This will enable the status bar at the bottom of the page (above the footer), allowing you to approve or reject the quality information, navigate to the status bar, and select approve.
Add the approval date, and the result, and optionally, you can make a comment for your suppliers and team to see. Once all information is entered, tap the update button.
Once you have filled in these options, tap the update icon on the right-hand side of the footer bar, and watch how your component card status bars change colour to indicate the new status.
Notes: You can select more than one item to approve/reject at once, however, if you do have multiple suppliers attached to this product, you’ll only be able to approve multiple items for 1 component supplier at any one time.

Beyond the Label: Diving into the Sustainable Story with Digital Product Passports
Consumers today are increasingly concerned about the environmental and social impact of their purchases. From the food they eat.
Bombyx’s AI Integration: Advancing Business Excellence in PLM, PIM, and DAM Systems
Let's delve into the exciting realm of Artificial Intelligence (AI) undergoing a transformative evolution. As we Enter the year 2024.

Beyond Baubles: A Stylish Dive into Christmas Fashion Trends.
e explore the latest Christmas fashion trends, with a focus on achieving a harmonious balance between sophistication and comfort. From luxurious velvets to cosy knits

Streamlining Winter Fashion with PLM: Managing Seasonal Changes
Winter fashion production demands meticulous planning and execution. PLM serves as a guiding force in production management, aiding in resource allocation, scheduling

Christmas Experience through Digital Transformation
During the Autumn/Winter months in Europe and the USA, are marked by heightened activity. The festive season introduces an atmosphere of joy and unity. Amidst the era of digital in
Demanding Trends & The Transformative Power of Product Lifecycle Management
Explore how strategic Product Lifecycle Management (PLM) empowers fashion to navigate trends sustainably. This post delves into the symbiosis of trends and sustainability,

The Power of Product Information Management (PIM) With a PLM System.
In today's fast-paced business environment, effective product information management is crucial for success. Product Information Management (PIM) is a powerful tool.
Fashion and the Power of Product Lifecycle Management
In recent years, the fashion industry has witnessed a surge in fashion, a phenomenon characterised by the rapid production and consumption of inexpensive clothing... and a whole l
Supply Chain Management has Forever Changed
Brands make use of product lifecycle data analysis to help them work out price points, marketing and advertising strategies, packaging, growth and expansion… and a whole lot more