
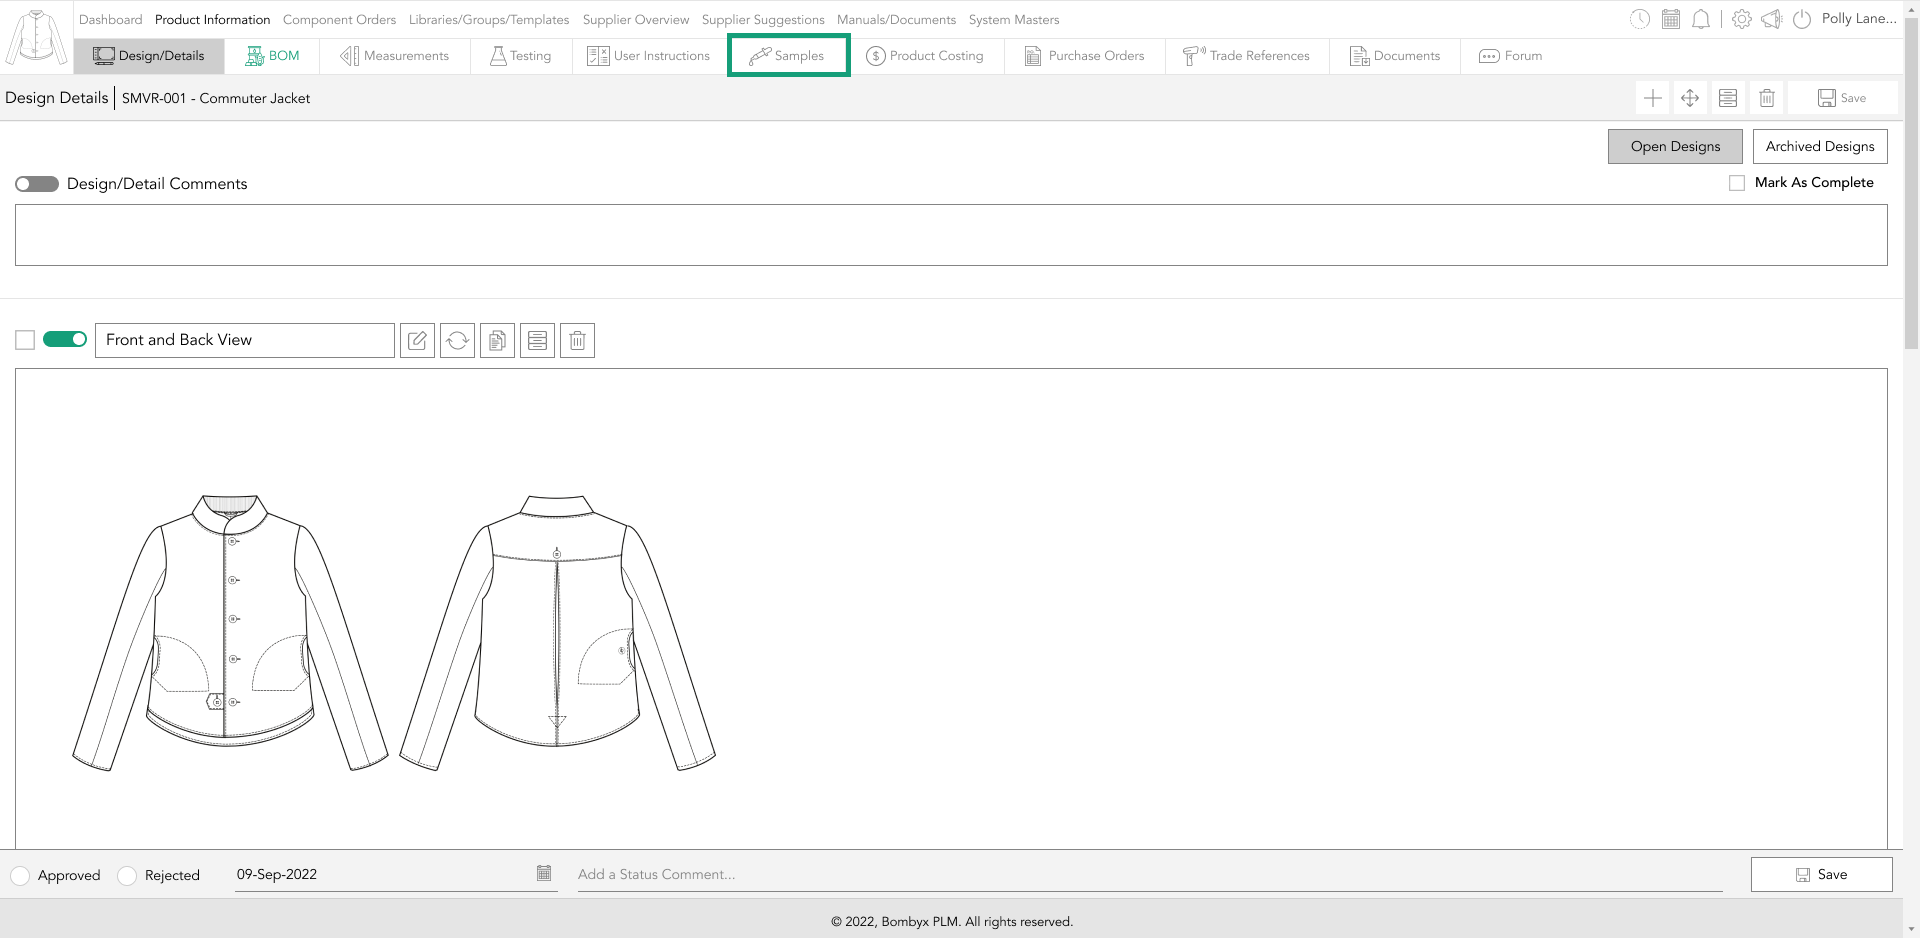
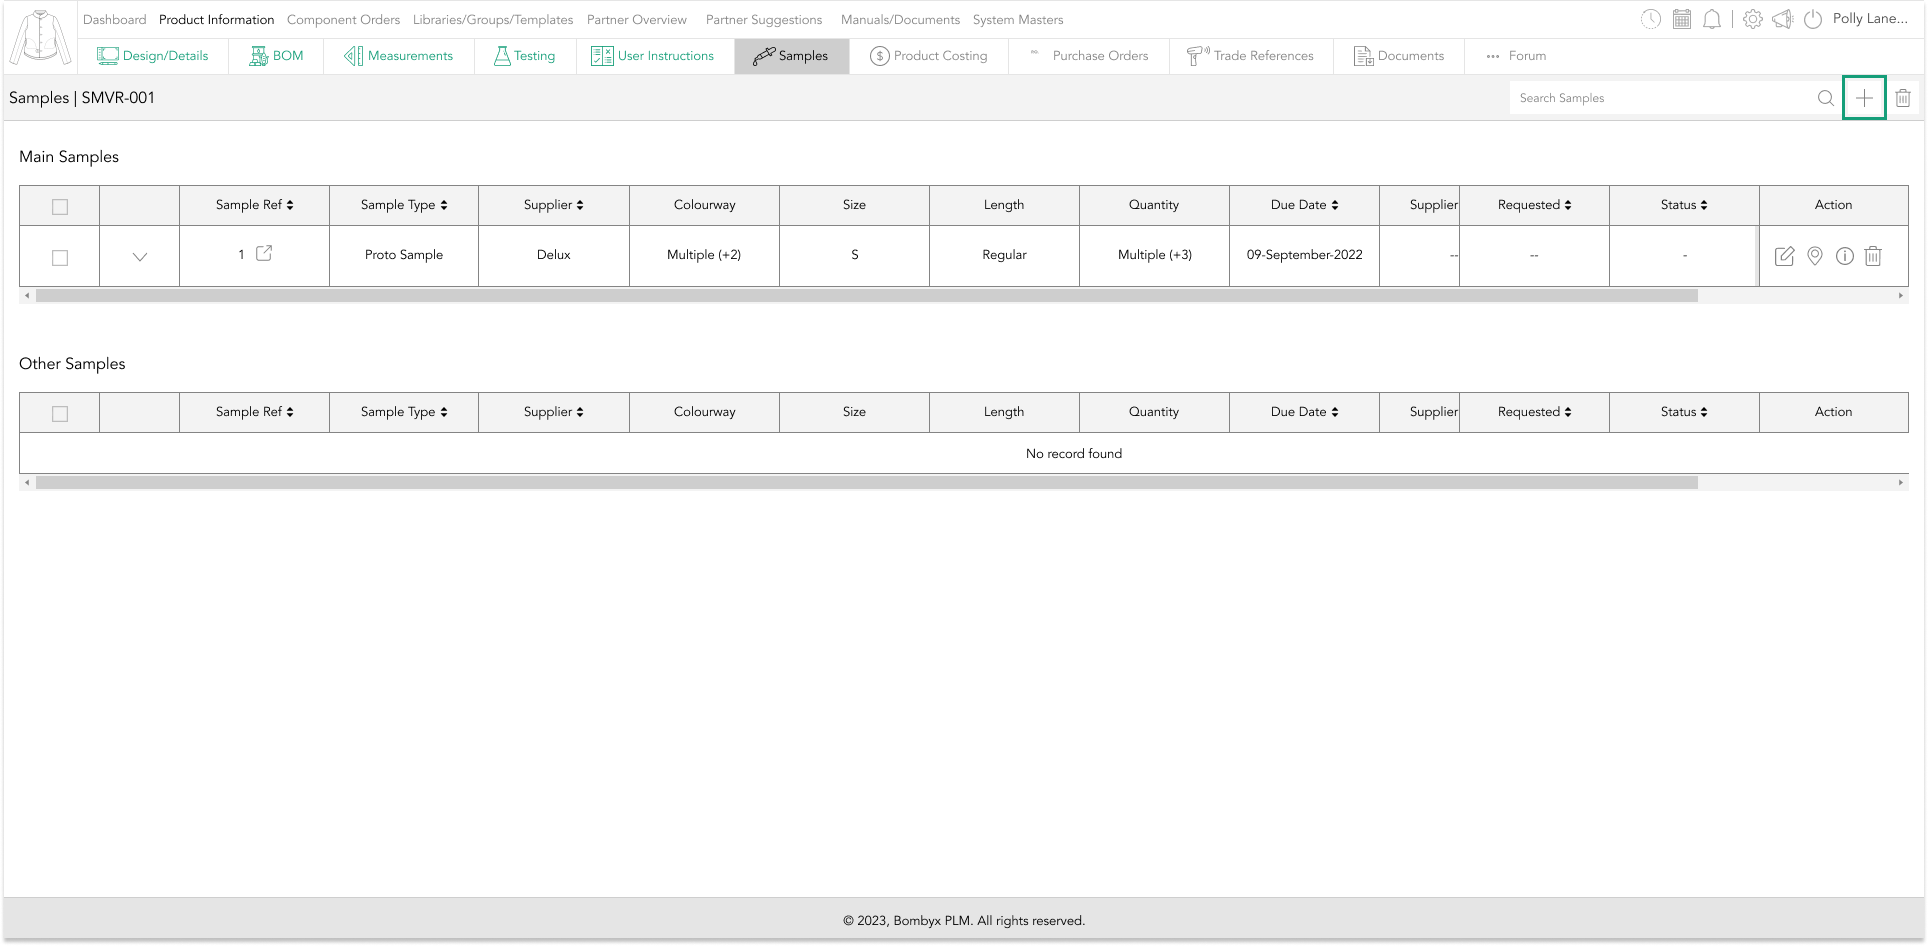
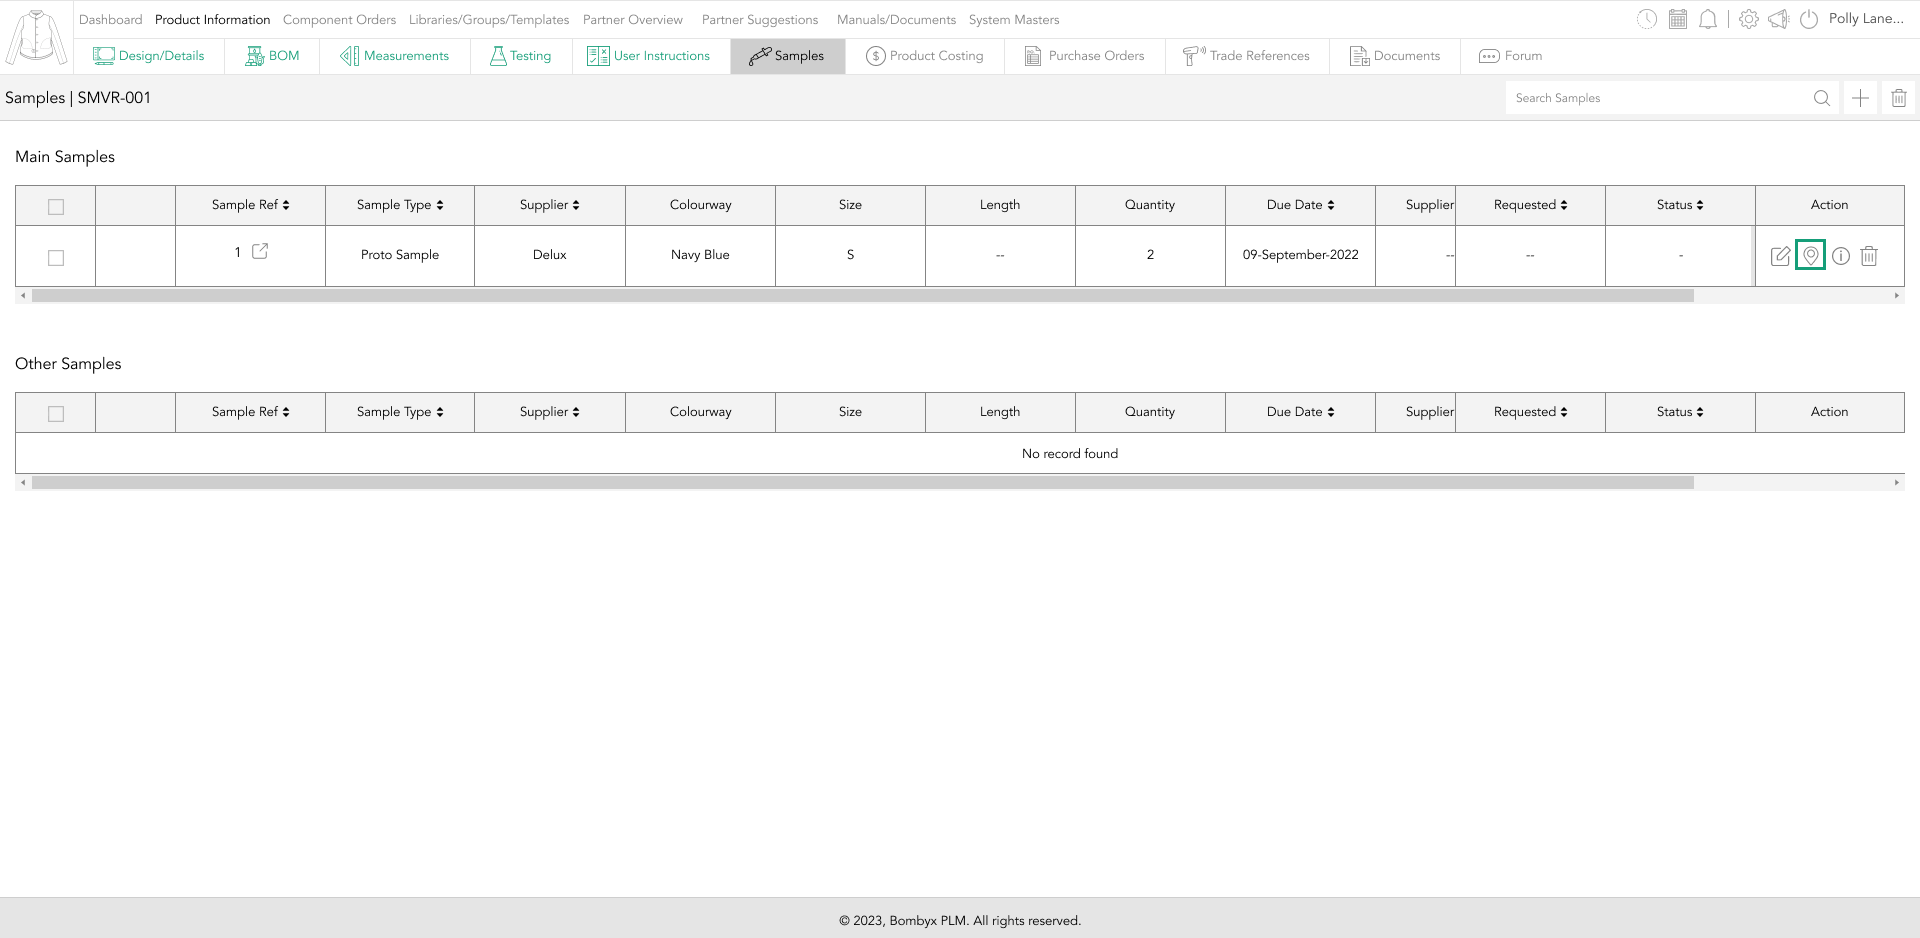
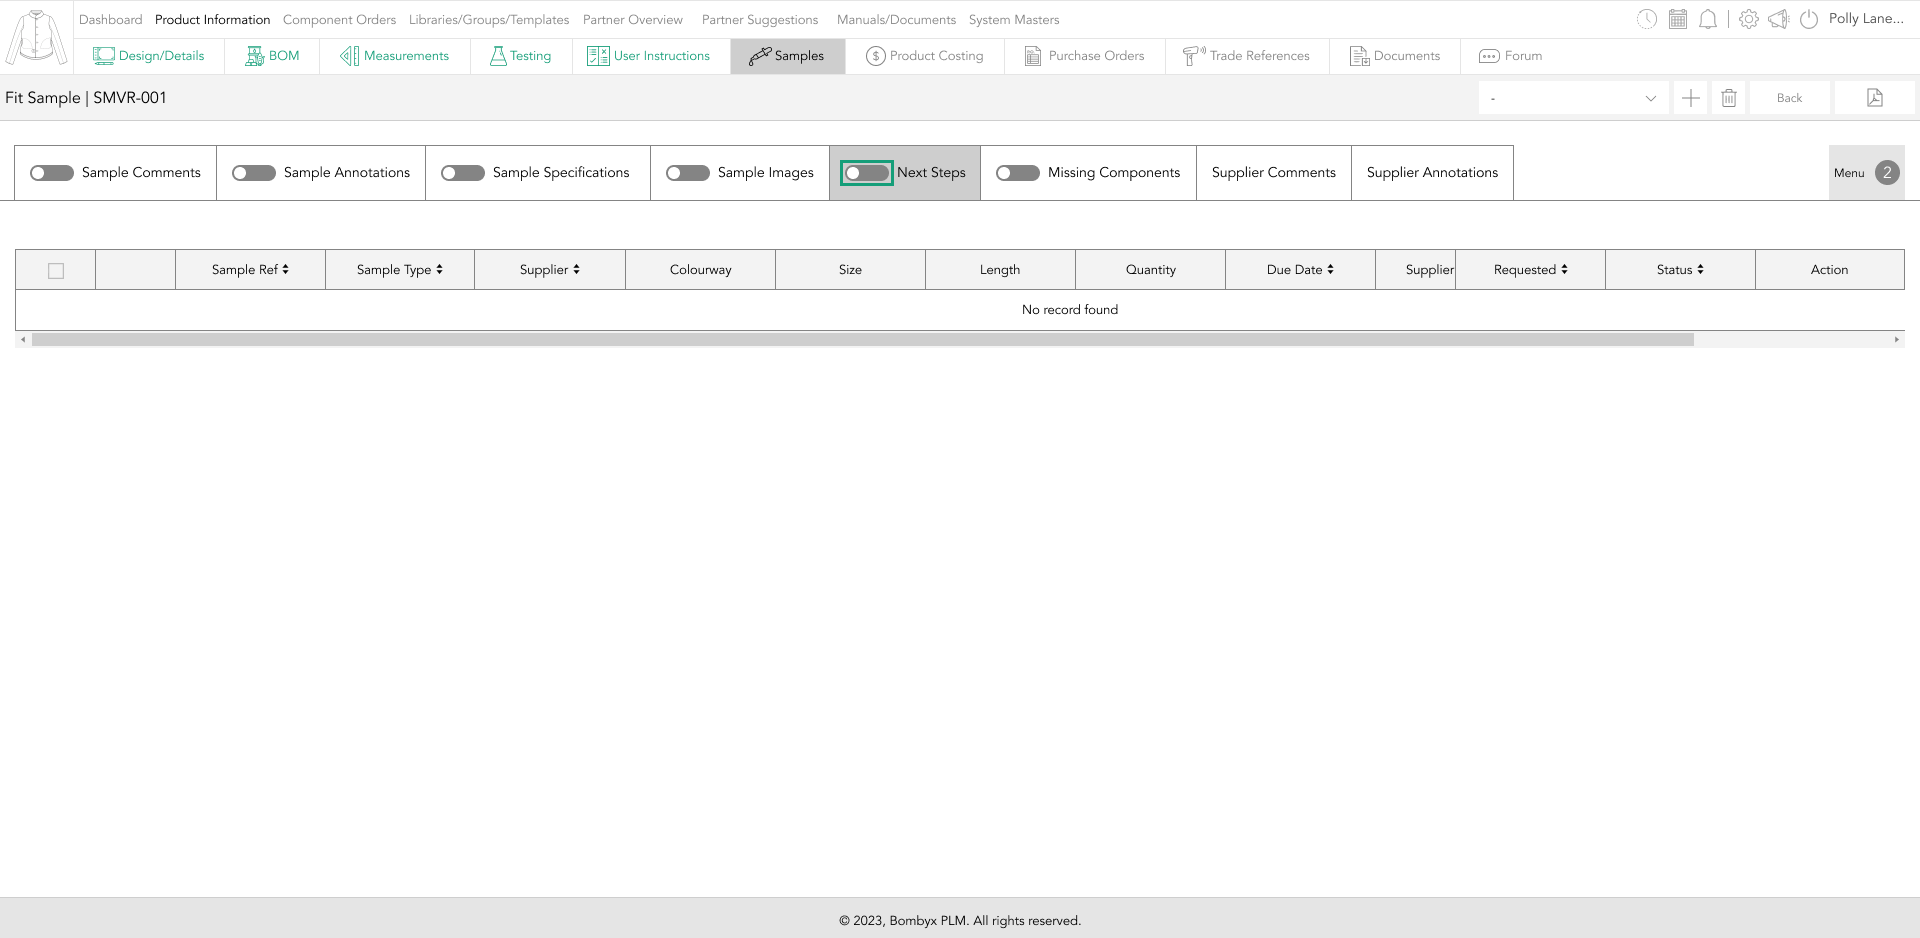
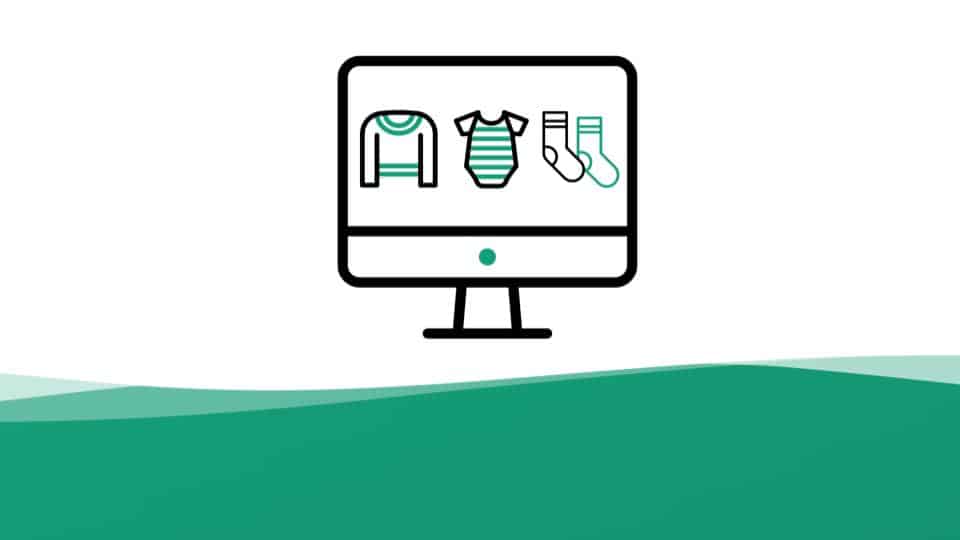
navigating to the samples tab
Firstly, navigate to 'Product Information' where all your products will be located.

Once inside the product, tap on the samples tab on the grey bar.
create/request a sample
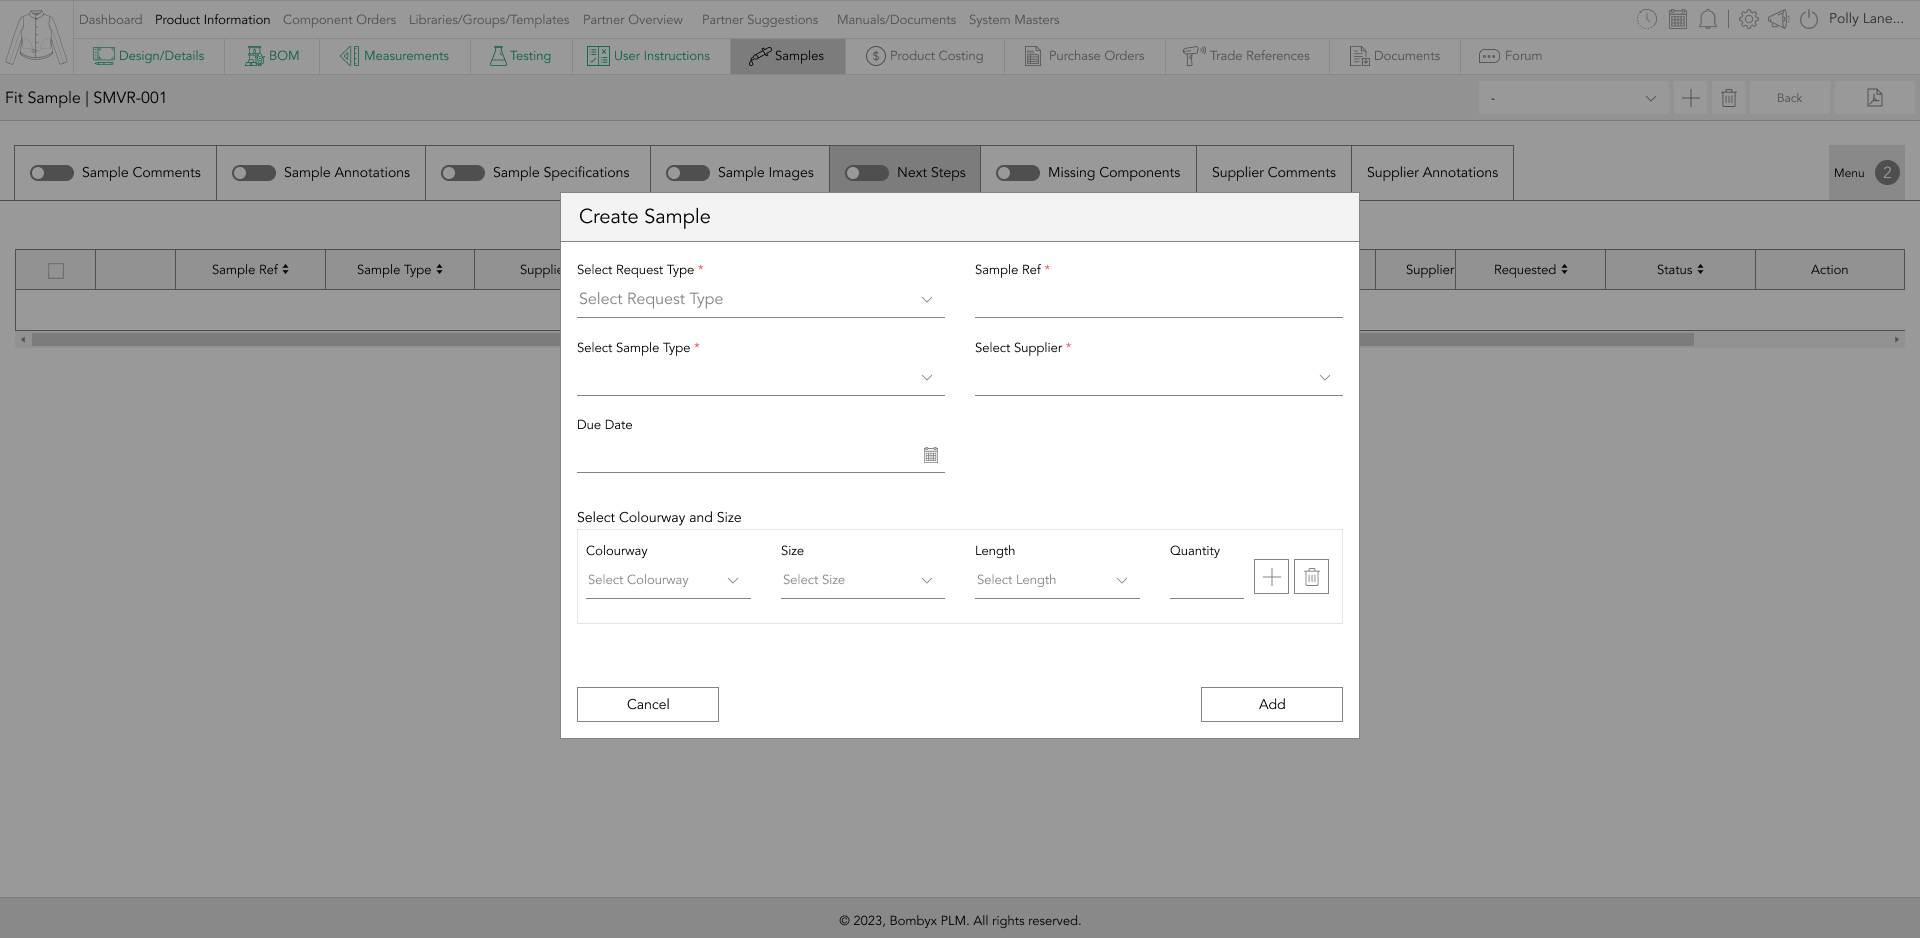
Tap on the + icon that is next to the search bar function.
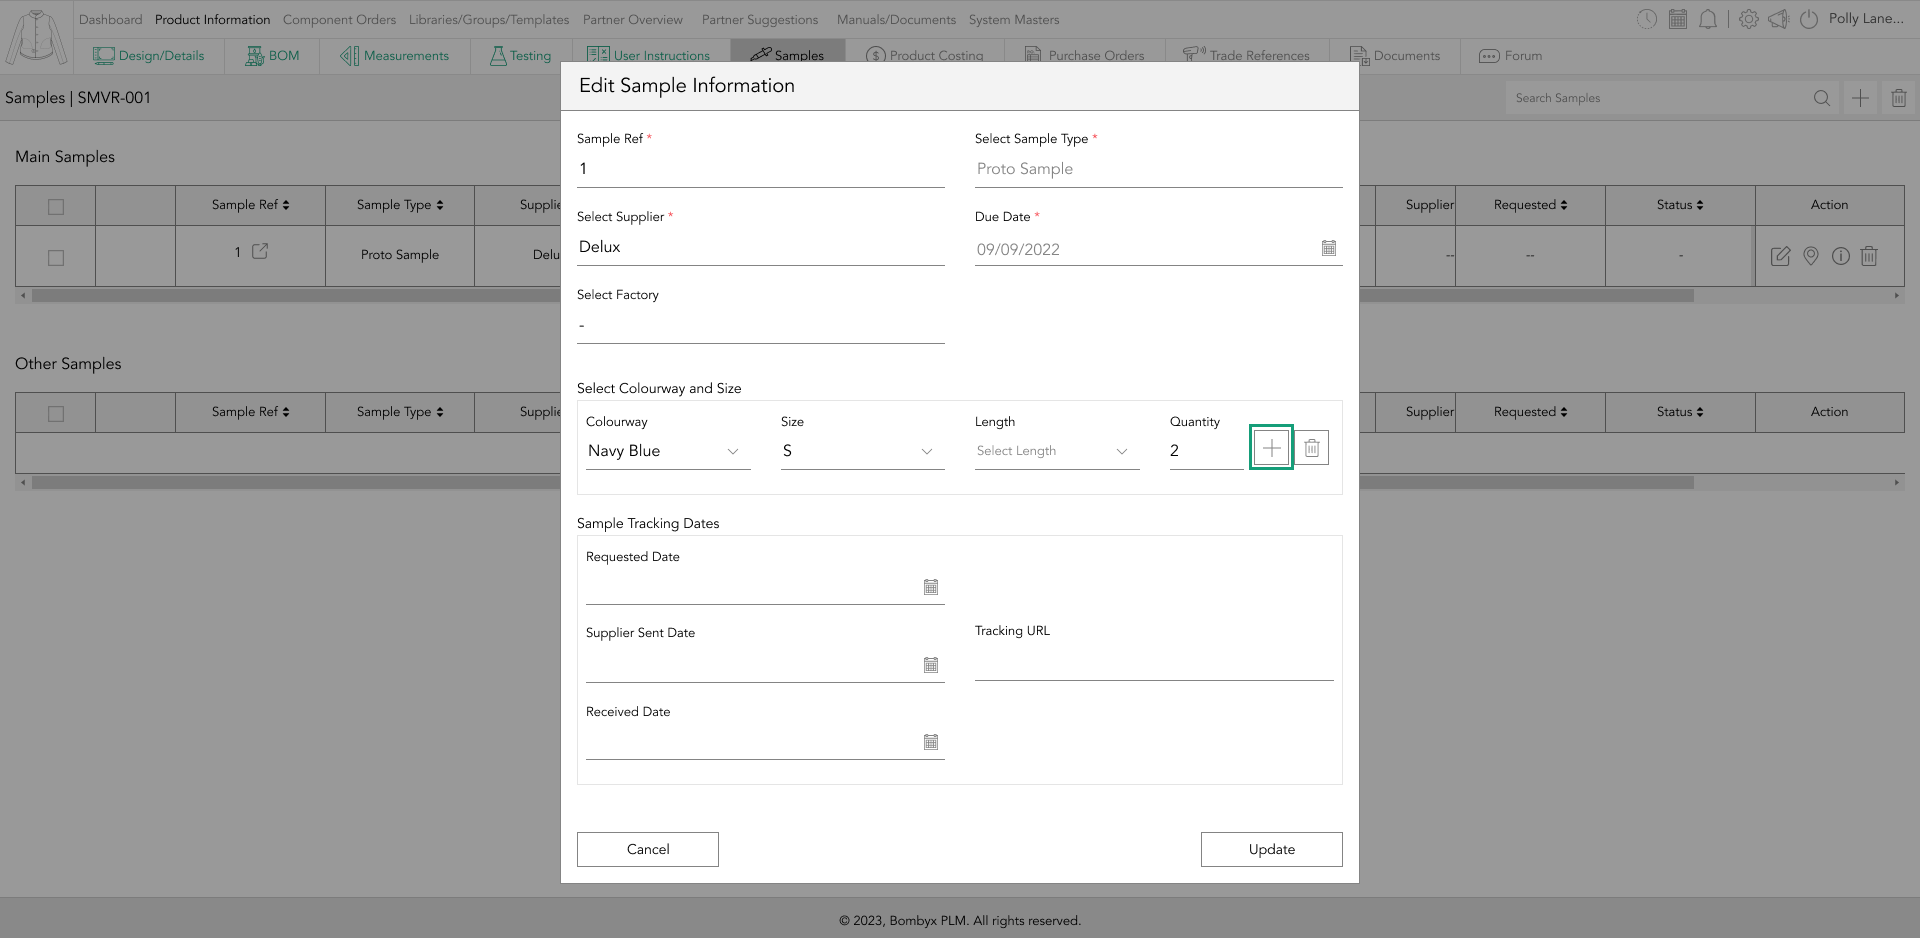
A popup will appear, here you can choose to create a new sample, or request a sample type. Give your sample a reference, and select from the sample type...
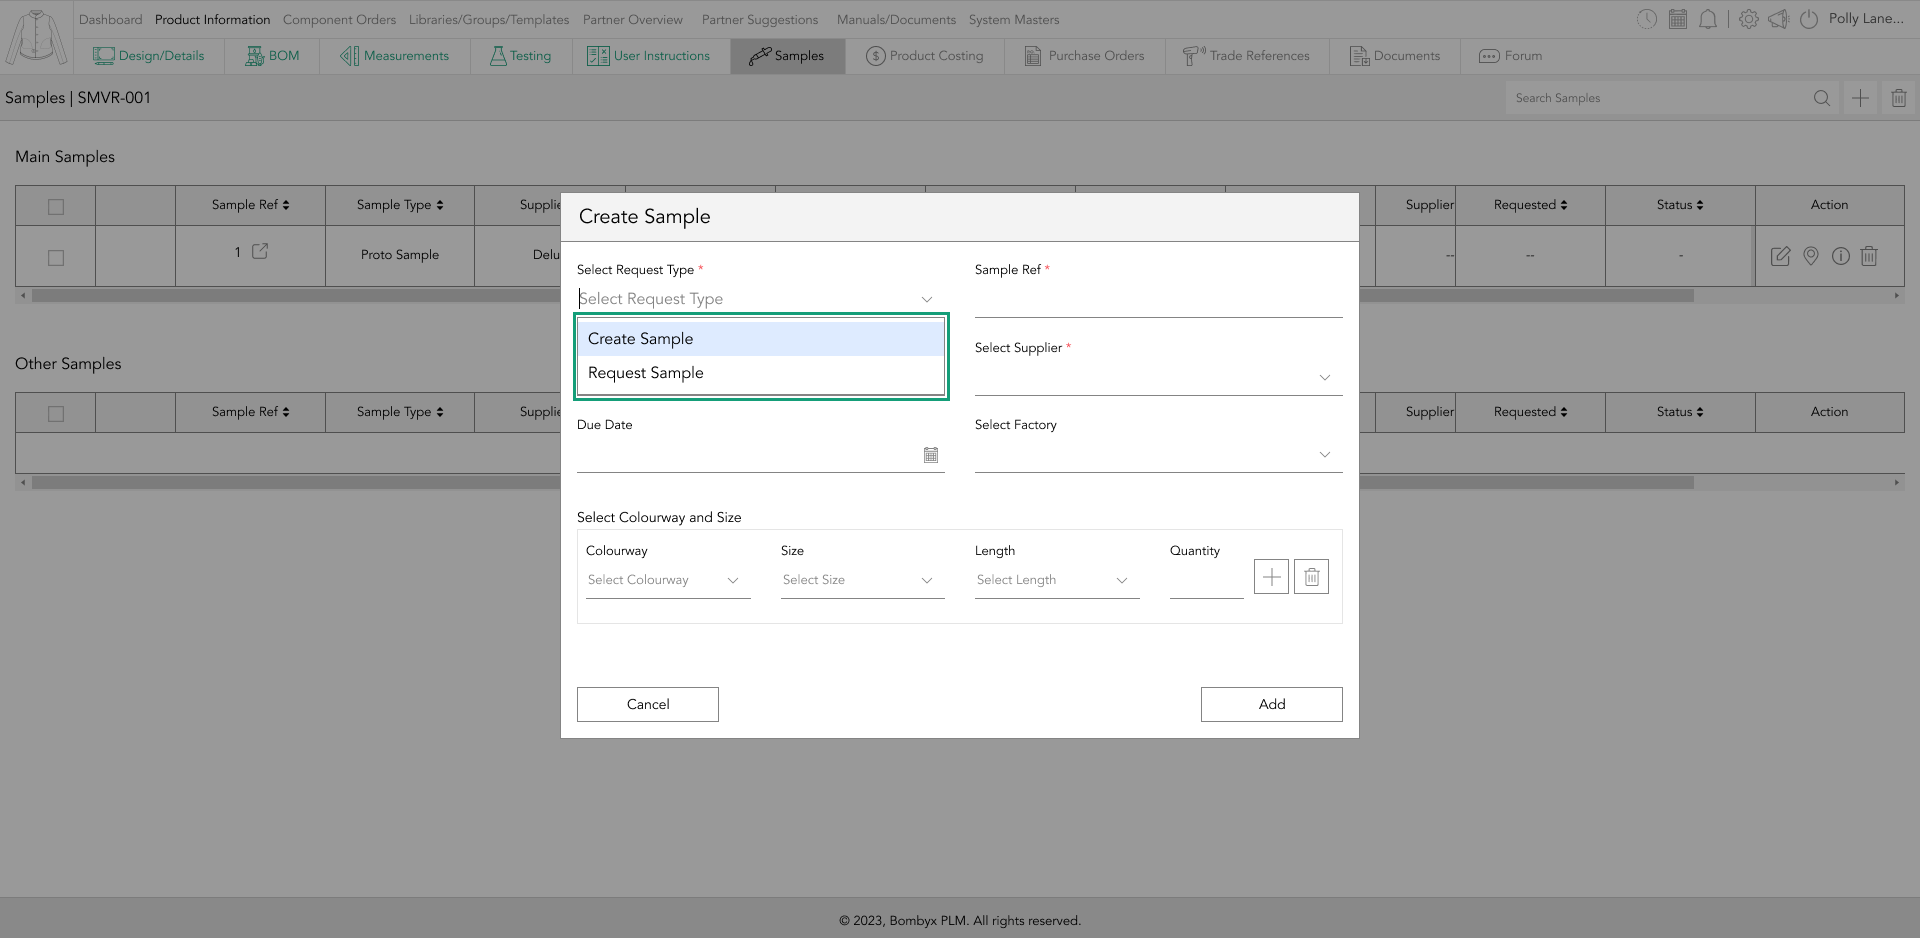
dropdowns which type of sample you want to request/create. Now select your supplier and tap Add to save…

You can also add the due date, which factory, and select colourways, sizes, and quantity of the sample, if you have that information to hand.
selecting colourway and sizes
When requesting/creating a sample, you can add the colourway…
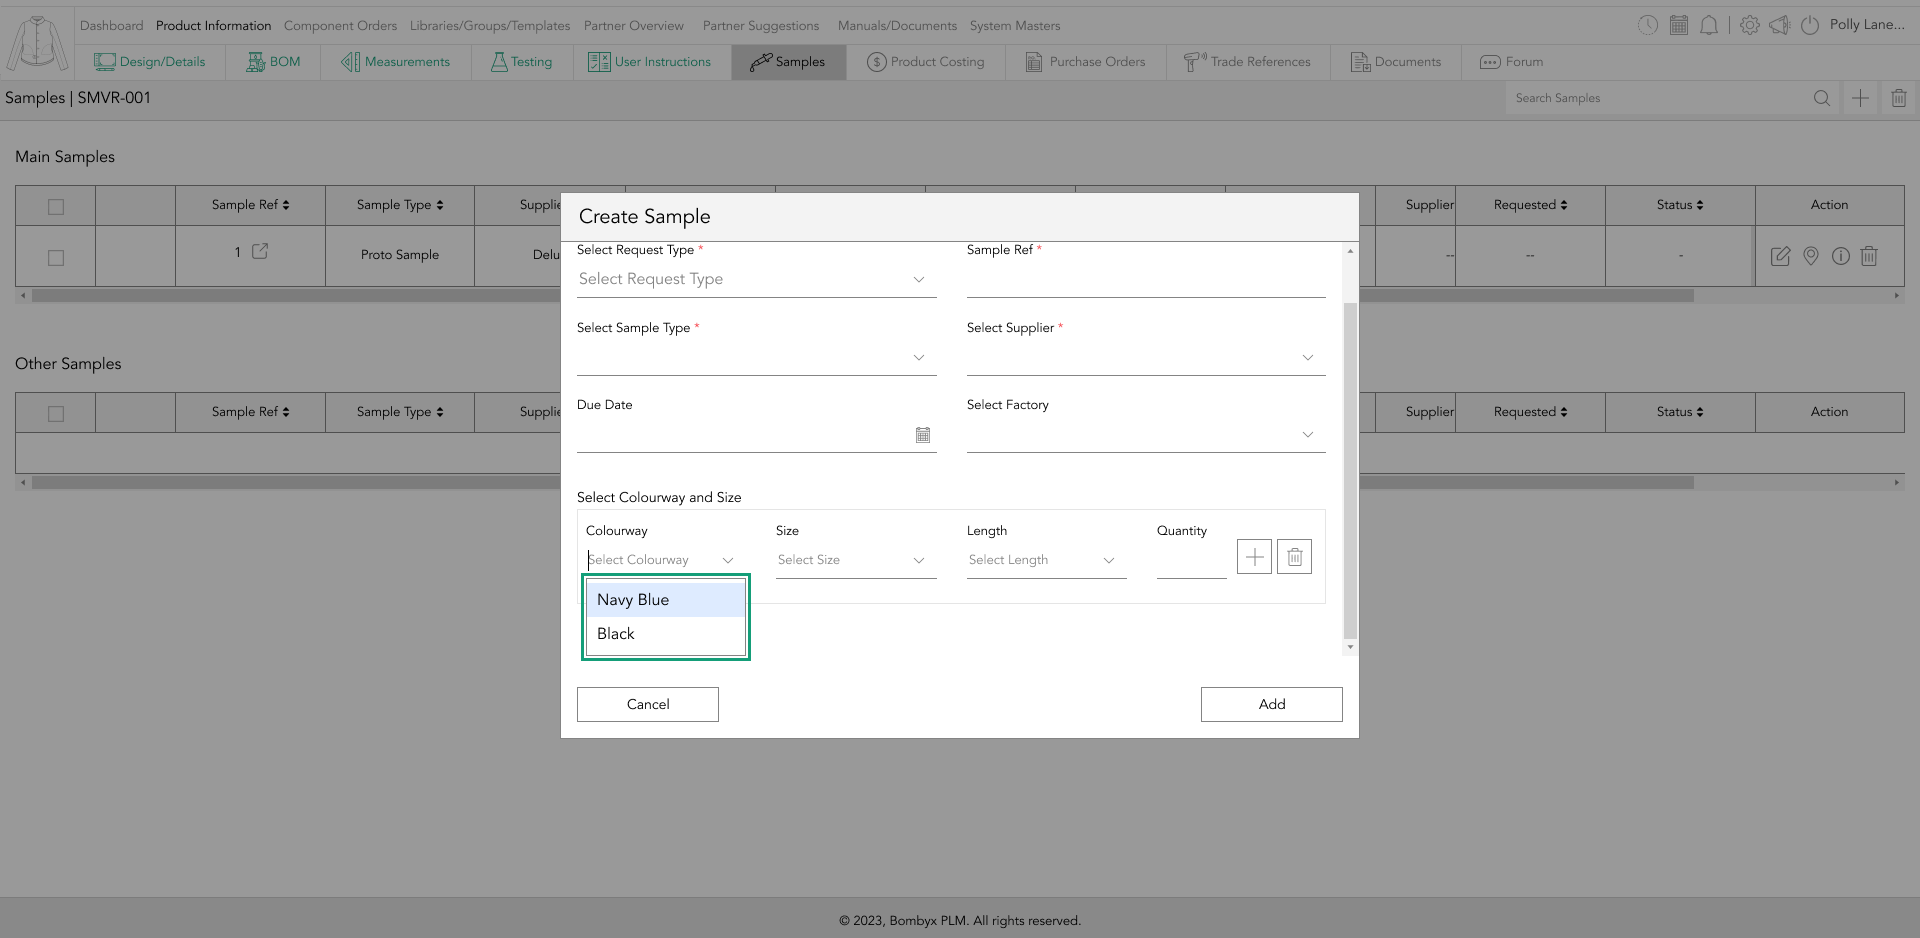
The size, quantity and UoM..

If you require multiple colourway samples, tap the add icon, and a new row will become visible for you to add multiple, to delete tap the bin icon.
sample tracking dates
If you want to enter the tracking details, you can do so in the sample request popup.
Or you can enter this information at a later date, by tapping on the tracking icon in the action panel, at the end of the selected samples row.
![]()
If you are creating a sample, you have the option to edit the backlog and edit the requested date.
![]()
editing samples
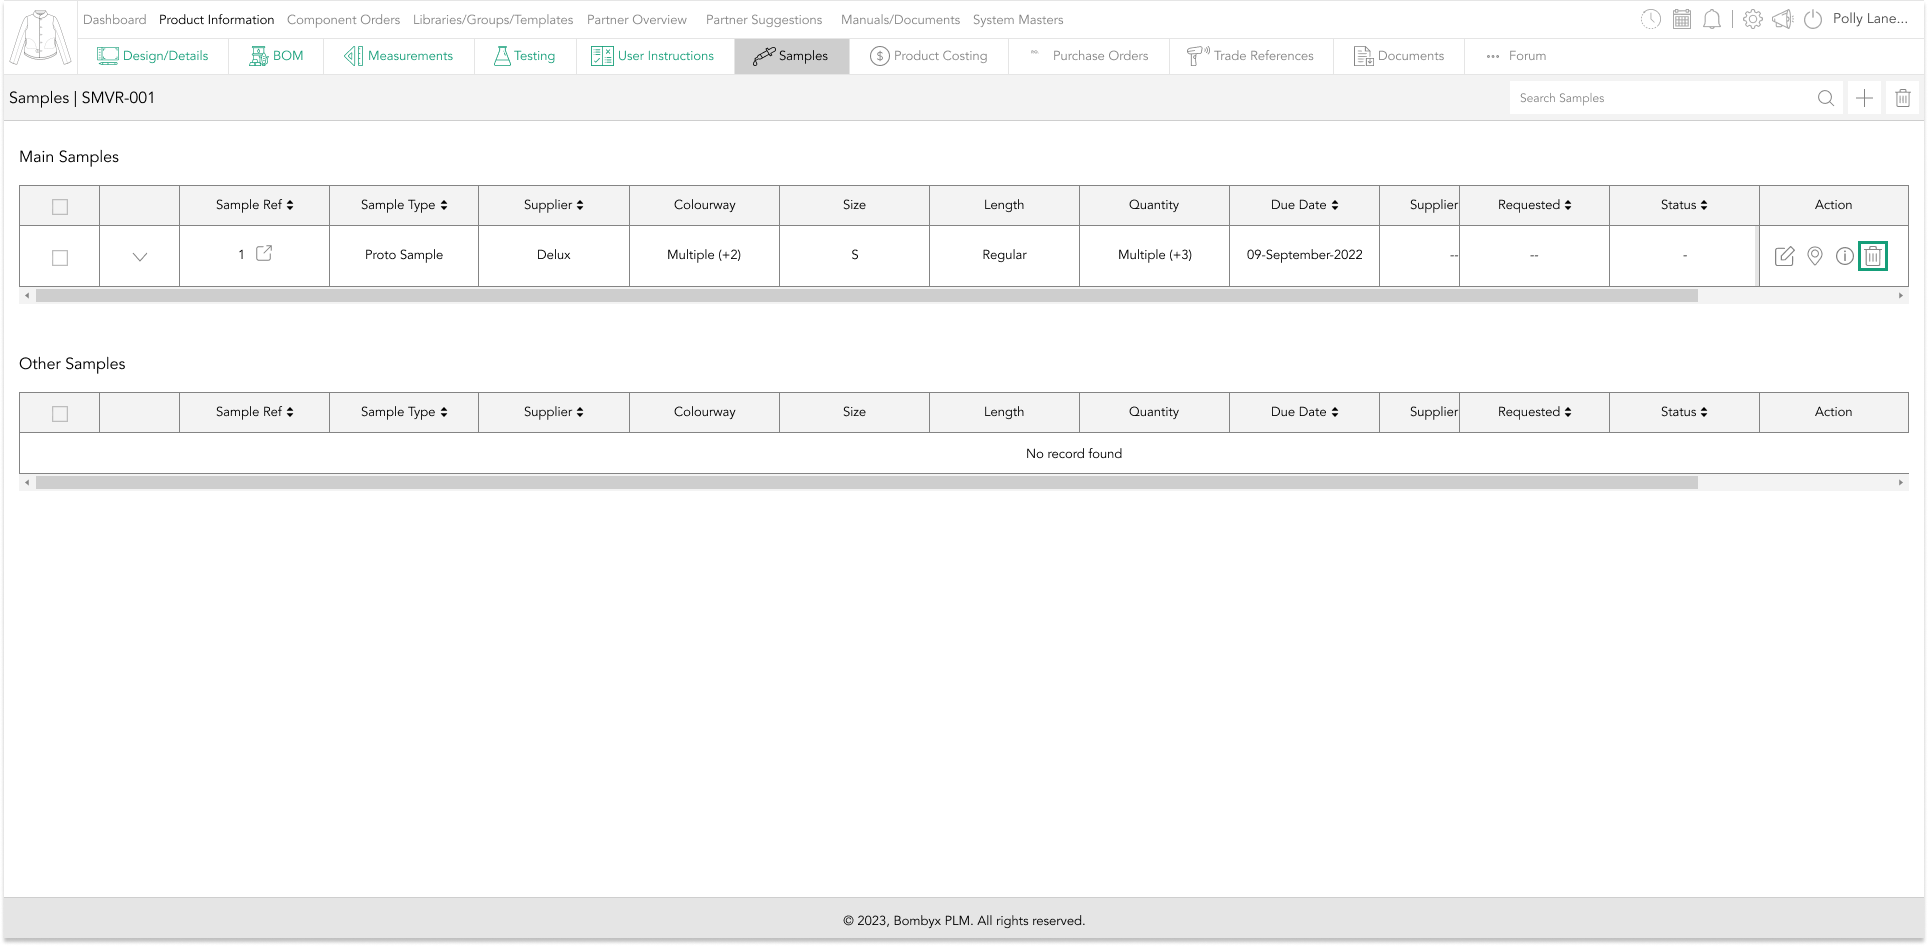
If you want to edit the core sample information, tap on the edit icon…
This will open the sample placement popup, for you to update your sample information.
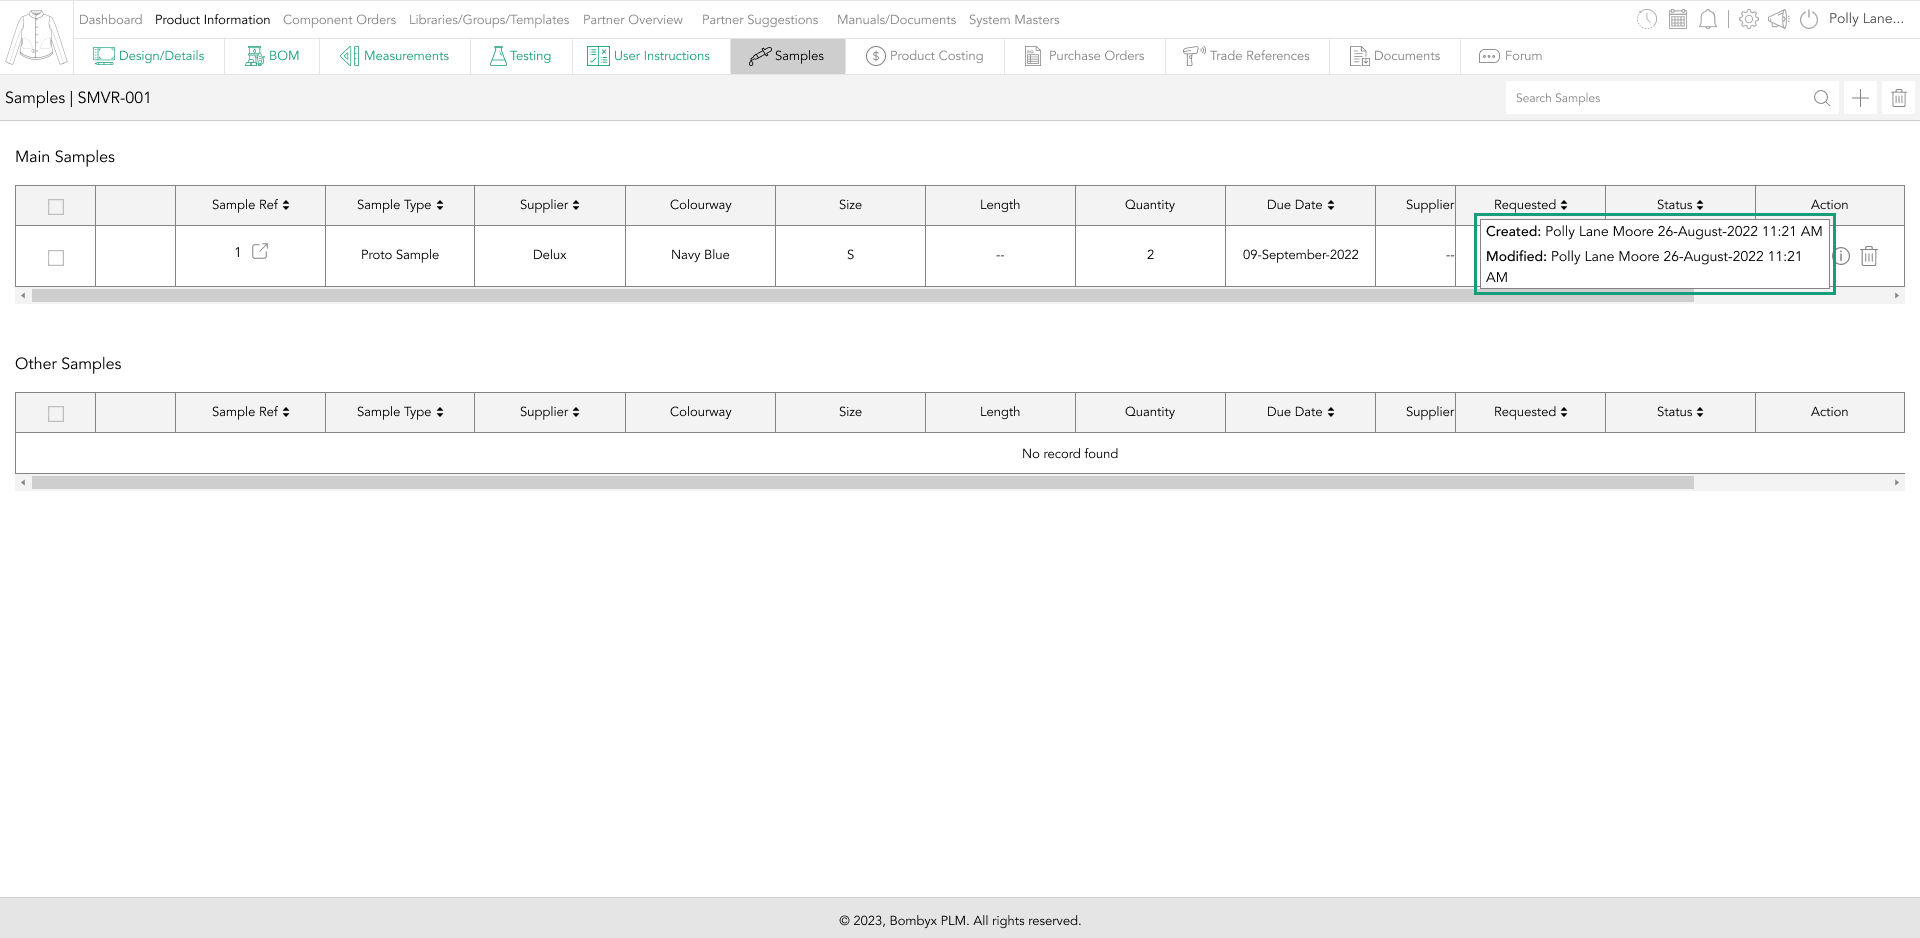
created/modified
To see who created or modified the sample, Hovering over the information icon will bring a popup…
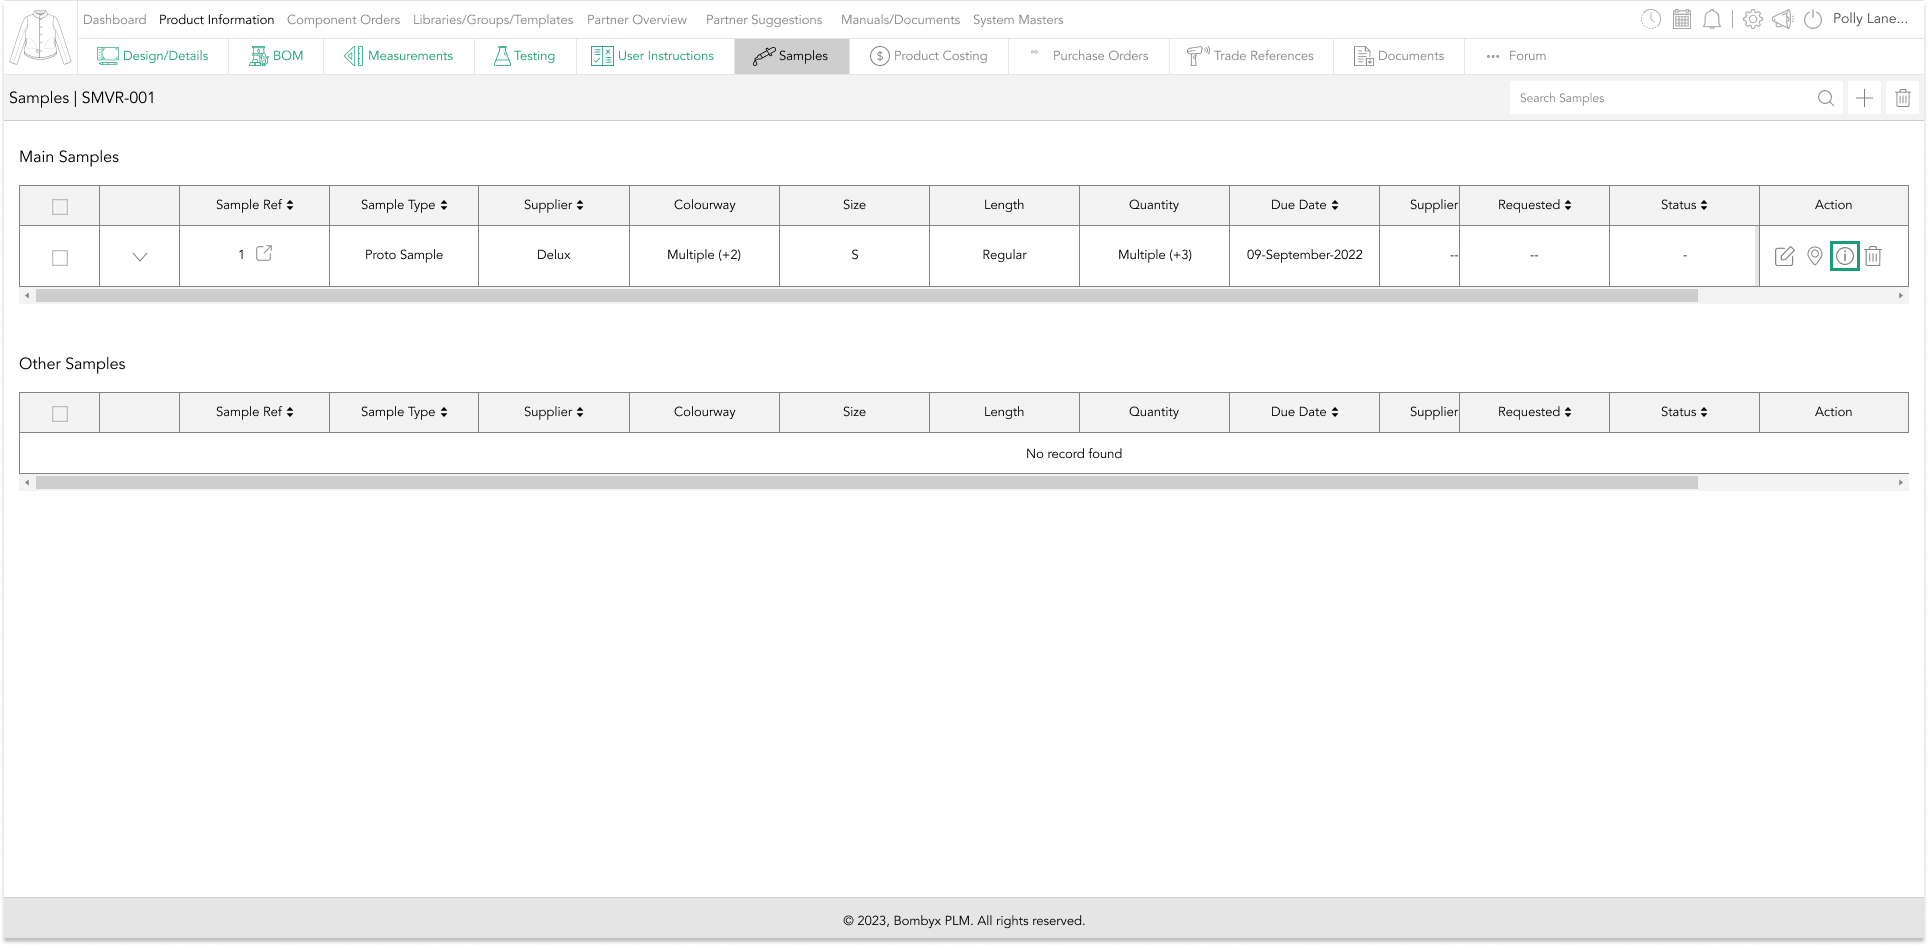
The time and date of who created and modified the sample will appear.
deleting samples
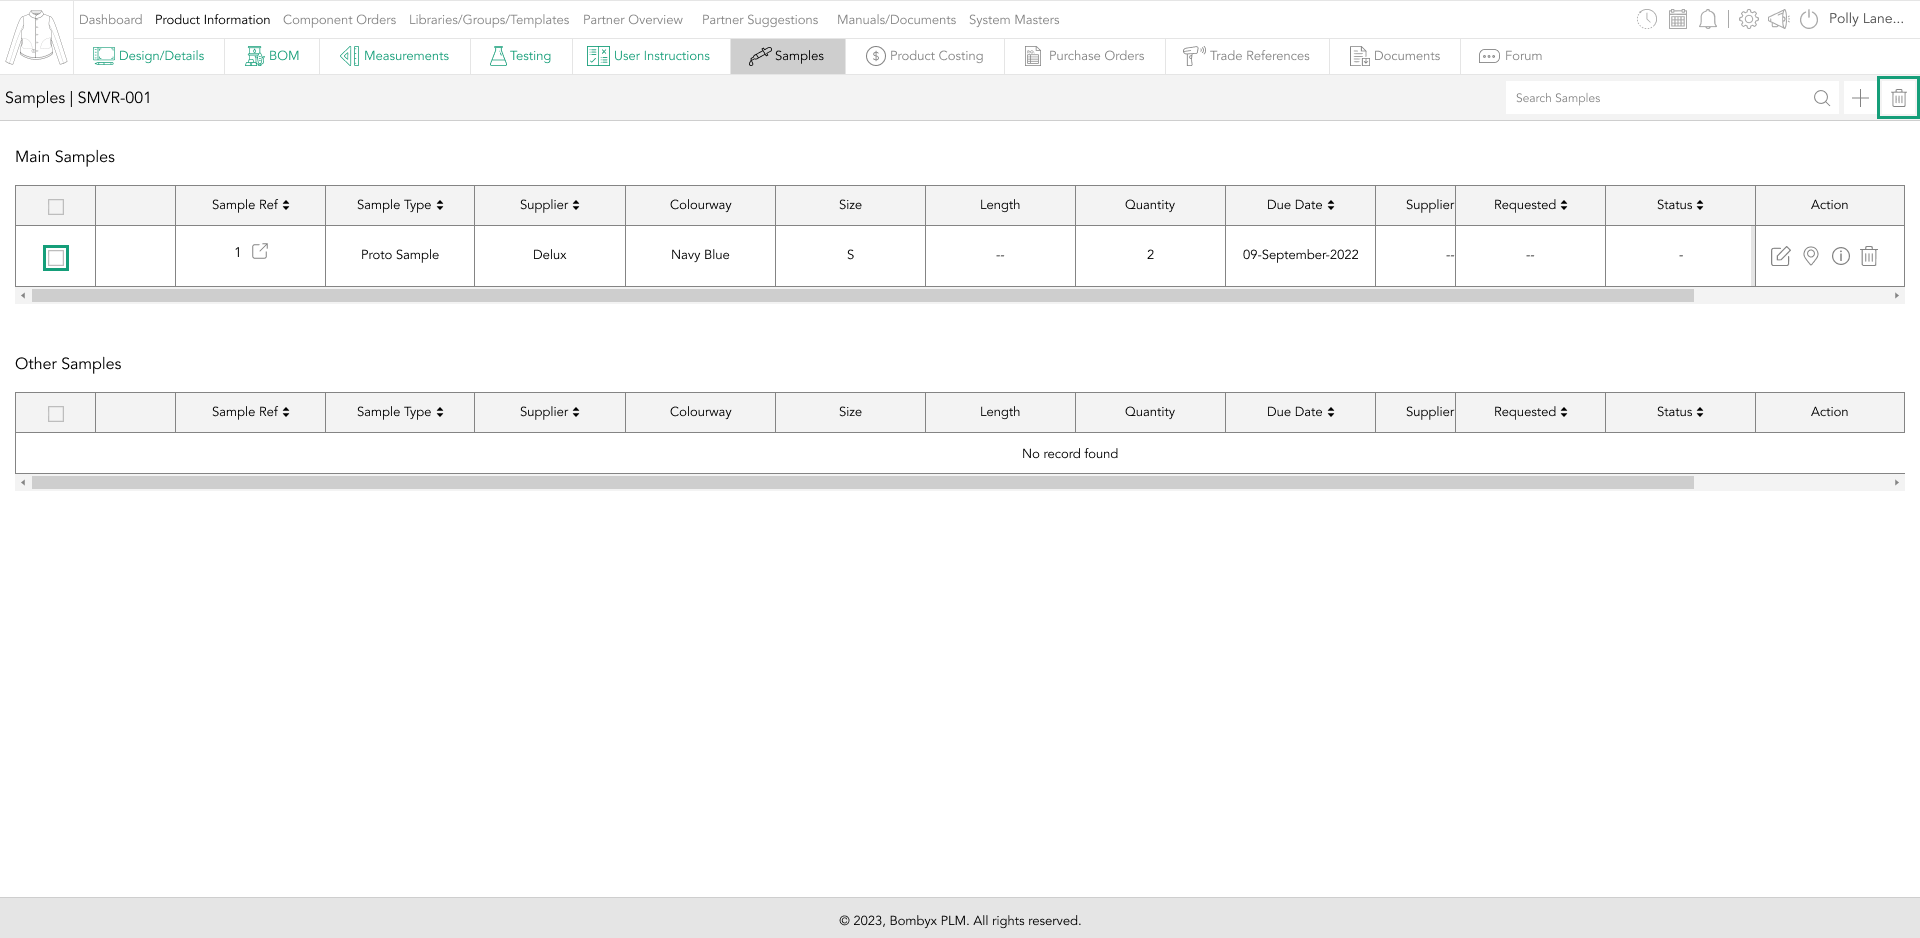
To single delete, a sample, simply tap on the bin icon that is located at the end of the sample row, under the action panel.
To delete multiple samples, tap the checkboxes on the left-hand side of the samples table, and tapping the delete icon that is positioned next to the search bar function, this will remove the samples selected.
going into a sample
Tapping on the sample name under the sample ref field will take you into the samples area...

Where you have a selection of tabs, these are.
- Sample comments
- Sample annotations
- Sample images
- Next
We are going to start the demonstration with sample comments.
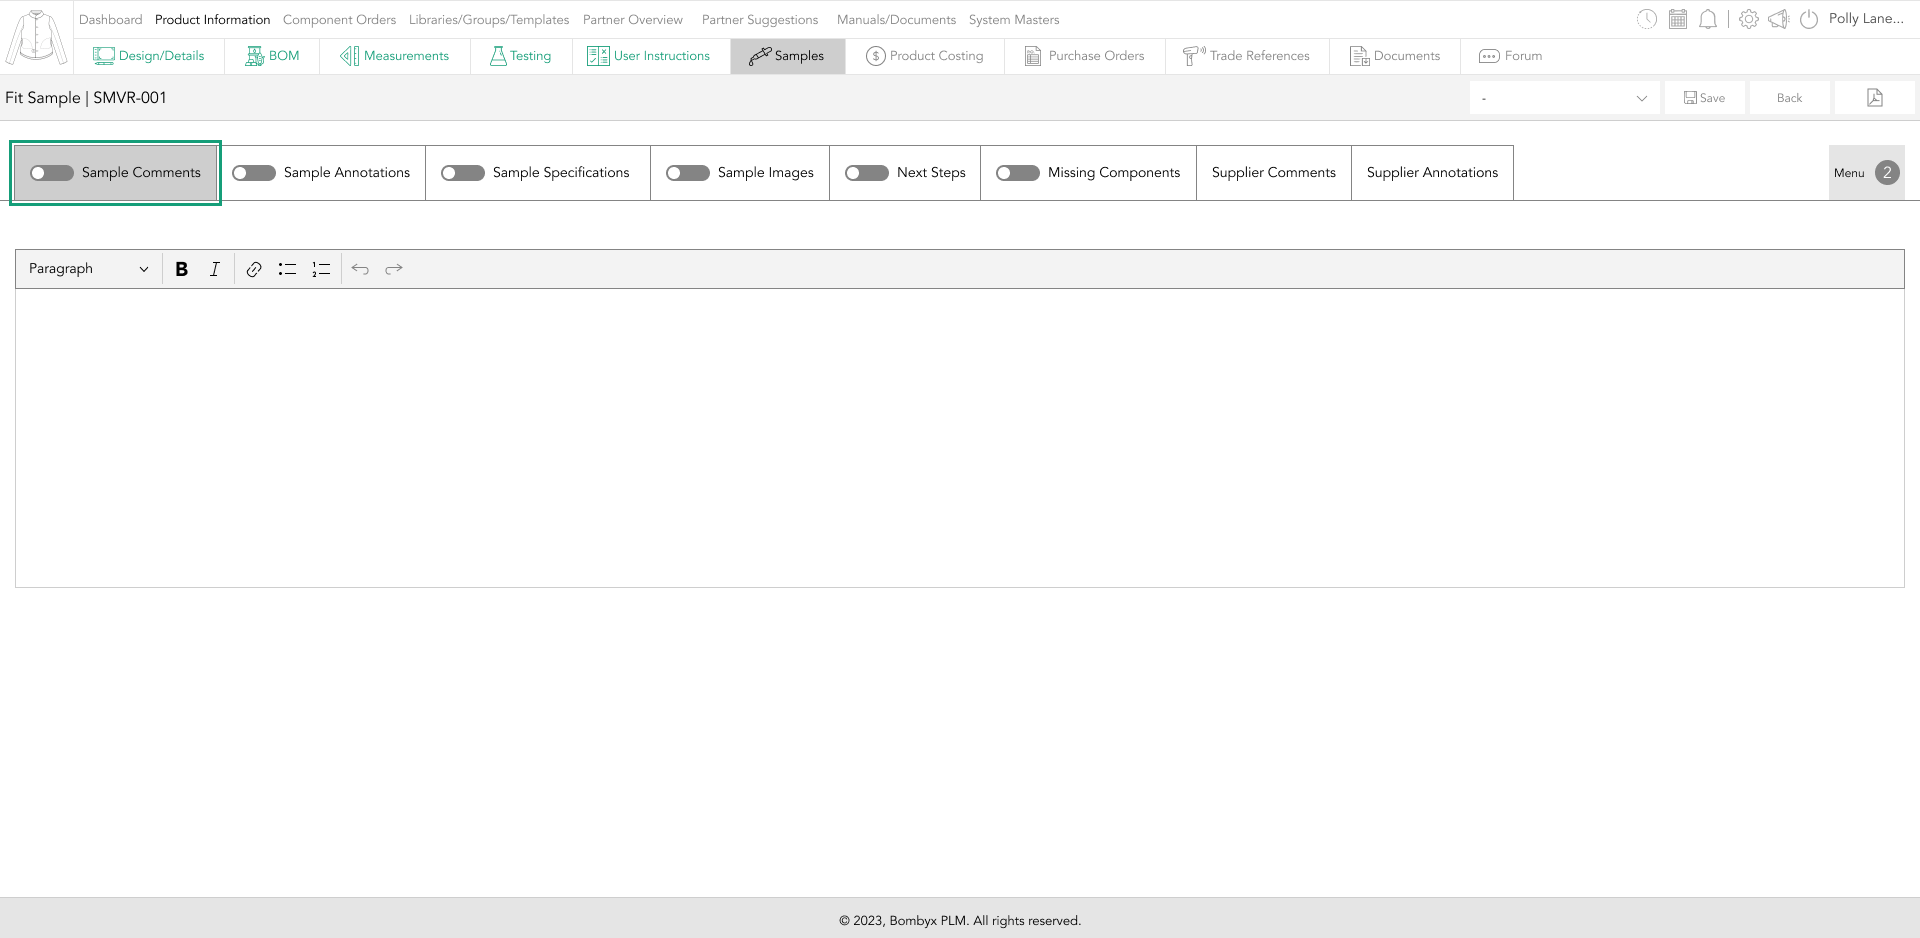
sample comments
Here is a text area for general comments that you may wish to share with your collaborators, whether that be your internal team or supply chain.
To make it visible outside of your organisation is to turn the toggle green, and your external partners will also be able to view the comments.
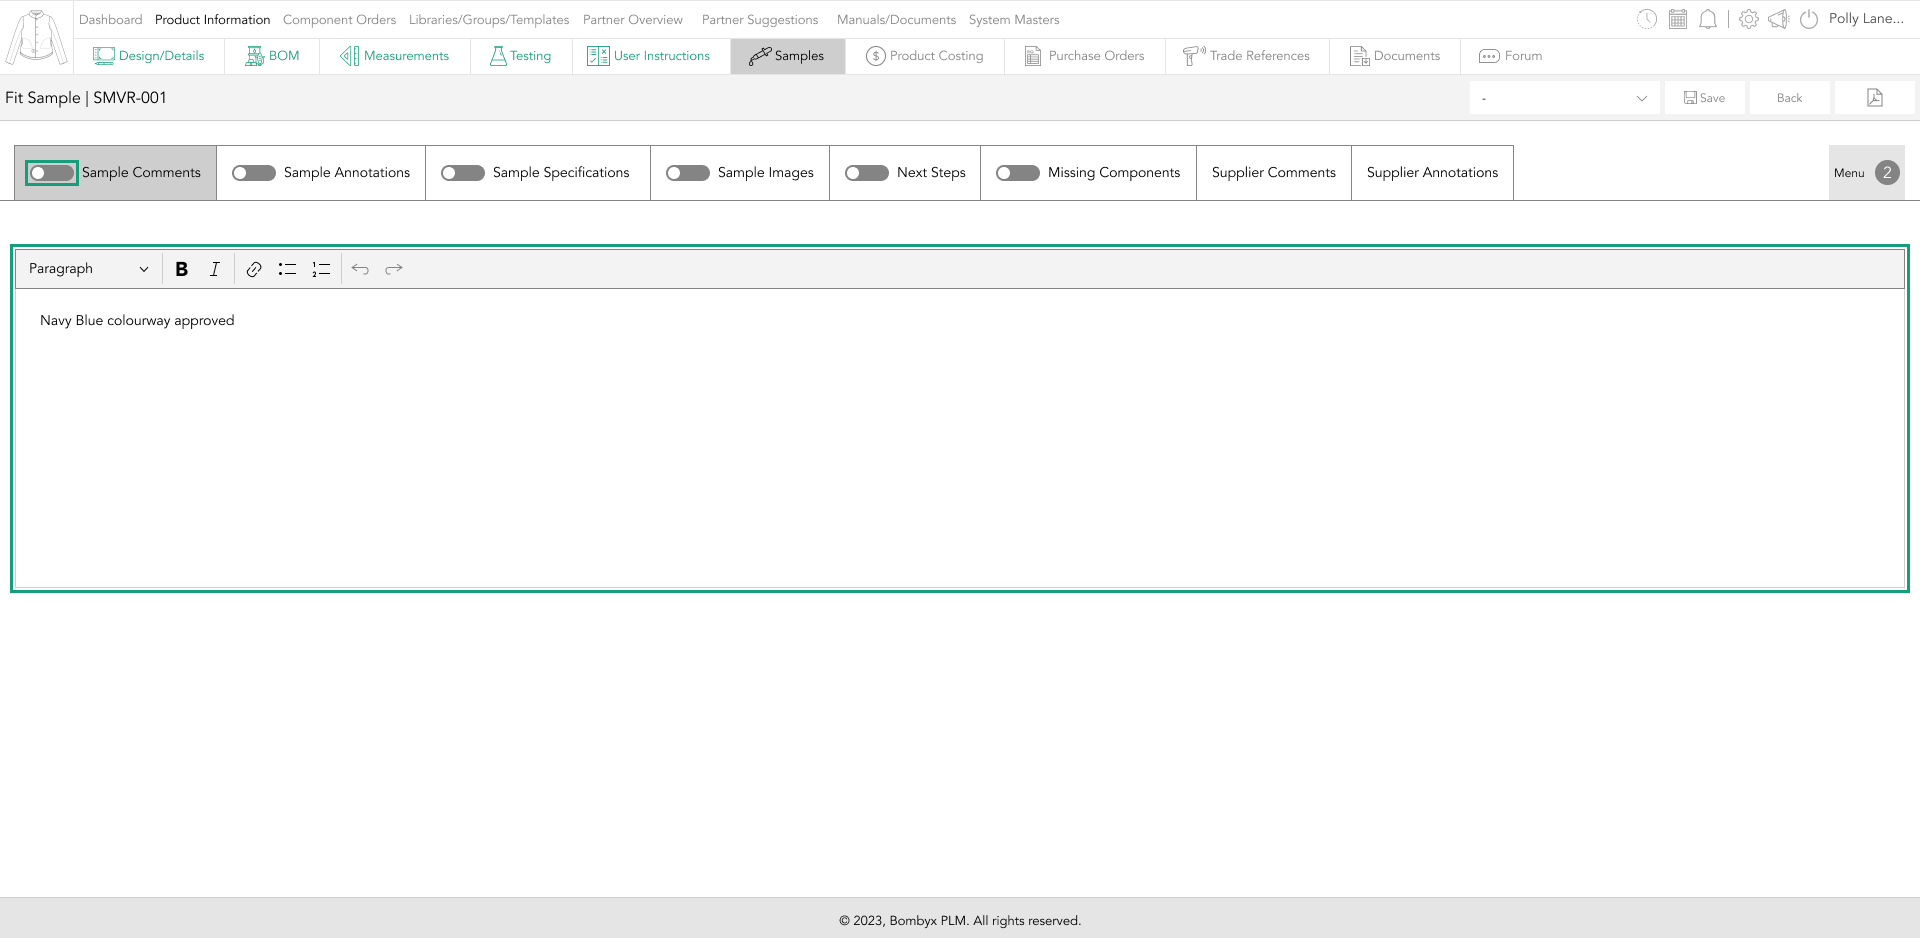
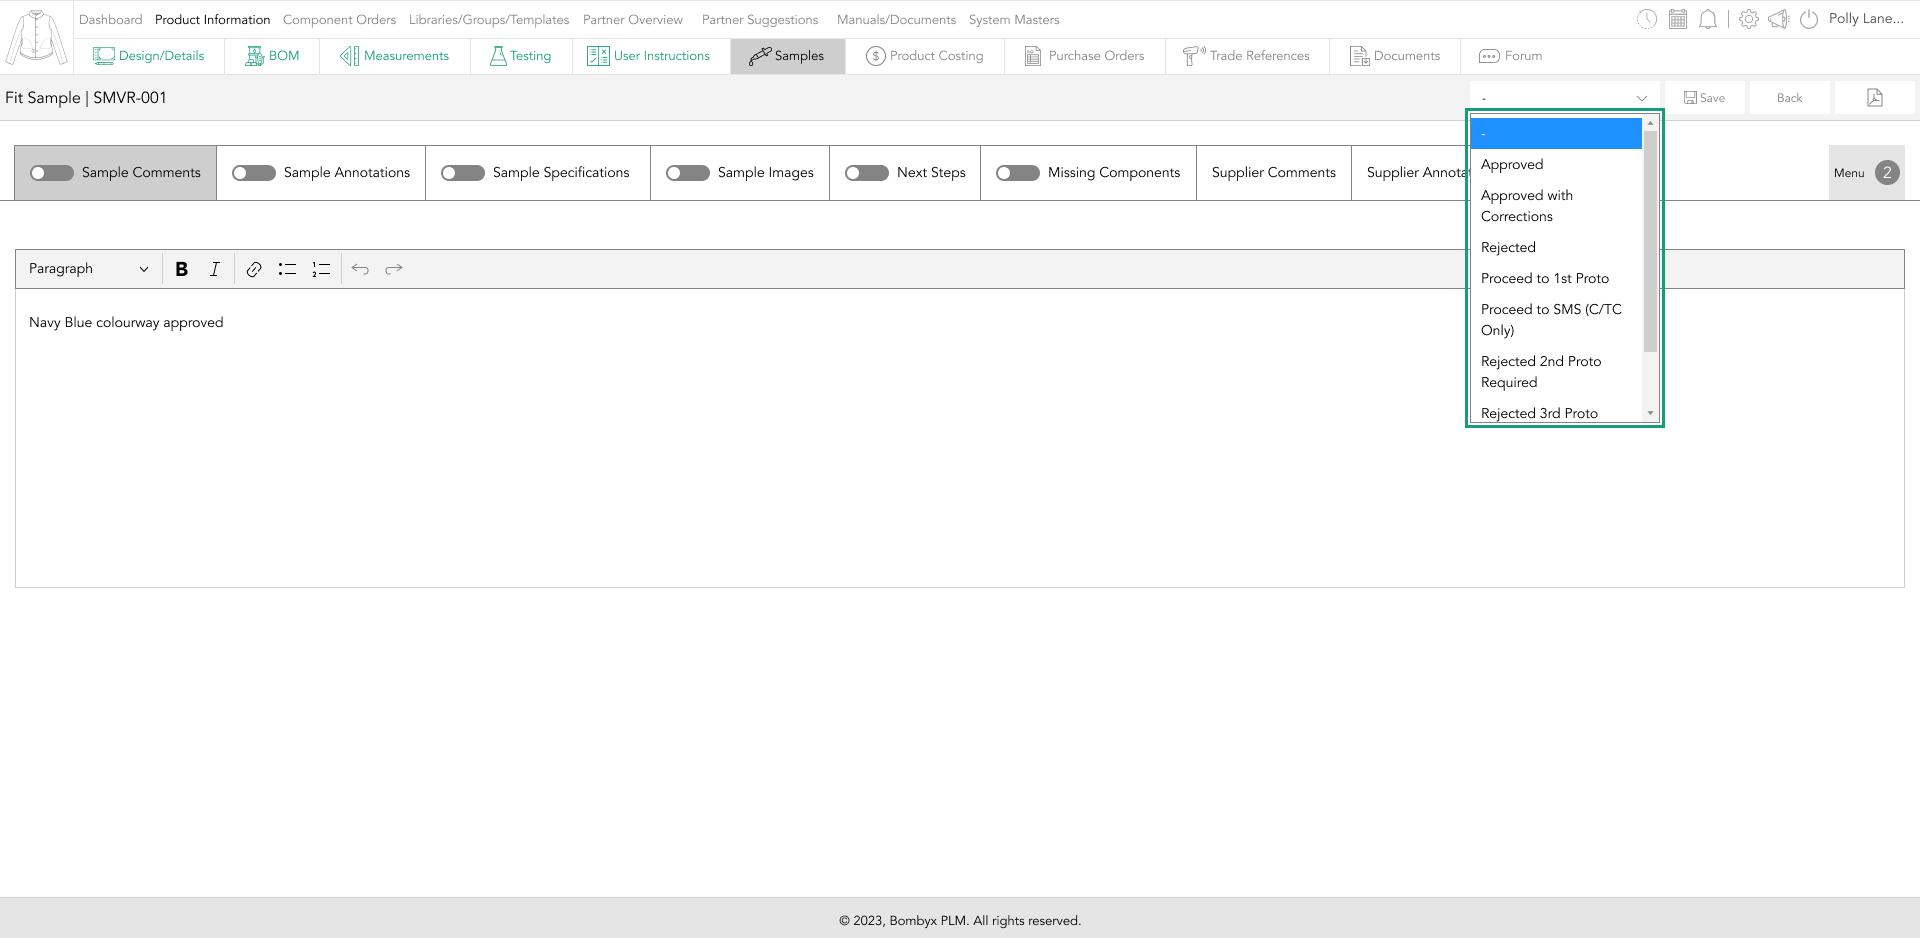
You can select the status of the sample. By tapping on the dropdown and selecting the status.
Once done tap save.
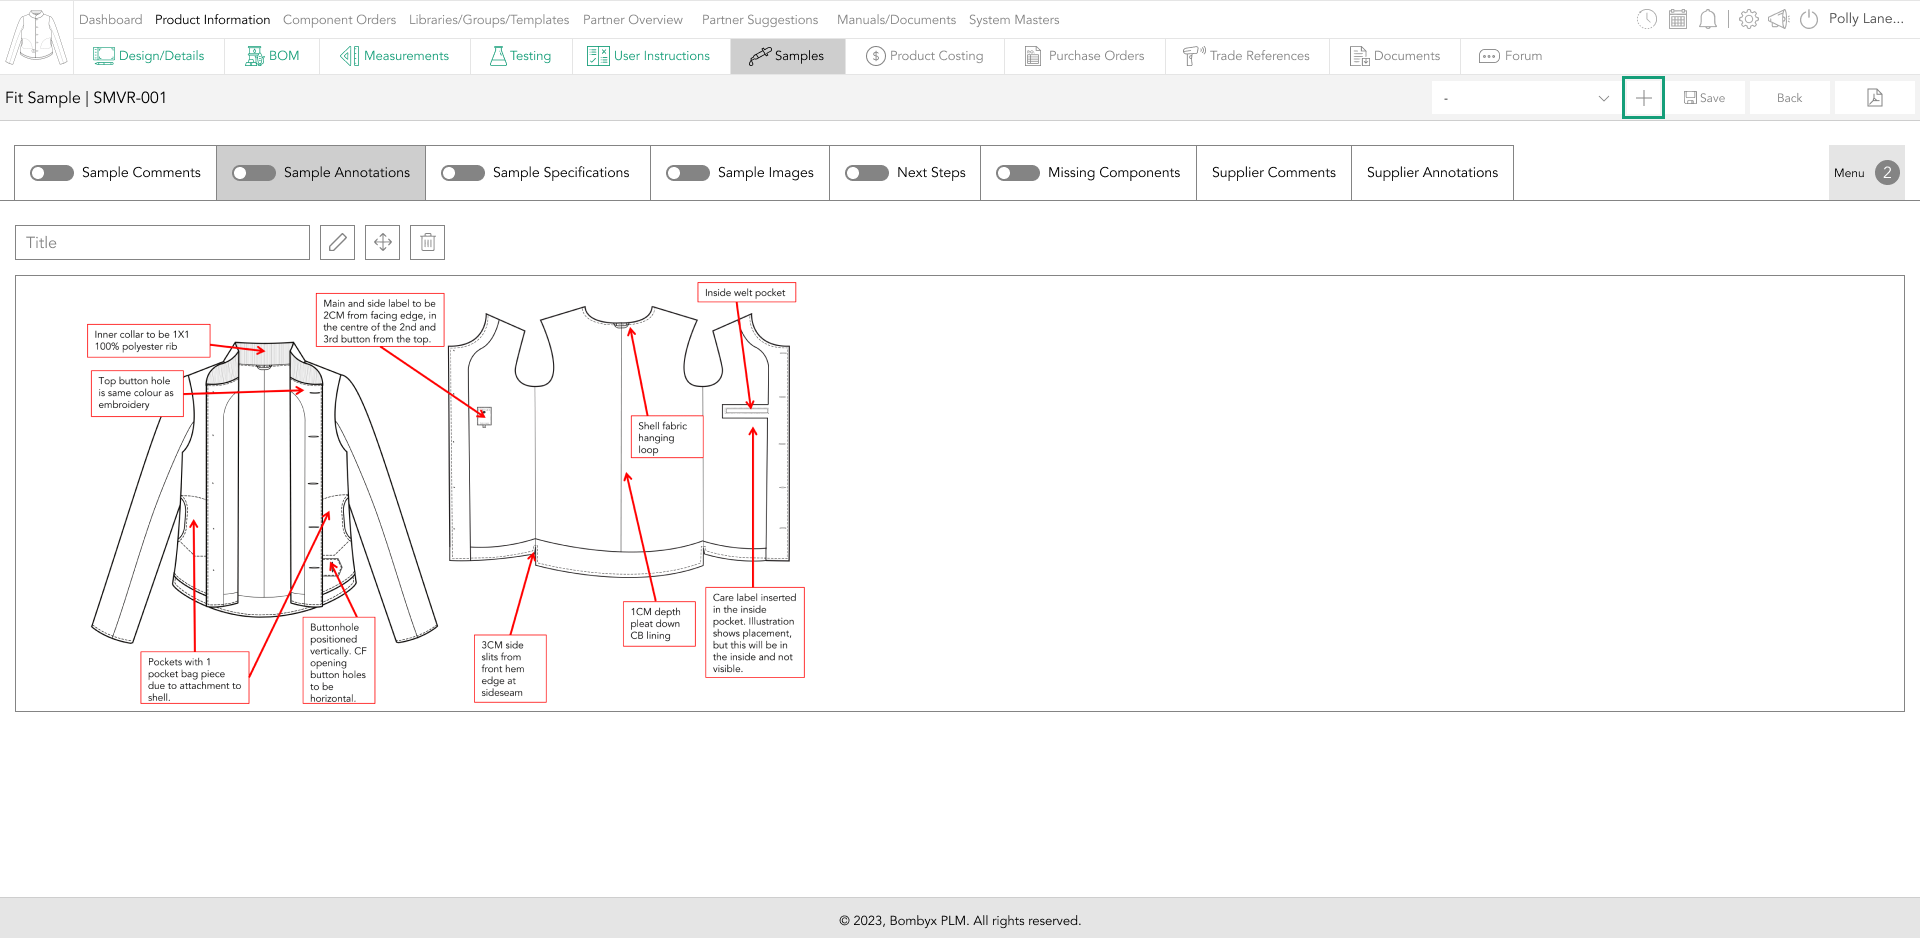
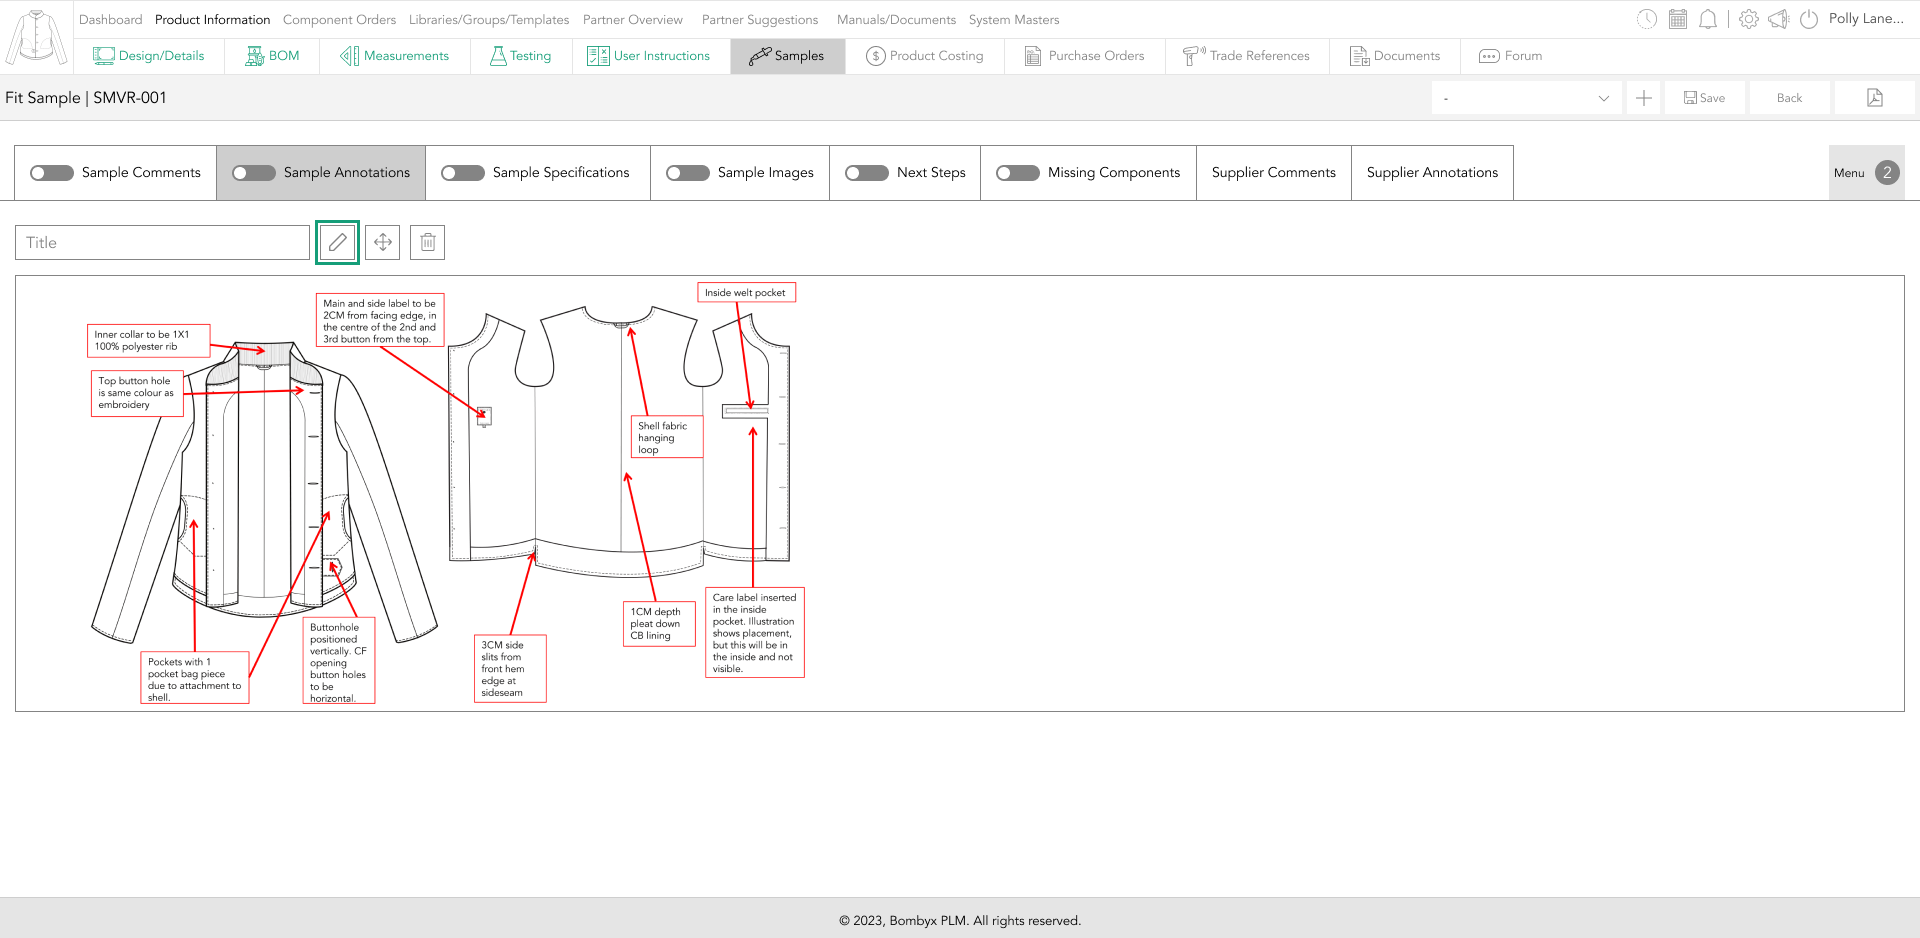
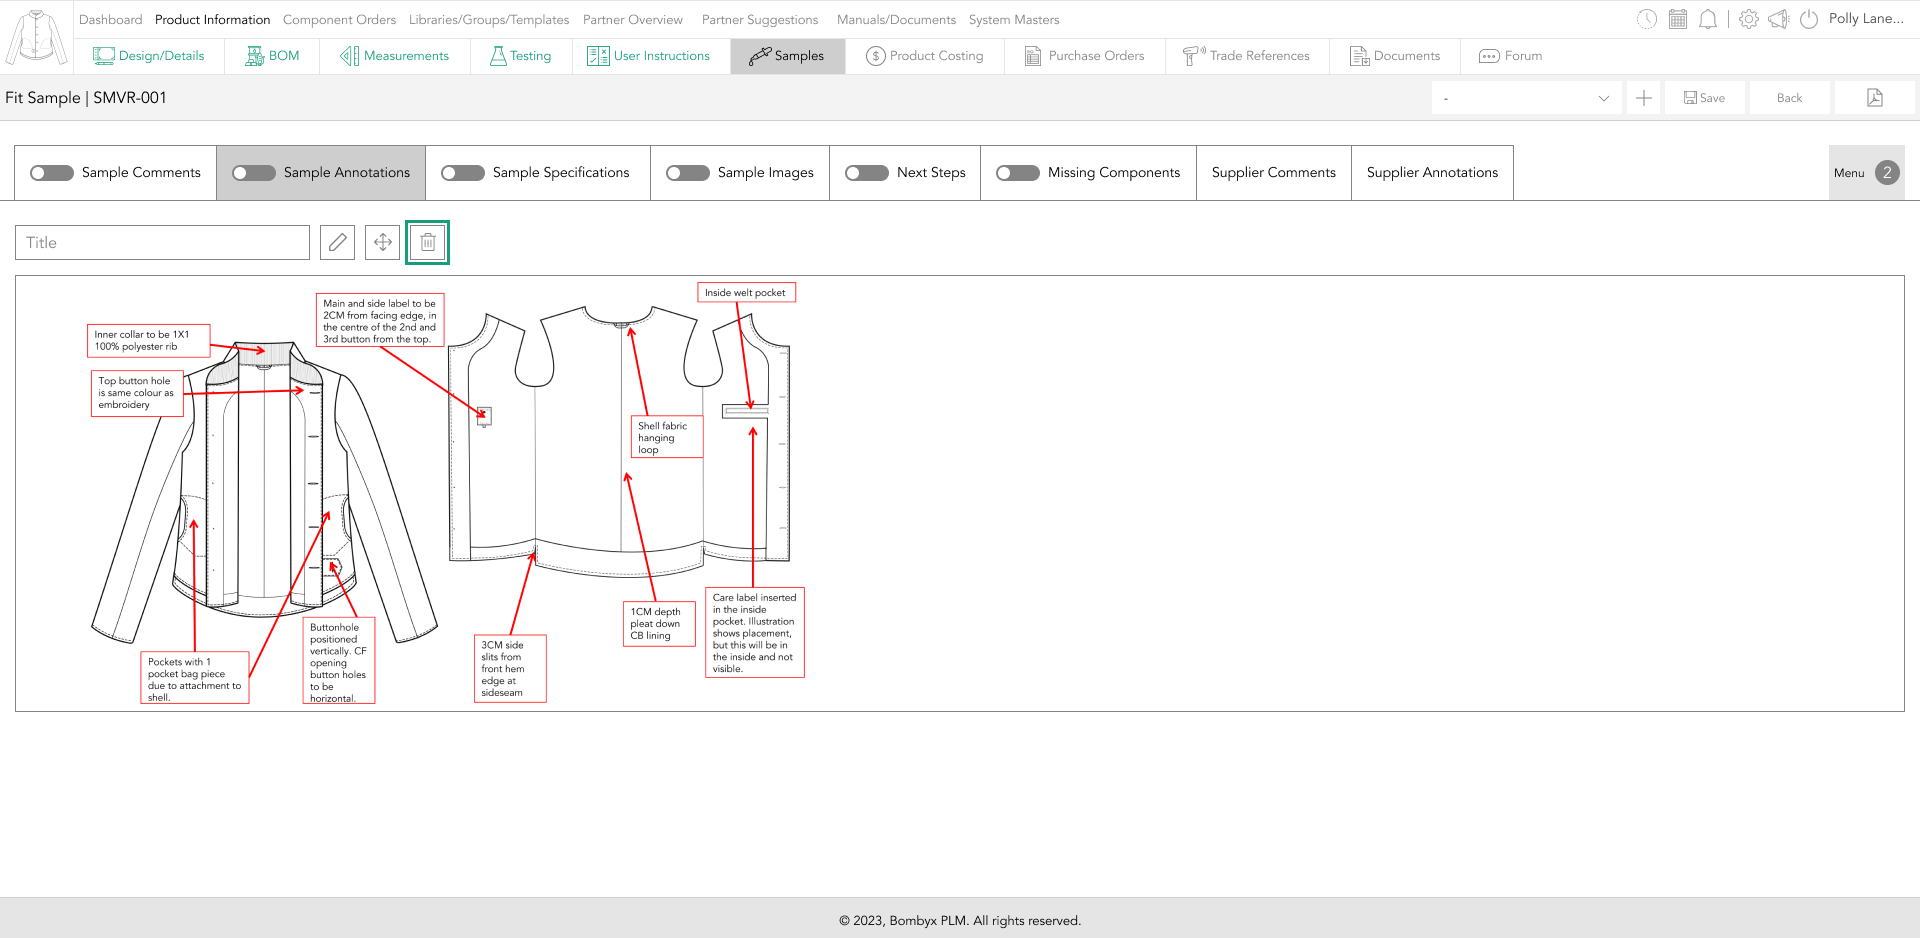
sample annotations
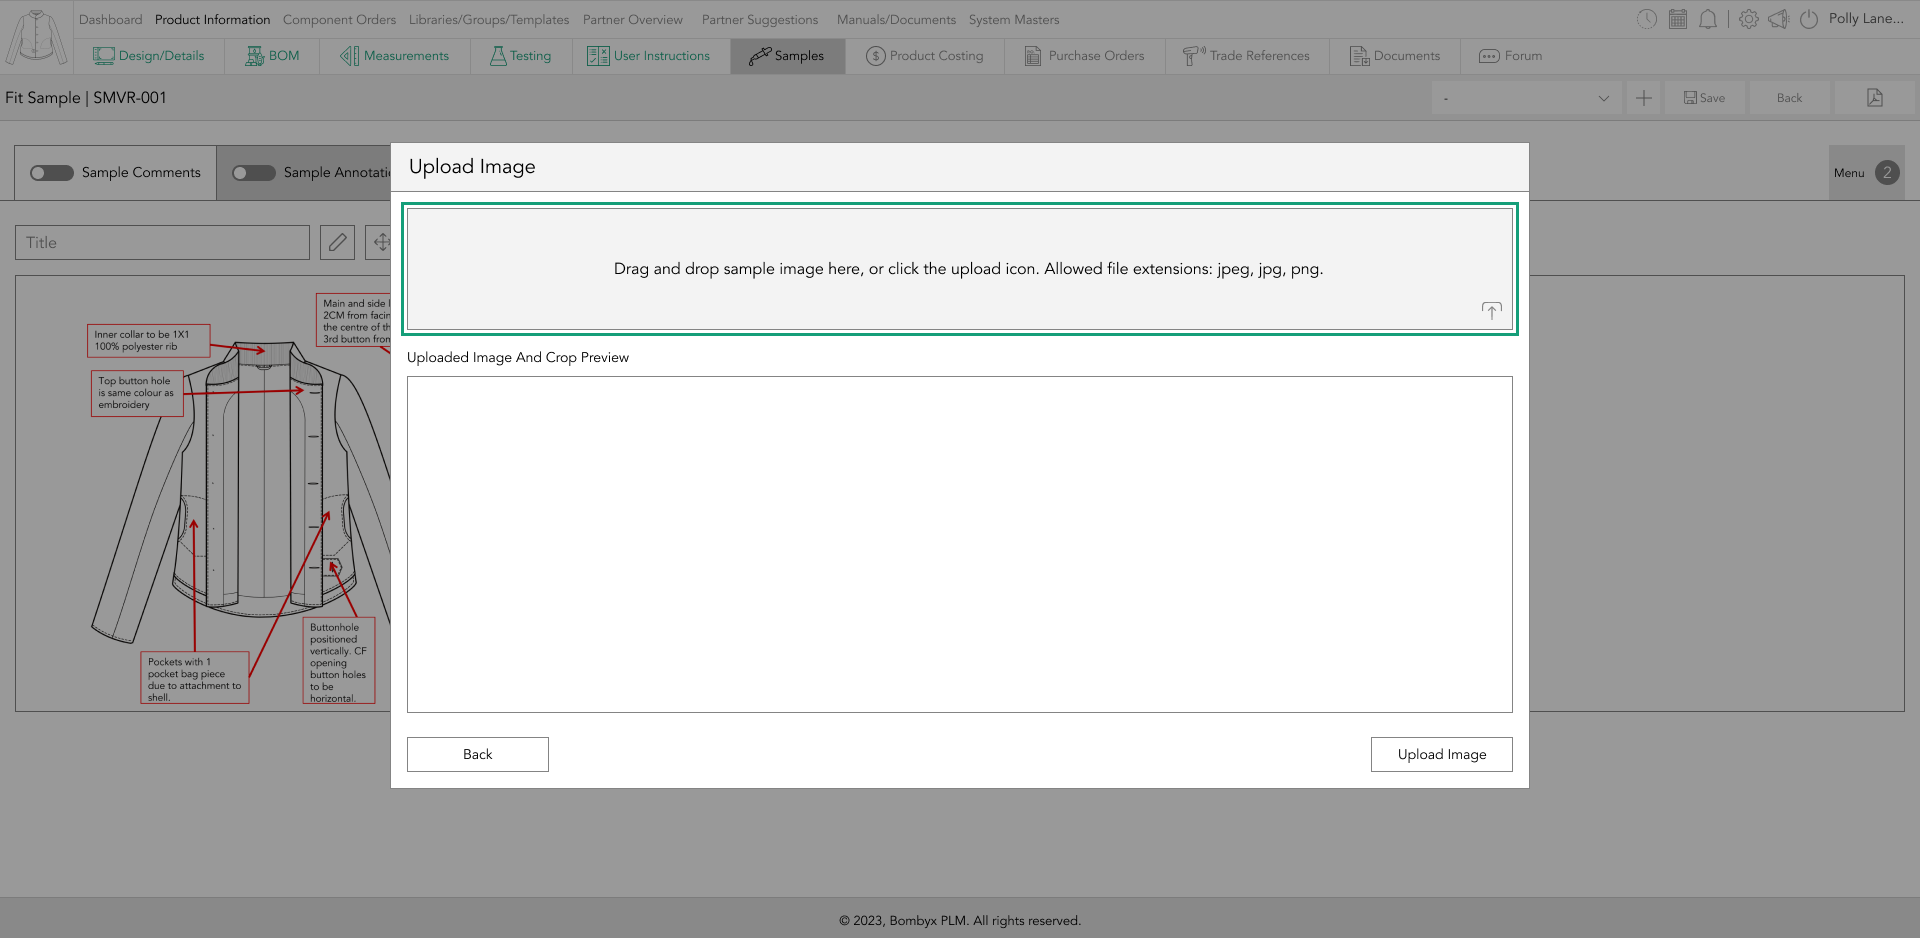
To add annotations, tap the add icon, on the right-hand side of the page...
And a popup will appear, where you can either drag and drop or upload the file.
The annotation function, works the same as adding annotations in design/details, if you are yet to add annotations to a design, head over to design/details to learn how to annotate your designs.
If you need to edit/update your annotation, tap the edit icon...
this will bring you back to the annotations page.
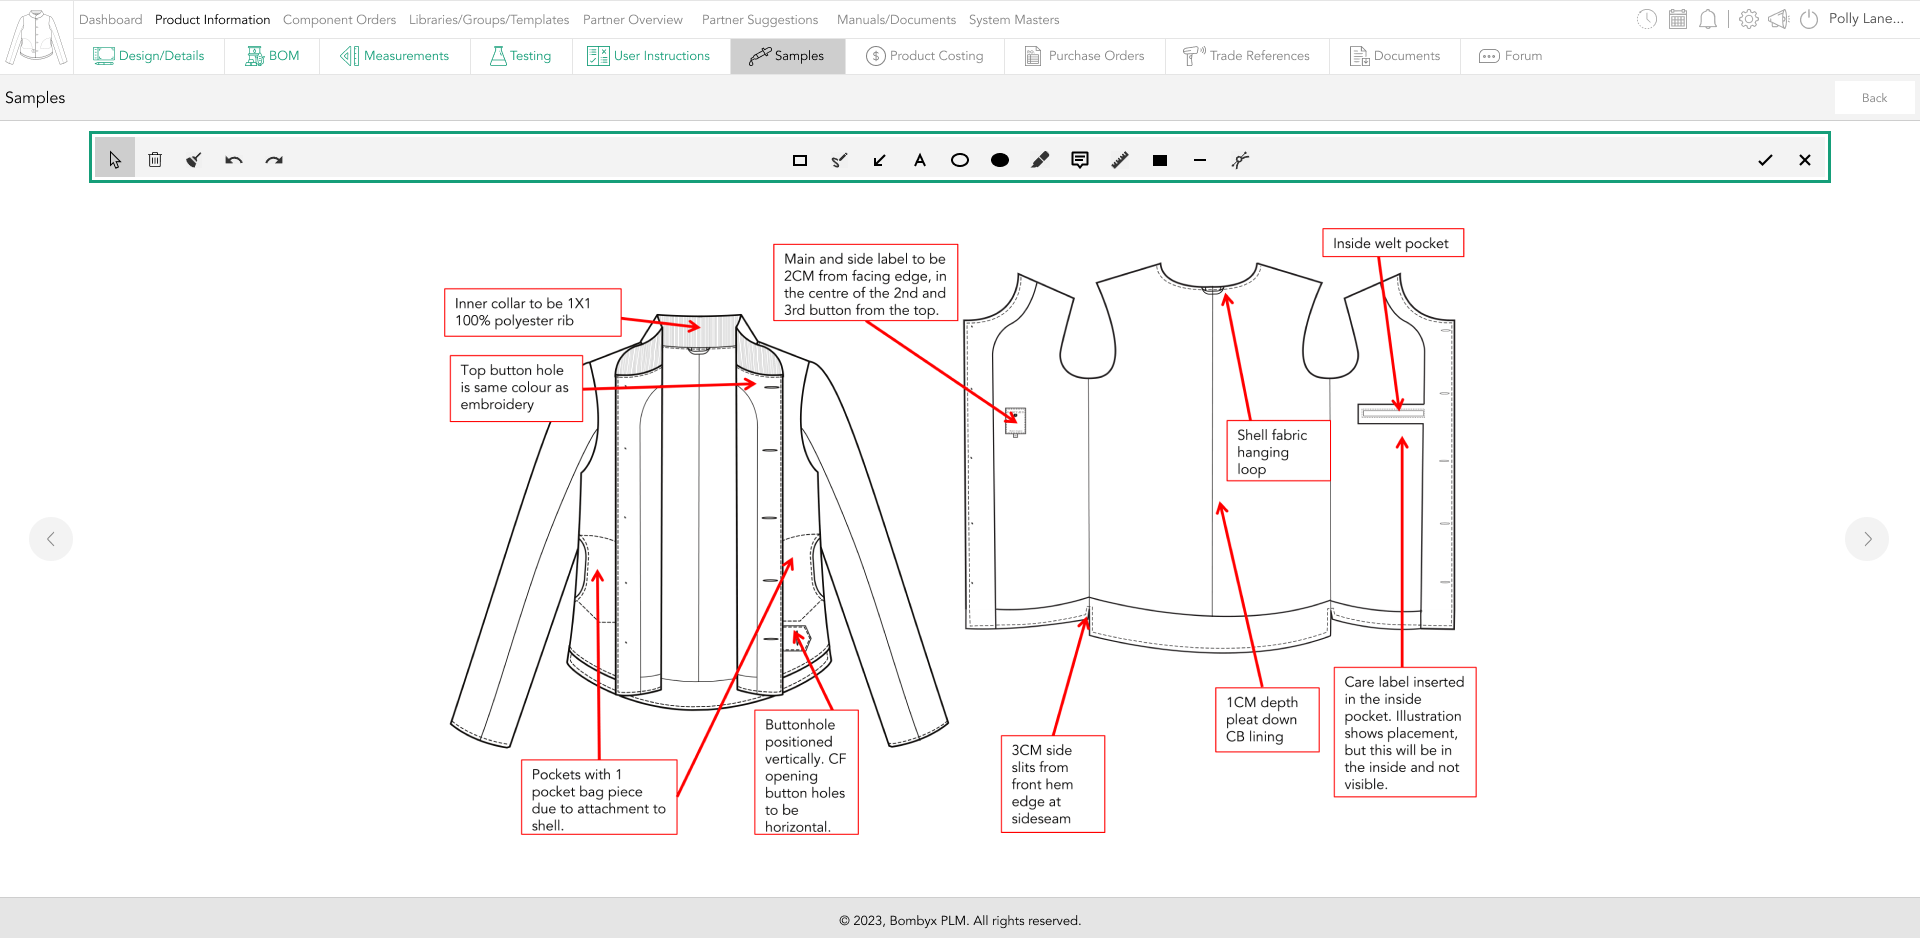
To rearrange the sequence of the images, simply press and hold the rearrange icon of the image you wish to move, and drag and drop the image into the position you would like.

To delete an image, tap on the bin icon above the image of the sample you wish to delete.
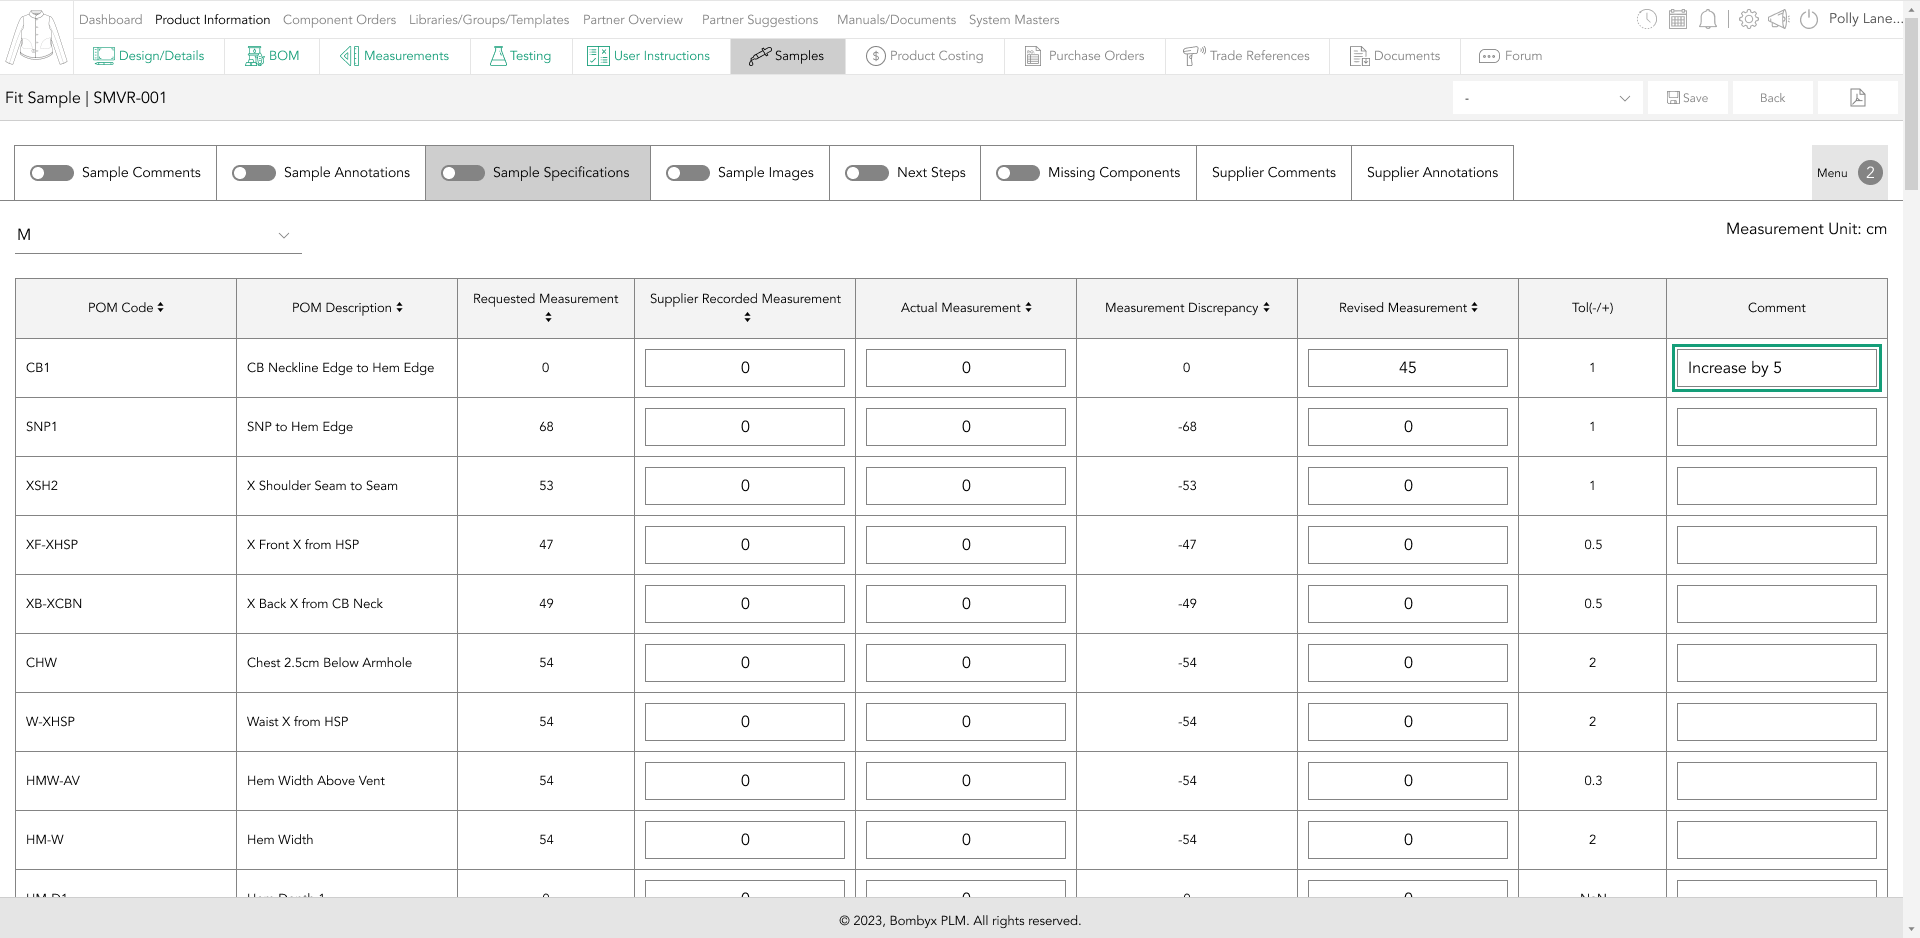
sample specifications
If you or your supplier need to make any changes to the measurements of this sample, they can do so by going into the sample specifications tab, and entering a revised measurement...
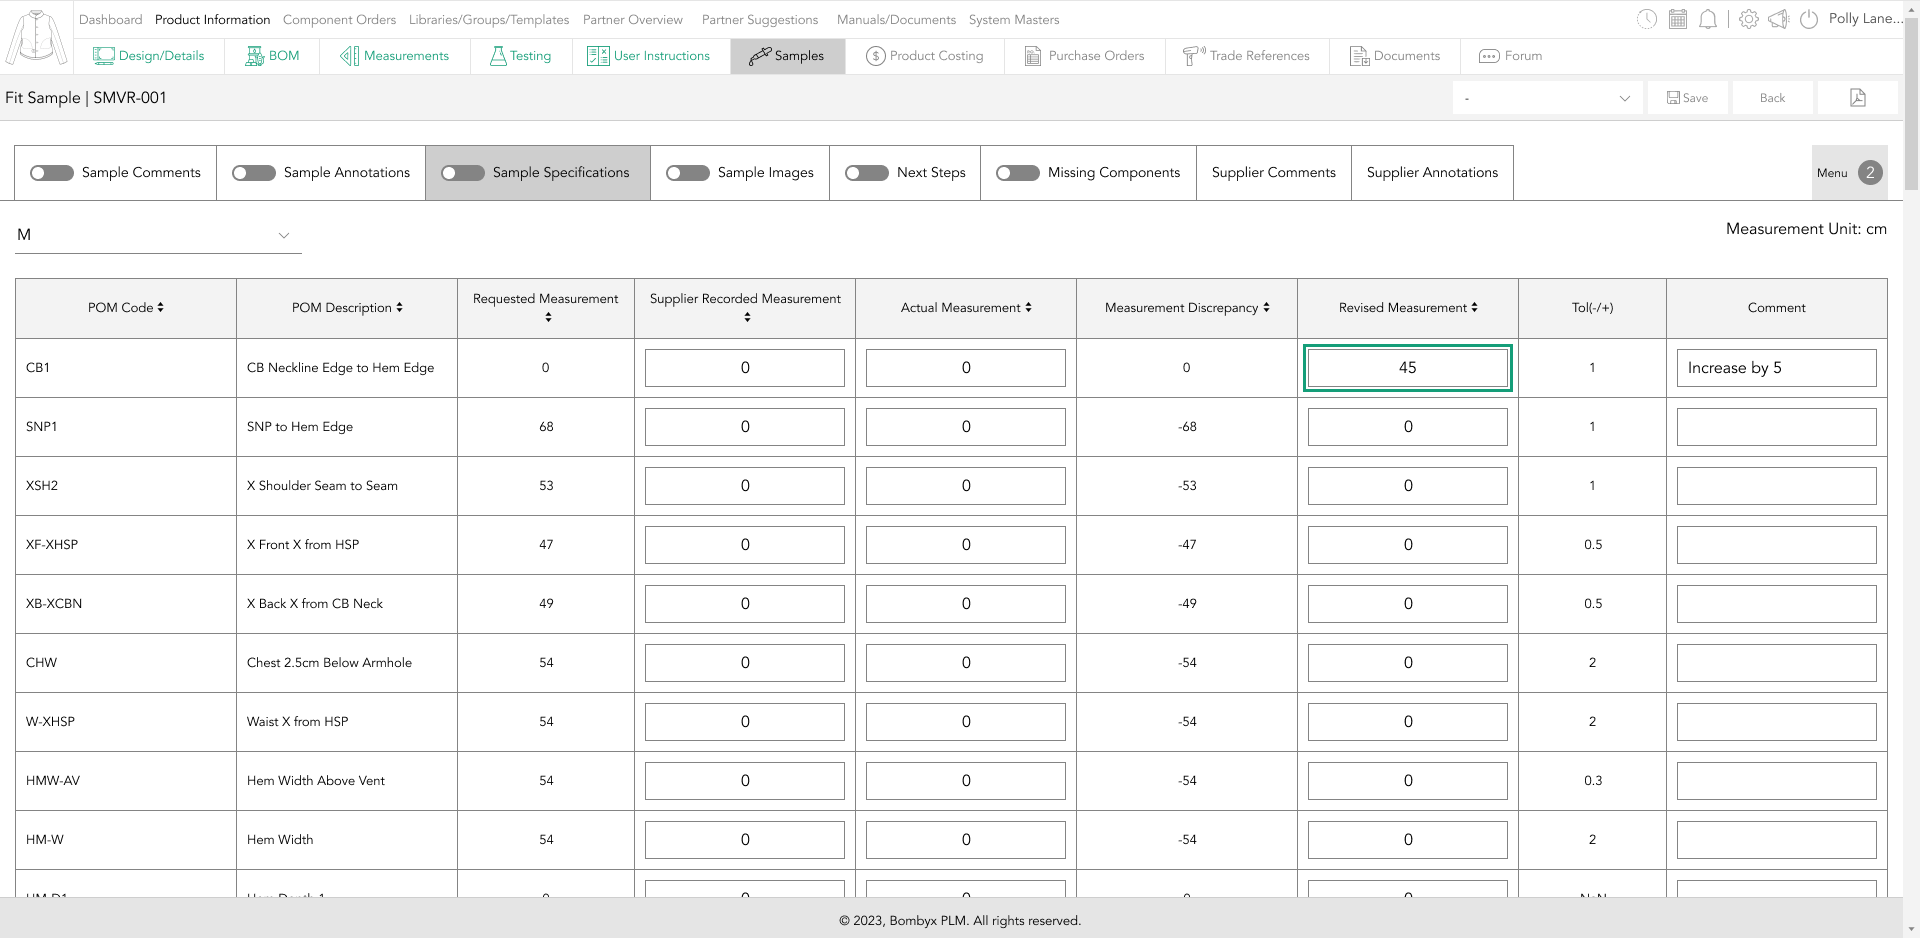
There is a space for your user or supplier to leave a comment for that revised measurement.
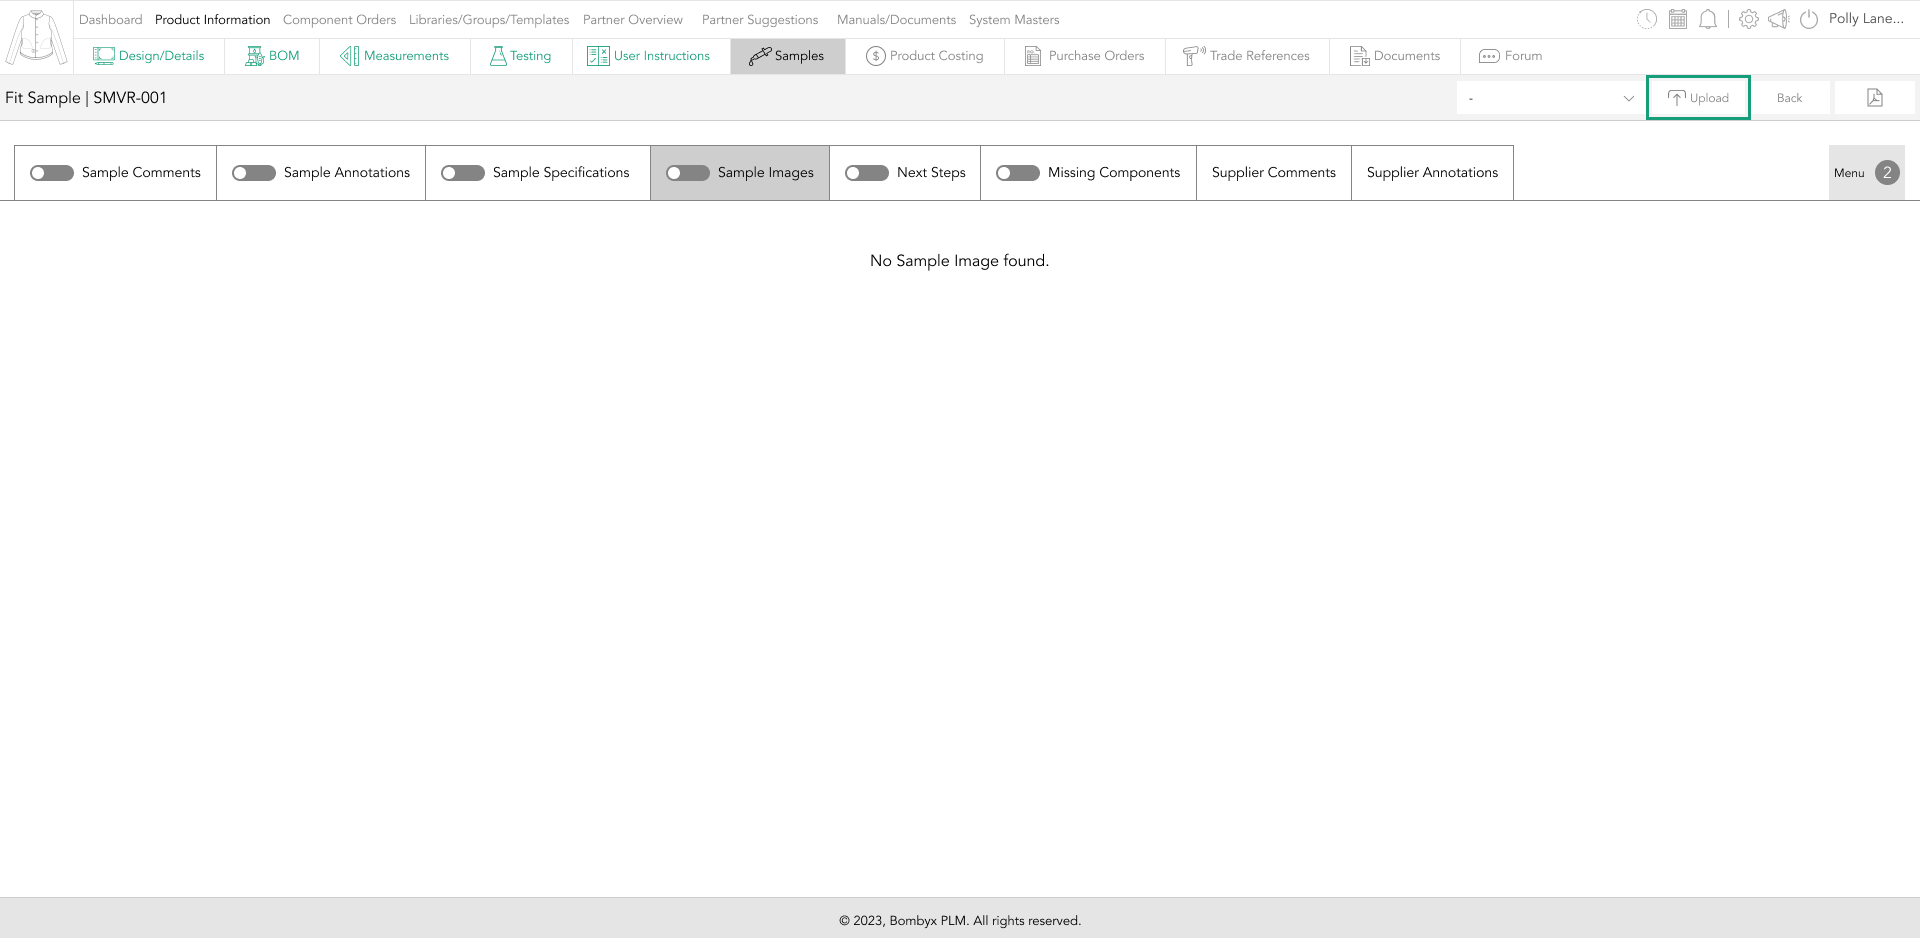
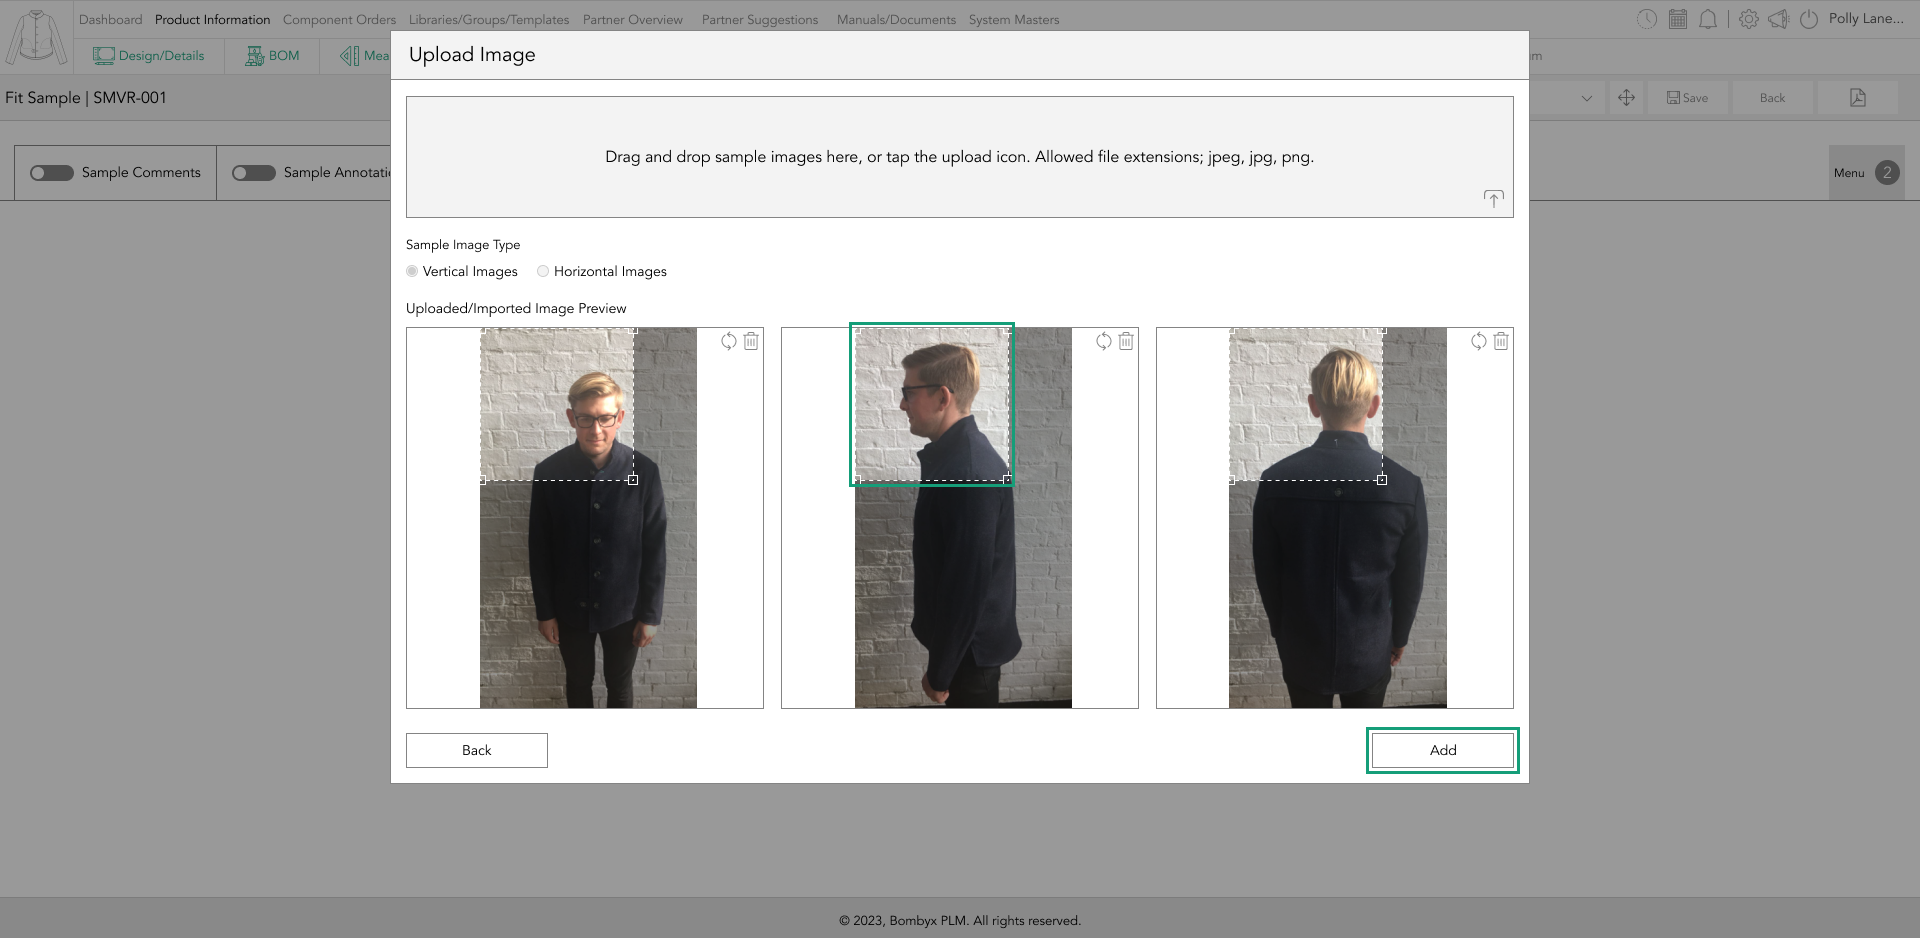
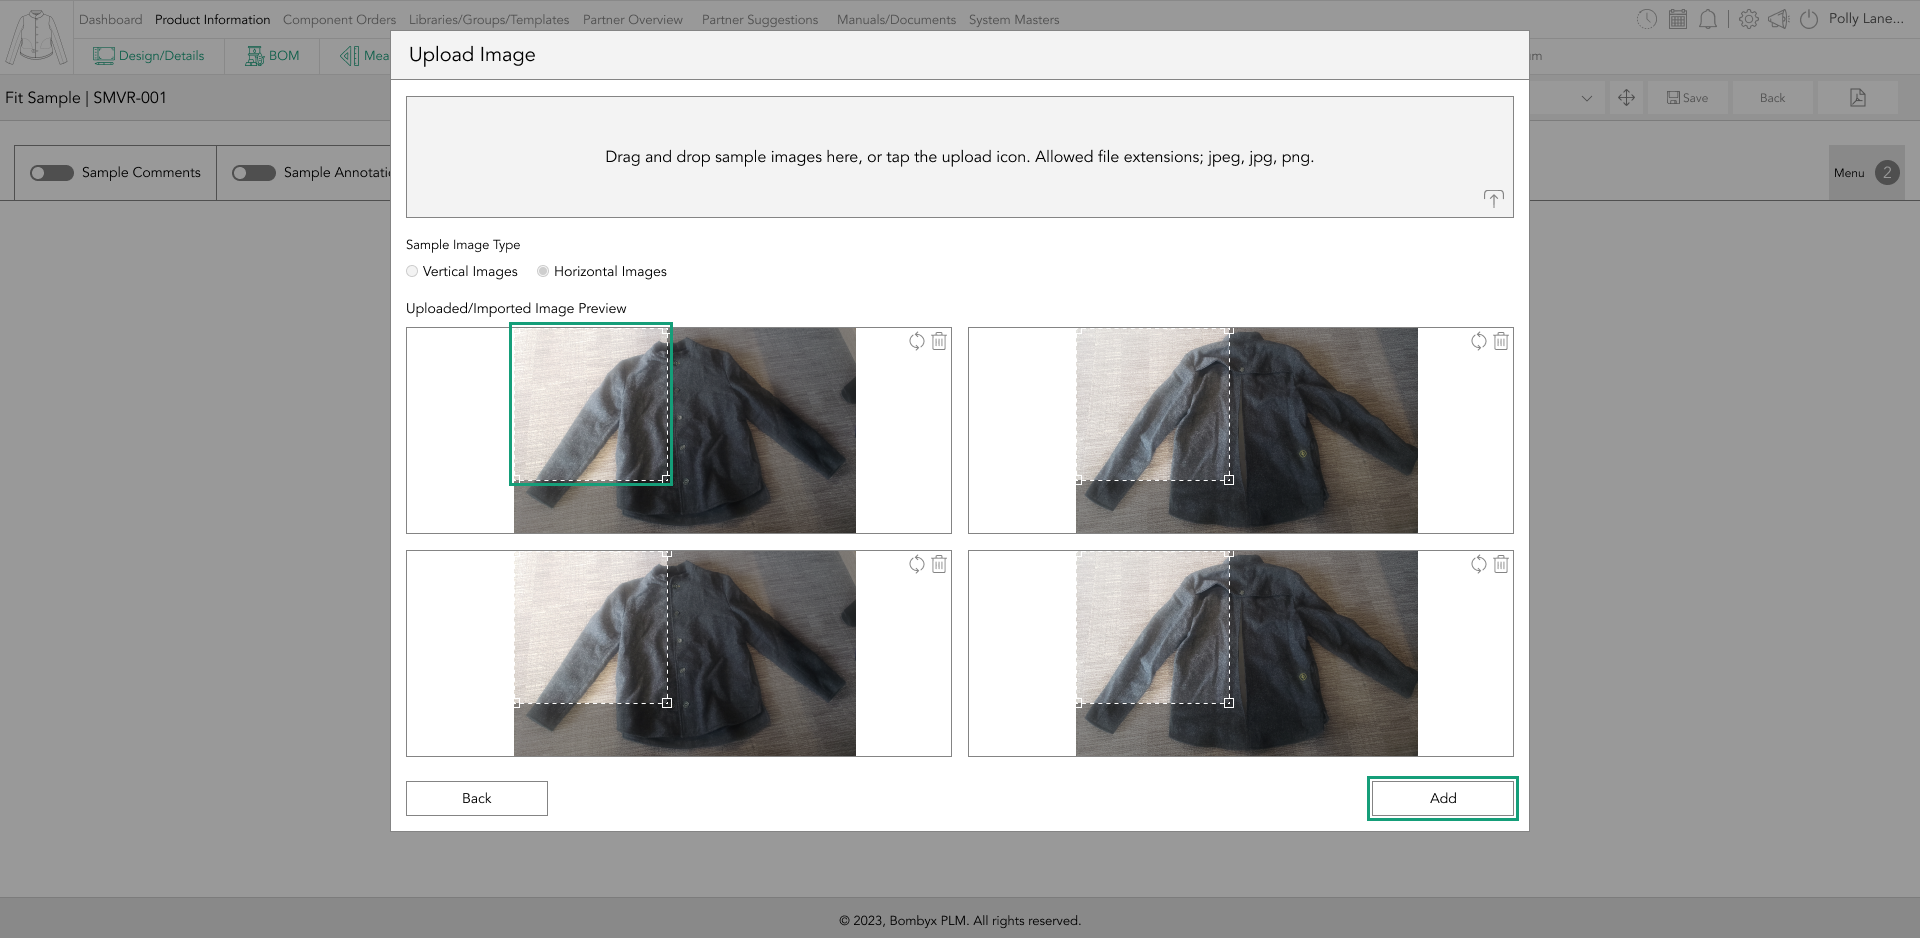
sample images
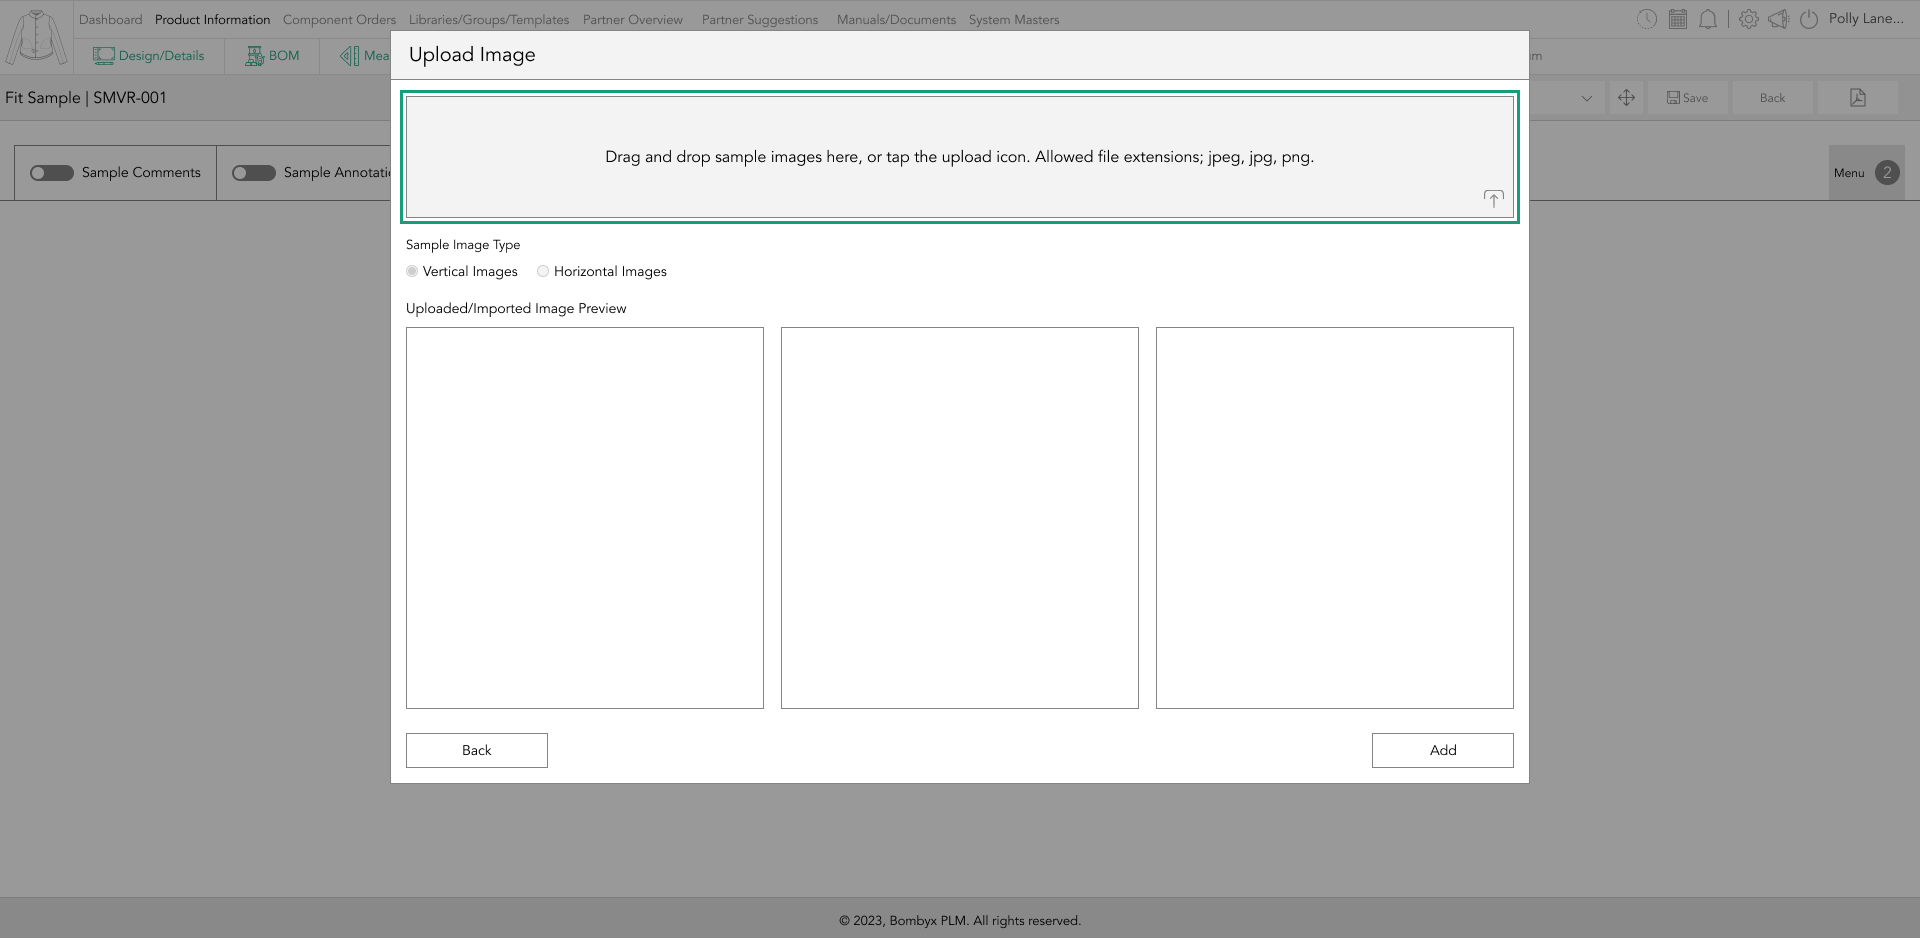
To upload images for your sample, tap the upload button on the right-hand side of the page…
Here you can select, if you want the images vertical, or horizontal, drag and drop or upload the image here.
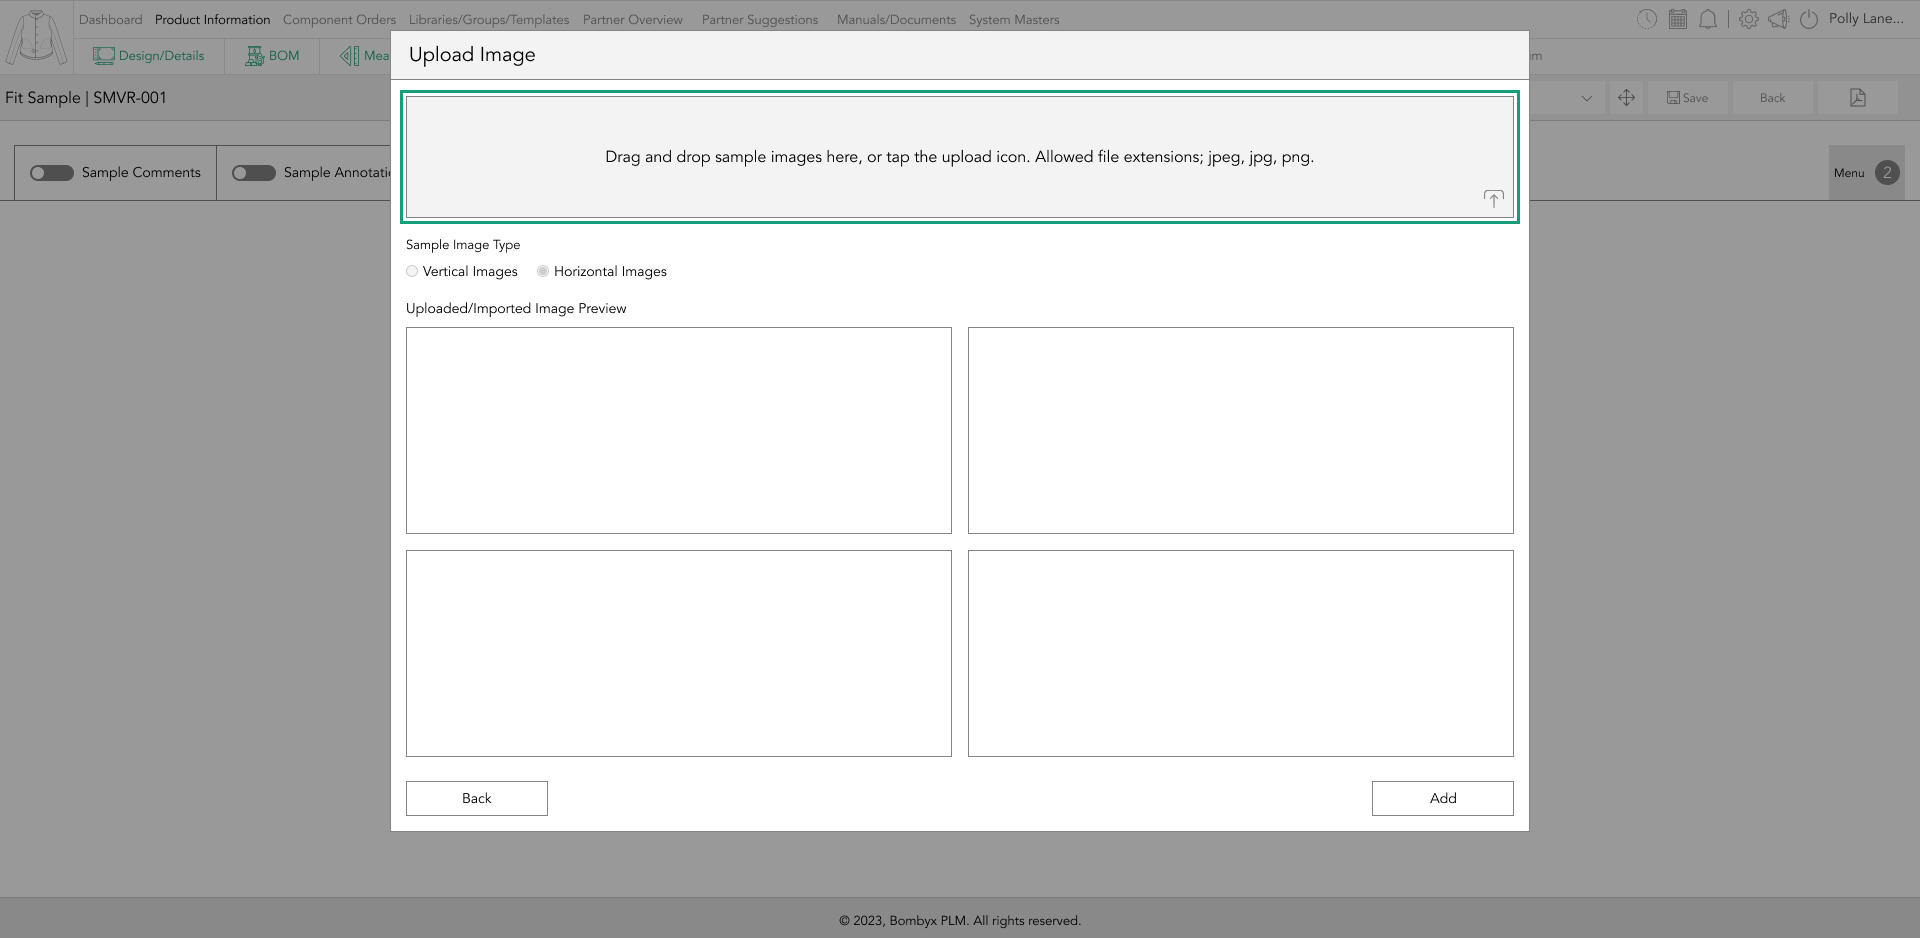
You’ll have the ability to crop the image, by dragging on the corner of the crop area and resizing it to your requirements.
Once done tap 'add'
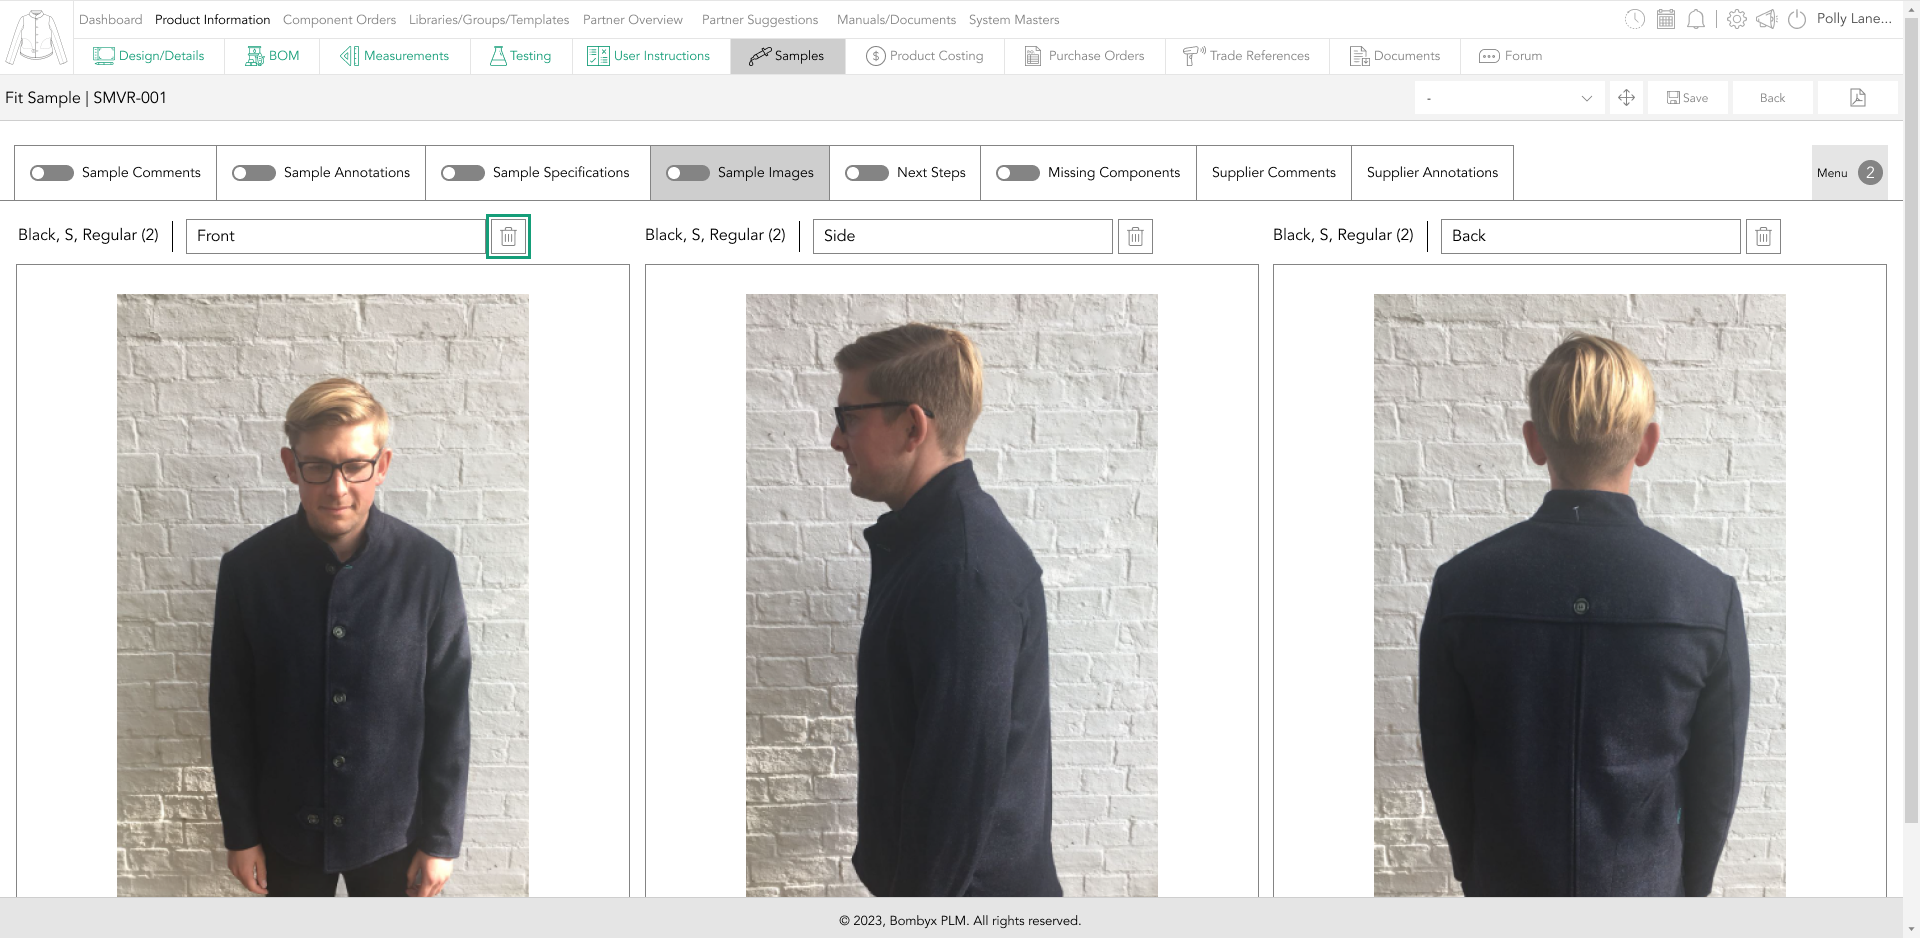
Enter a title for your image, then click save.
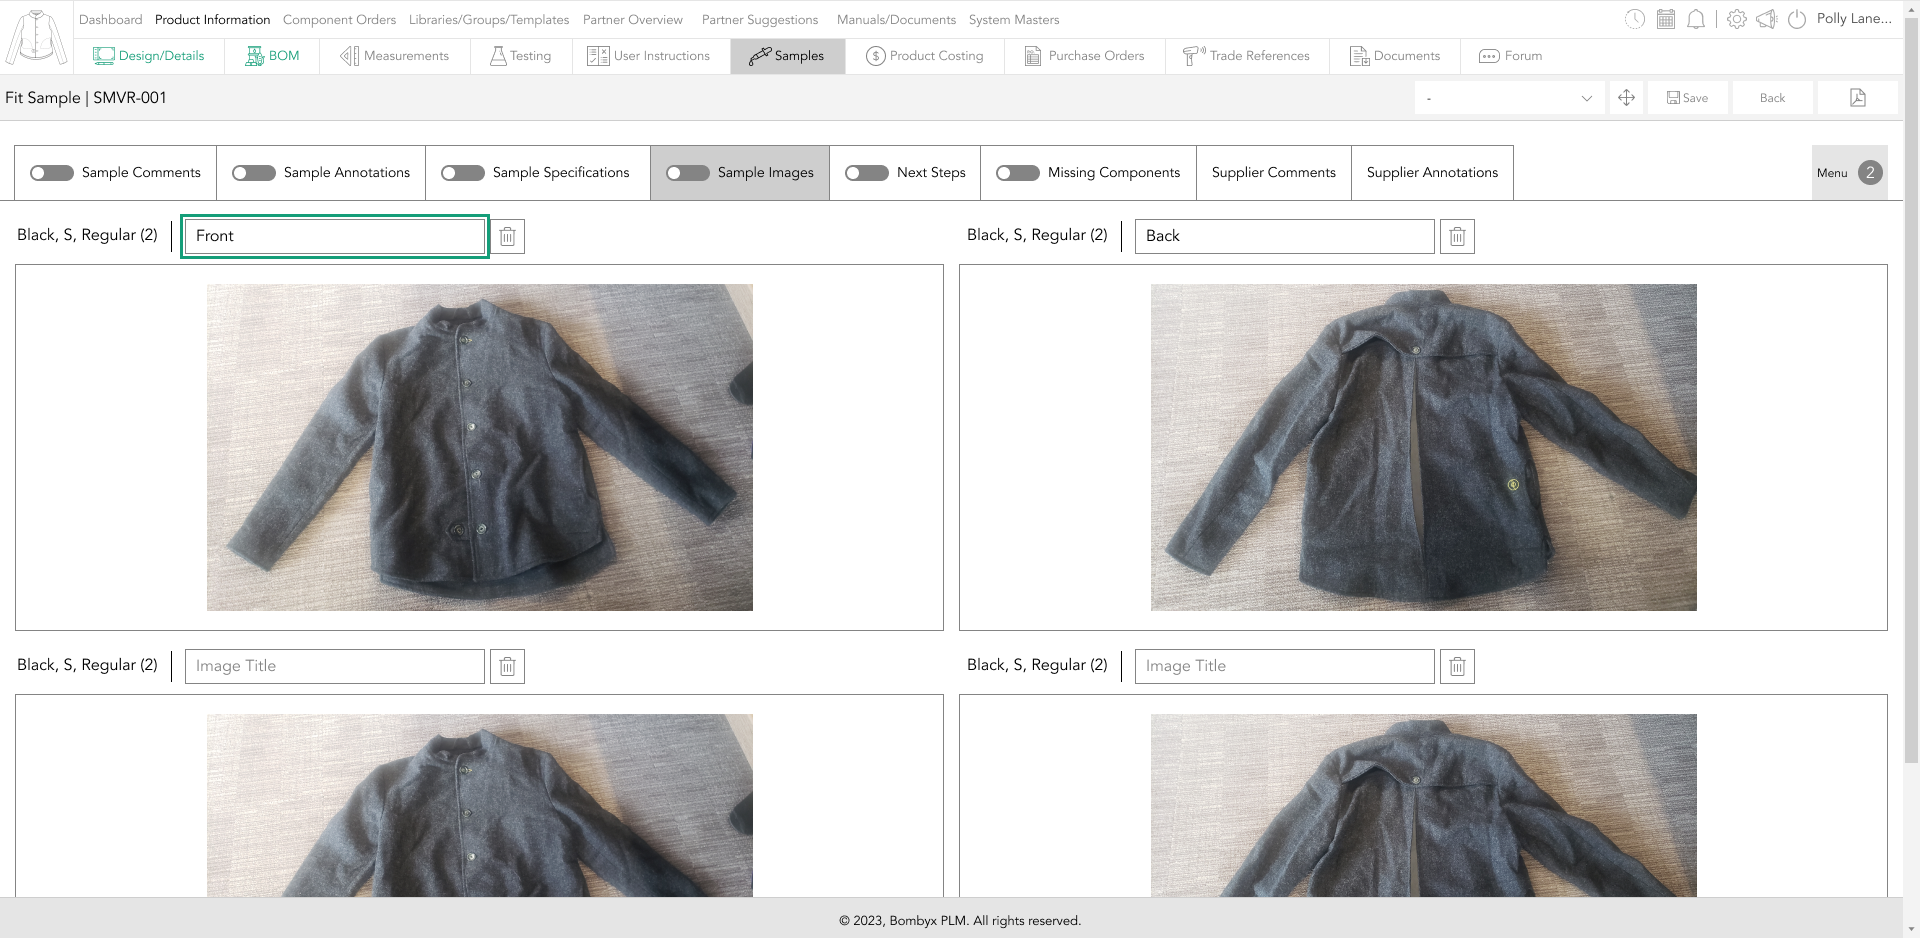
To delete an image, tap on the delete icon, you will find this next to the title bar.
next steps
The next step is used when you have requested a sample, by switching the toggle green...
This will indicate that you are moving to the next step in the production process.

A very similar popup will appear, for you to create/request your next steps sample.

Beyond the Label: Diving into the Sustainable Story with Digital Product Passports
Consumers today are increasingly concerned about the environmental and social impact of their purchases. From the food they eat.

Bombyx’s AI Integration: Advancing Business Excellence in PLM, PIM, and DAM Systems
Let's delve into the exciting realm of Artificial Intelligence (AI) undergoing a transformative evolution. As we Enter the year 2024.

Beyond Baubles: A Stylish Dive into Christmas Fashion Trends.
e explore the latest Christmas fashion trends, with a focus on achieving a harmonious balance between sophistication and comfort. From luxurious velvets to cosy knits

Streamlining Winter Fashion with PLM: Managing Seasonal Changes
Winter fashion production demands meticulous planning and execution. PLM serves as a guiding force in production management, aiding in resource allocation, scheduling

Christmas Experience through Digital Transformation
During the Autumn/Winter months in Europe and the USA, are marked by heightened activity. The festive season introduces an atmosphere of joy and unity. Amidst the era of digital in
Demanding Trends & The Transformative Power of Product Lifecycle Management
Explore how strategic Product Lifecycle Management (PLM) empowers fashion to navigate trends sustainably. This post delves into the symbiosis of trends and sustainability,
The Power of Product Information Management (PIM) With a PLM System.
In today's fast-paced business environment, effective product information management is crucial for success. Product Information Management (PIM) is a powerful tool.
Fashion and the Power of Product Lifecycle Management
In recent years, the fashion industry has witnessed a surge in fashion, a phenomenon characterised by the rapid production and consumption of inexpensive clothing... and a whole l

Supply Chain Management has Forever Changed
Brands make use of product lifecycle data analysis to help them work out price points, marketing and advertising strategies, packaging, growth and expansion… and a whole lot more