
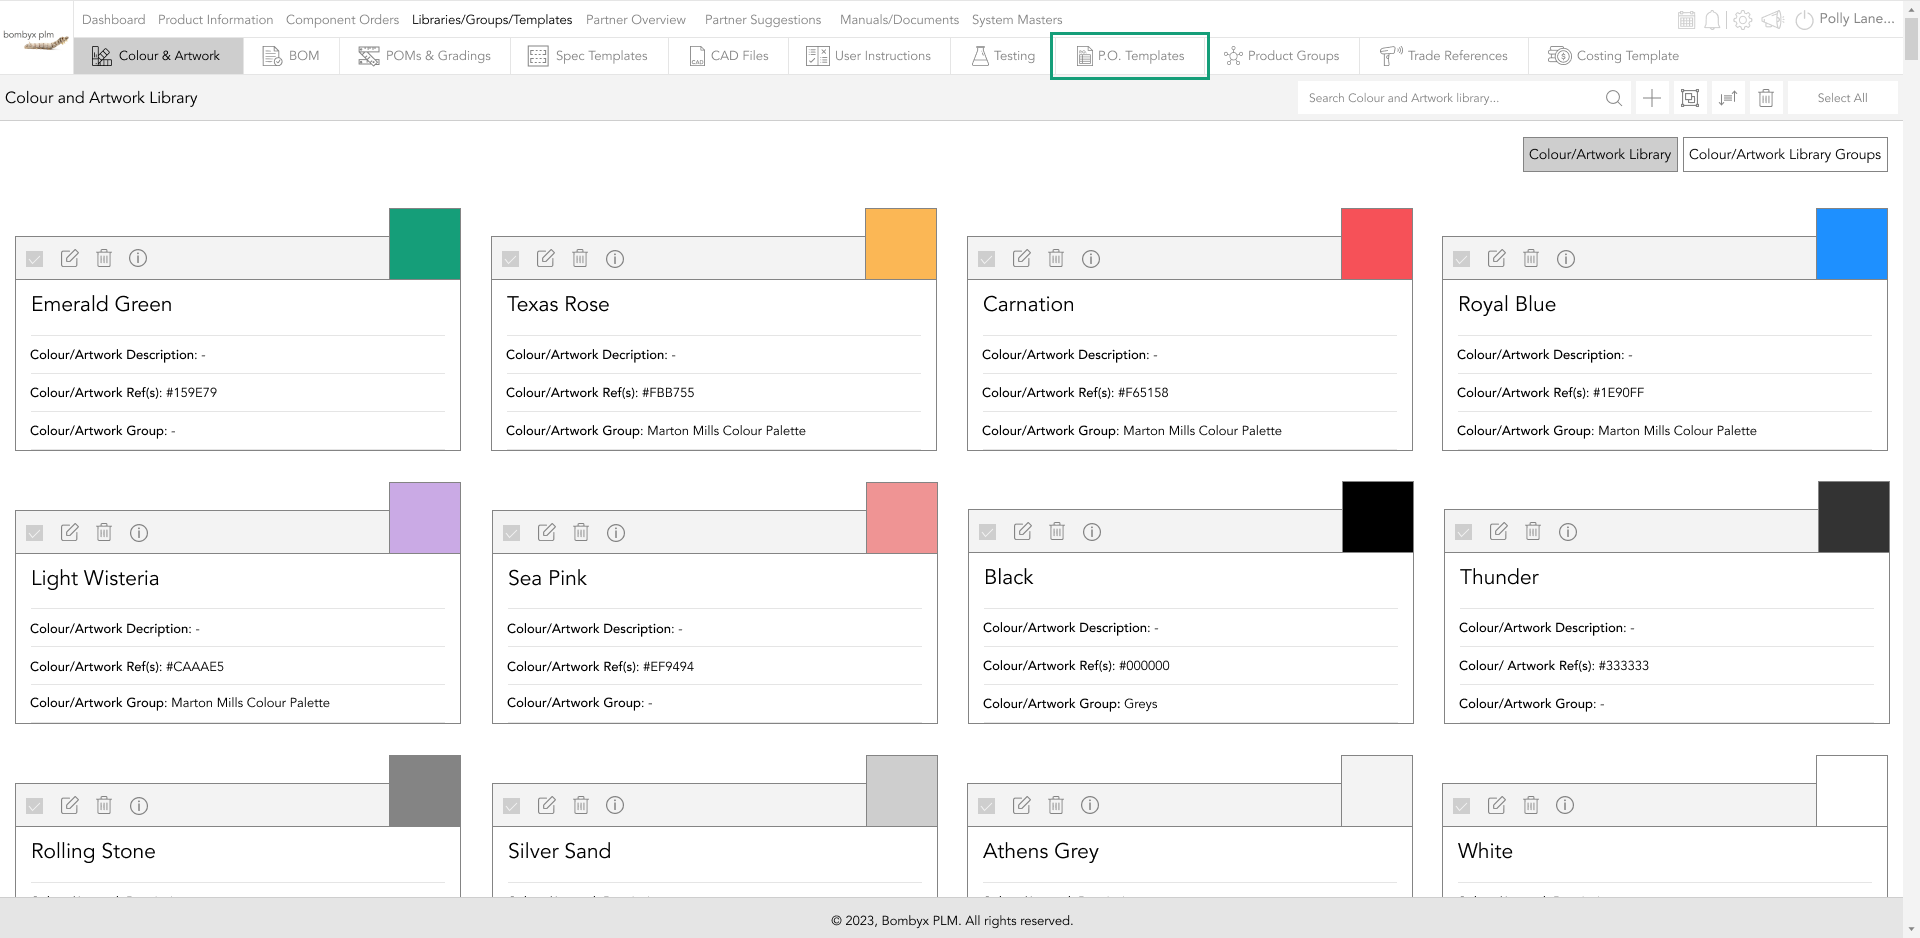
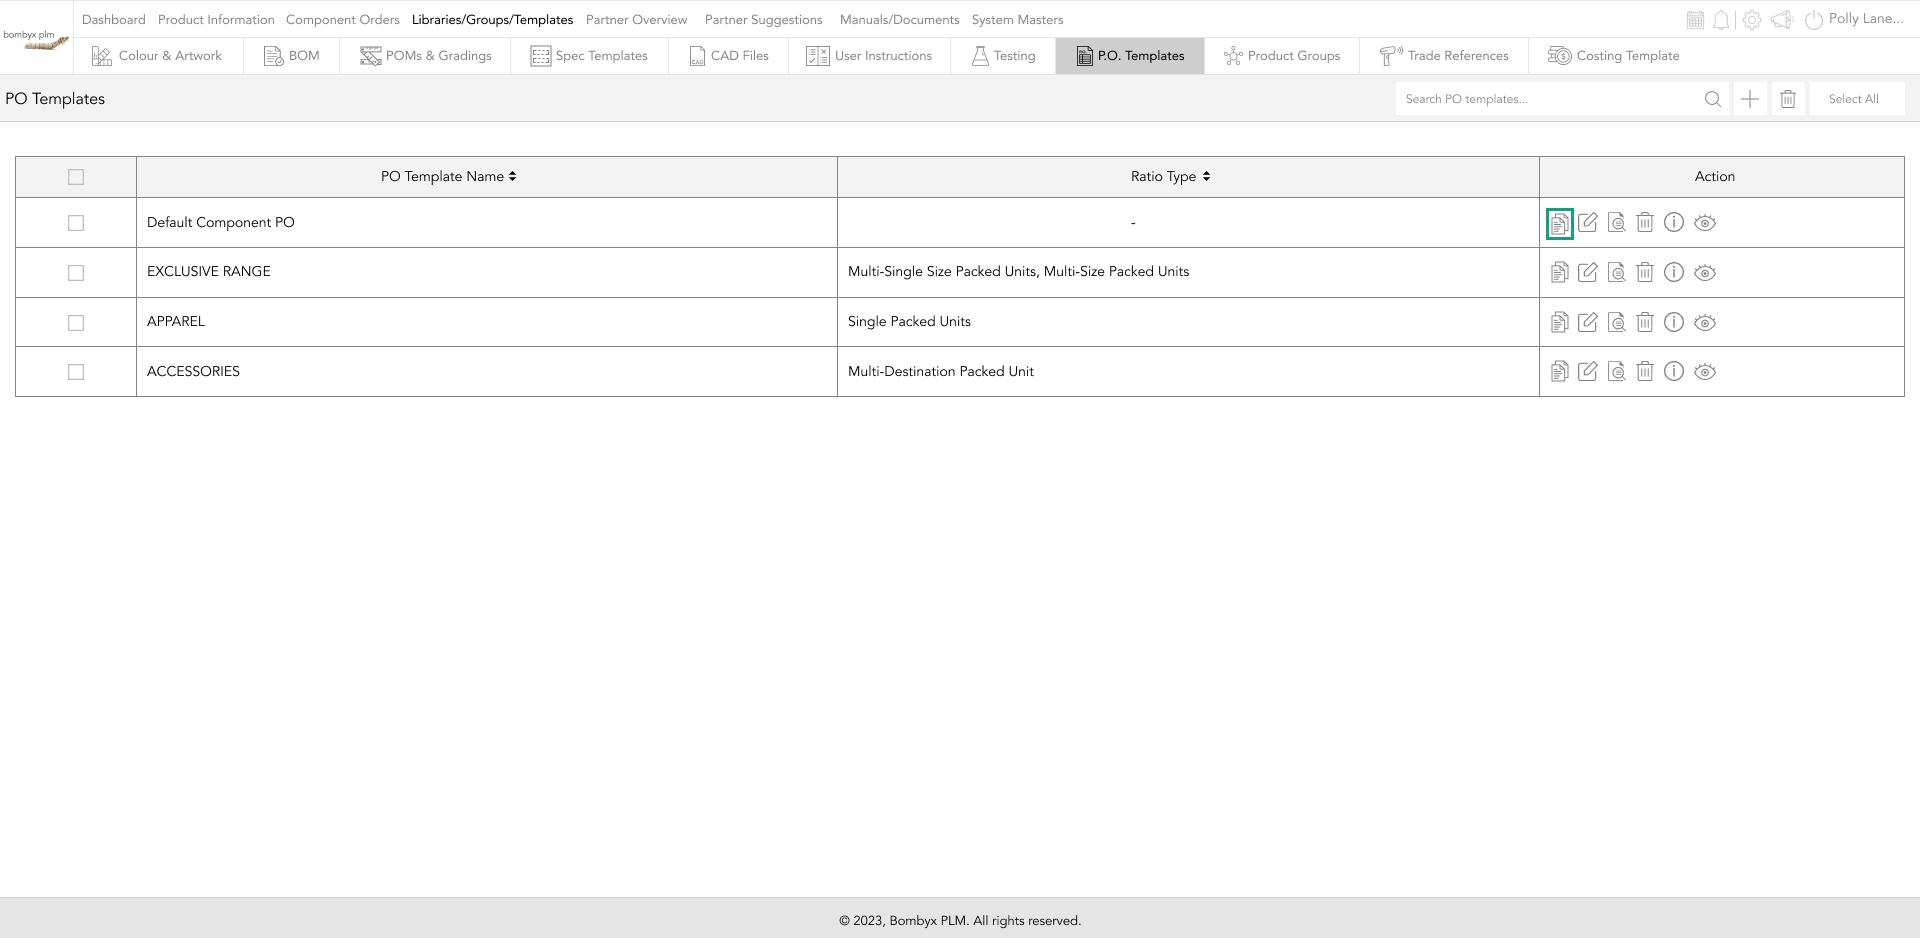
navigating to the purchase order template
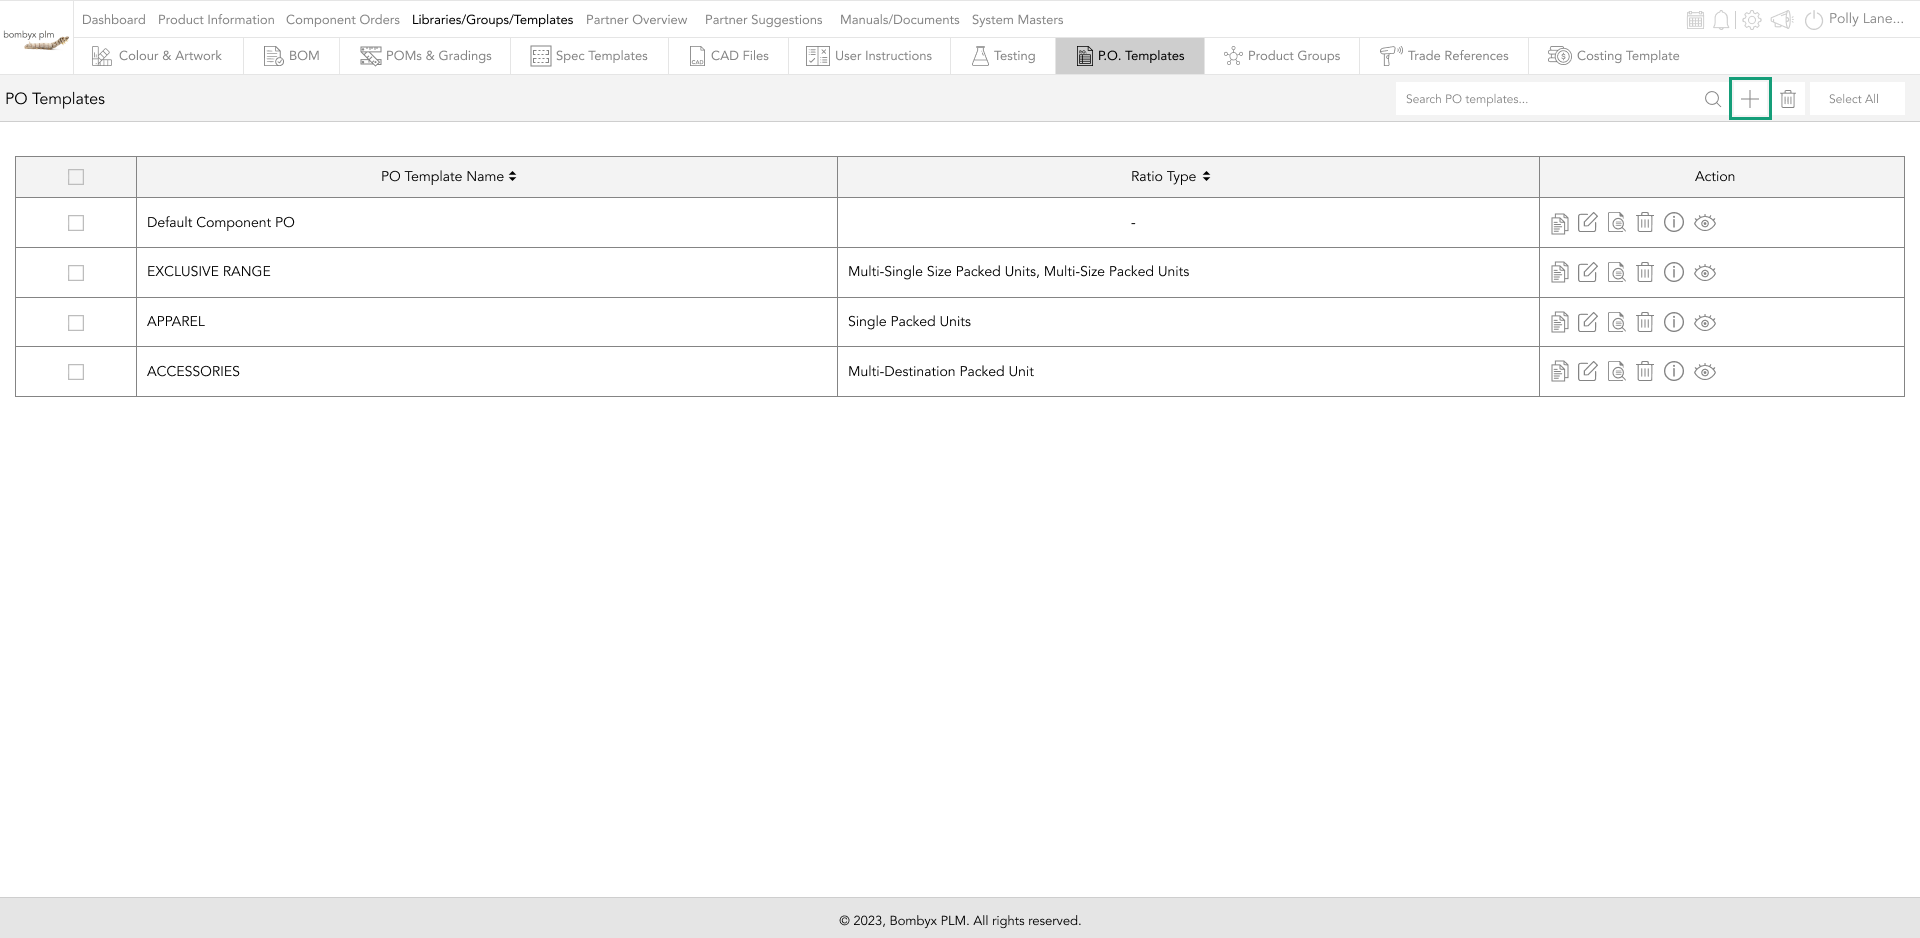
You must click into the libraries/groups/and templates, once inside the libraries, tap the ‘PO Template’ button in the menu bar to enter this page.
To create a new template, tap the plus icon.
creating a new template
Creating templates in the system saves time, you can raise an order within minutes, rather than having to reinvent the structure every time. Purchase Orders can differ in how information is presented, leaving each user to decide on how to display this critical information.
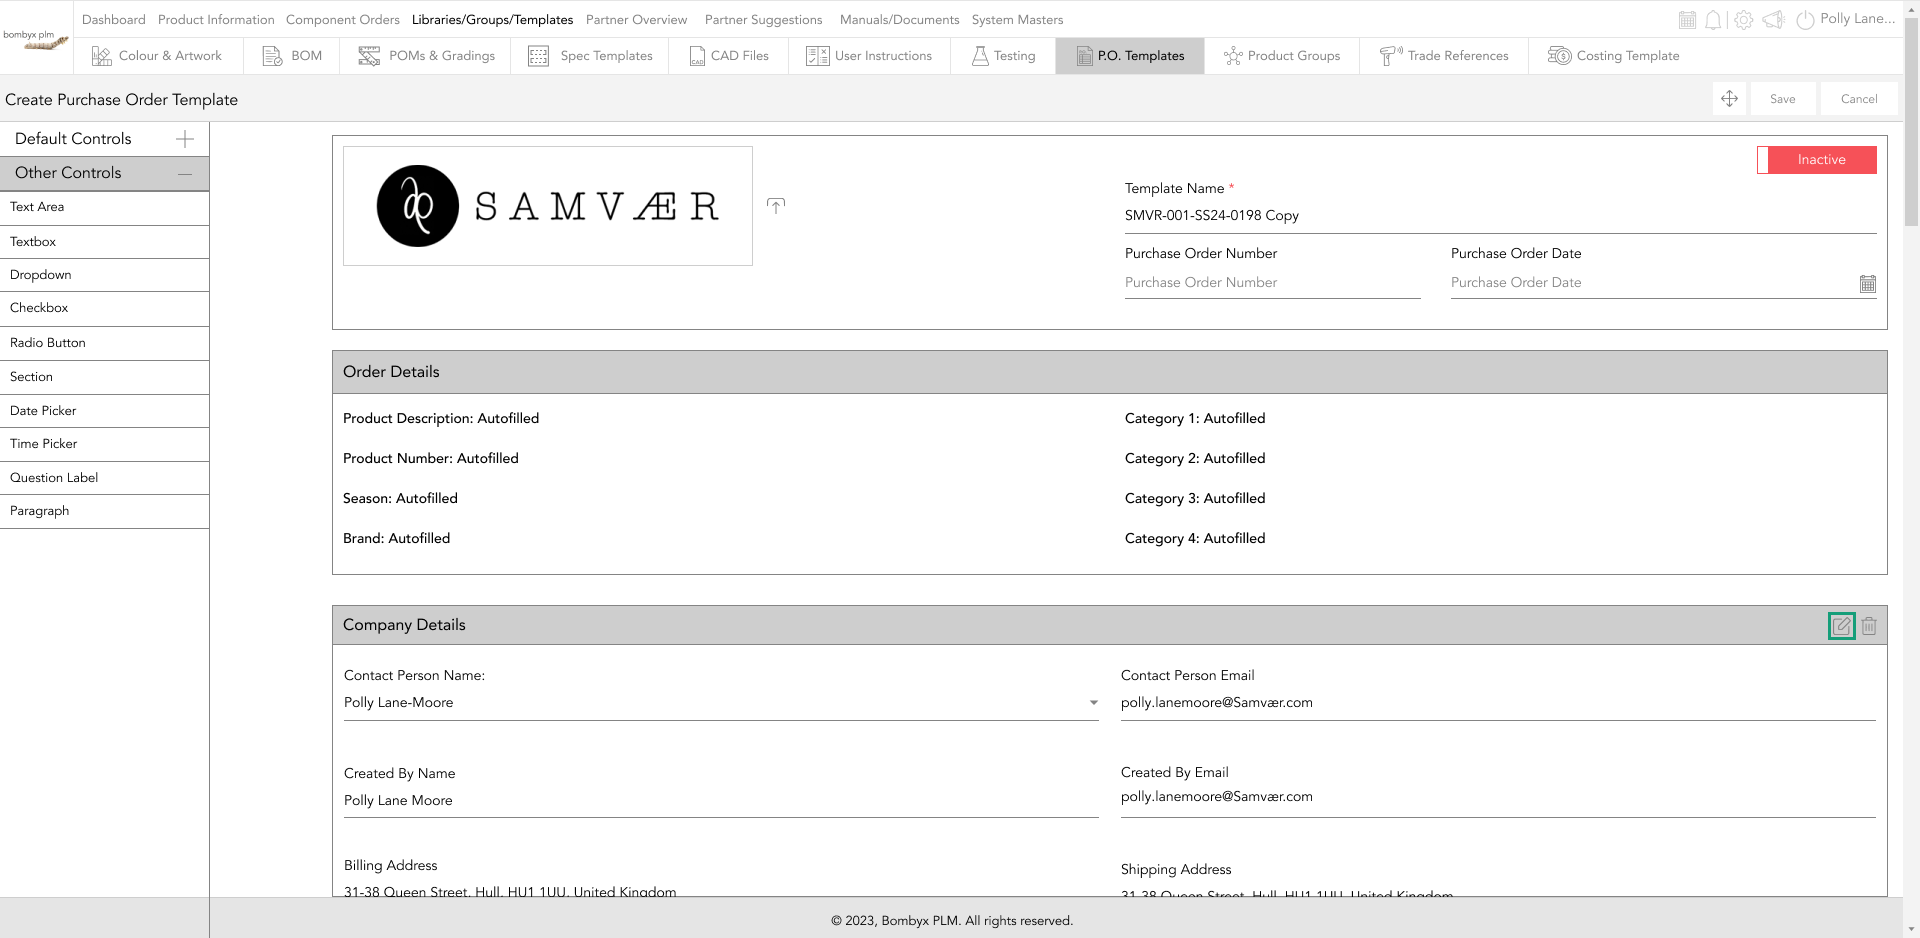
The first section you see is the template name, order number, order date, and an upload icon for you to upload your company logo.
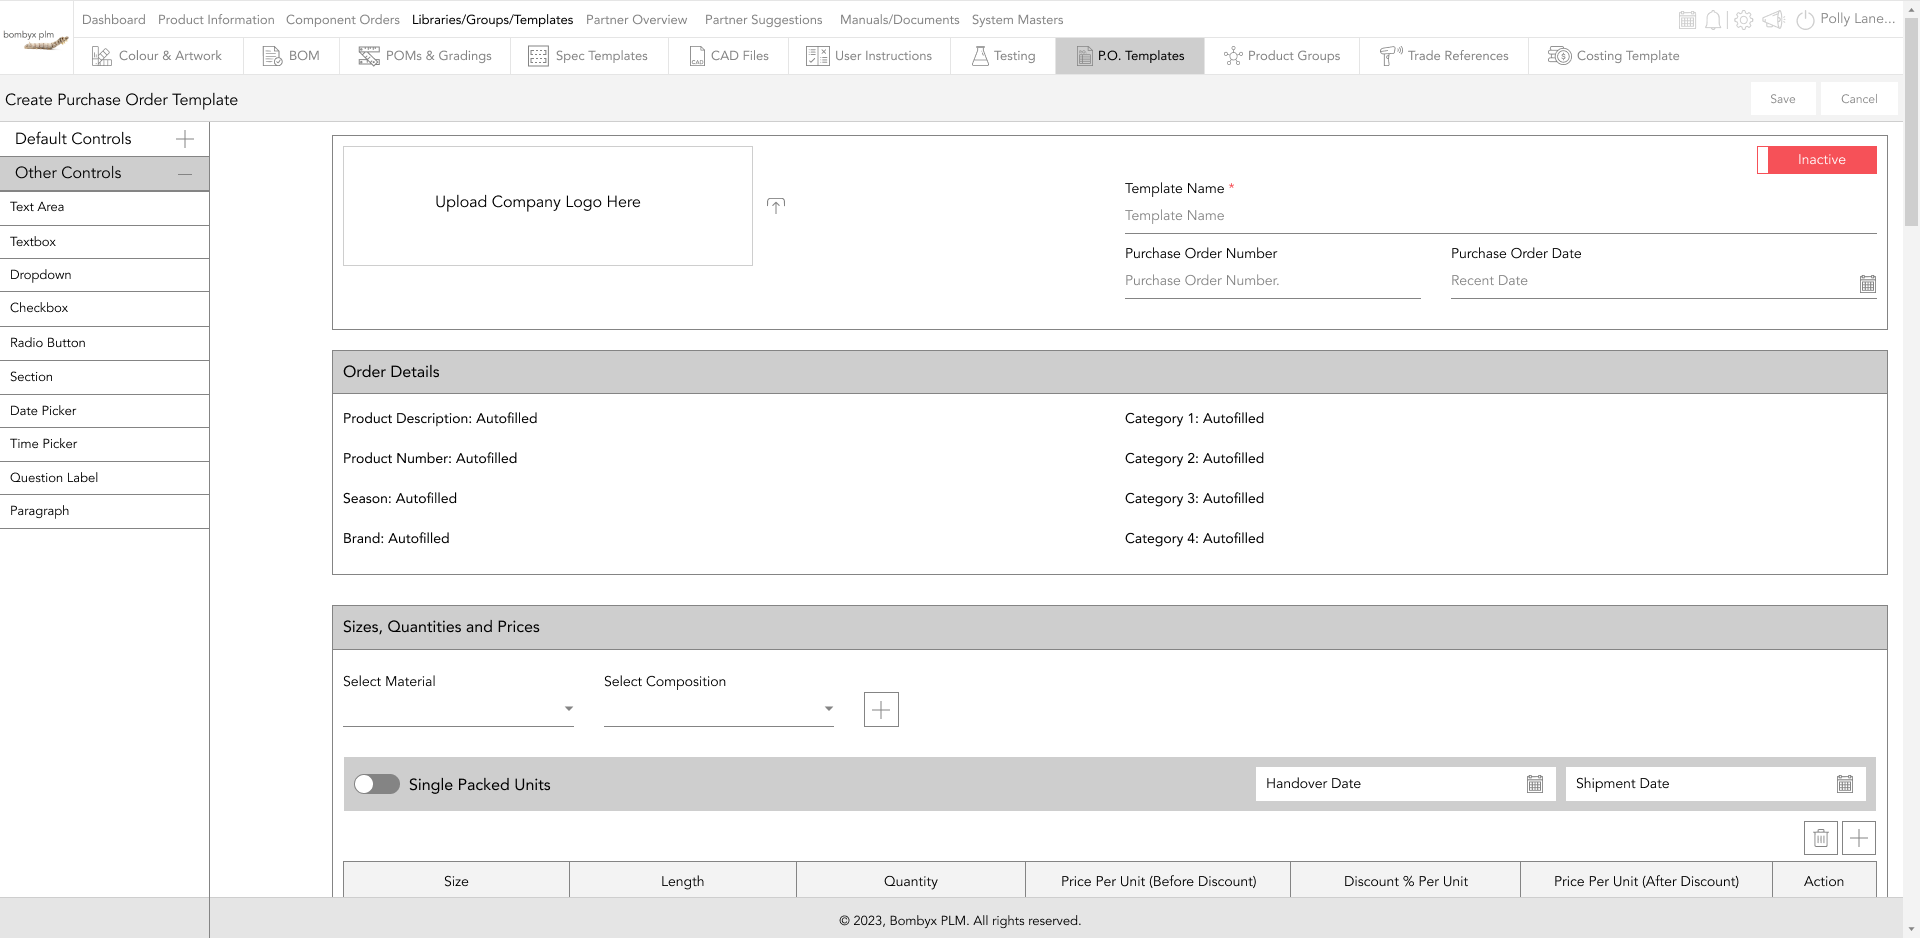
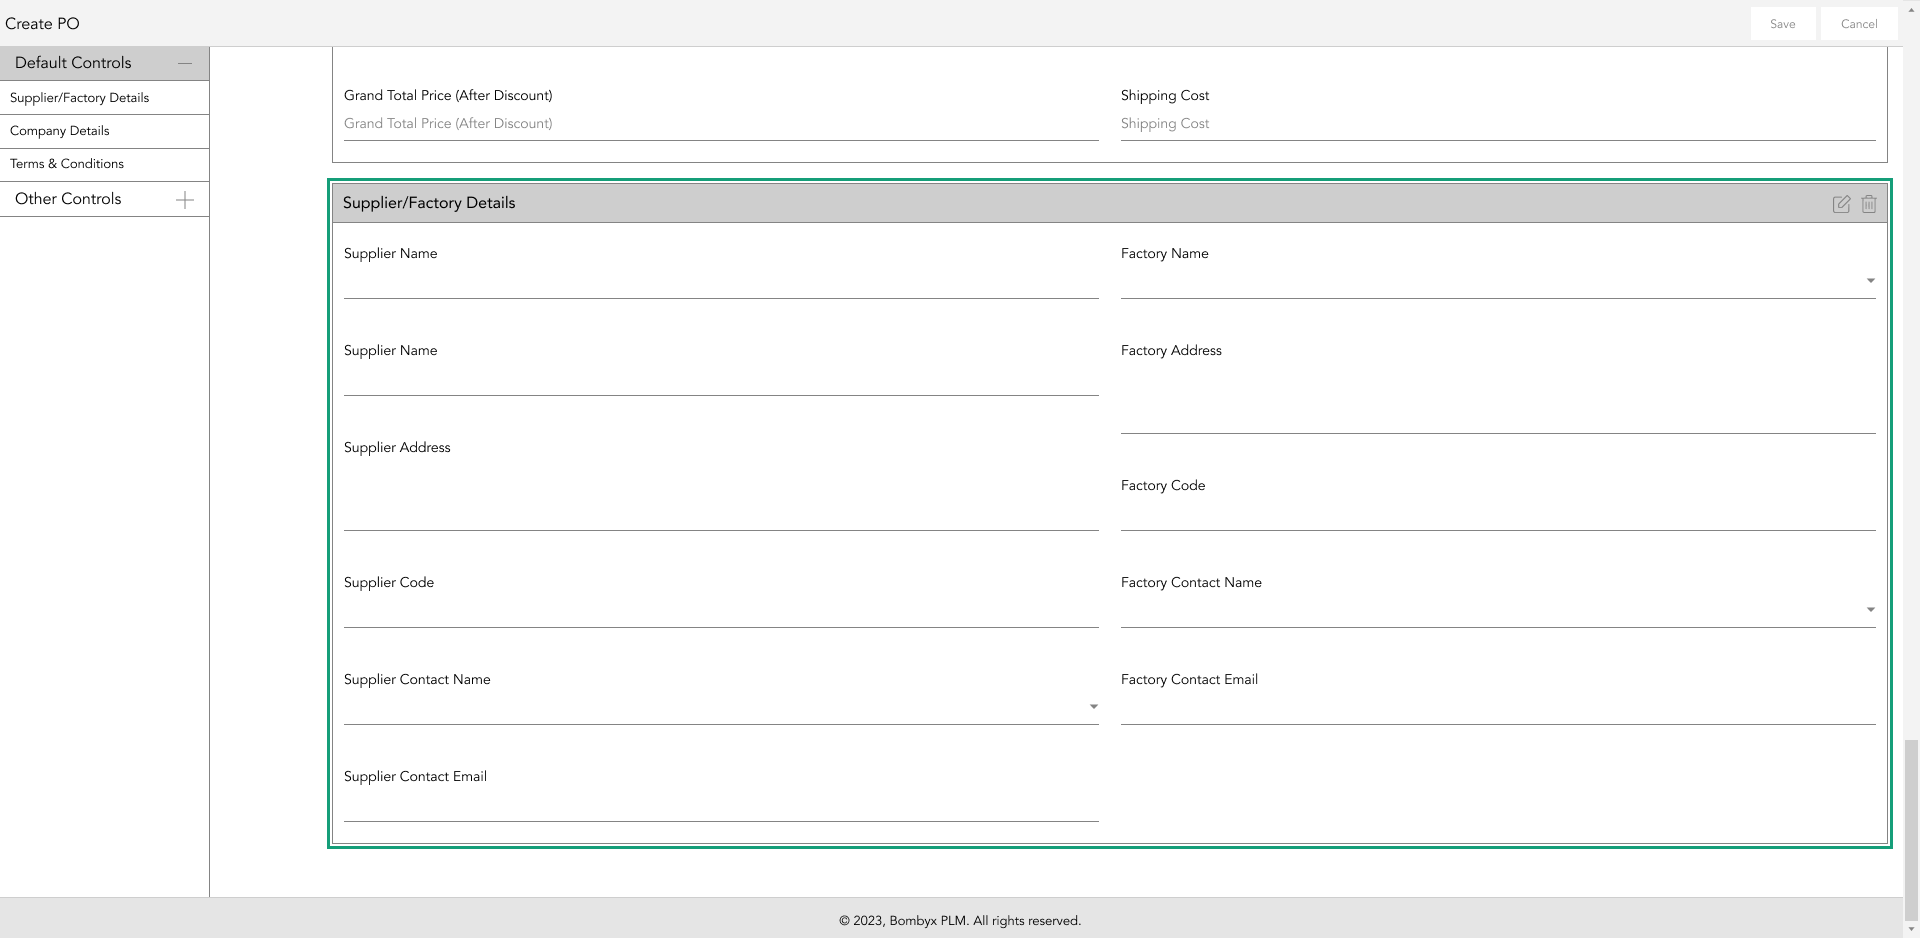
To the left of the page, you will see Default Controls and Other Controls, select Default and drag in the Supplier/Factory Details section, and place it in the area of your choosing. These are mandatory so you will not be able to create a purchase order without this information.
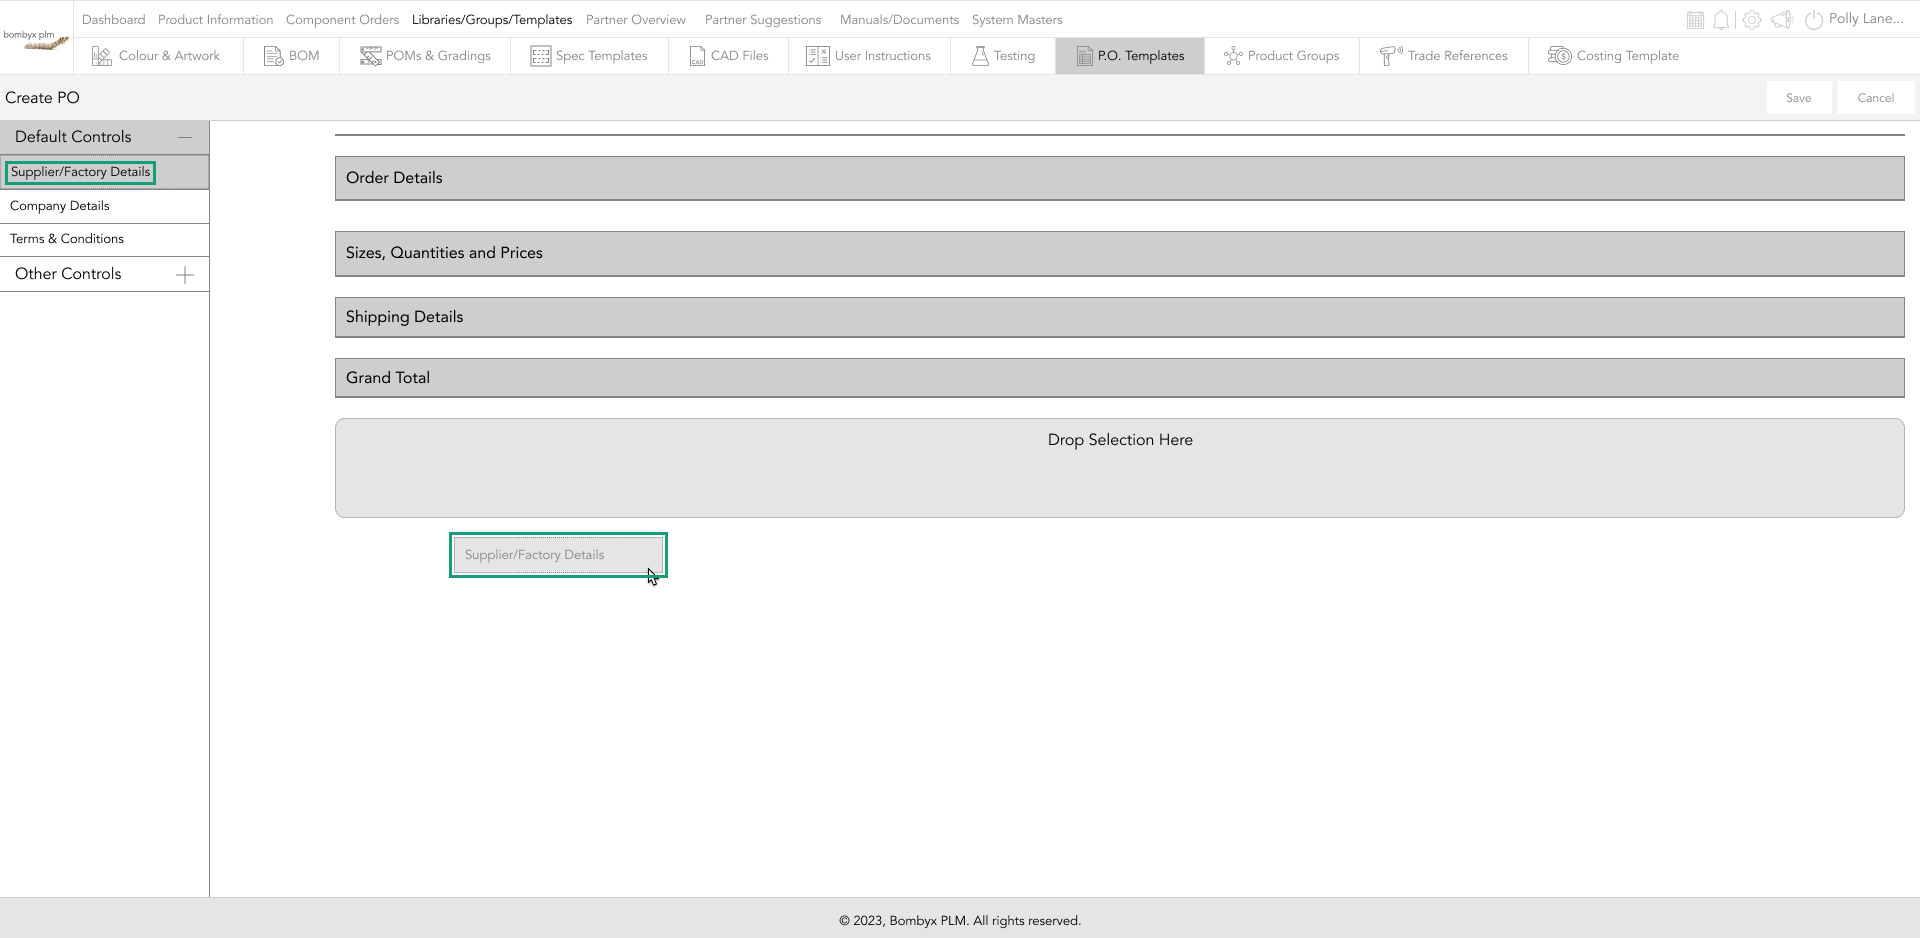
Once you have dropped it into place, the section will become visible for you to enter the relevant information.
The next section is Company Details, select from the dropdowns and enter the requested information in the text boxes.
A purchase order is important for both parties involved as it acts like a receipt, to ensure that goods are shipped on time, and track budget spending. This is also useful to avoid disputes during a transaction.
other controls
When creating your template, you have the option to add other controls, these consist of text areas, checkboxes, date pickers, question labels, etc.
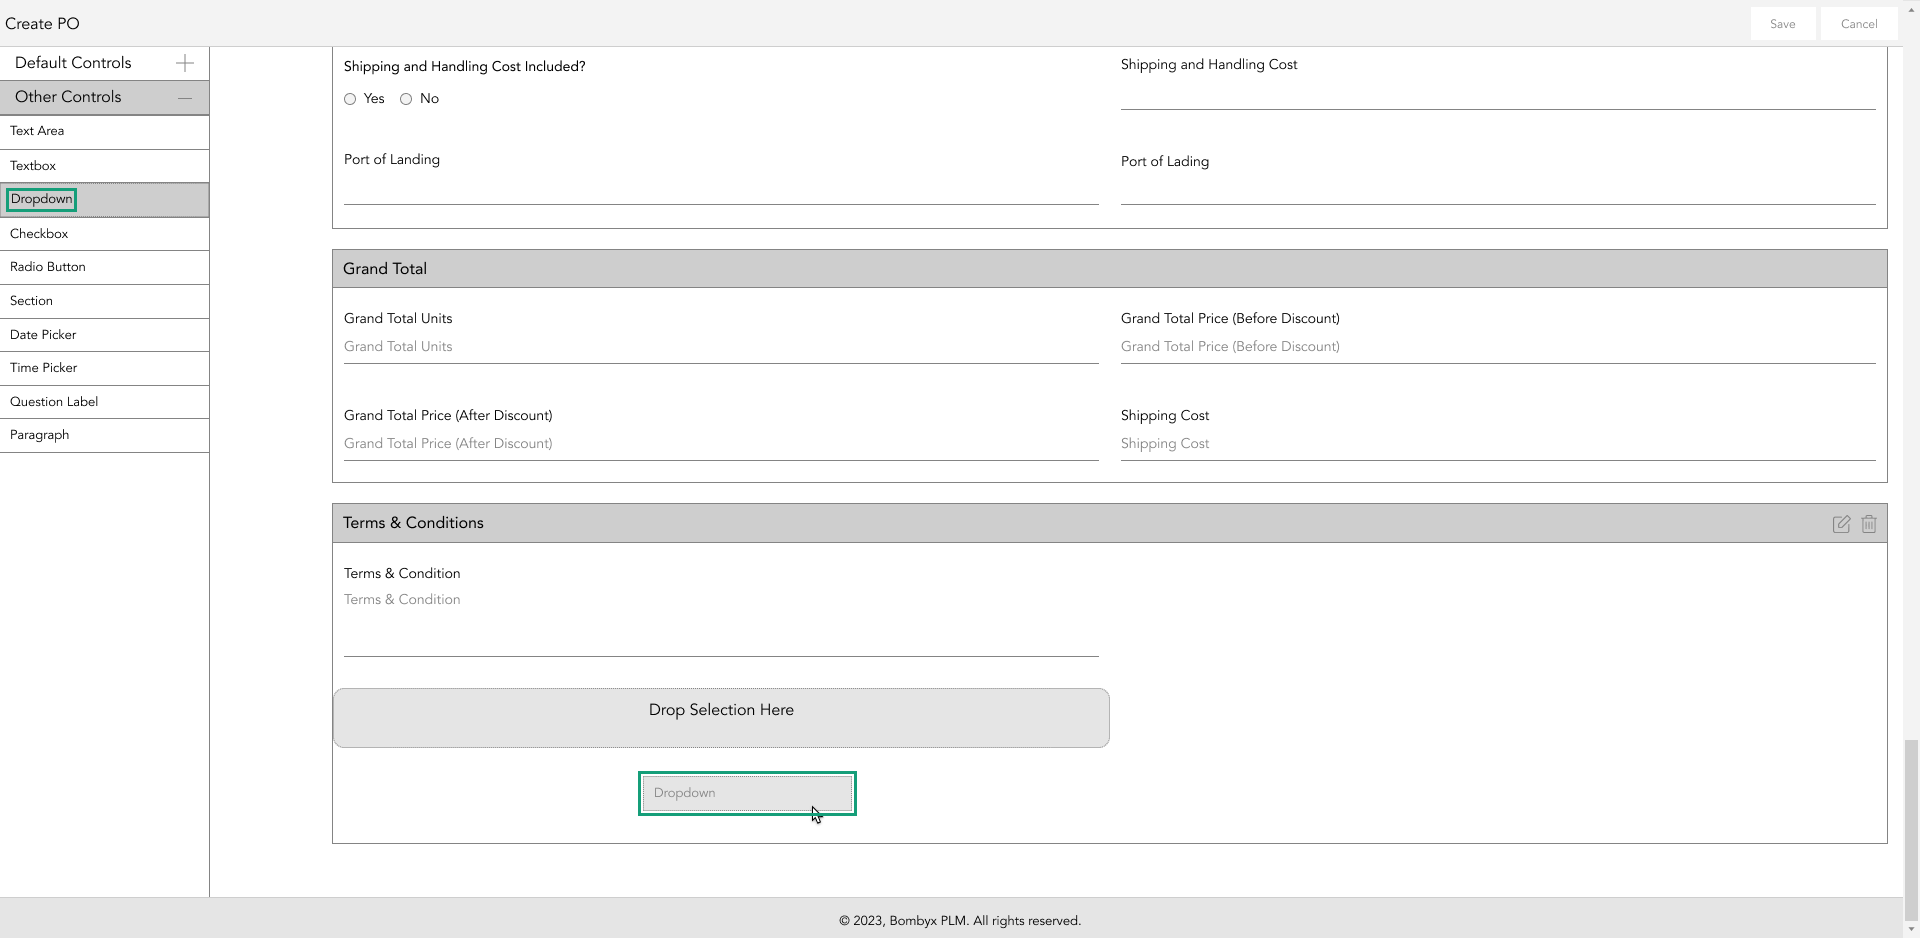
Just like Default drag and drop into place.
rearranging sections
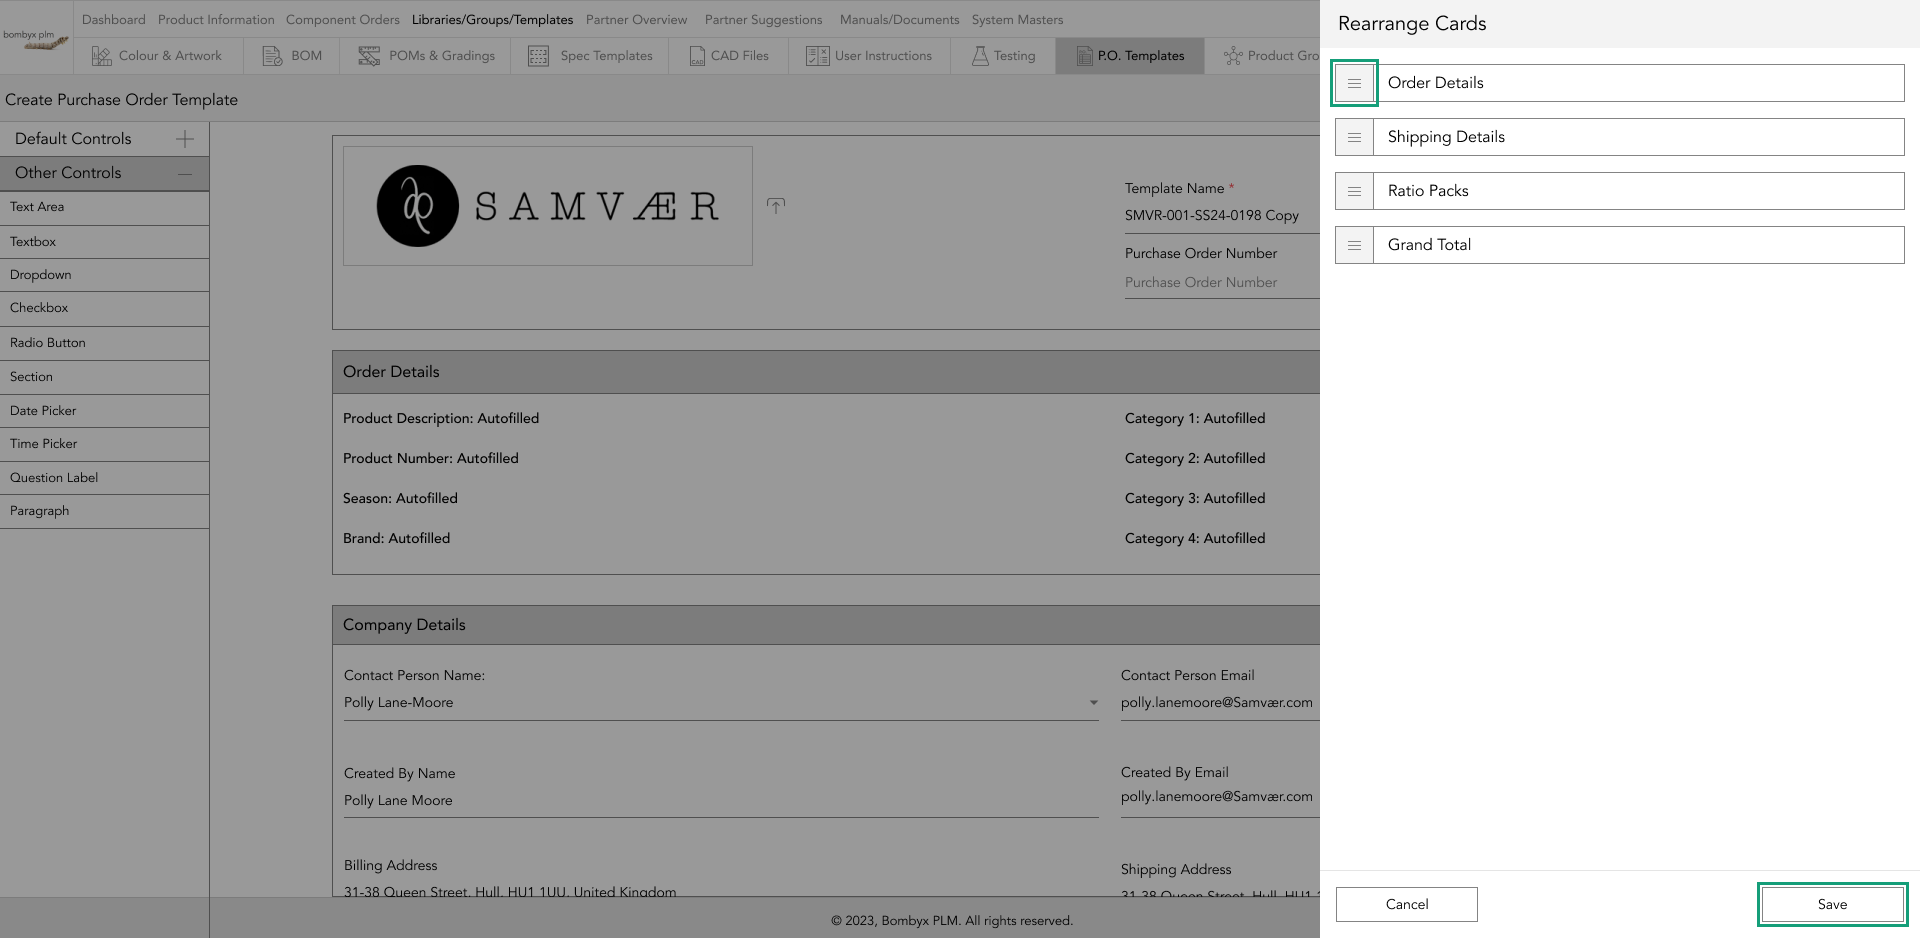
To rearrange the sections into a preferred order, tap the re-arrange button.

For rearranging, tap and hold the re-arrange icon on the left-hand side of each section in the popup, and drag it into the order you’d like it to be displayed. To save this sequence tap ‘Save’ at the bottom of the popup.
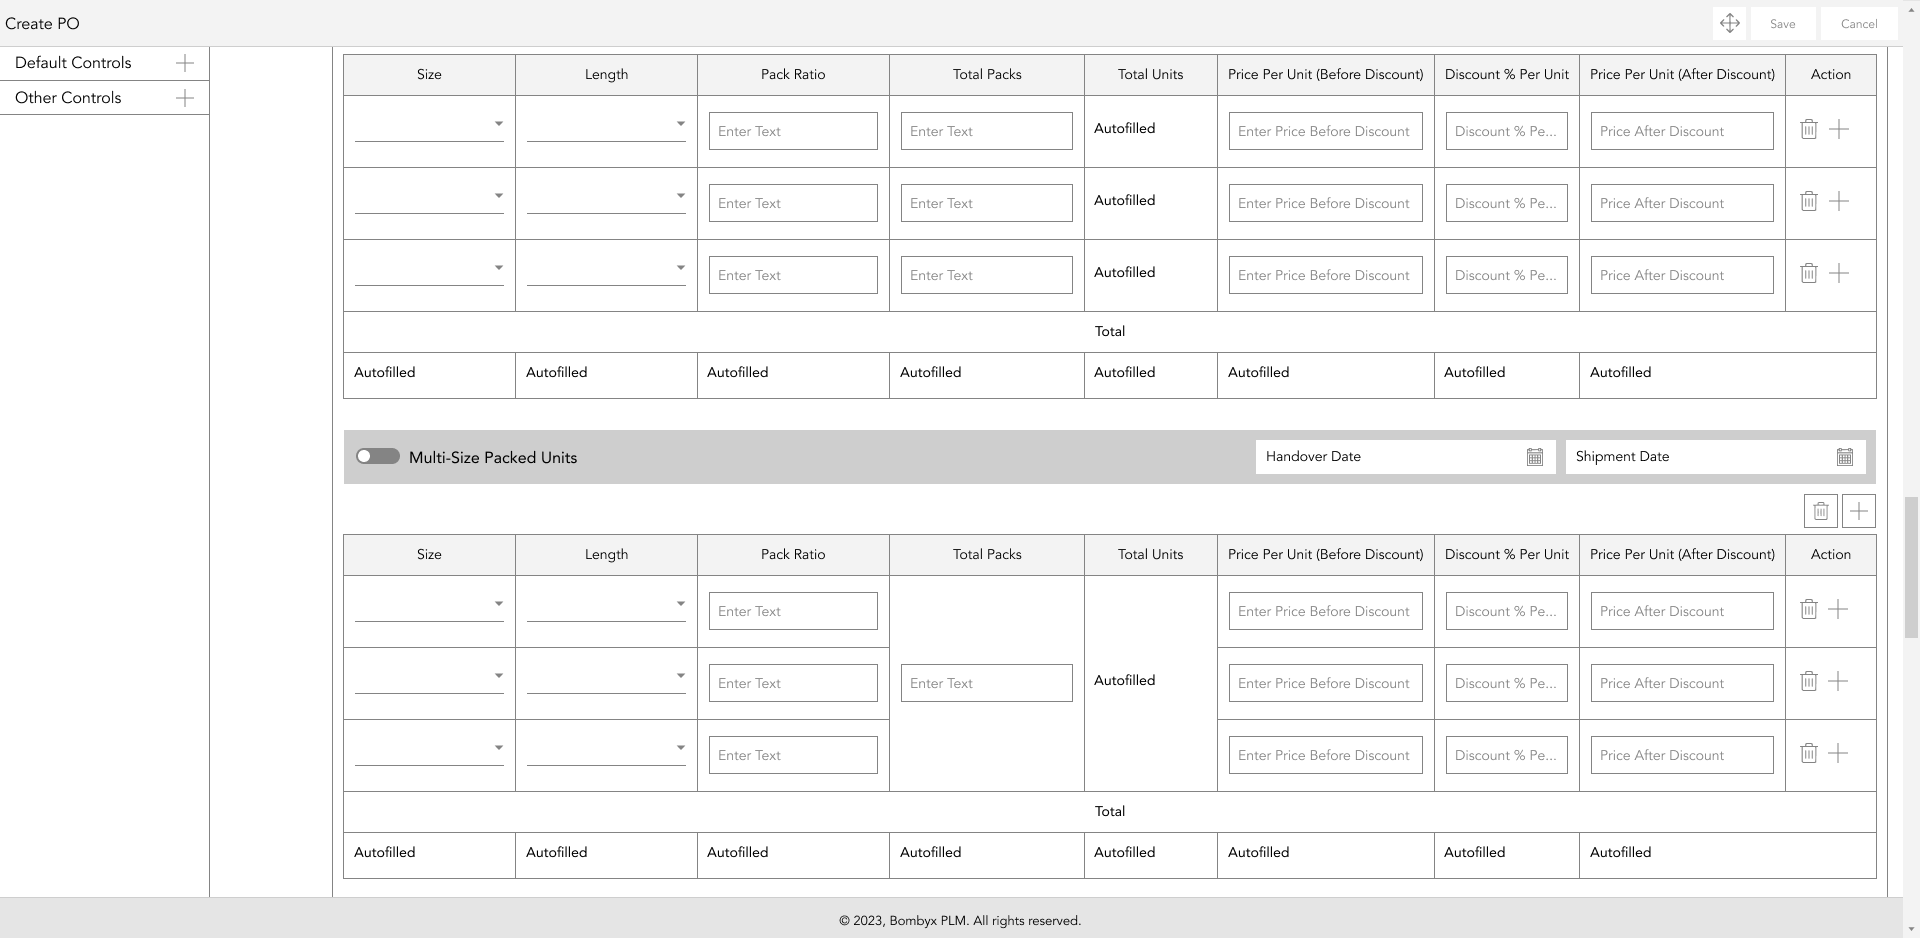
toggles
The default mode for a toggle switch is off. To turn it on, just tap the toggle and it’ll turn to green indicating that it is switched on.
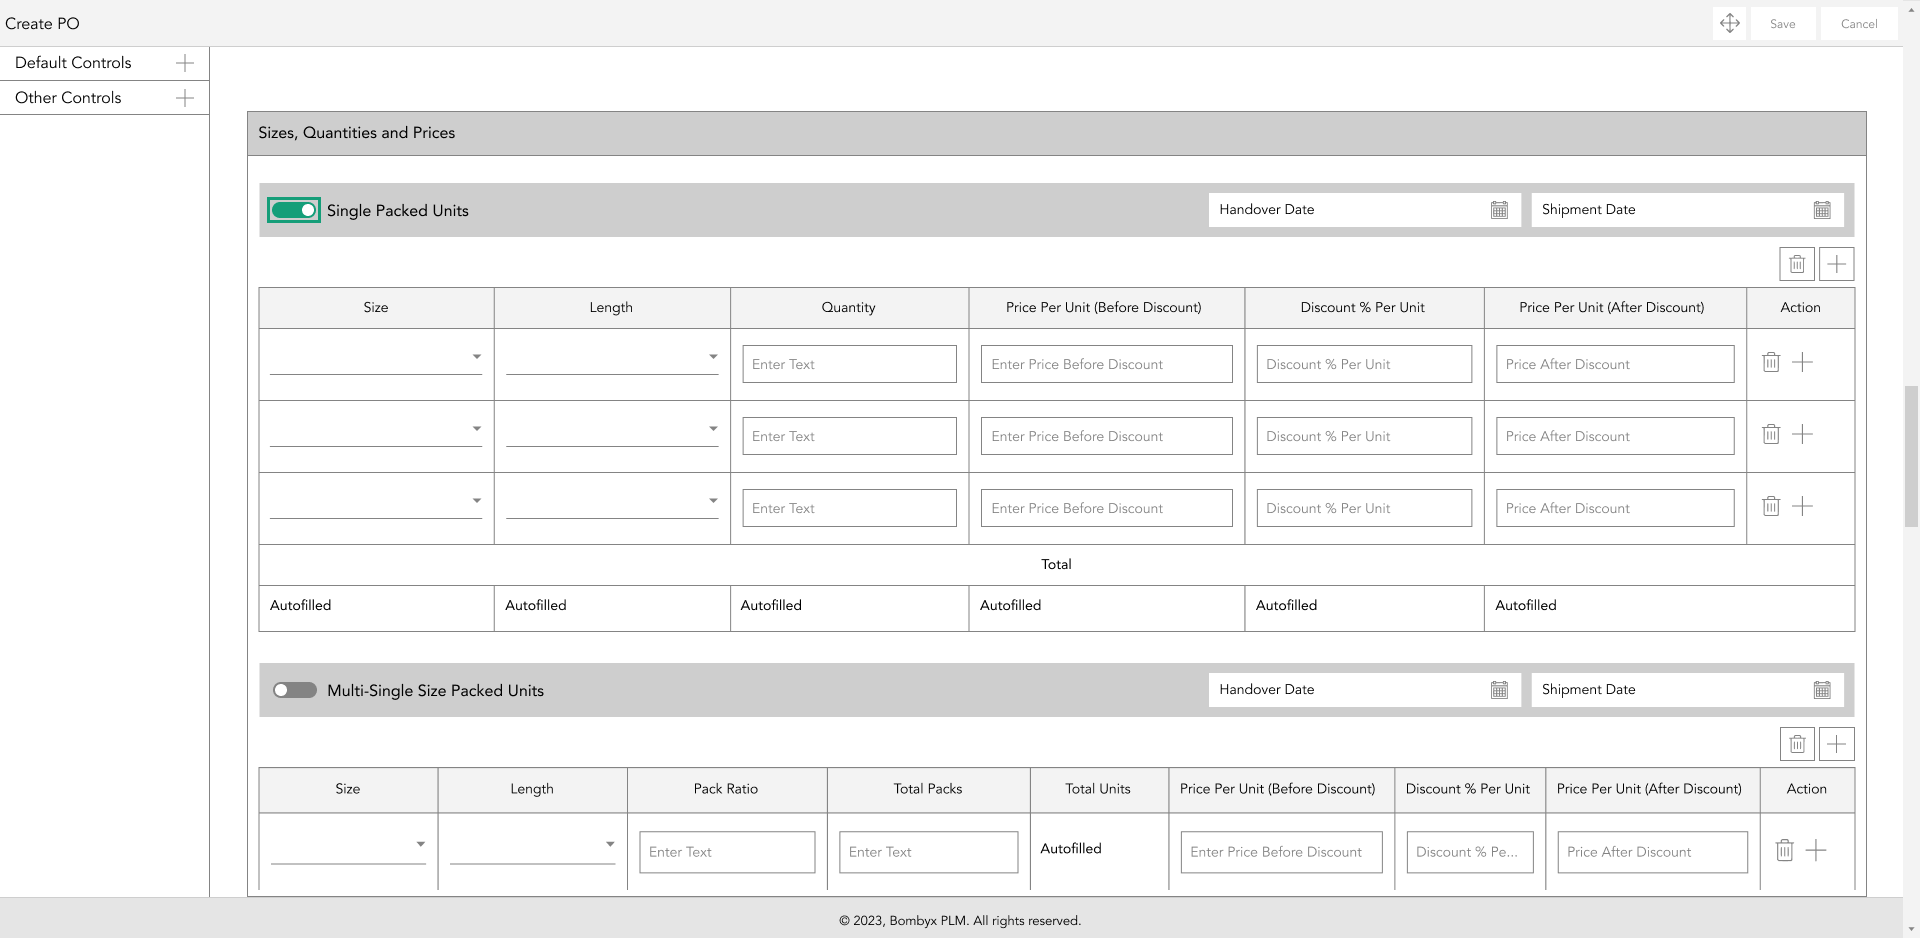
By switching it on, you’re allowing your integrated suppliers to see information in this section, as well as the information, that is visible in the documentation that is submitted to a supplier or downloaded.
sizes, quantities, and prices
Having a purchase order template is having a clear list of all items so that there is less risk of suppliers getting orders wrong, using the Bombyx system stops communication issues and data loss.
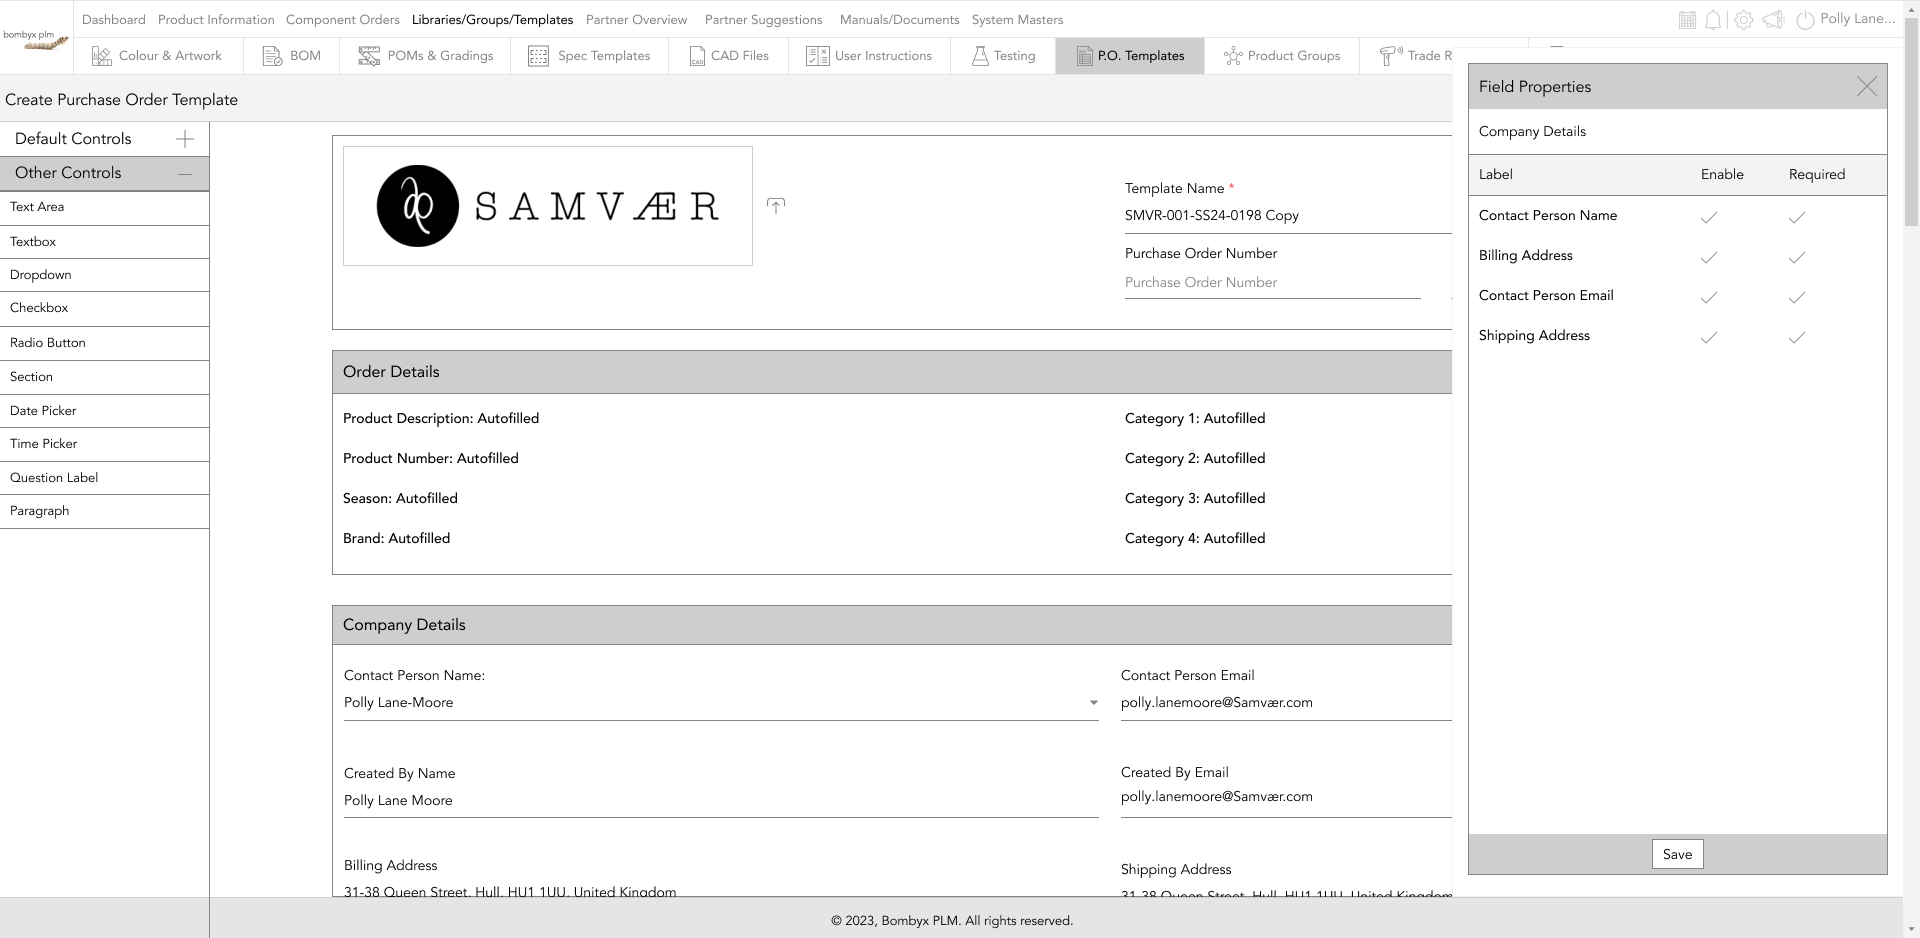
editing sections
Some sections in the purchase order can be edited/updated, to edit all the details in a section, tap the edit icon on the header card. A popup will appear on the right side of the page, here you can untick labels from that section to not appear when the P.O. is downloaded.
You can also tick/untick the Required labels list.
If you just want to edit/update one field in the section, hover over the text and an edit icon will appear on the row of the text area, tapping this will again bring a popup but here you can edit the supplier name, and tick/untick the enable and required fields.
duplicating purchase order templates
To duplicate a template, tap the duplicate icon at the end of the row of the selected template.
This will take you back inside the template, for you up edit/update the P.O. number, as discussed each number needs to be unique. Once done tap save.
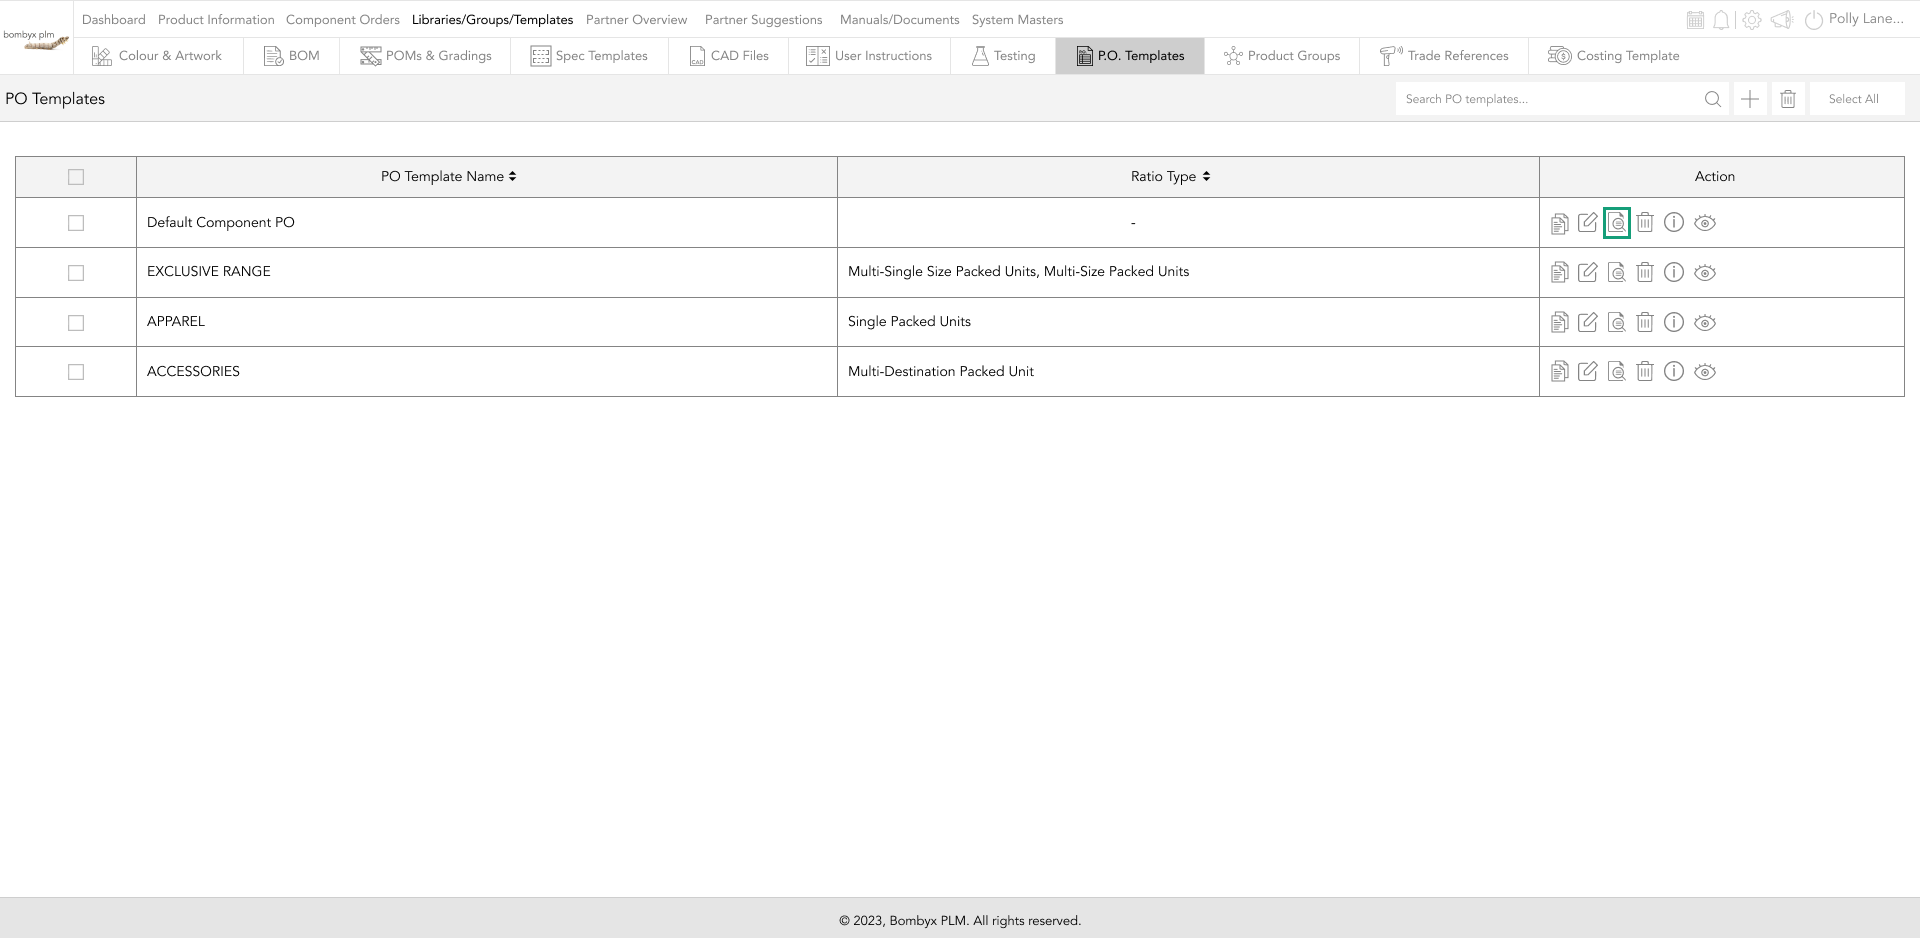
preview template
To preview the template, tap the preview icon in the action panel column.
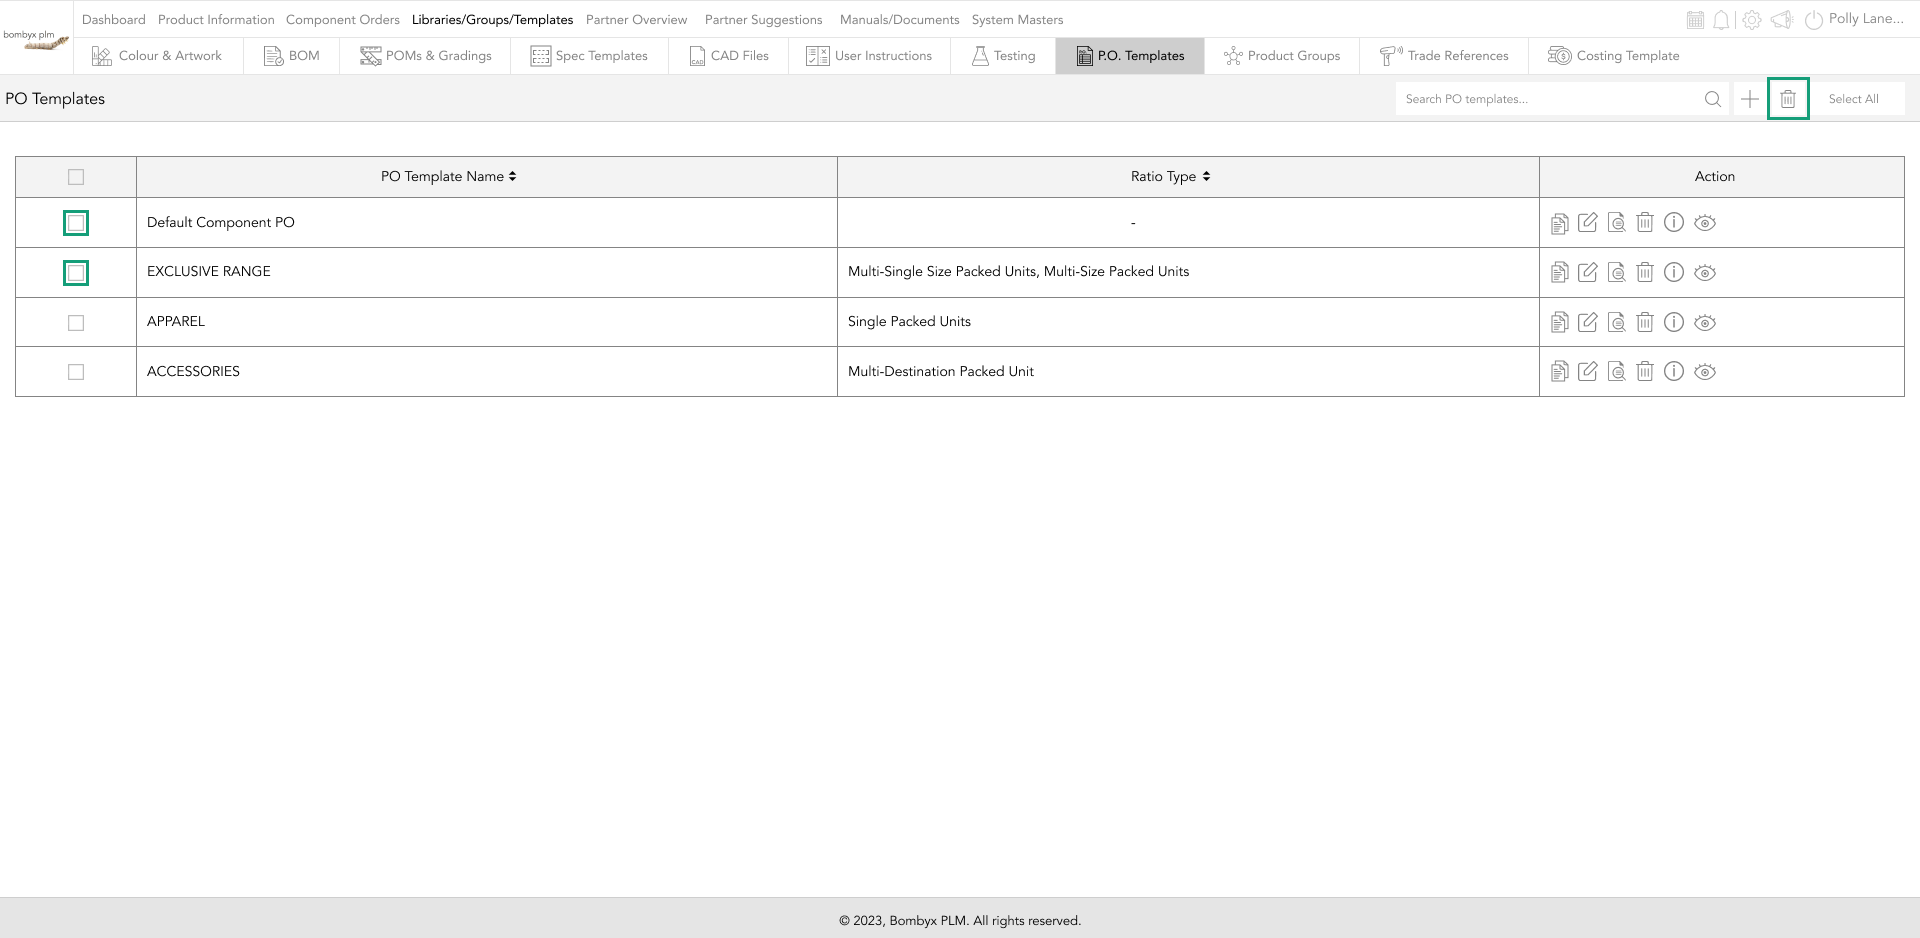
single & multiple deleting templates
To delete a single template, tap the delete icon, of the selected template row.

If you want to delete multiple templates at once, select the checkboxes down the left side of the poms, and tap the ‘delete’ button, positioned to the right of the search bar function.
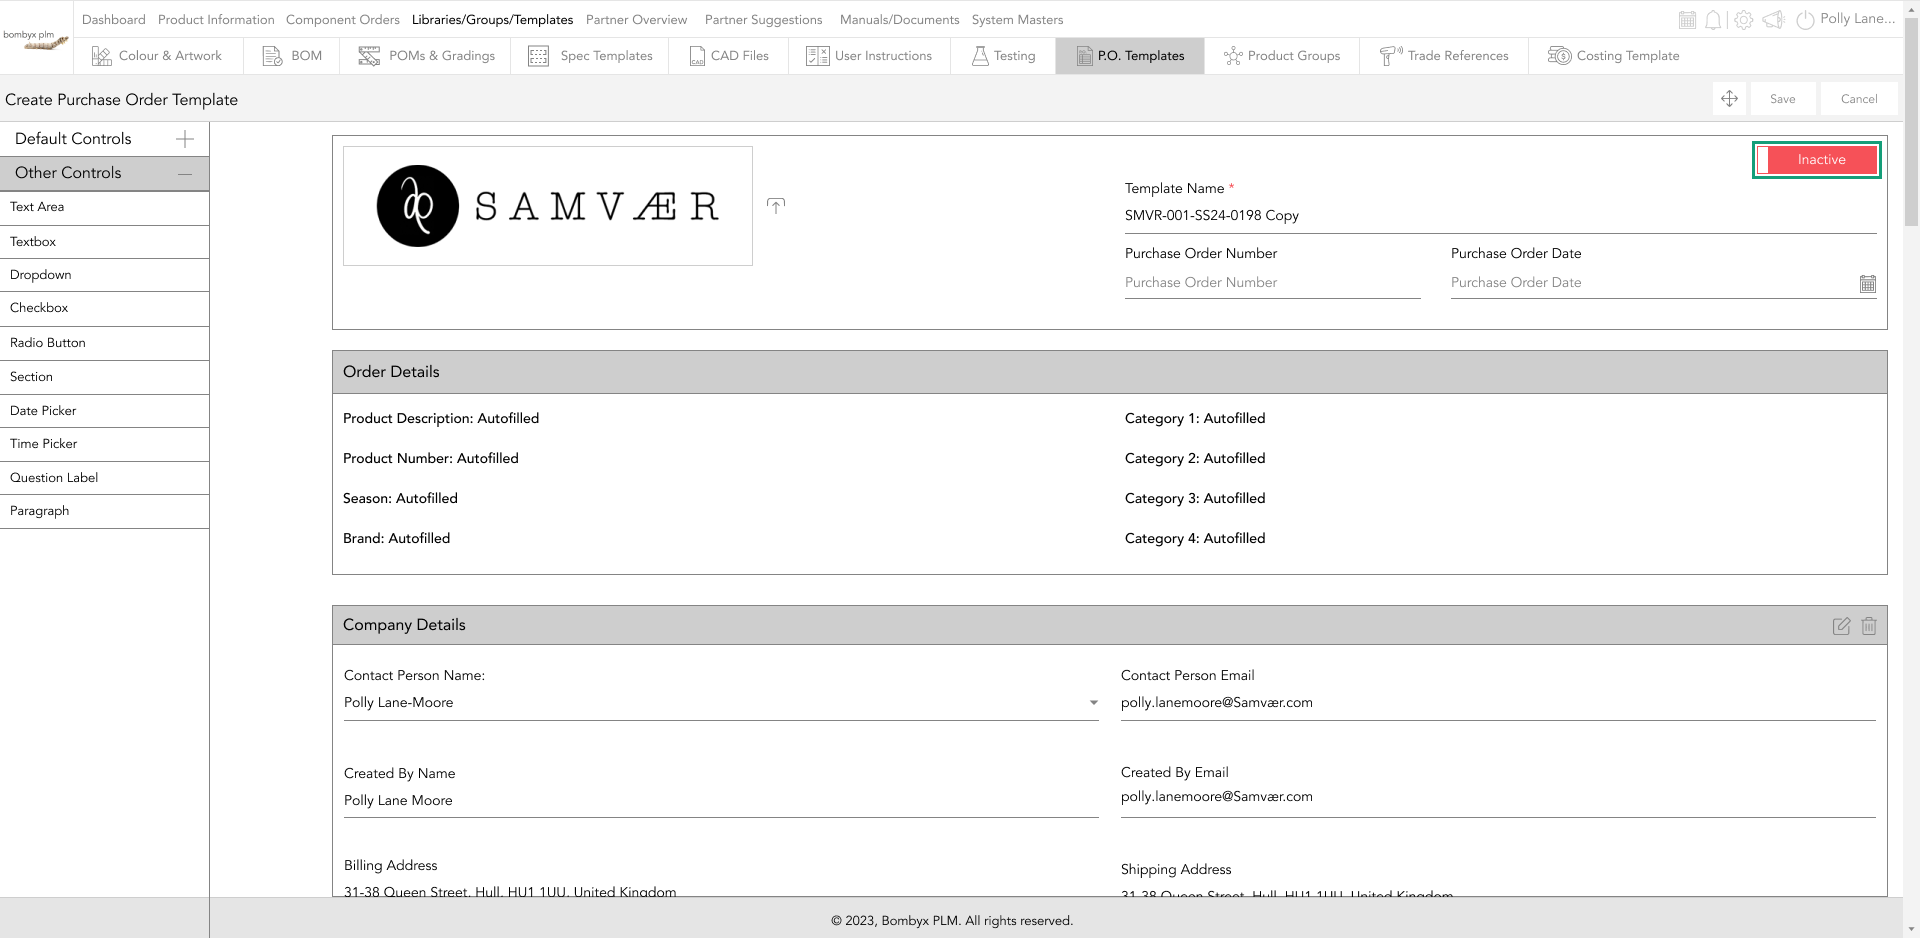
active/inactive
When you have finished entering the information for the template, you can now make the template active, by clicking the inactive toggle button, to the right of the page. If the template stays inactive, you will not be able to assign the template to the purchase order of a product.
In the template library, the eye icon represents the status of the template, So you can make this active/inactive by tapping the eye icon. A popup message will appear with the updated status.
![]()
created & modified by
To see who uploaded or modified the purchase order template, hover over the information icon in the action panel column.

And it’ll show the details of when the template was uploaded, by who, as well as the date and time. If the template has been modified It’ll also show by who, along with the date and time.
select/unselect all
To select all, tap on the ‘select all’ button this will mark all templates with a tick, From here you then you can either delete all of the templates by clicking on the ‘bin’ icon next to the search bar.
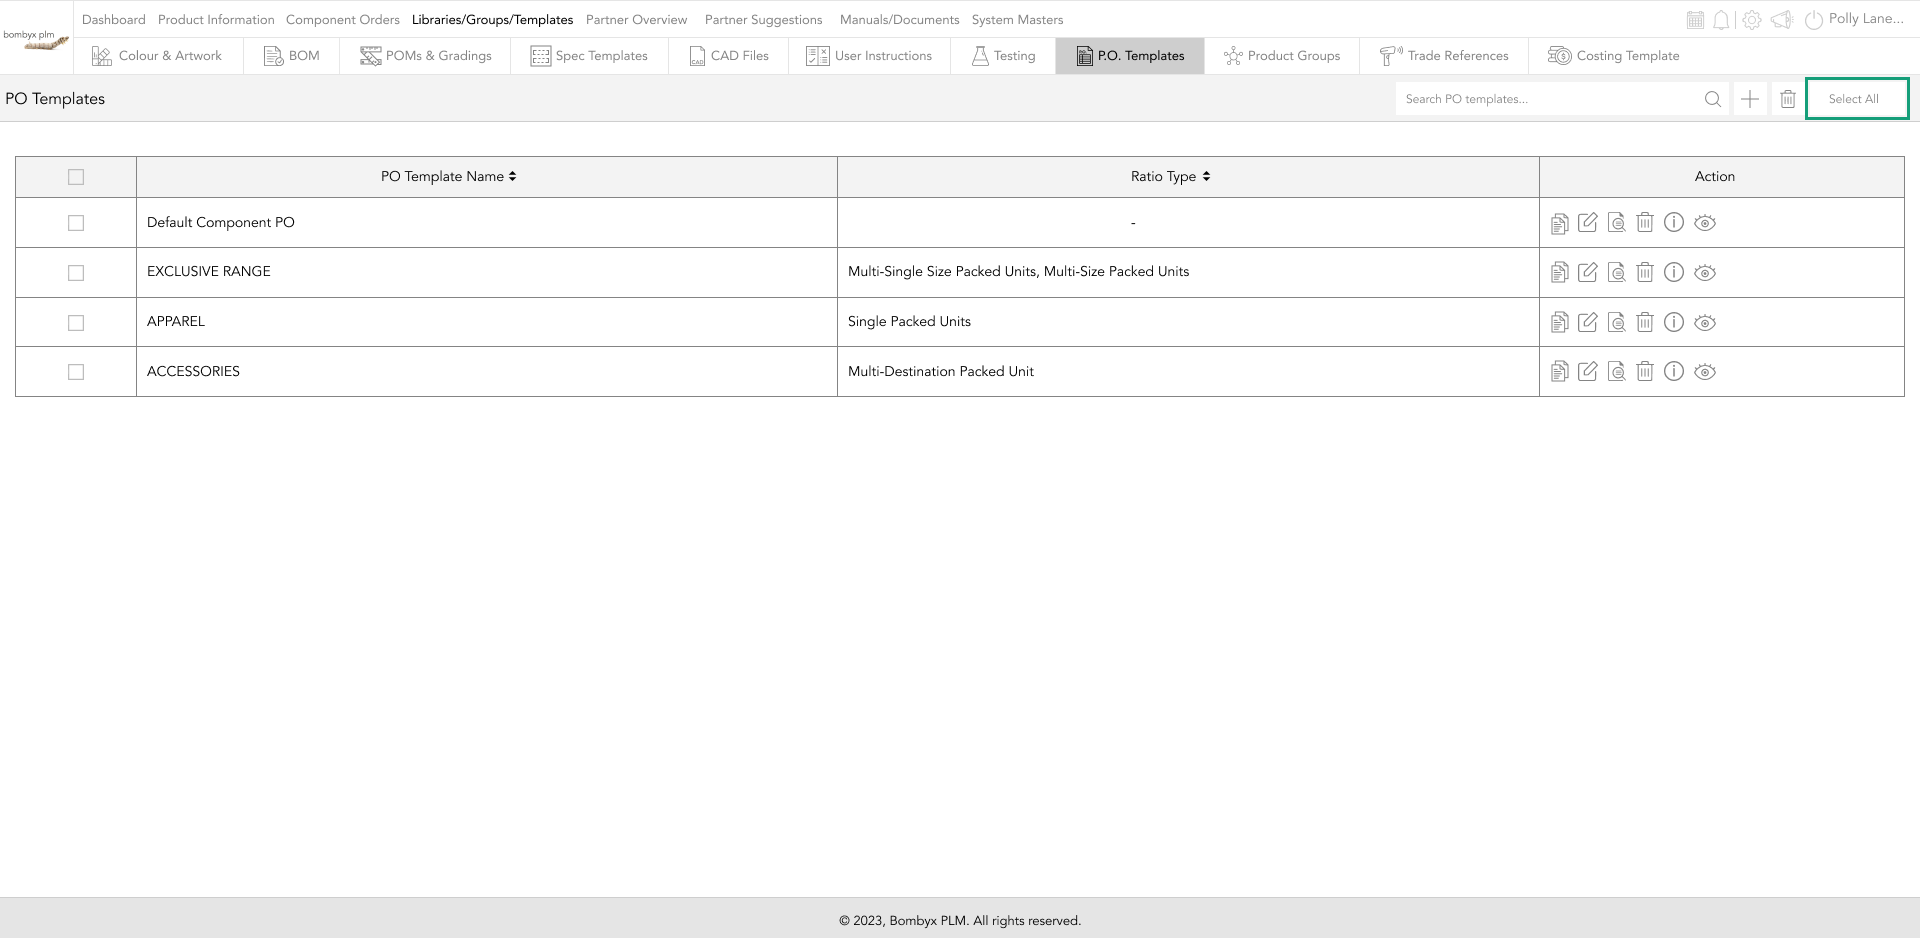
To unselect all, just tap on the ‘unselect all’ button in the same position as the select all and this will cancel the action.

Beyond the Label: Diving into the Sustainable Story with Digital Product Passports
Consumers today are increasingly concerned about the environmental and social impact of their purchases. From the food they eat.
Bombyx’s AI Integration: Advancing Business Excellence in PLM, PIM, and DAM Systems
Let's delve into the exciting realm of Artificial Intelligence (AI) undergoing a transformative evolution. As we Enter the year 2024.

Beyond Baubles: A Stylish Dive into Christmas Fashion Trends.
e explore the latest Christmas fashion trends, with a focus on achieving a harmonious balance between sophistication and comfort. From luxurious velvets to cosy knits

Streamlining Winter Fashion with PLM: Managing Seasonal Changes
Winter fashion production demands meticulous planning and execution. PLM serves as a guiding force in production management, aiding in resource allocation, scheduling

Christmas Experience through Digital Transformation
During the Autumn/Winter months in Europe and the USA, are marked by heightened activity. The festive season introduces an atmosphere of joy and unity. Amidst the era of digital in
Demanding Trends & The Transformative Power of Product Lifecycle Management
Explore how strategic Product Lifecycle Management (PLM) empowers fashion to navigate trends sustainably. This post delves into the symbiosis of trends and sustainability,
The Power of Product Information Management (PIM) With a PLM System.
In today's fast-paced business environment, effective product information management is crucial for success. Product Information Management (PIM) is a powerful tool.
Fashion and the Power of Product Lifecycle Management
In recent years, the fashion industry has witnessed a surge in fashion, a phenomenon characterised by the rapid production and consumption of inexpensive clothing... and a whole l
Supply Chain Management has Forever Changed
Brands make use of product lifecycle data analysis to help them work out price points, marketing and advertising strategies, packaging, growth and expansion… and a whole lot more
Purchase order templates are essential tools used in business transactions to streamline and standardize the procurement process. These templates provide a structured format for creating and documenting purchase orders, which serve as formal requests for the purchase of goods or services from suppliers. Purchase order templates typically include important details such as the buyer and supplier information, item descriptions, quantities, unit prices, terms and conditions, delivery instructions, and payment terms. By utilizing these templates, businesses can ensure accuracy, consistency, and transparency in their purchasing activities, enabling effective communication with suppliers, efficient inventory management, and proper financial record-keeping. Purchase order templates play a crucial role in facilitating smooth procurement operations, reducing errors, and establishing clear agreements between buyers and suppliers.