
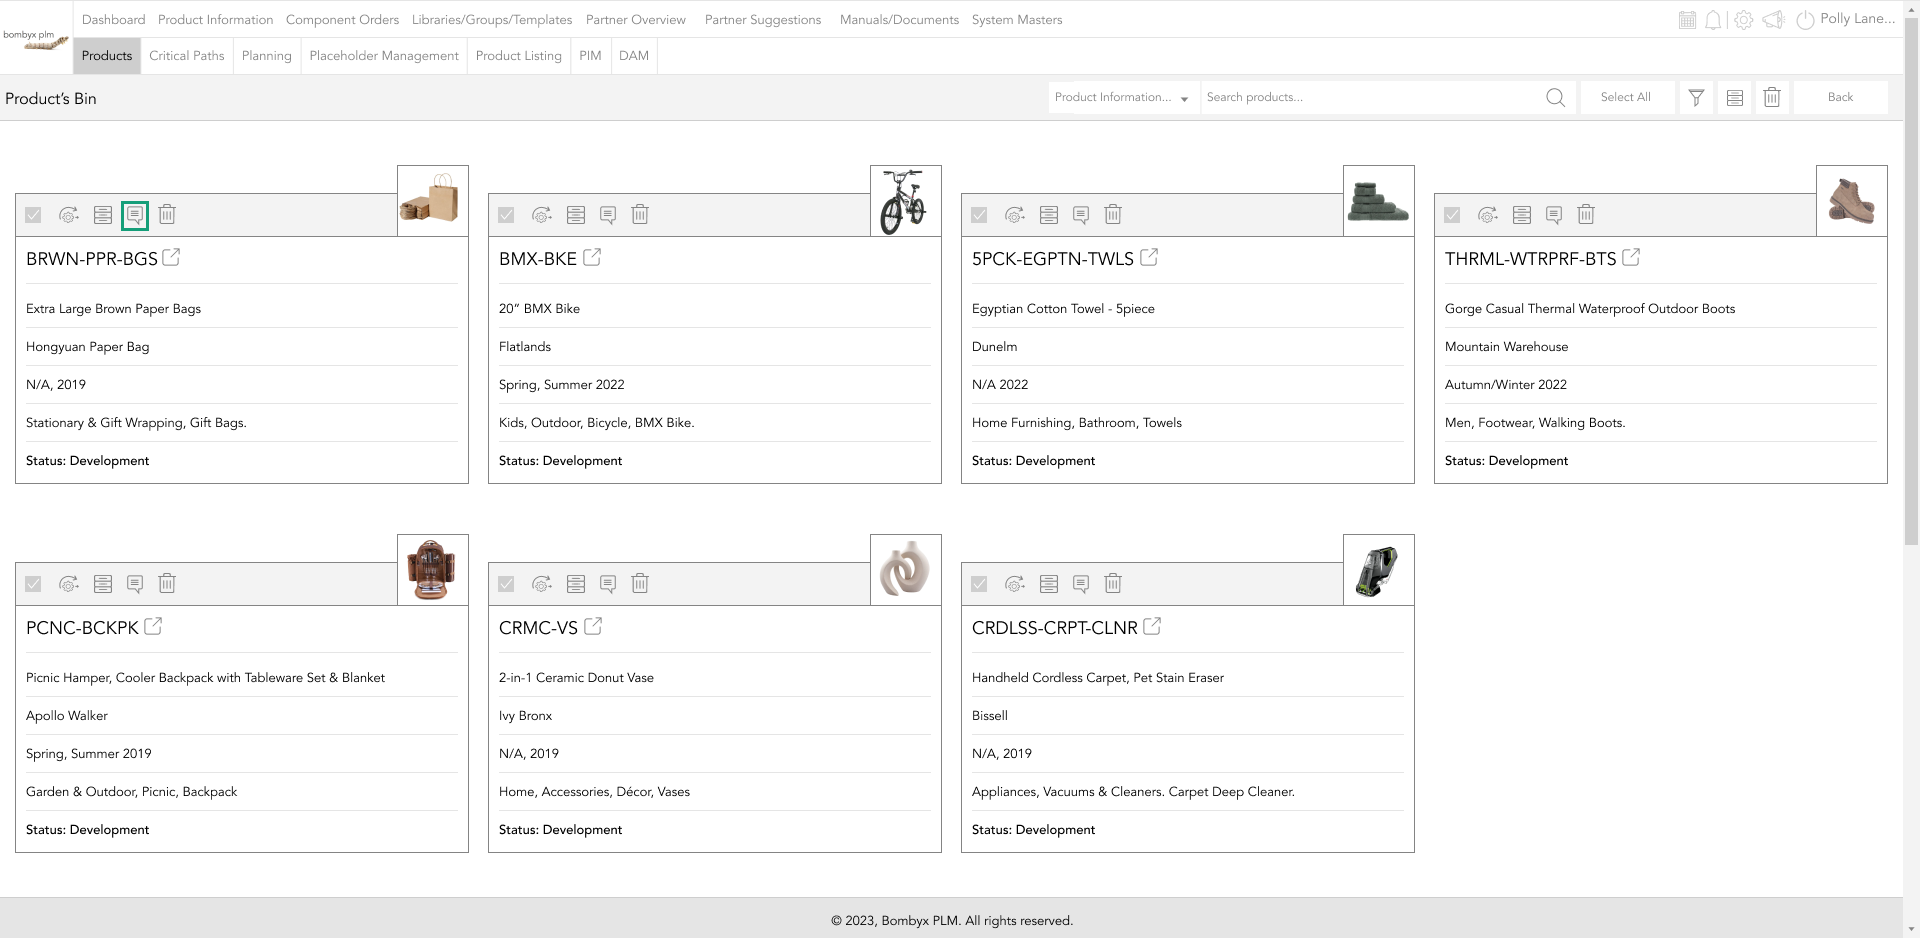
selecting product groups
By using the select product group option, you can select a current group to view the products within that group.
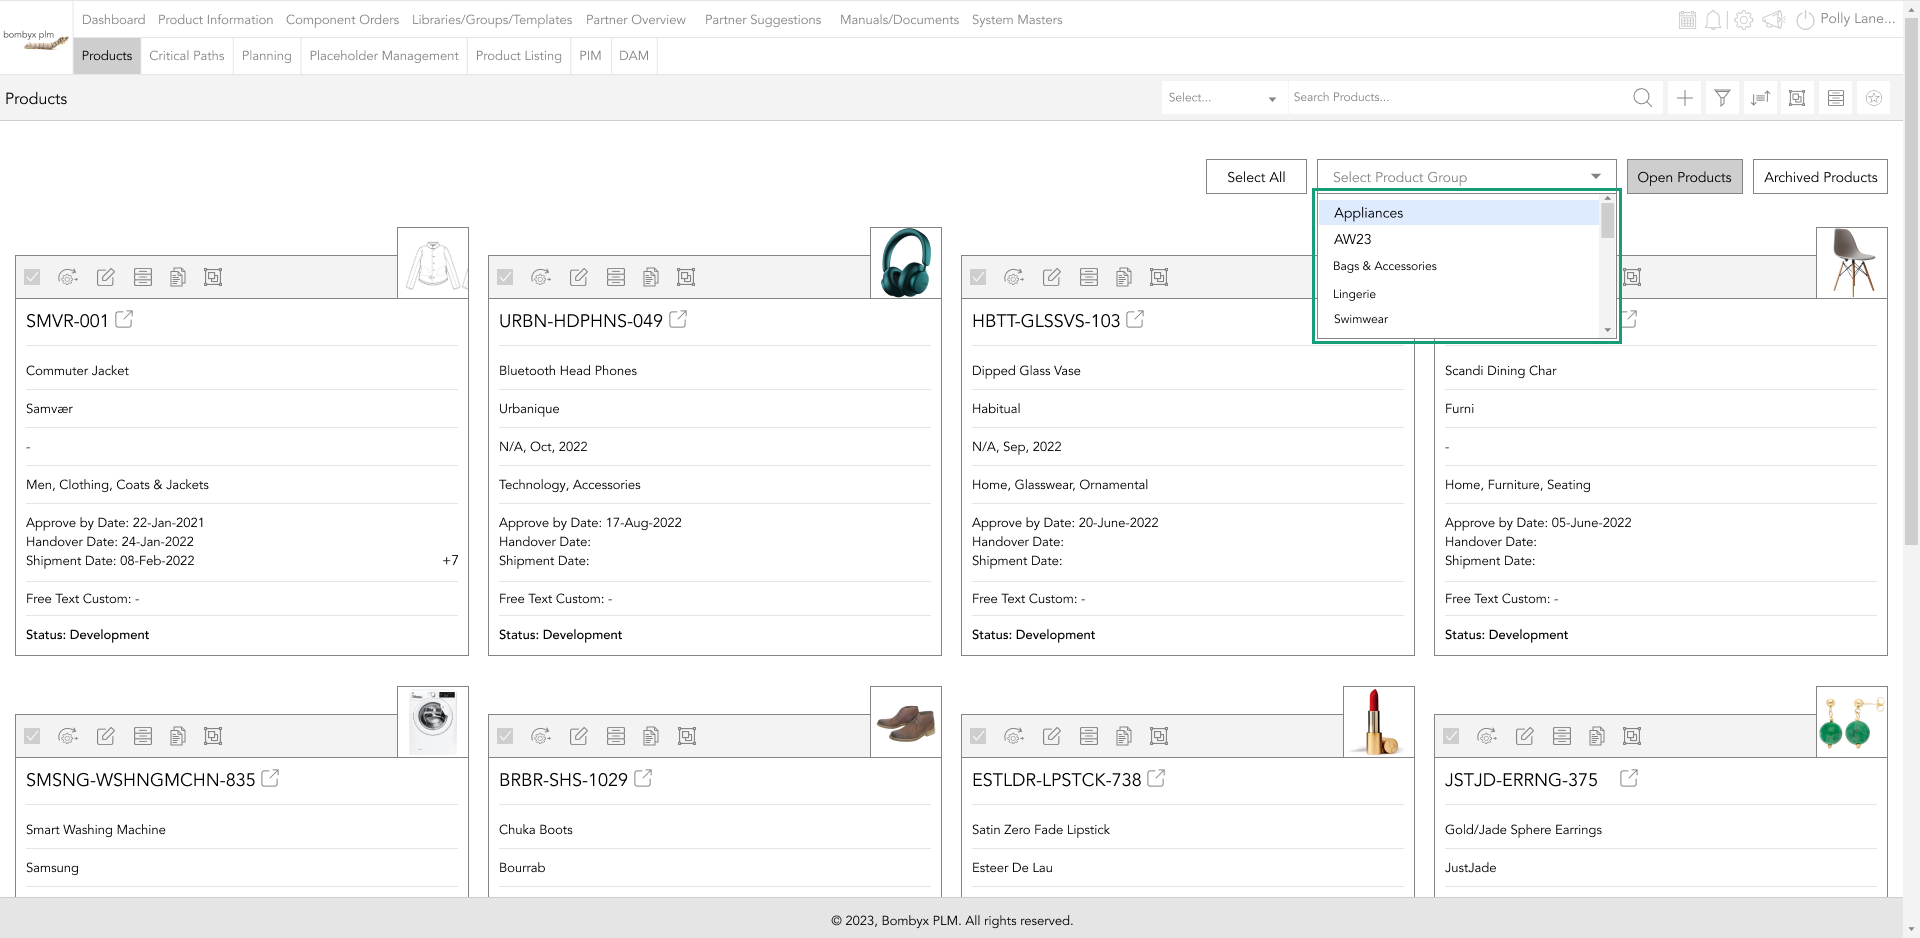
If no group has been created, click here to find out how to create a group for the product.
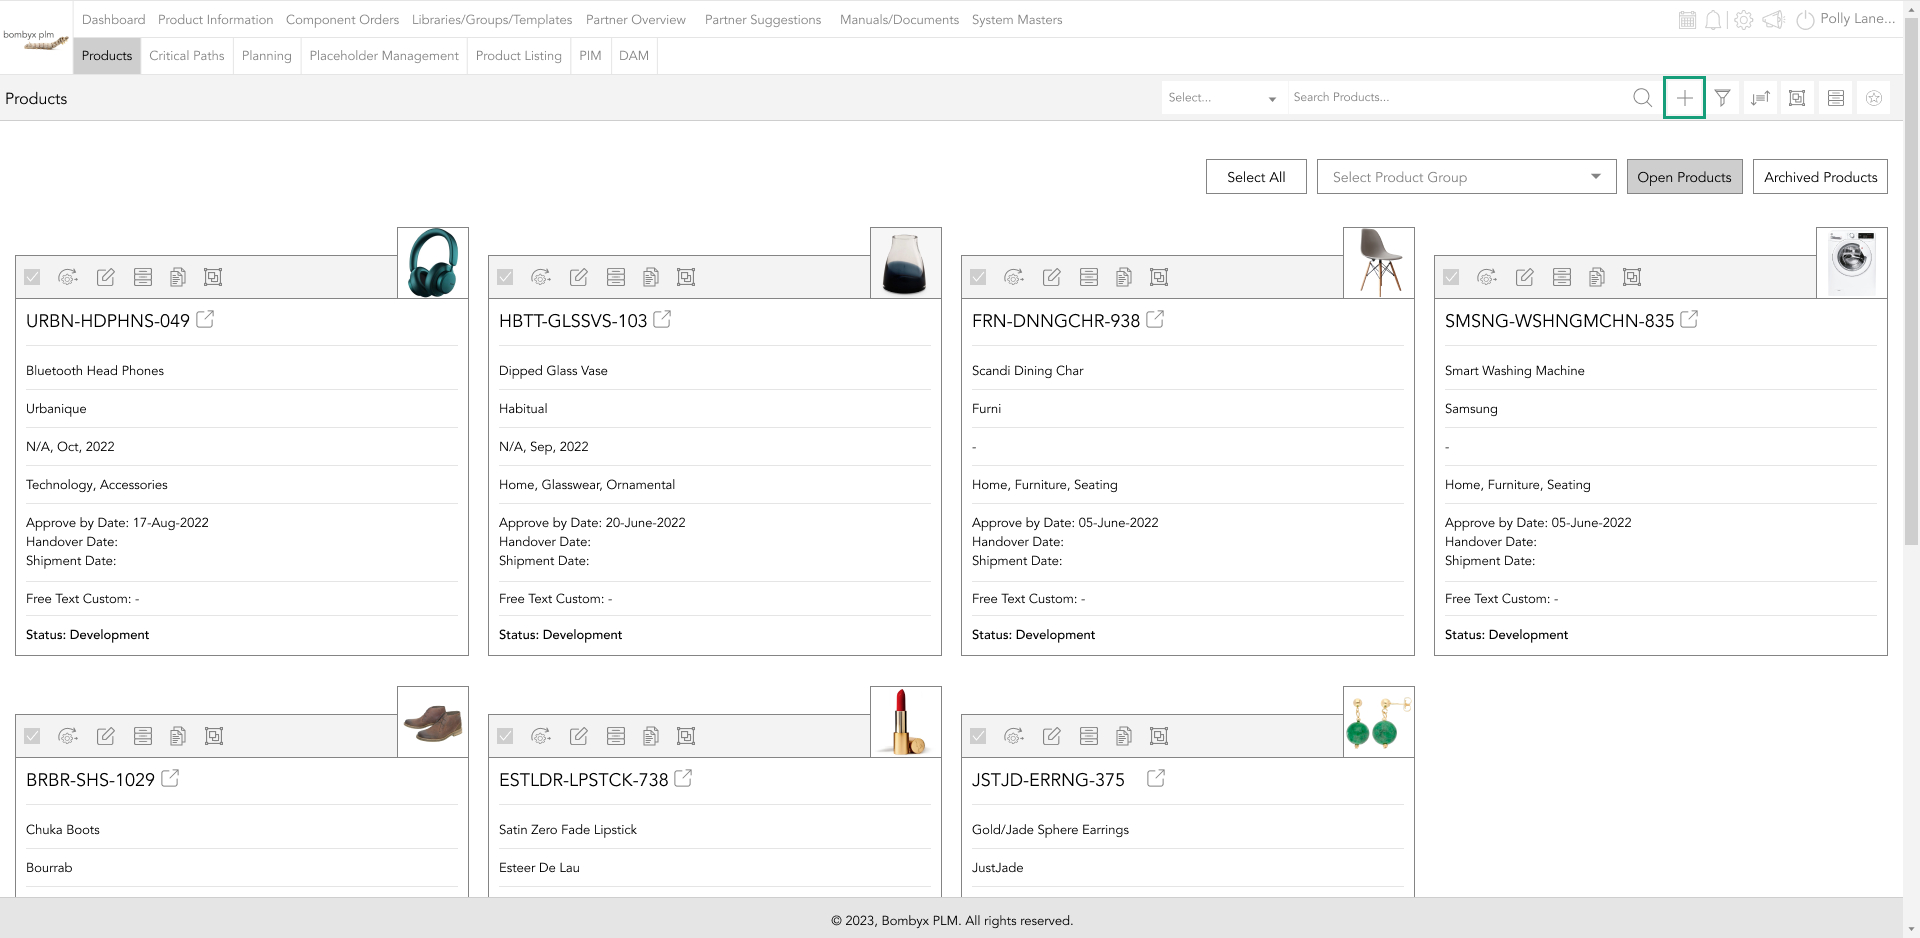
adding a new product
Besides the search bar, all you have to do is select the plus icon.
And then fill in the relevant information sections. 6 of which are required fields so they will need to be filled before saving.
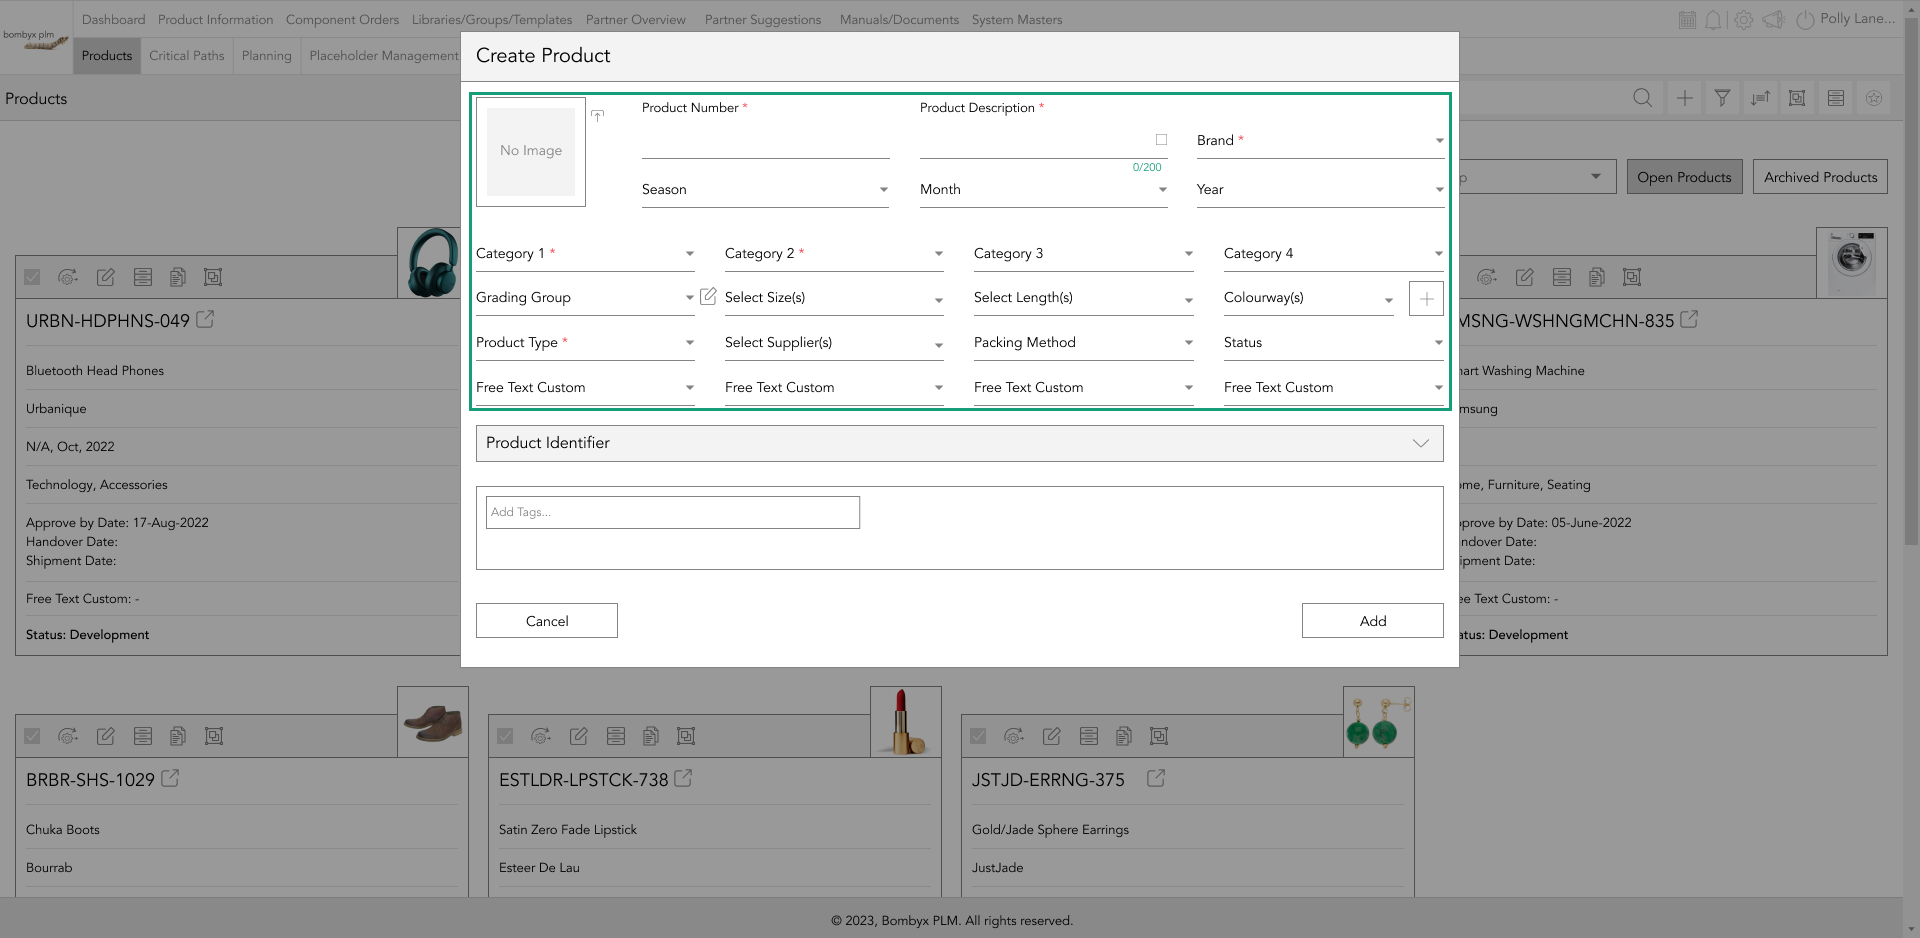
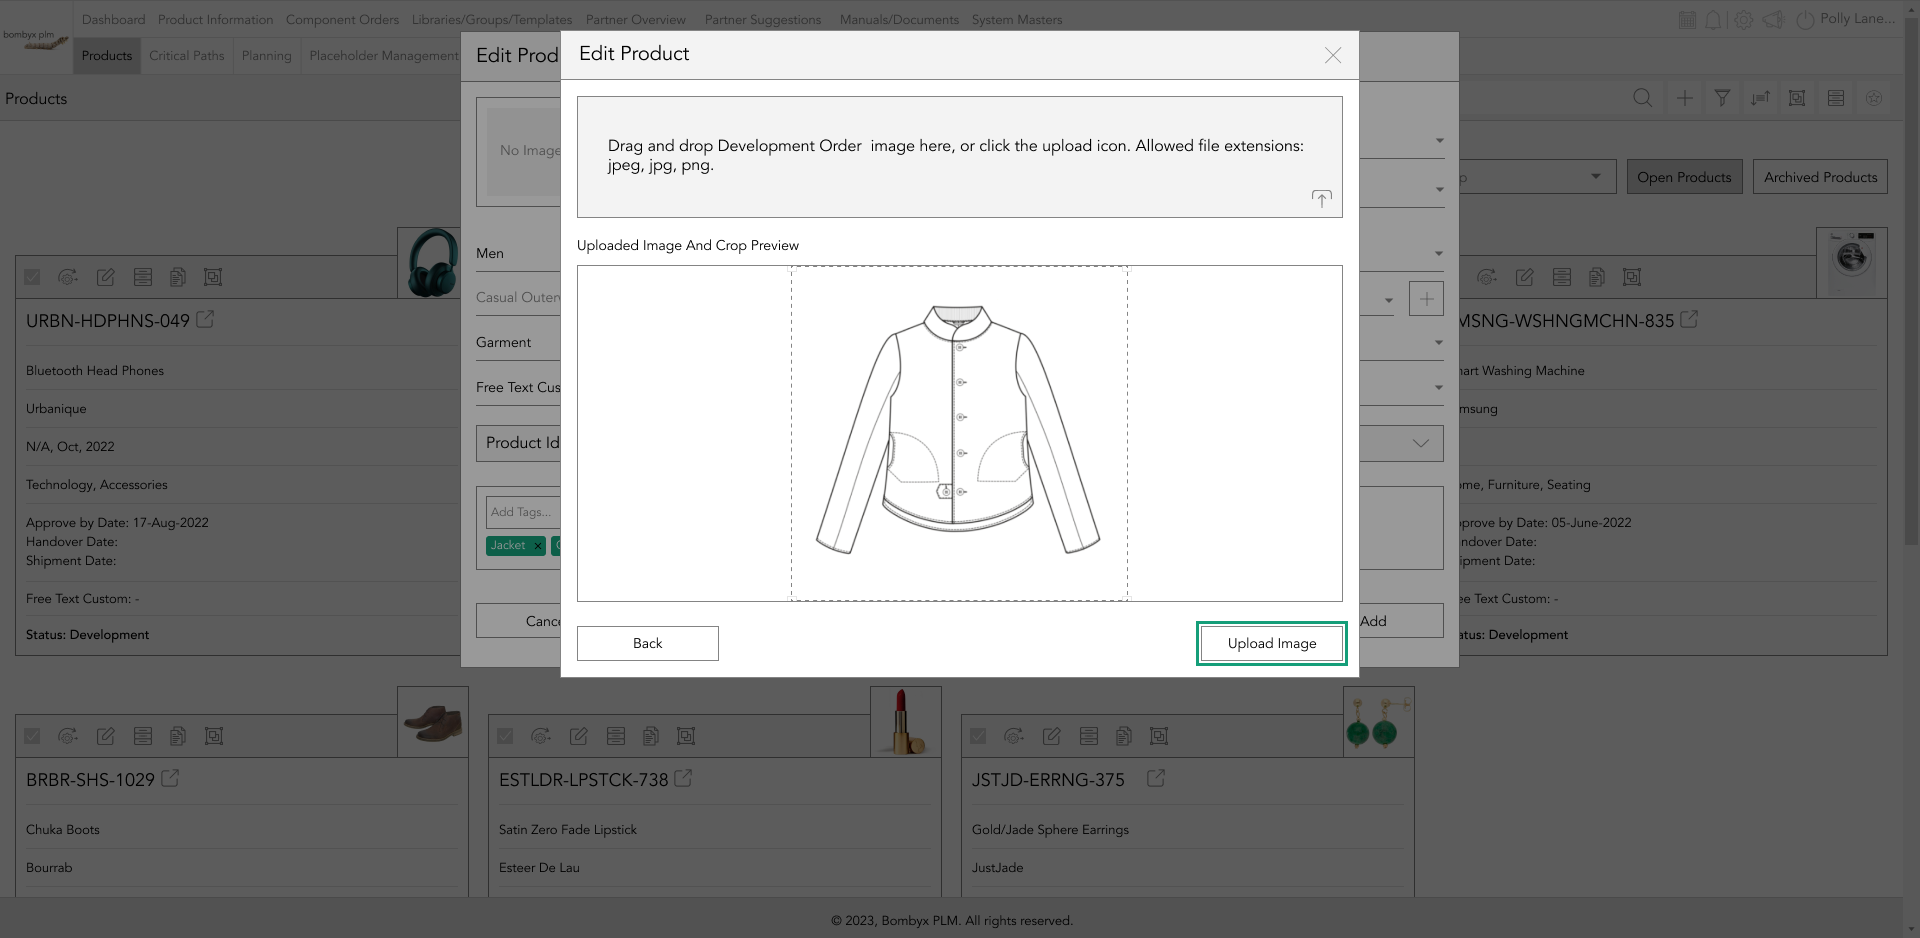
You may also add a preview image for your product by using the upload icon and dragging your imagery into the popup, or alternatively, tapping the upload area, and then select the files you wish to upload.
The rest of the information can be entered at a later date if you do not have that information to hand.
Once done tap ‘Add’ to save your changes and create the new product entry.
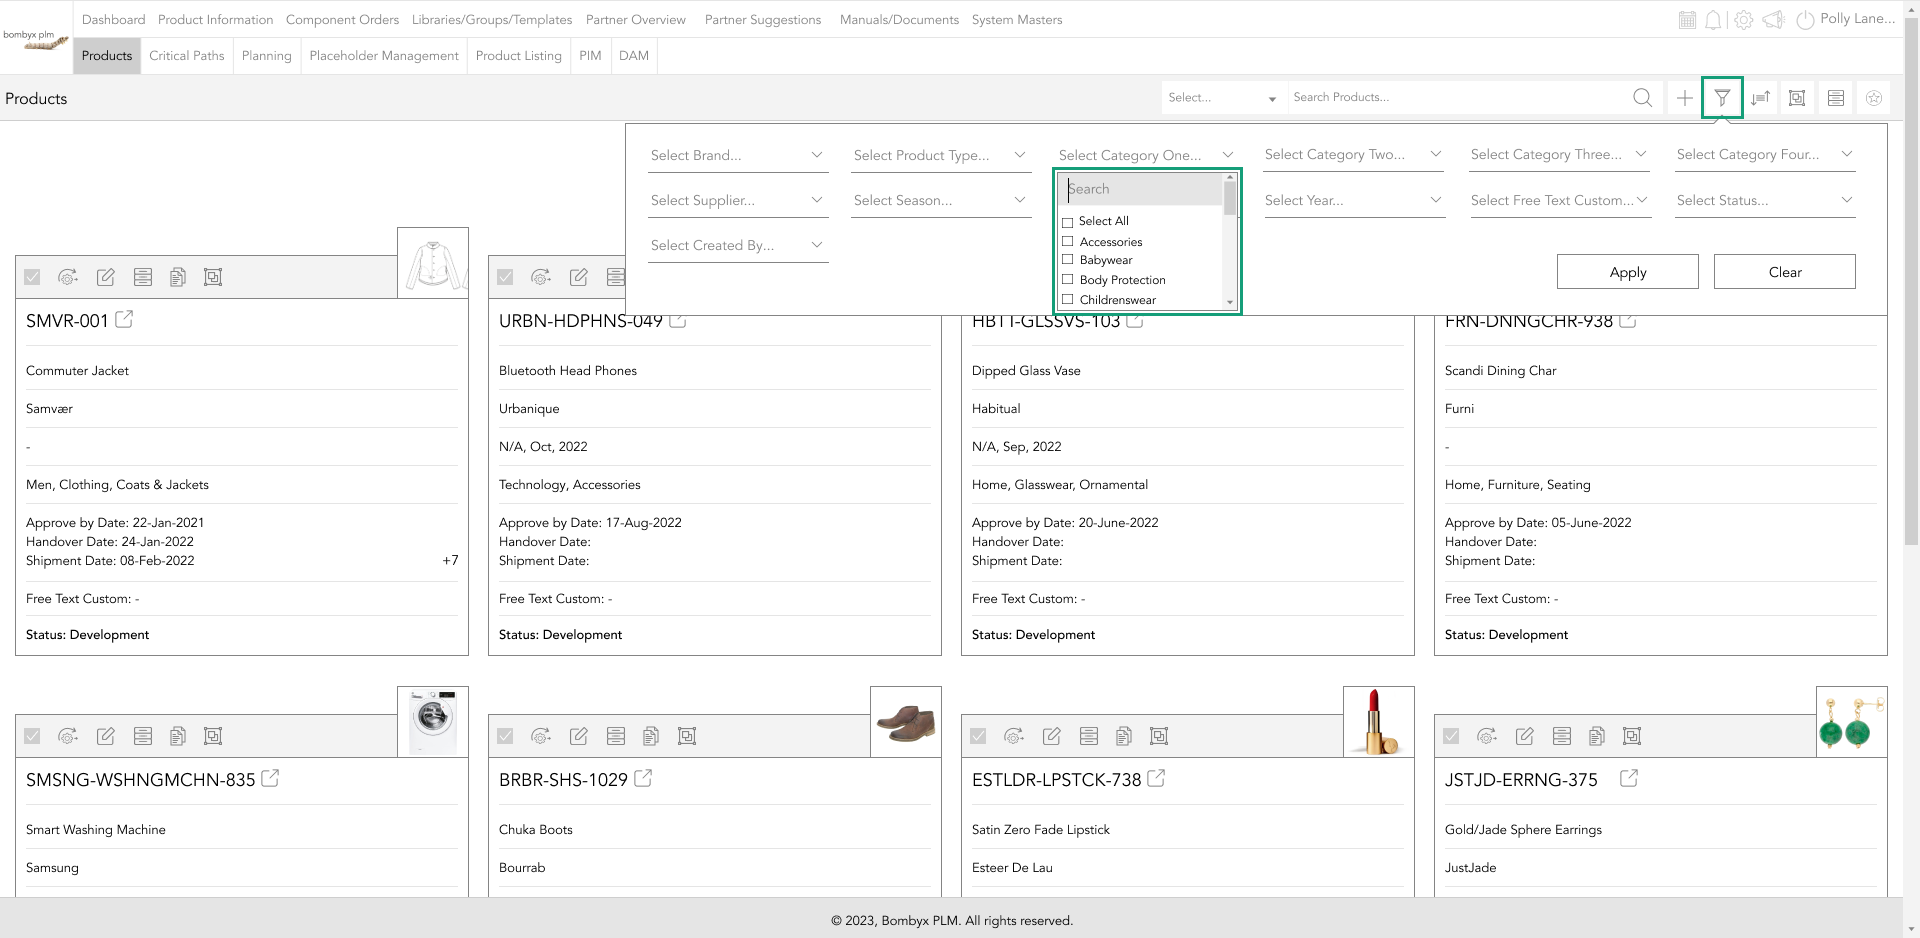
filtering products
Tapping on the filter icon allows you to filter the products in the library based on which pieces of information you are selecting. You can use as many, or as few, of the available dropdowns when filtering your search.
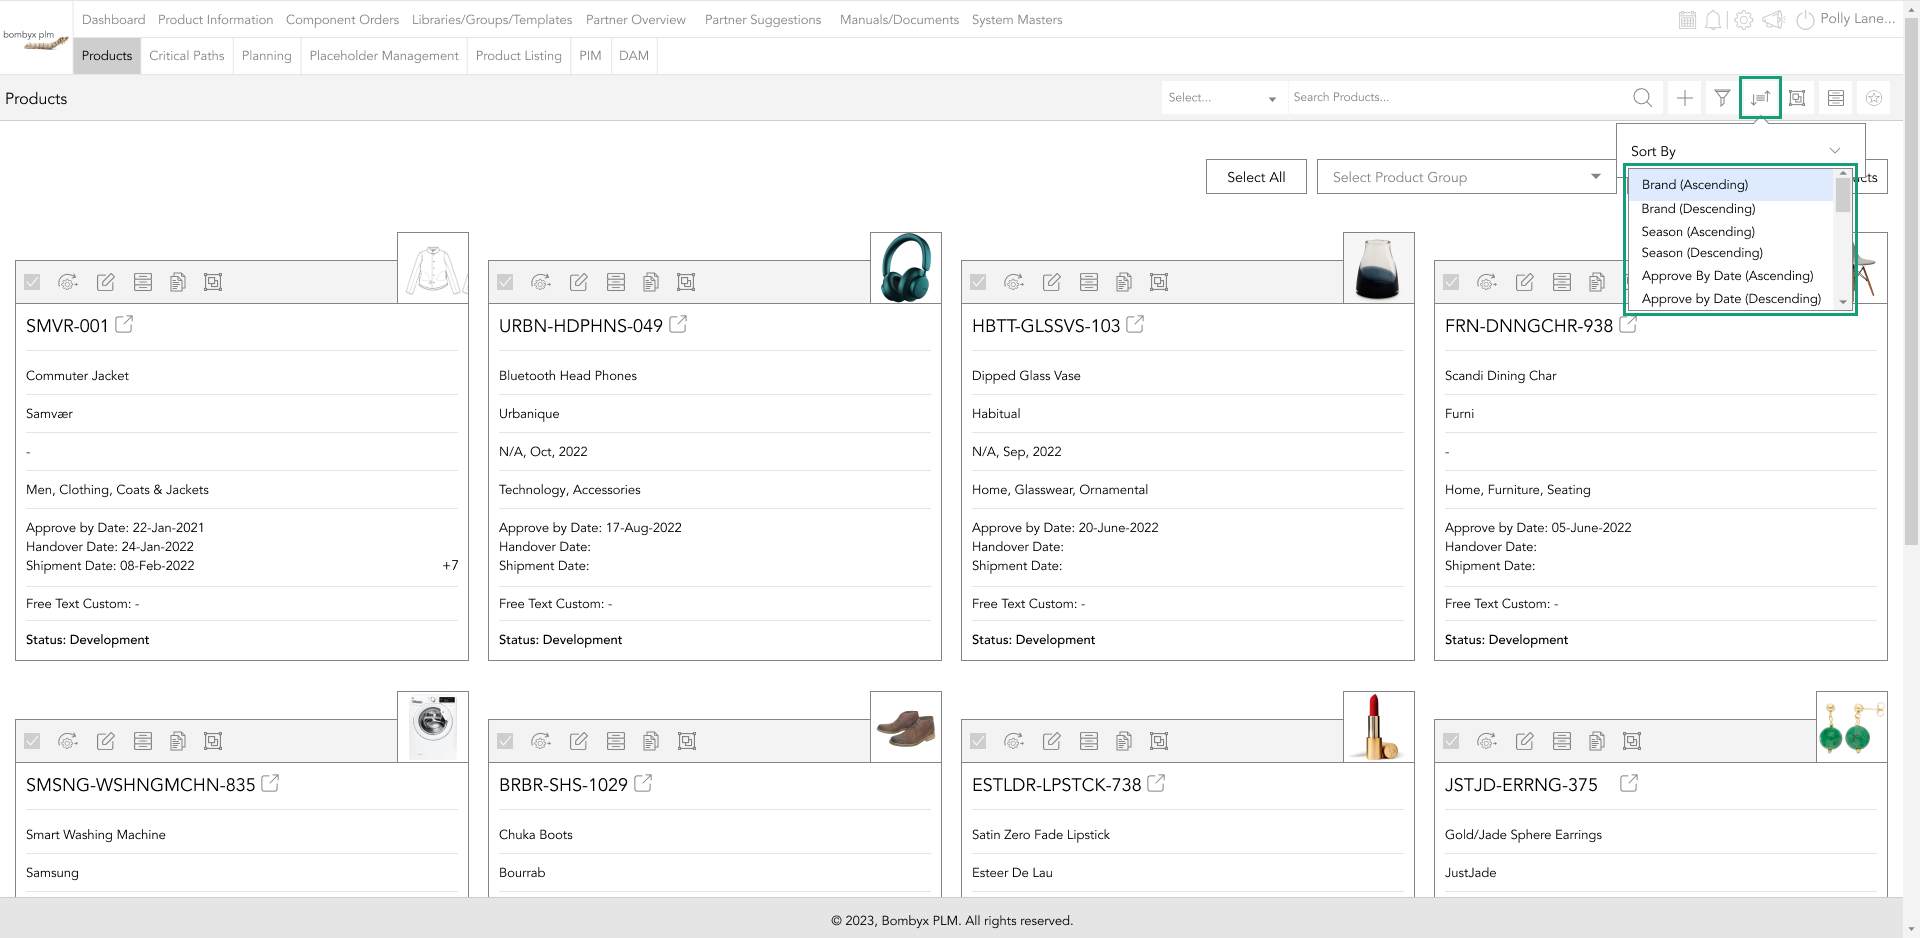
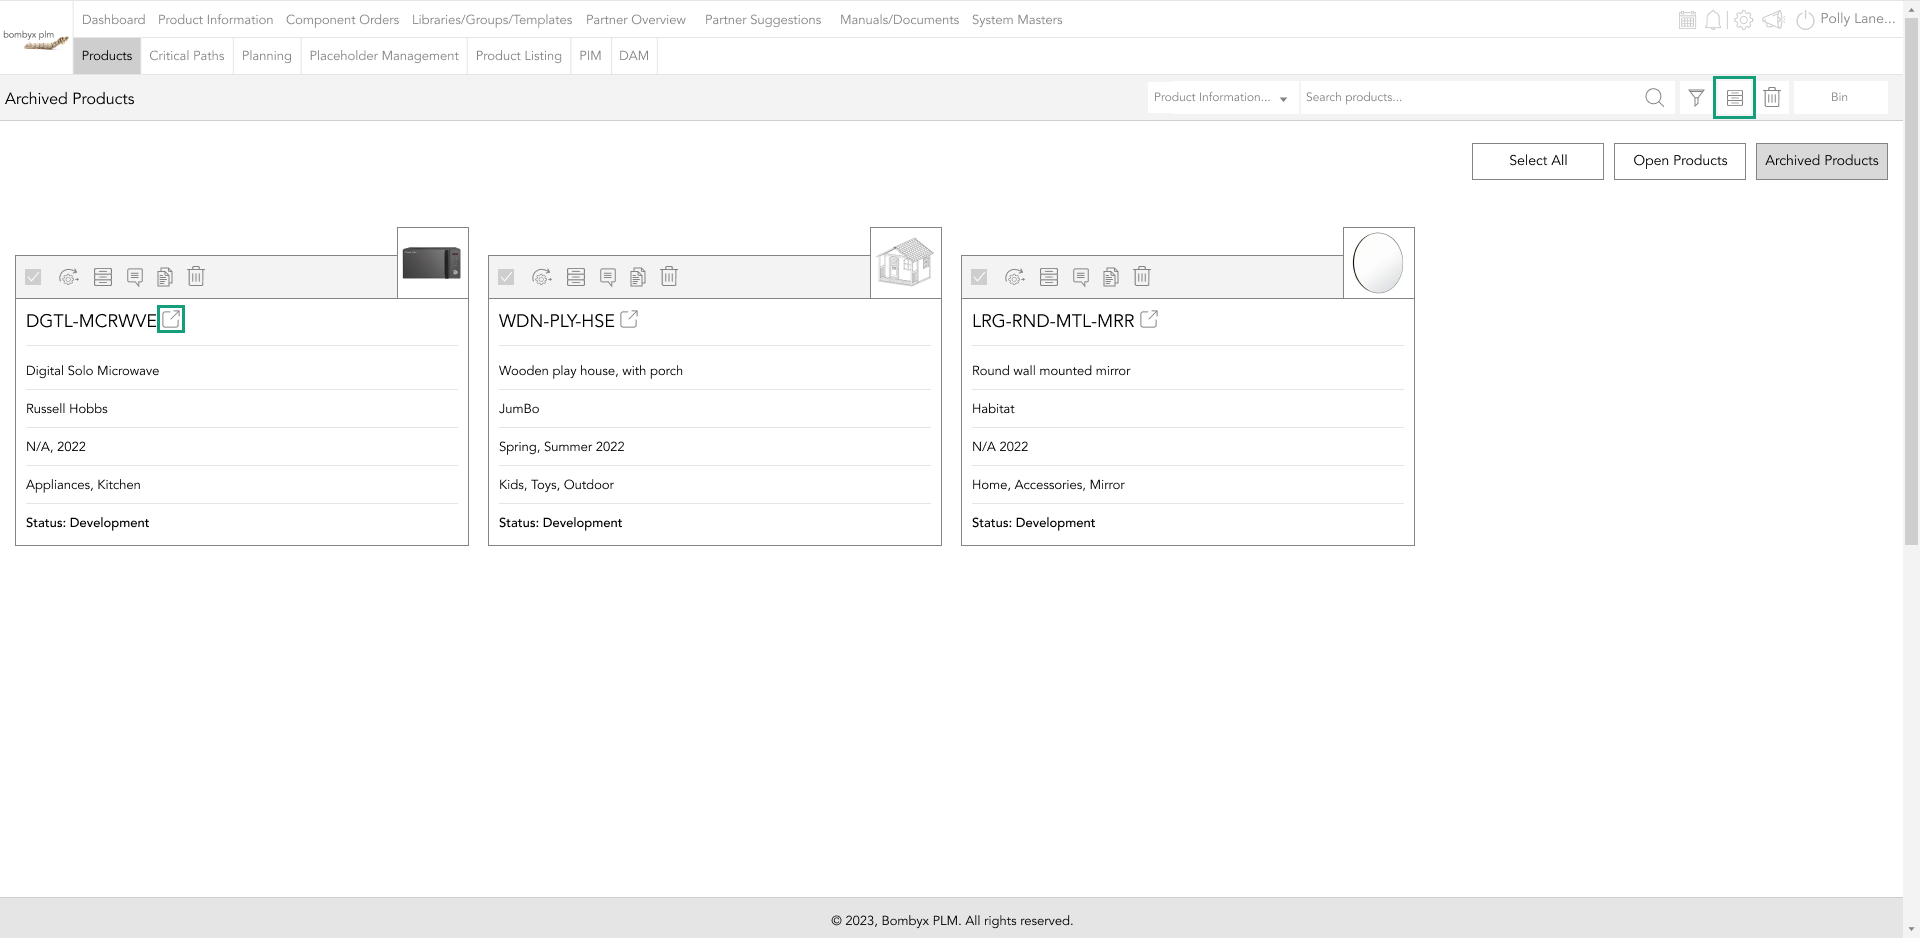
sorting products
For sorting the order of the products in the library, you may use the sort icon on the top bar. Tapping on it will give you a drop-down list of possible sorting options, from alphabetical and dates to ascending and descending orders.
adding a product to a group
To add products to an existing product group, you will first have to select the ones you’d like to choose by tapping the checkboxes on the top right of the product cards. Once selected, tap the group icon then select the group you would like to add the products to.

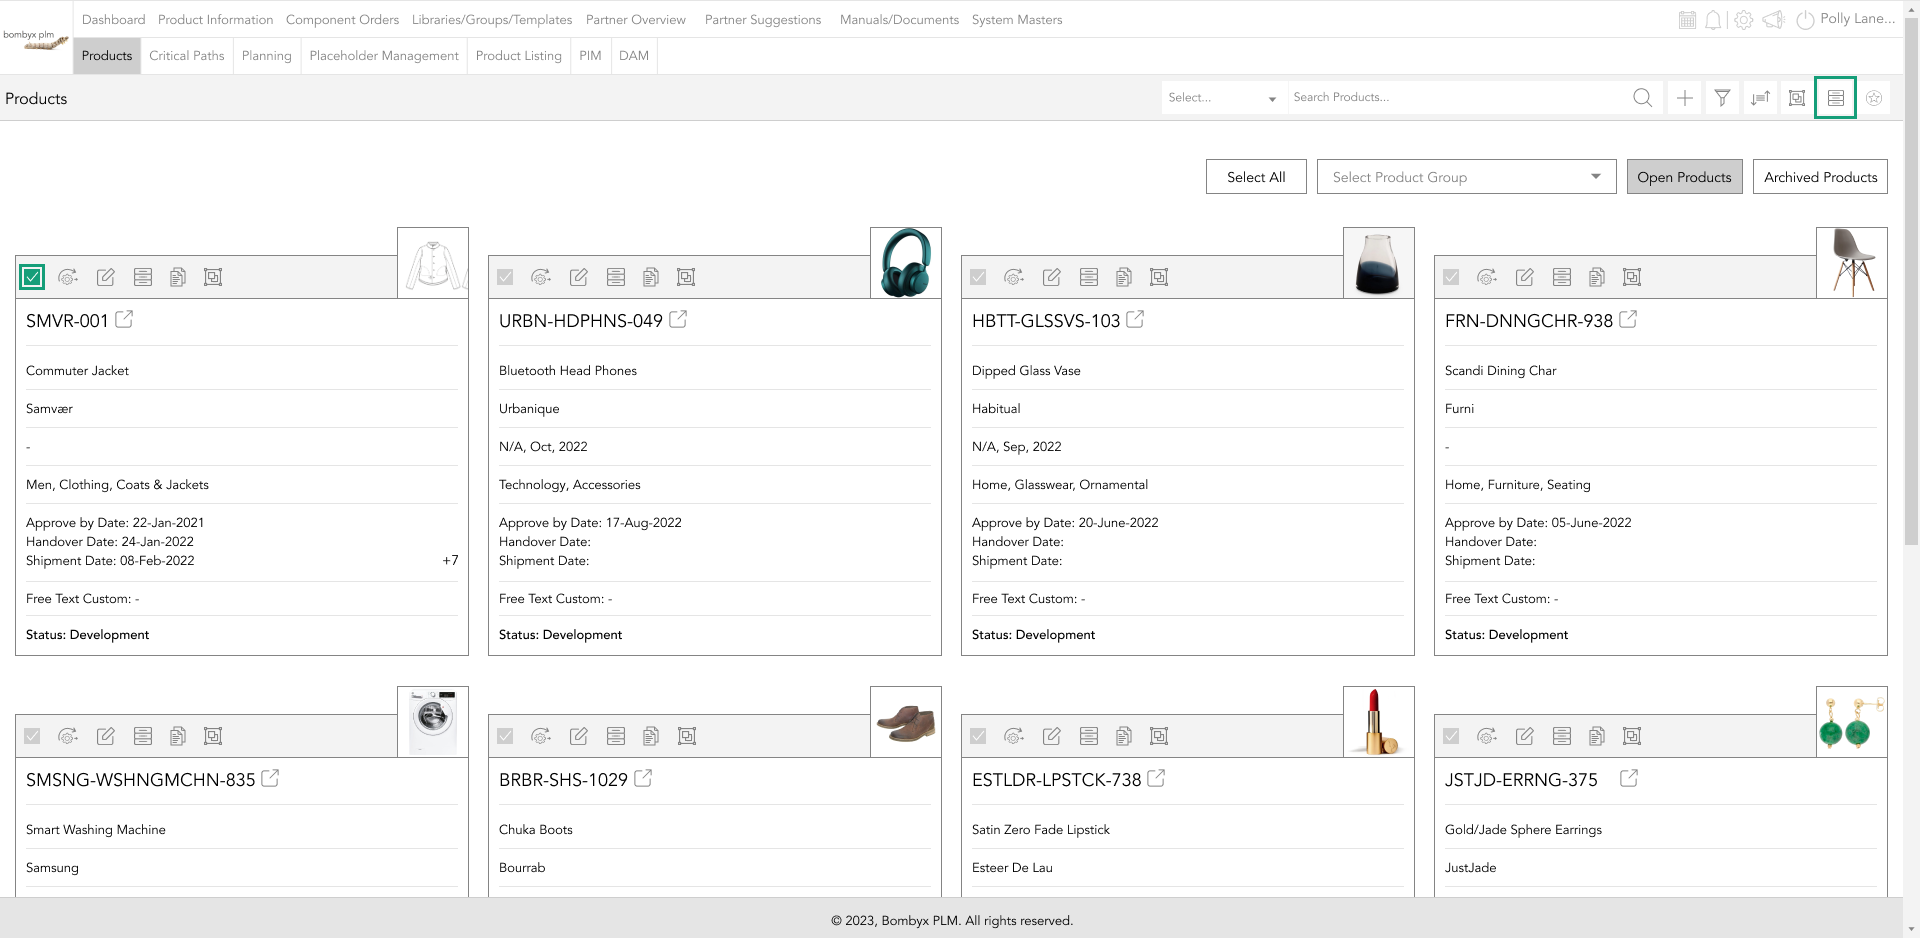
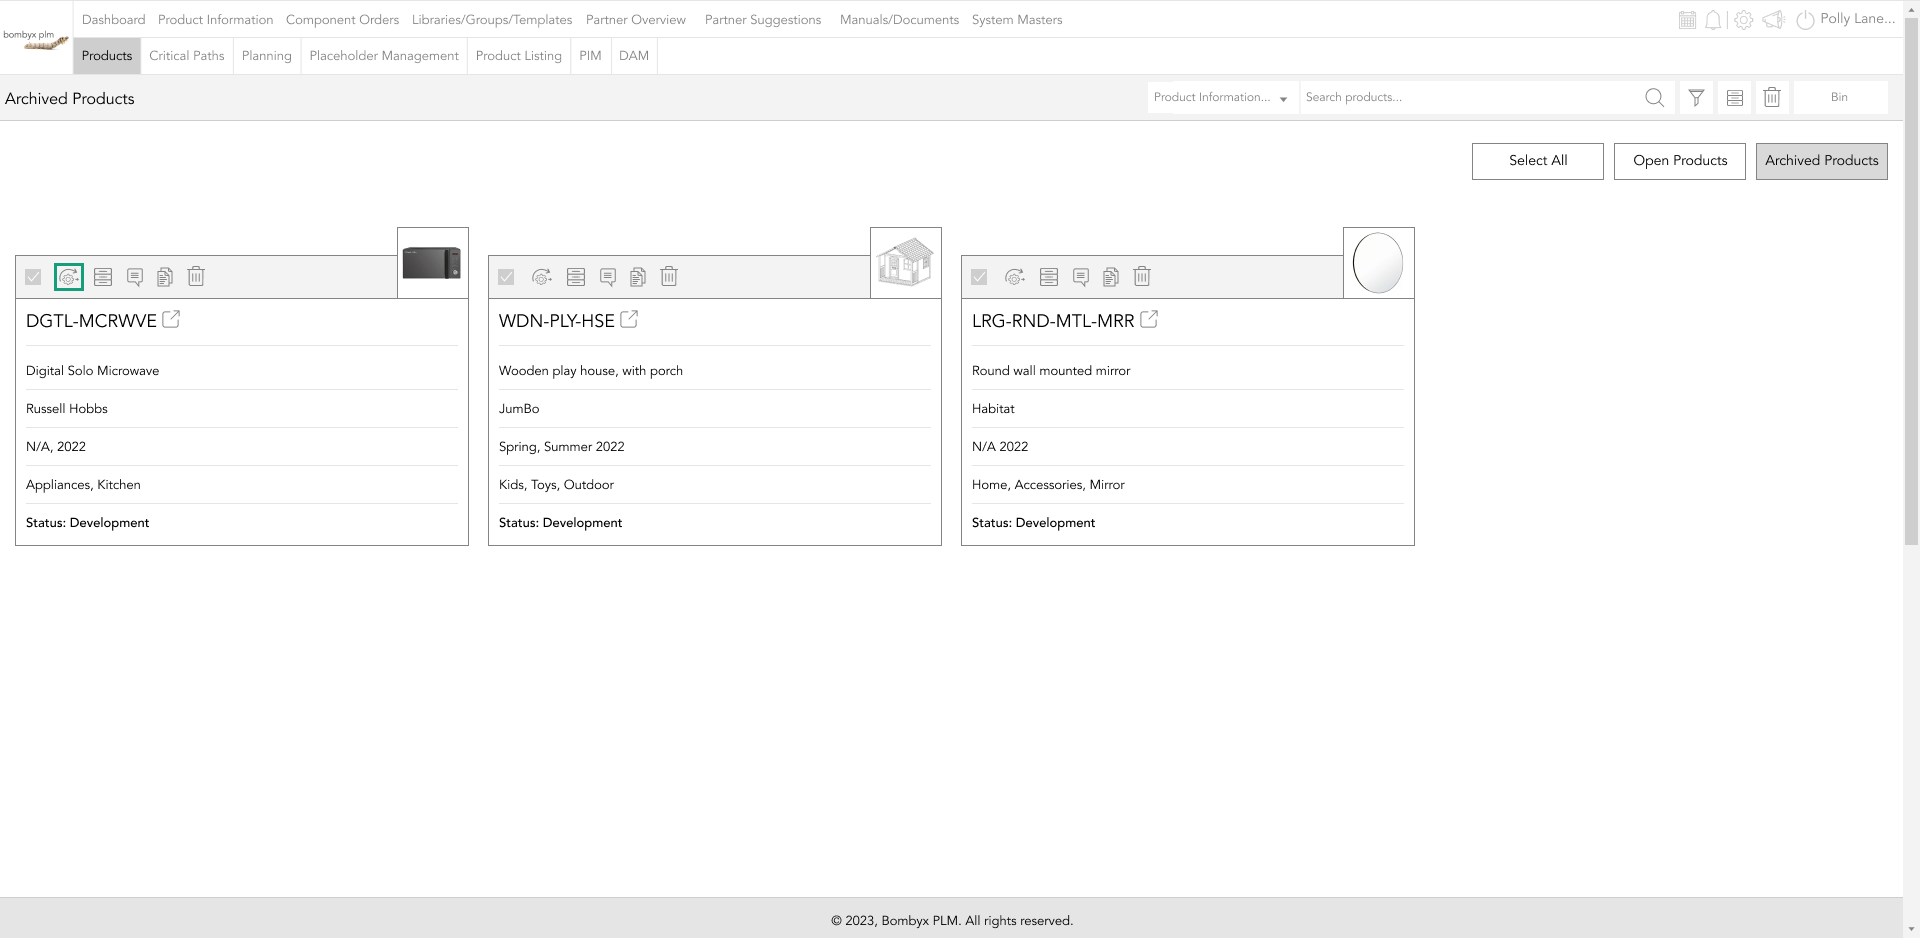
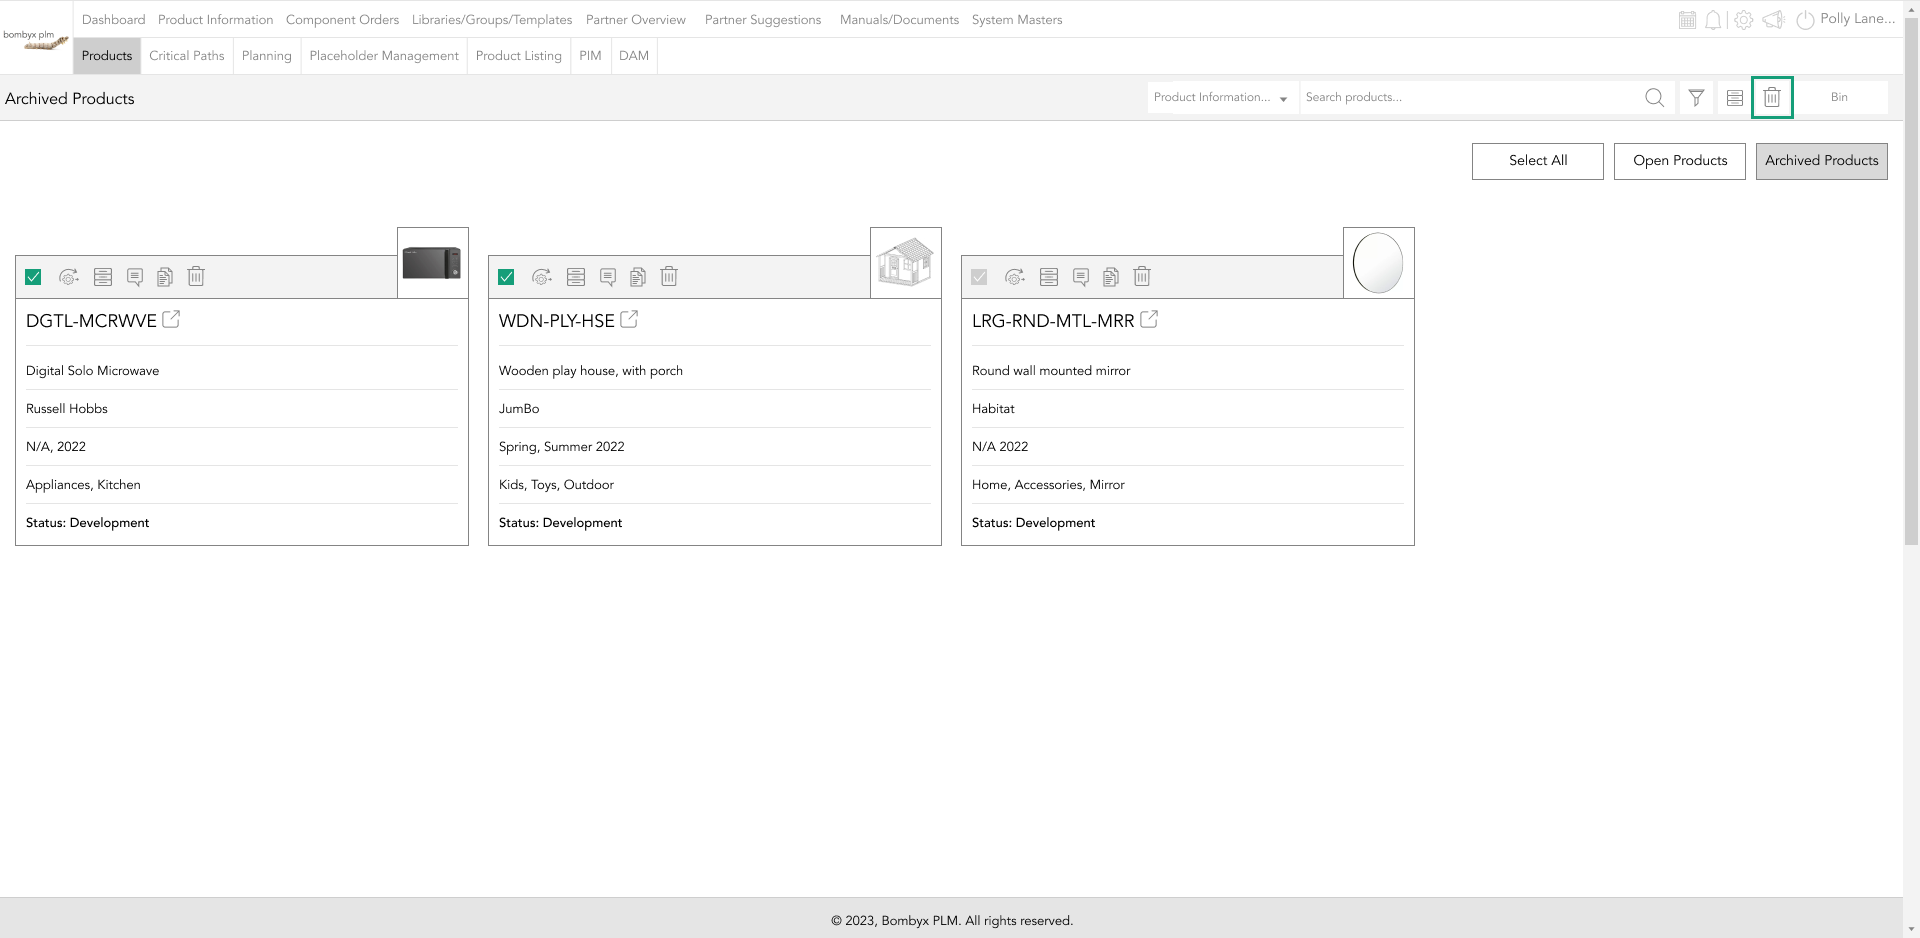
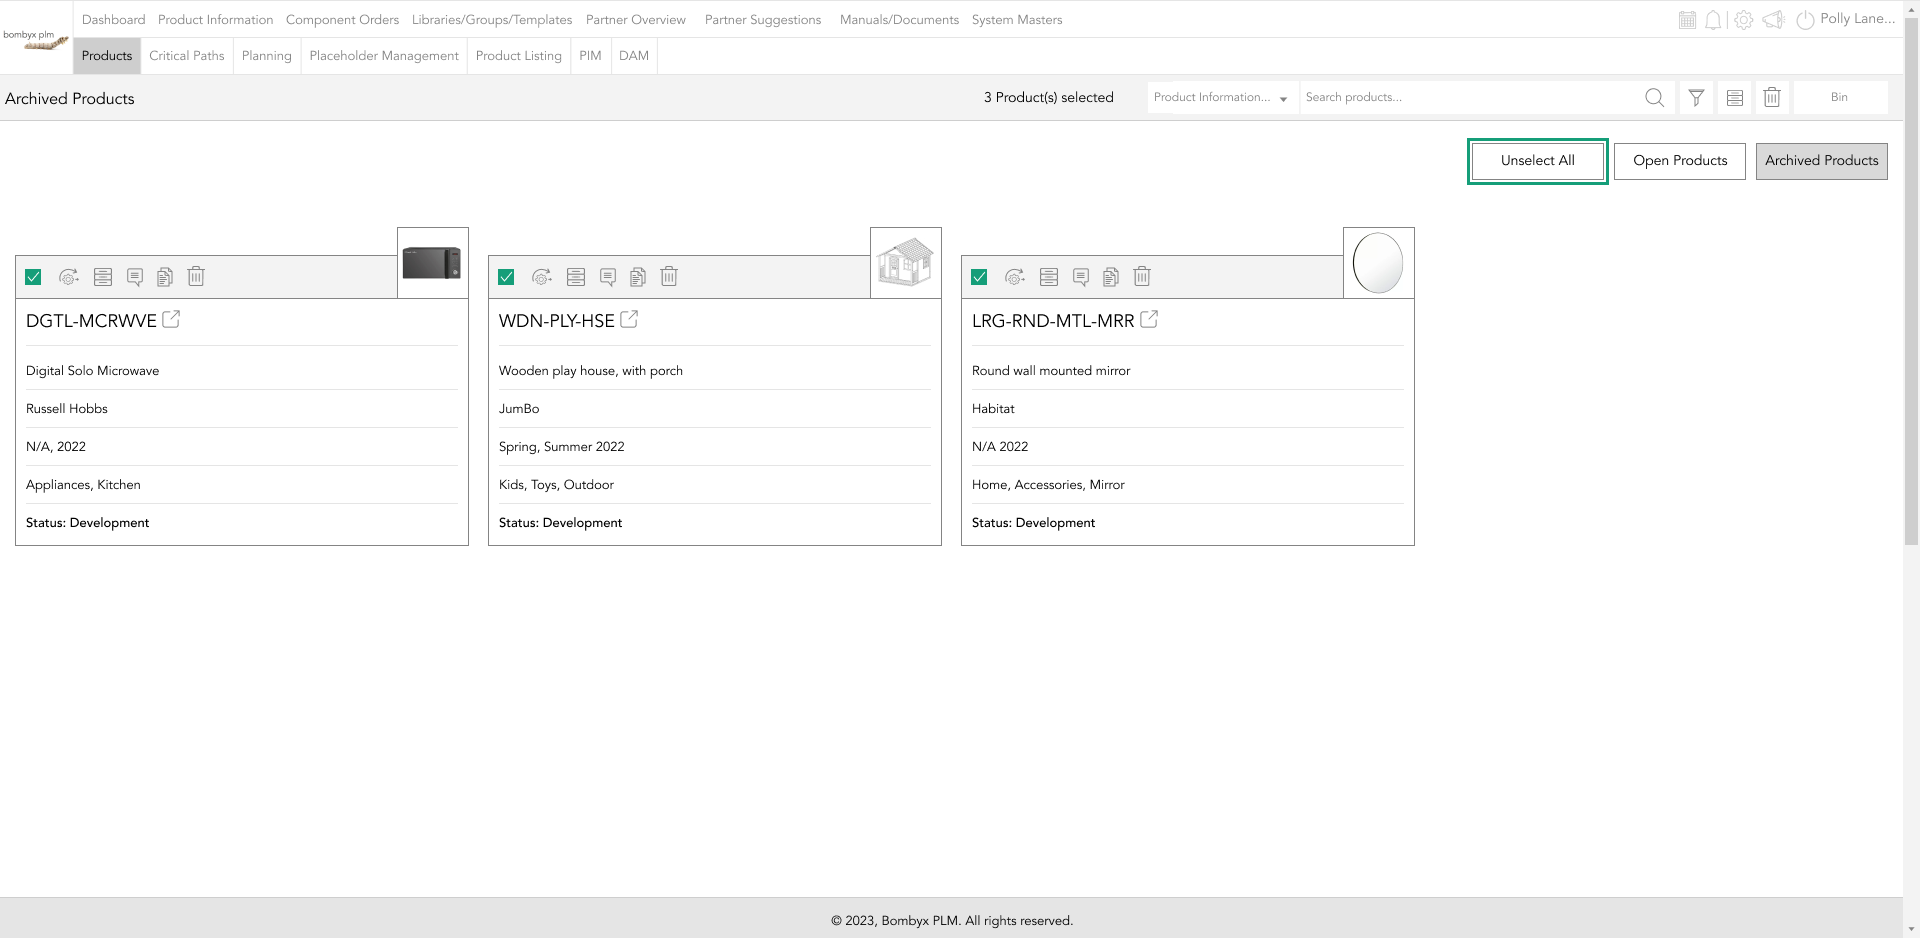
archiving products
Archiving multiple products works in a similar way to how grouping does, being that you have to select the products you would like to archive beforehand first. Once you have selected the products just tap on the archive icon to archive all the selected products.
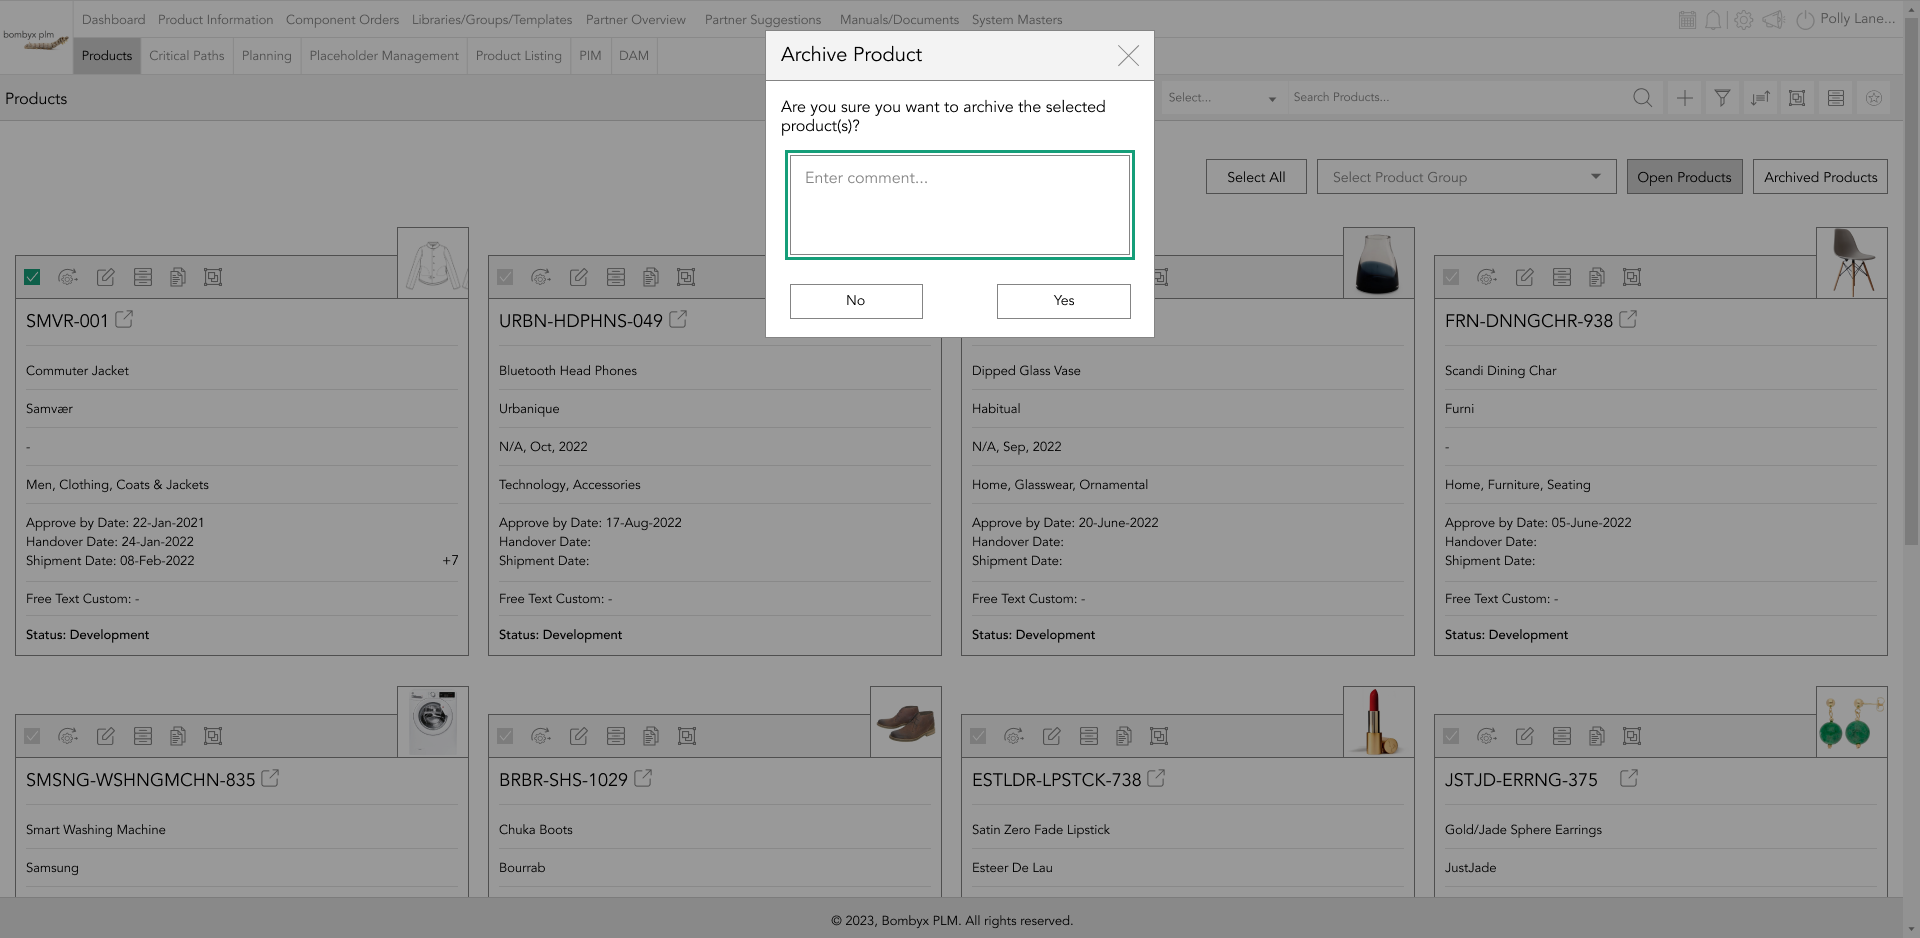
A pop-up will appear to which you can leave a comment giving the reasons for archiving. Once done tap save.
Or tap the archive icon on the top bar of the products card to archive a single product.
Once archived the product will not show in the main product library so to view this product you may click on the ‘archived products’ part of the library. From there you can also unarchive products to bring them back into the active library.
changing the status of a product
To change the status of a product tap the checkboxes of the products you wish to make the edit to. Once selected, tap on the status icon to open the options to change all the selected products’ statuses.

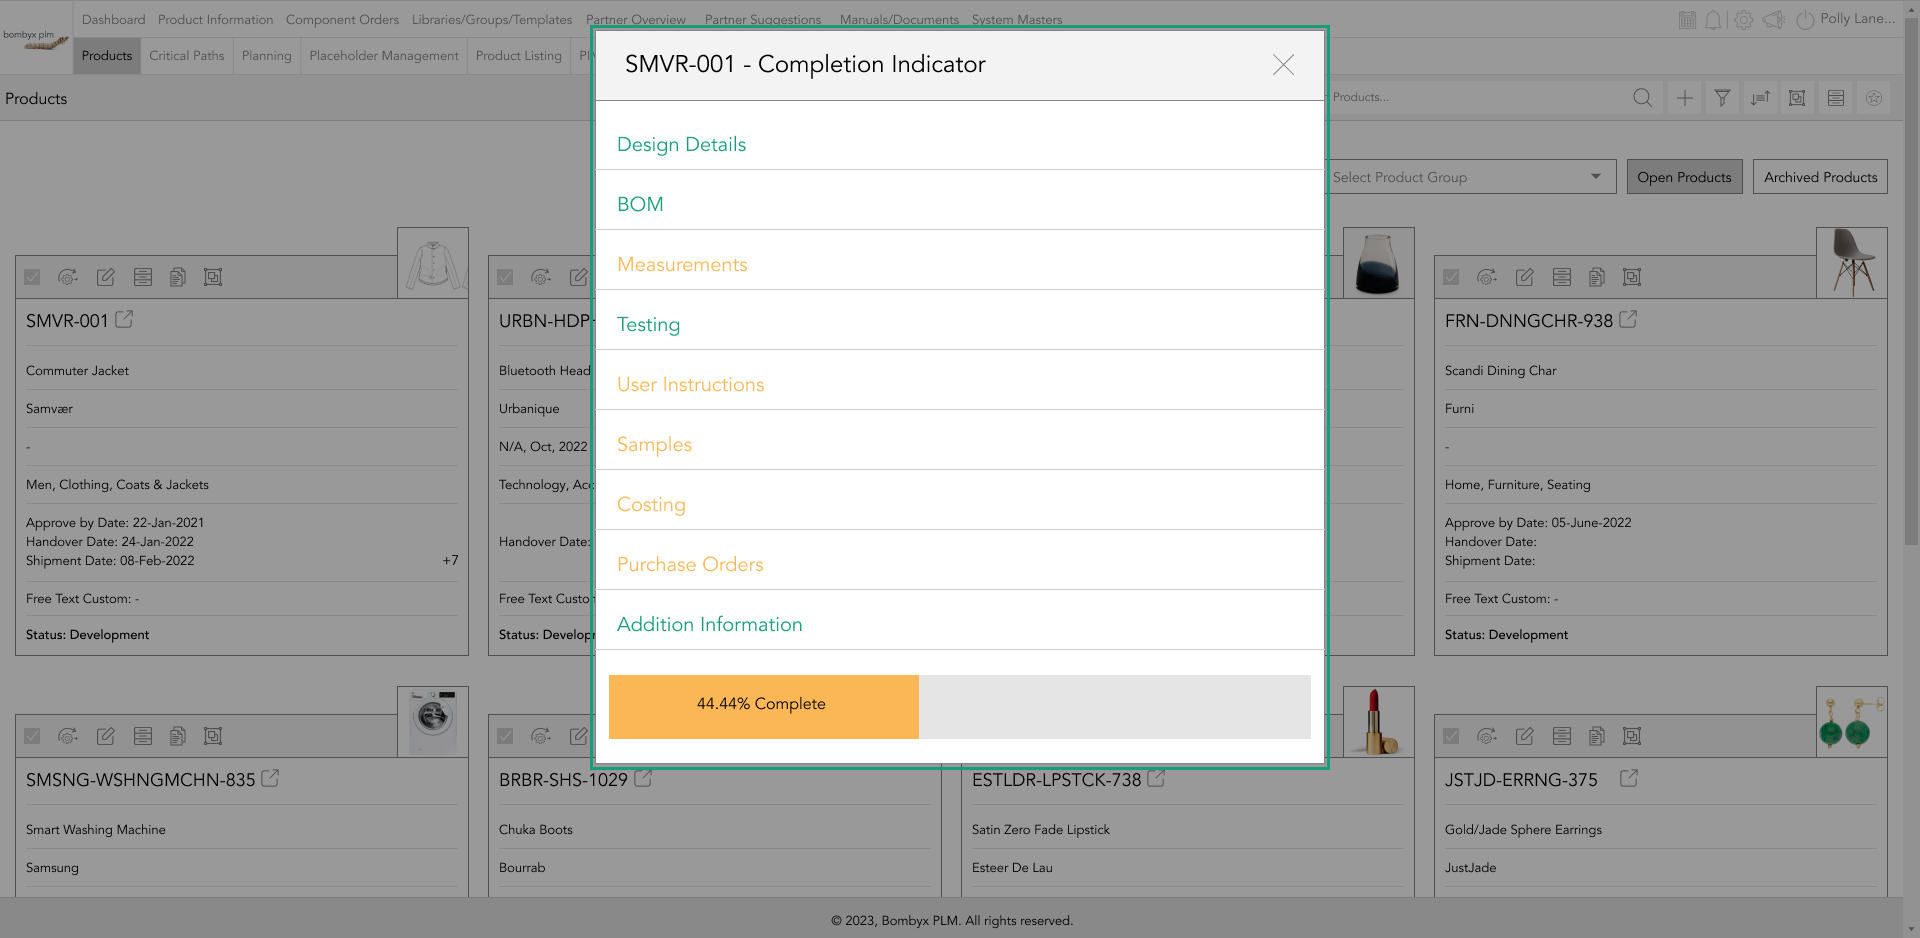
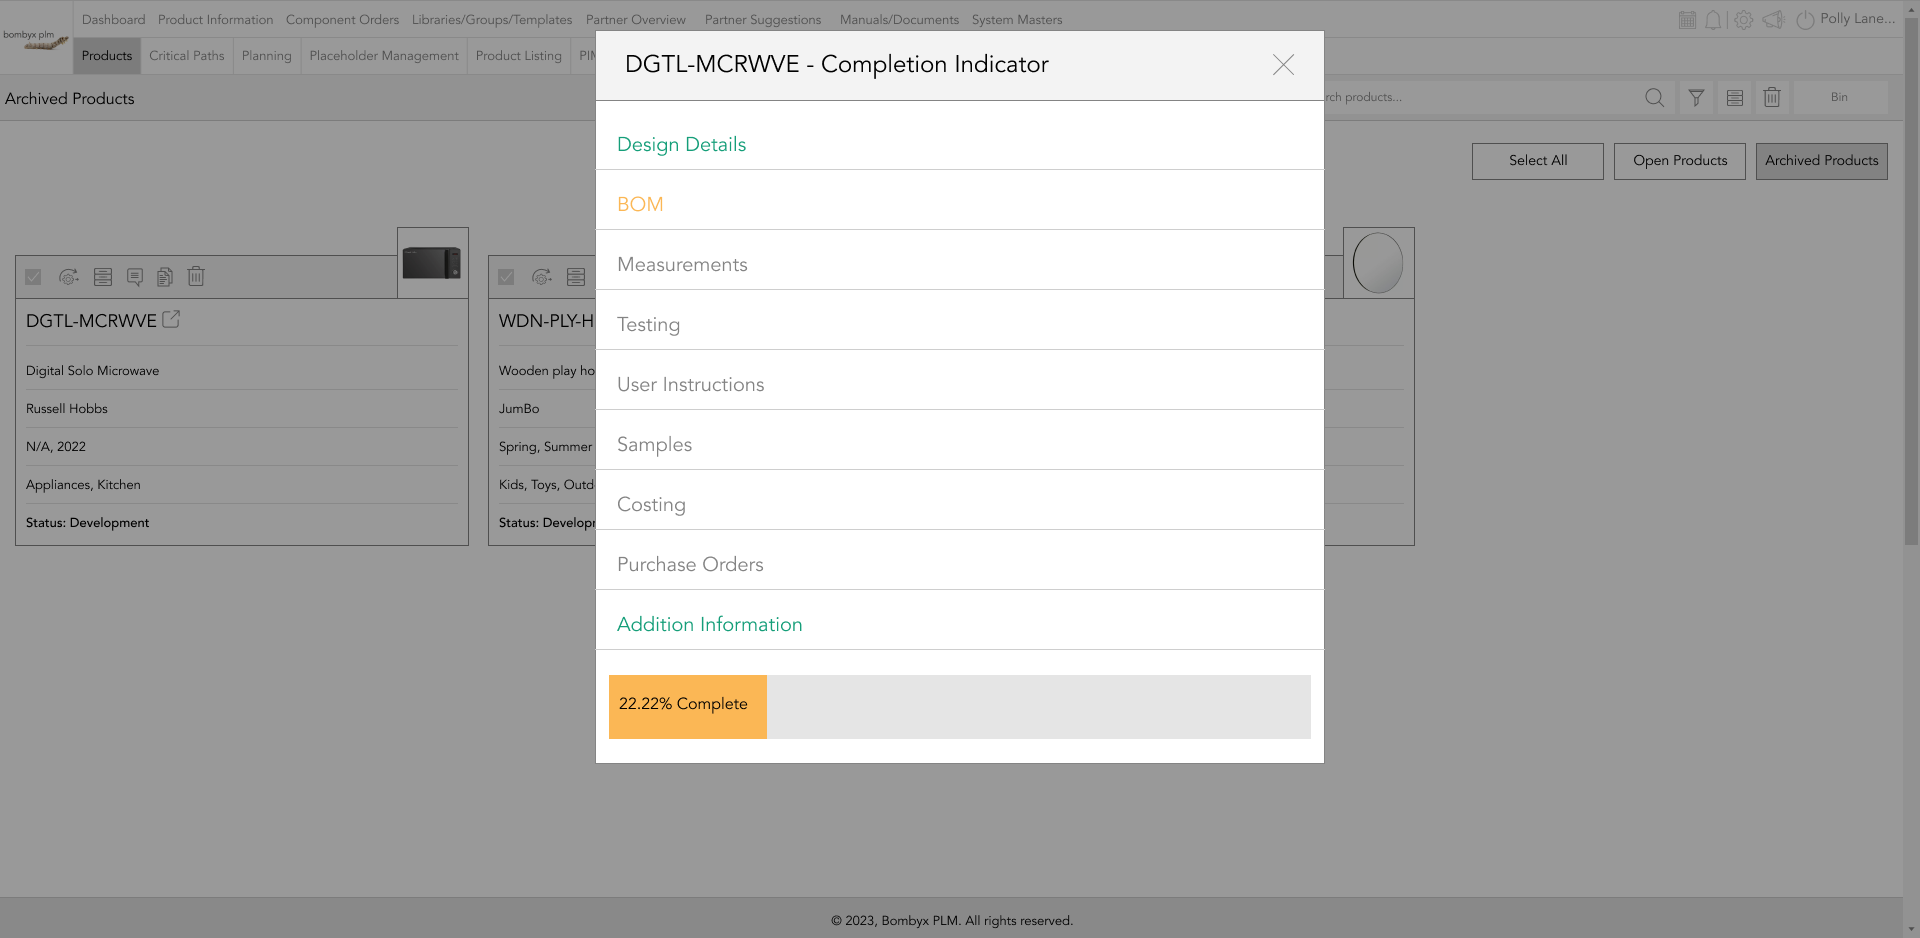
viewing the completion of a product
By tapping on the completion indicator icon you may view how far along the production of the product is.
![]()
The overall completion of the production is displayed with a percentage bar and each part of the production is listed with their statuses, as the colour of the titles changes depending on the status. The titles on the completion pop-up also serve as links to the parts of the products.
editing an existing product
To edit a product of choice, tap on the edit icon to open the editing pop-up. Once you have made the changes you wished, tap on the update button to save your changes.

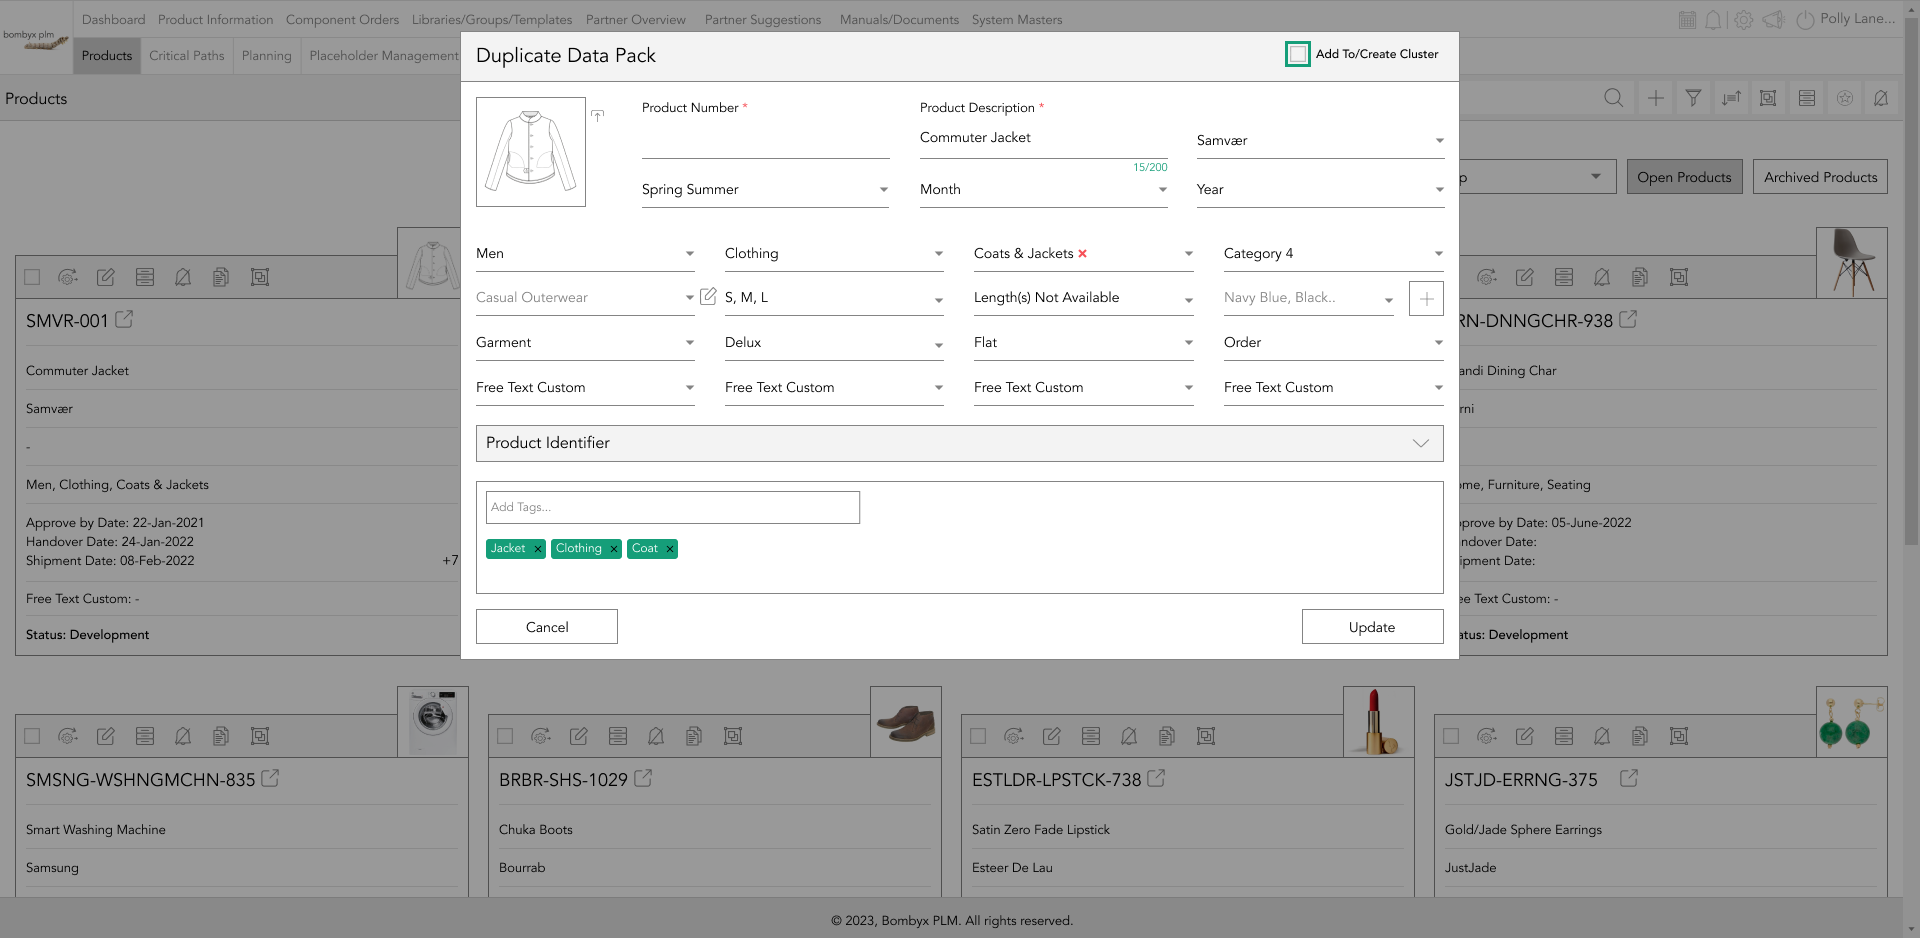
duplicating data packs
To duplicate a pack tap the duplicate icon.
![]()
This will copy over all the information from that product's card, all you have to do is update the product number as each product has to have its own unique product number. And tapping the checkbox on the header of the popup will allow you to add the duplicated pack to a cluster.
adding tags to a product
You can add tags to a product to make it easier to search by products using the search bar function. To add tags to a product, click the edit icon on the products card, at the bottom of the popup where it states ‘Add a Tag’ start entering the tag name and tap the enter button on your device.
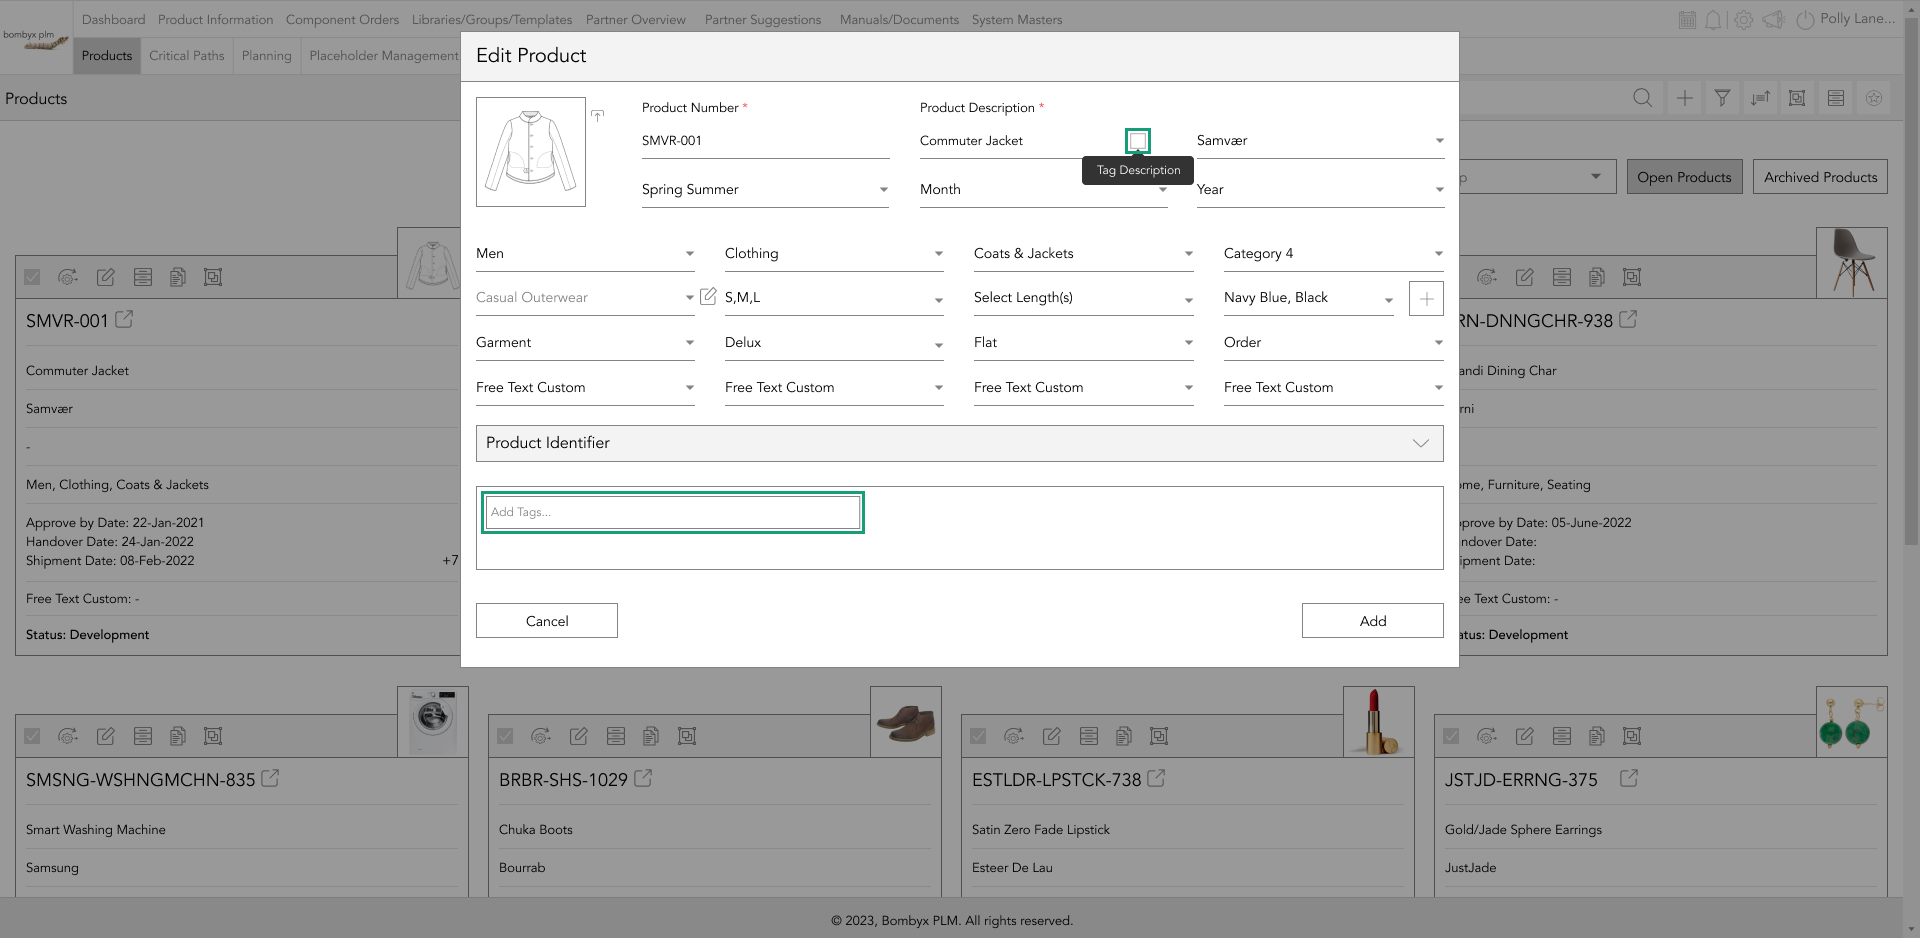
And while creating the product you can tap the checkbox next to the products description area, and this will automatically create tags based on the description you enter.
Once you have added all the tags that are relevant to the product, tap update.
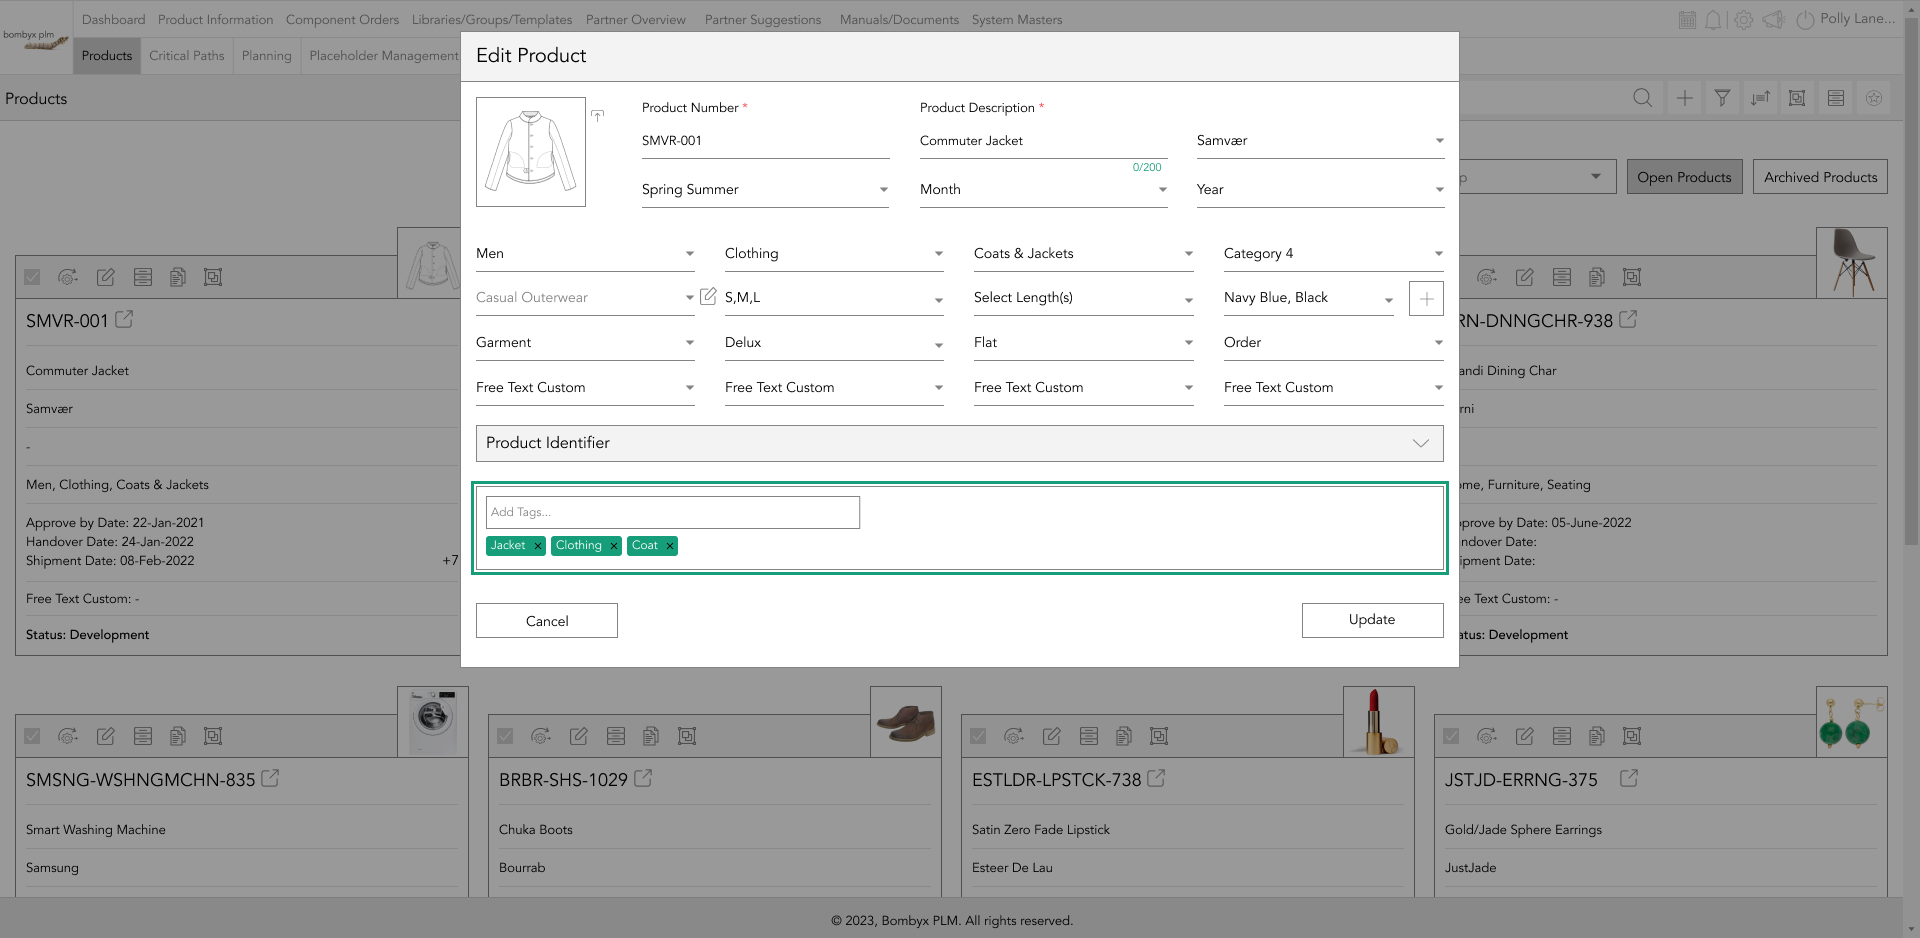
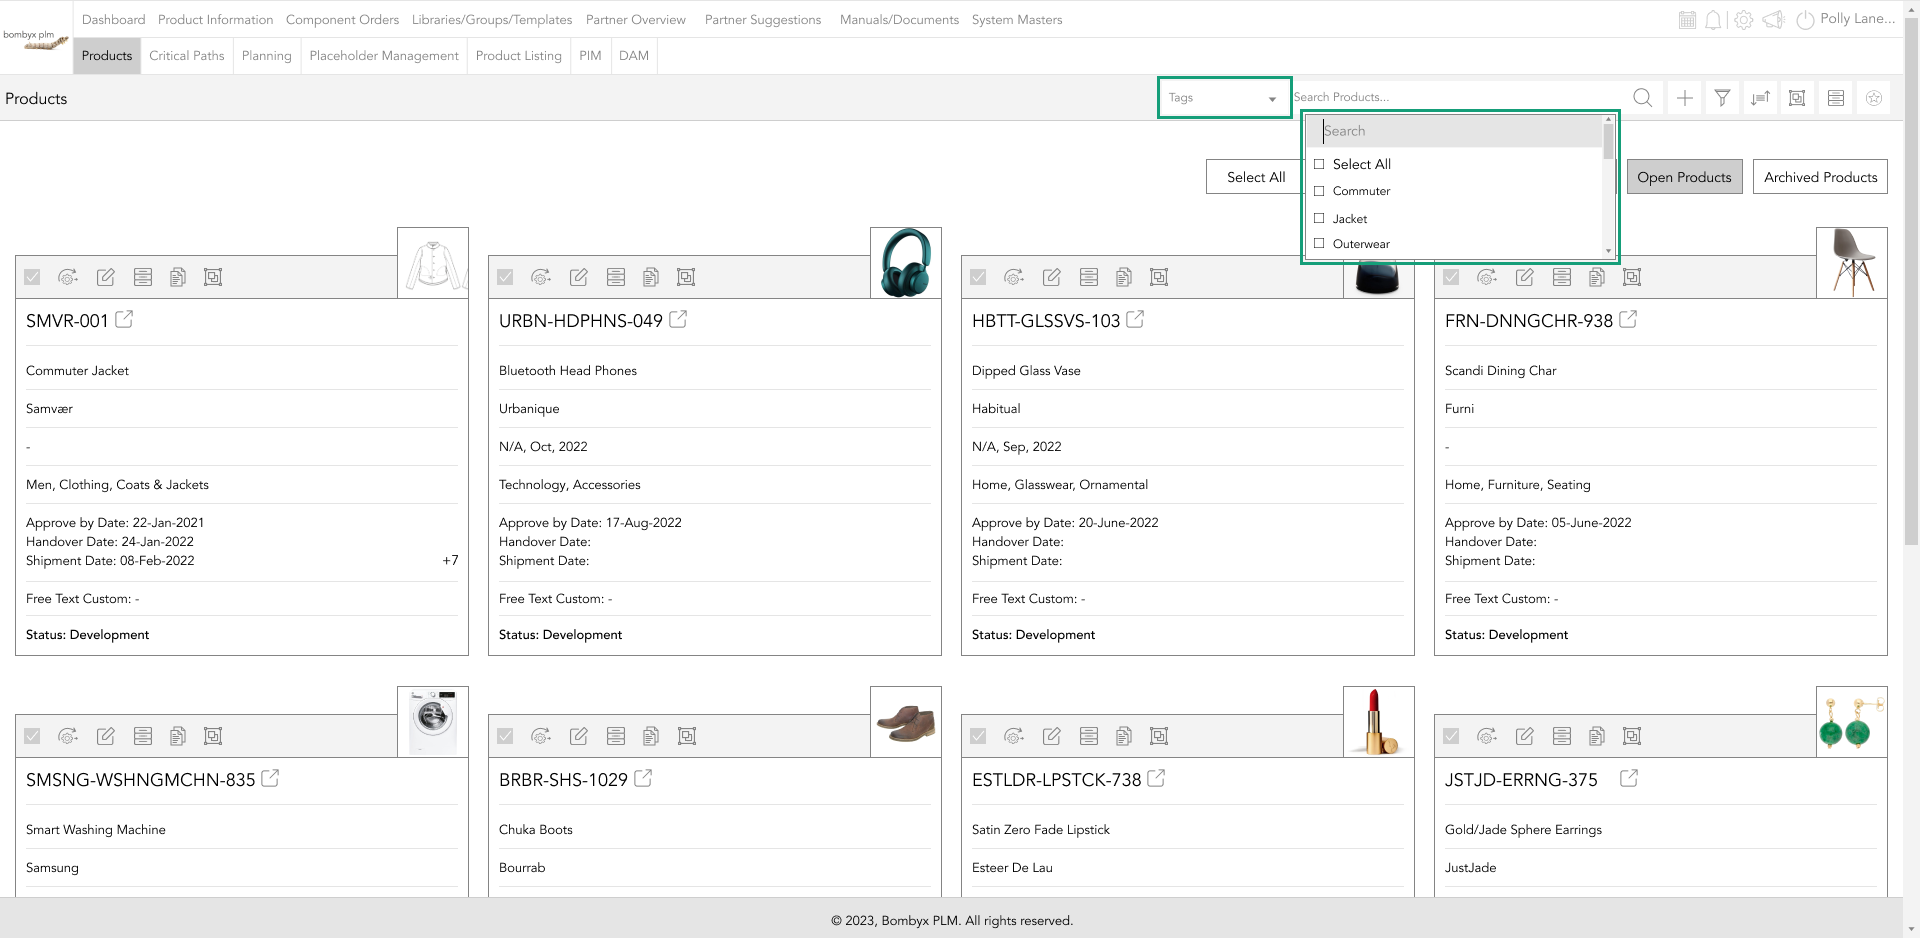
Now when searching for a product using tags, select tags from the dropdown next to the search bar function, start entering the tag name, and Bombyx will filter through and show only the product associated with the tags.
changing grading groups
The only way to change a grading group in a product is by tapping the edit icon on the products card and then tapping the edit icon that is located next to the grading group dropdown, this will now be editable for you to select another grading group.
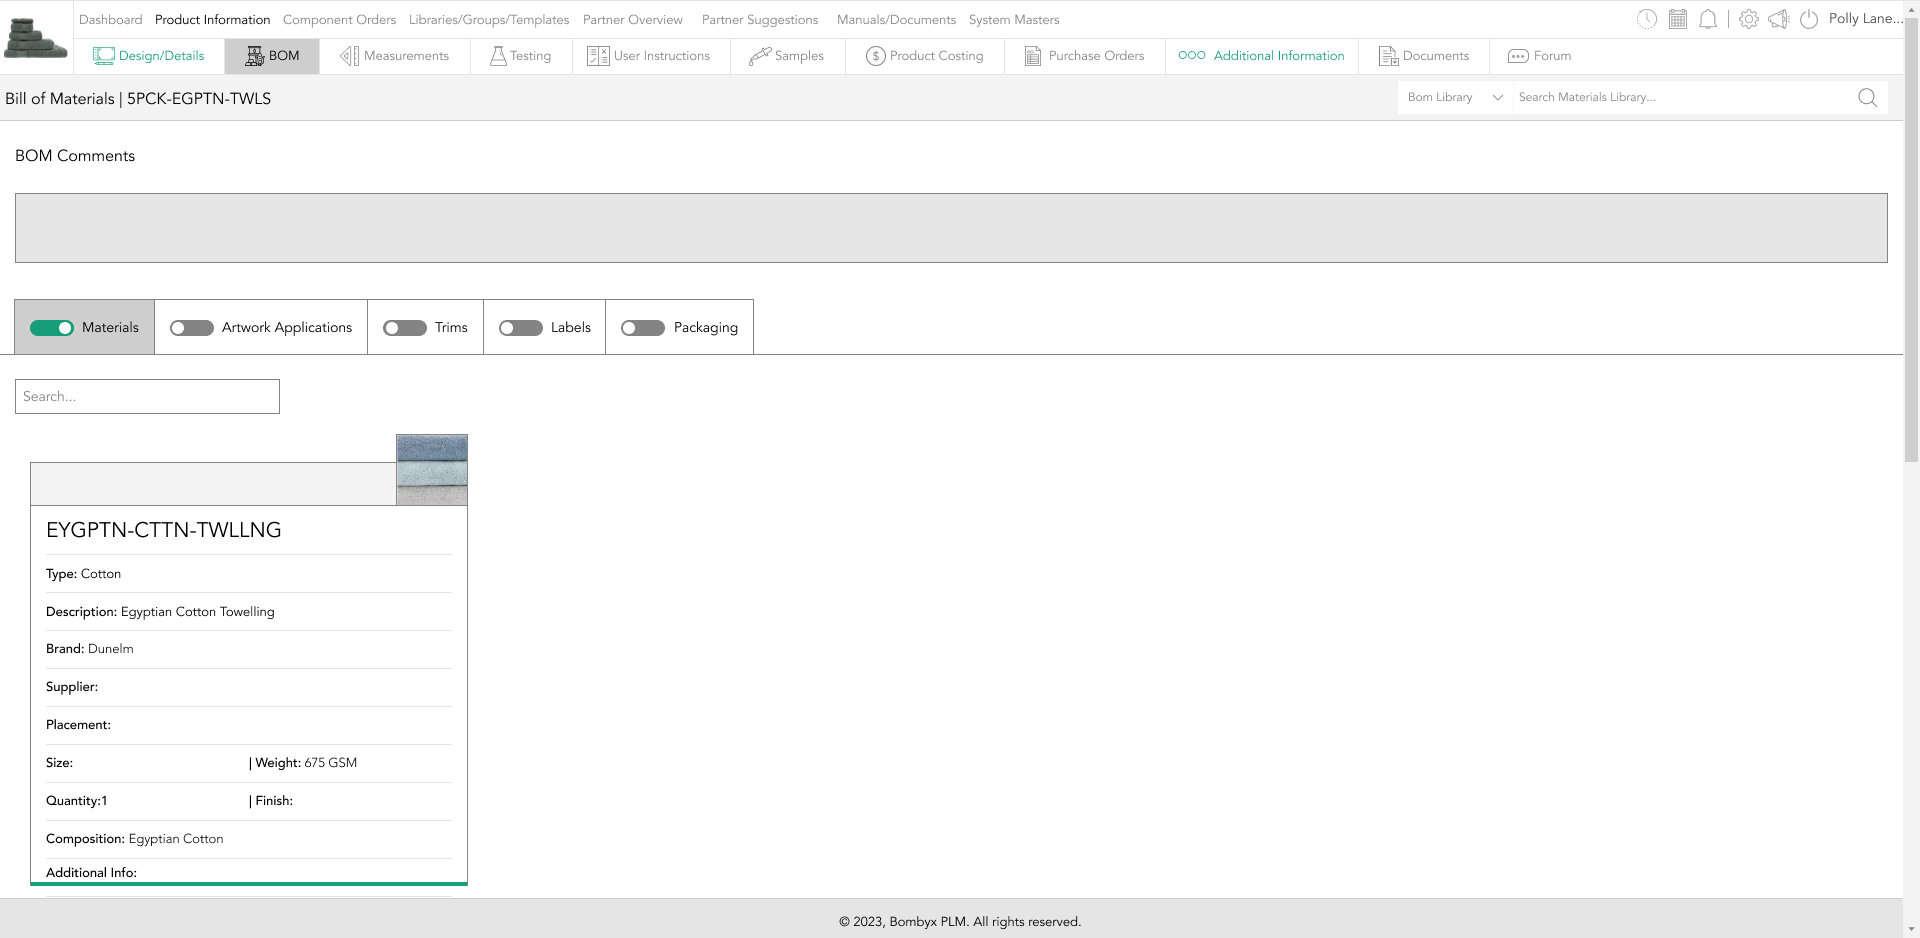
colourway & artworks
Select from the colourway & artwork dropdown the colour/artwork associated with this product, if the colour/artwork has not yet been created, you can do this by tapping the plus icon. You will need to add the colourways or artwork here in order for you to assign them to your products attributes later on in the process of the product.
product identifier
The product identifier feature is based on the core product information allocated with an individual product created on Bombyx. In short, this is where users can store all related unique product references per colourway and per size. The Industry common identifiers are known as SKU numbers or EAN/Barcode numbers.
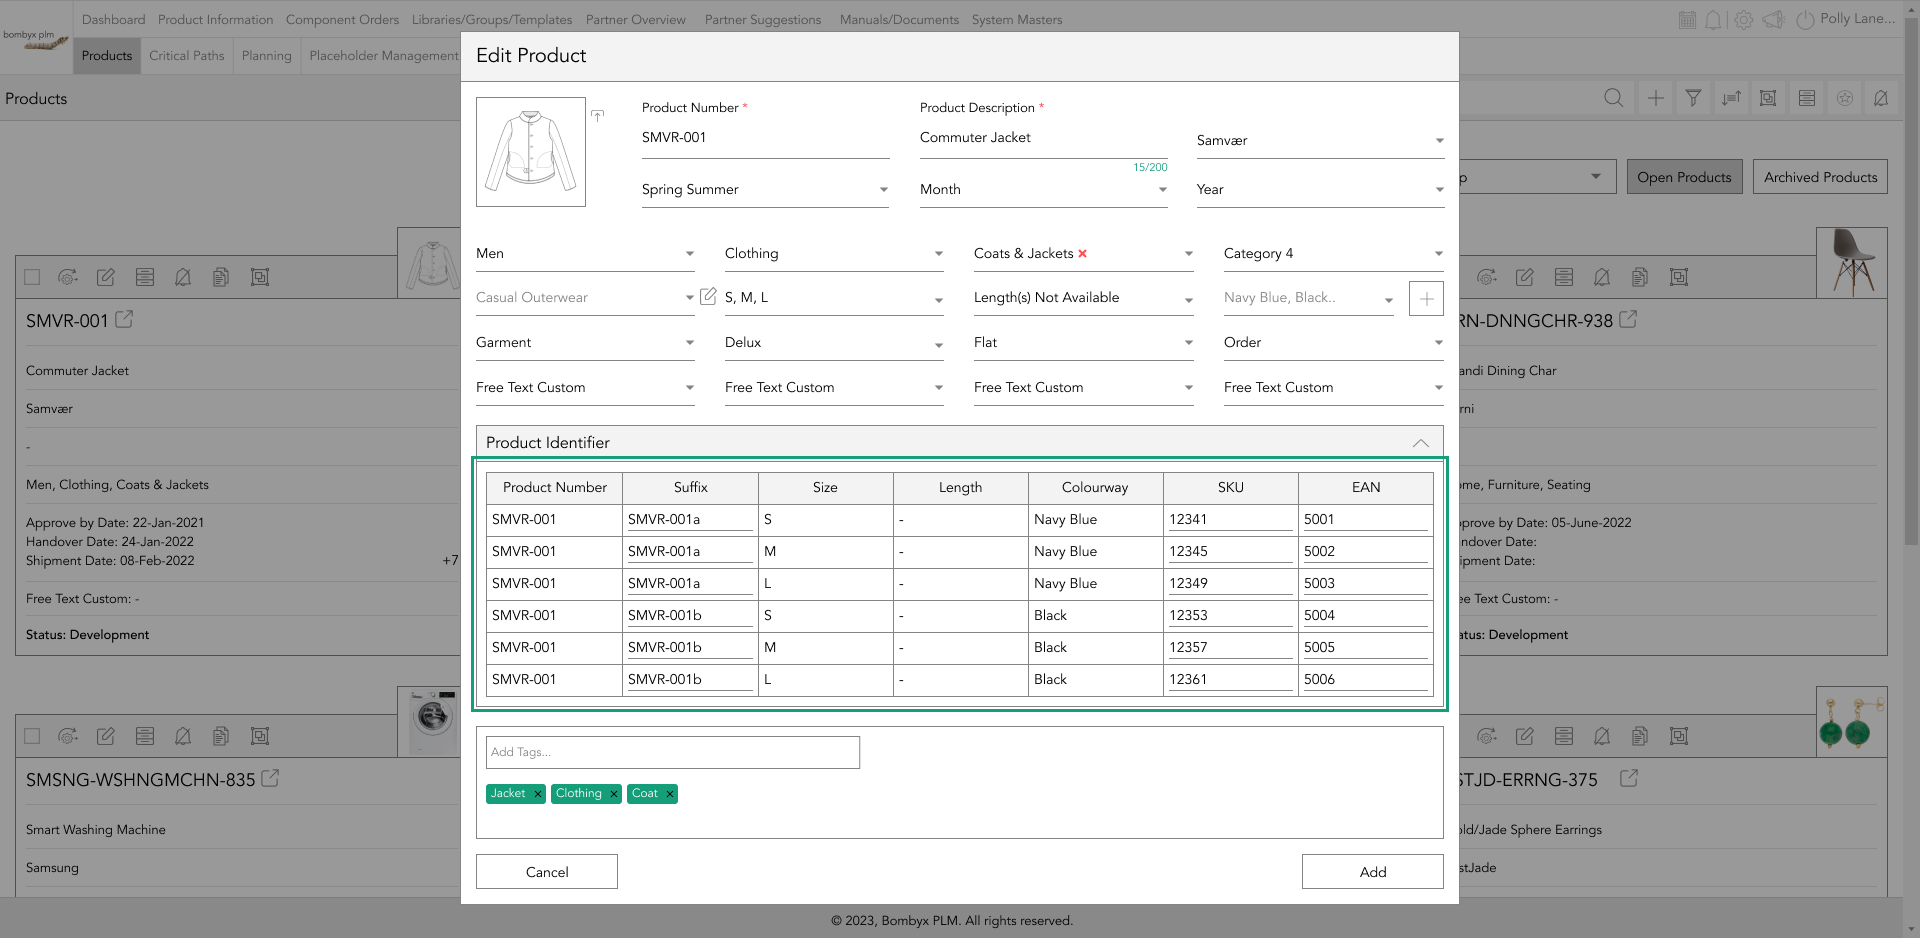
These can typically be seen on the product packaging and are used for inventory trace or track.
Their entry cells are auto-generated by Bombyx as the product is developed for users to add the data. These are also automatically added to the Range Plan, and vice versa, and can also be updated in the product information directly from the Range Plan.
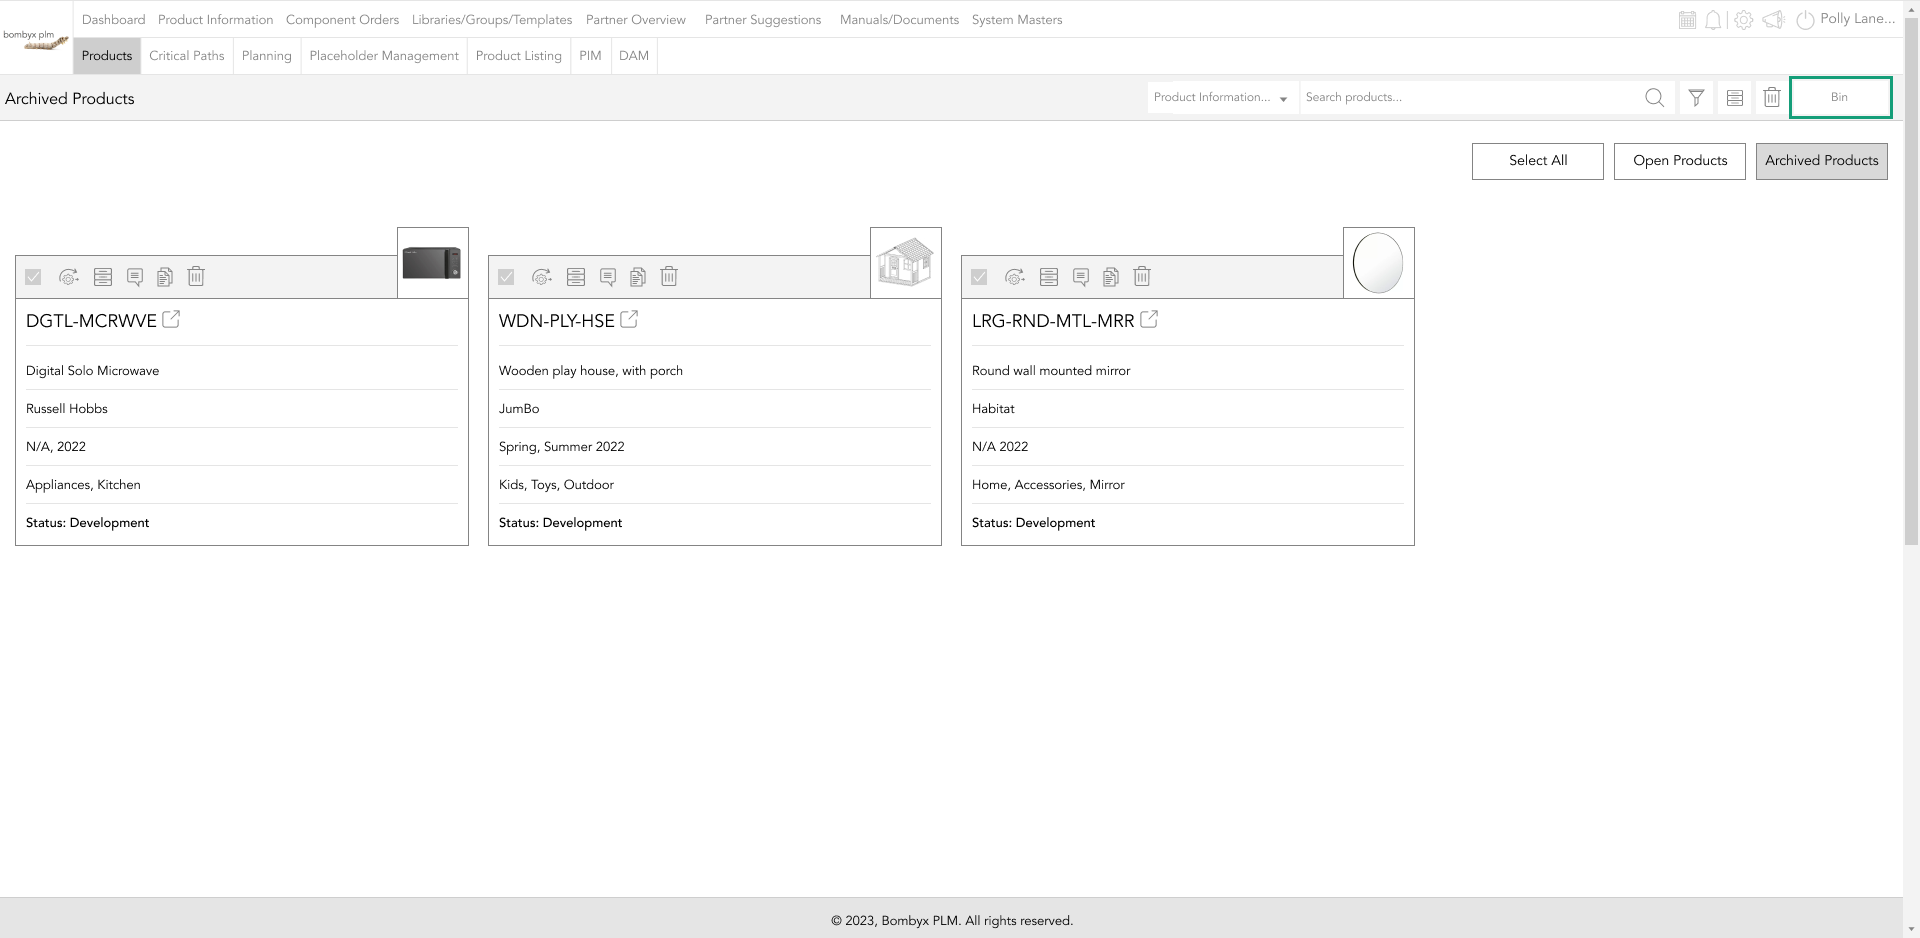
entering the archived page
Tap the Archived Products button to be able to access the products that have been archived.
Here is where you can view, unarchive, and delete product data packs.
completion indicator
To view the completion indicator tap on the completion icon, now you view where in the process the product has been completed or is still in the process of completion, indicated by the colour of the attribute.
Once pressed the completion indicator card will appear, with colour-coded attributes referencing how far along in the process the product is.
by tapping on the attribute title, you can enter that area of the products portfolio, this is only viewable, this can not be edited unless unarchived back into open products.
unarchiving products
If you want to unarchive a product, tap the unarchive icon.

This will bring a popup, the same as when you archive a product, you can leave a comment for the reasoning for unarchiving, and tap yes to continue.
To unarchive multiple products, tap the checkbox of each product you wish to unarchive and navigate your way to the unarchive icon that is located next to the search bar.

archived product's comments
Hovering over the comment icon will reveal the comment that was entered upon archiving the product.

duplicating archived product's
If you want to duplicate the data pack of an archived product, tap the duplicate icon, Now just enter the product's name and tap save to add this data pack, back into the open products area.

deleting archived products
Deleting archived products, here will not remove the data packs from the system, deleting archived products, will move them to the bin, and delete them from the archived page only.
To single delete, an archived product, tap the delete icon on the products card.

a popup will appear the same as archiving, which allows you to leave a comment as to why you are deleting this product.
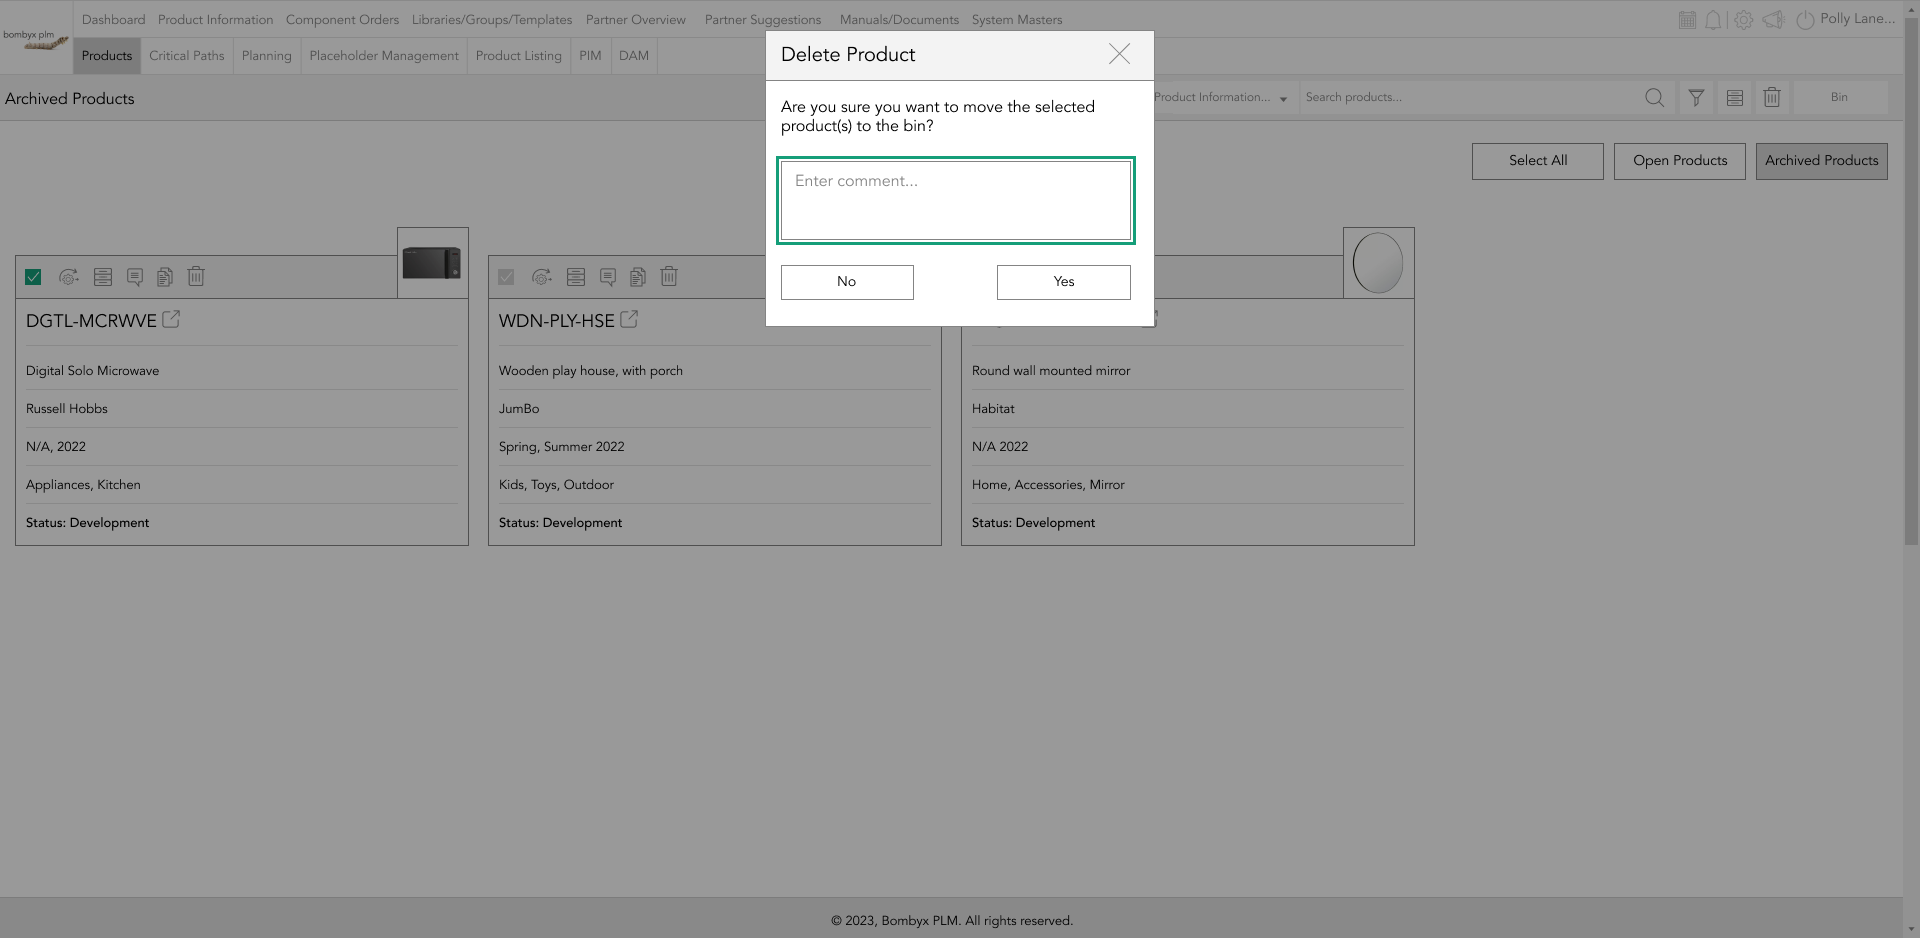
To delete multiple products to the bin, tap the checkbox of each product you want to remove and tap the delete icon that is located next to the search bar function.
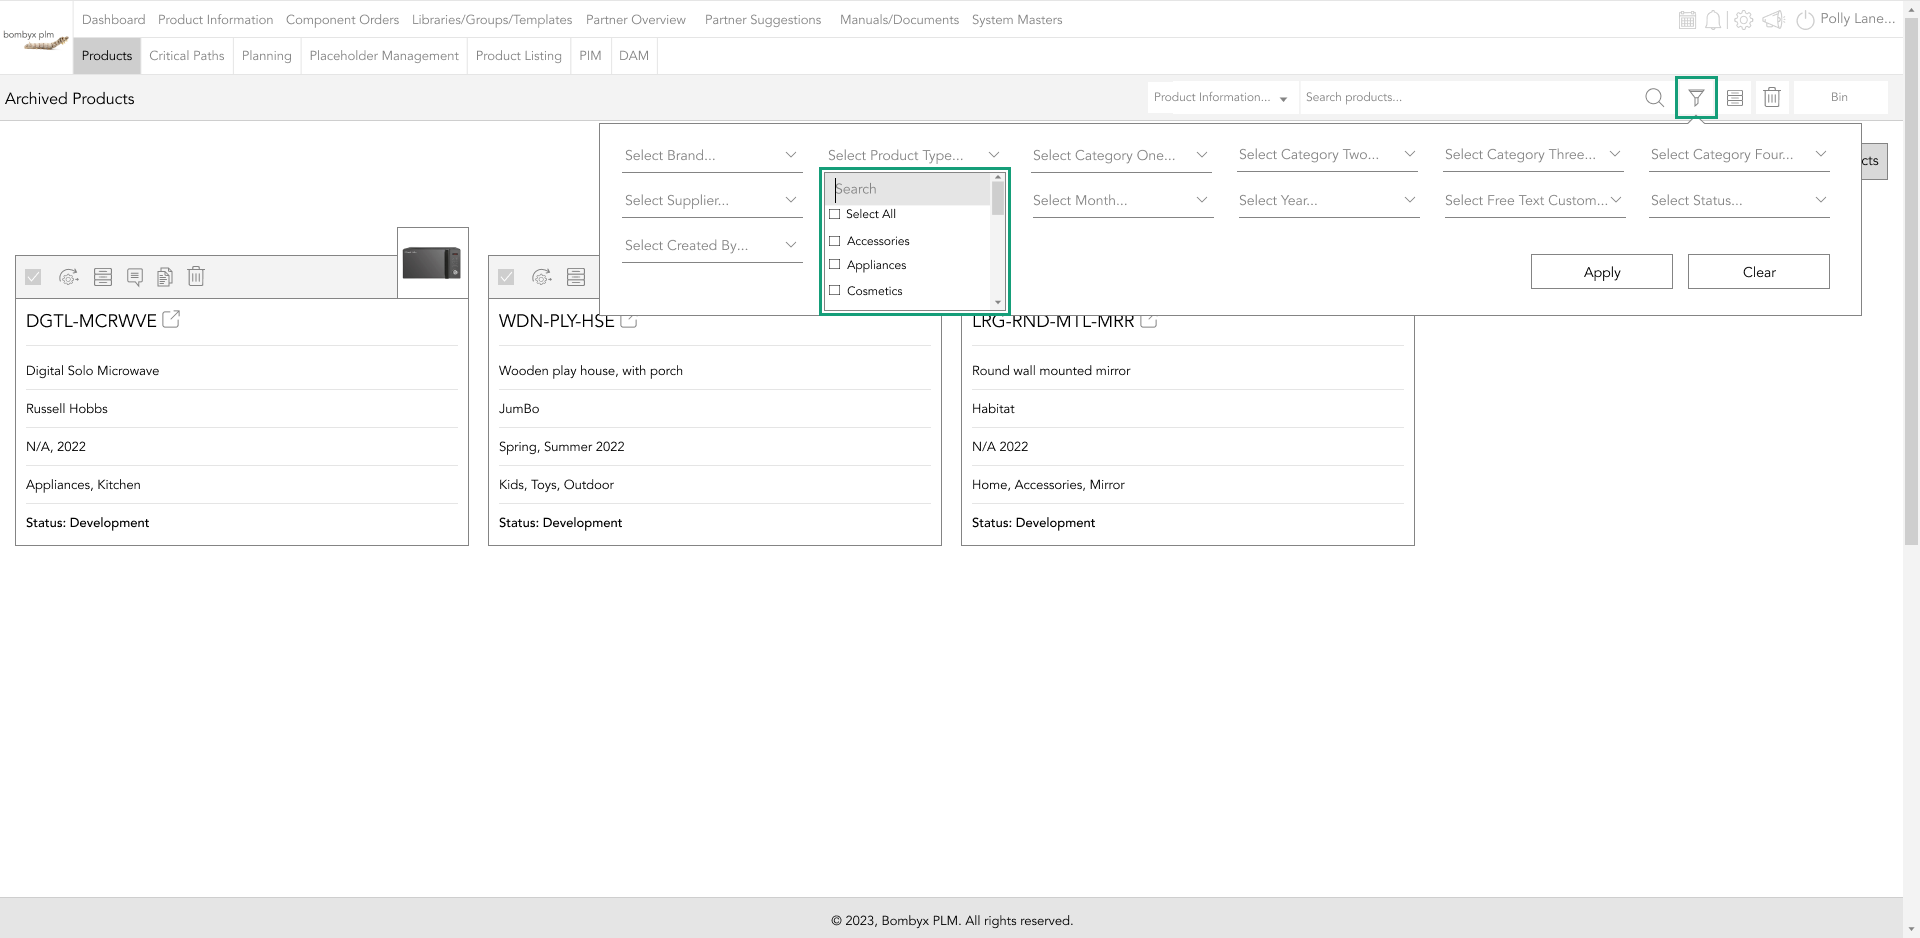
filtering archived products
To search for archived products by brand, year, categories, and so on, tap the filter icon and select as many or as few attributes, and select apply, and only them products will appear.
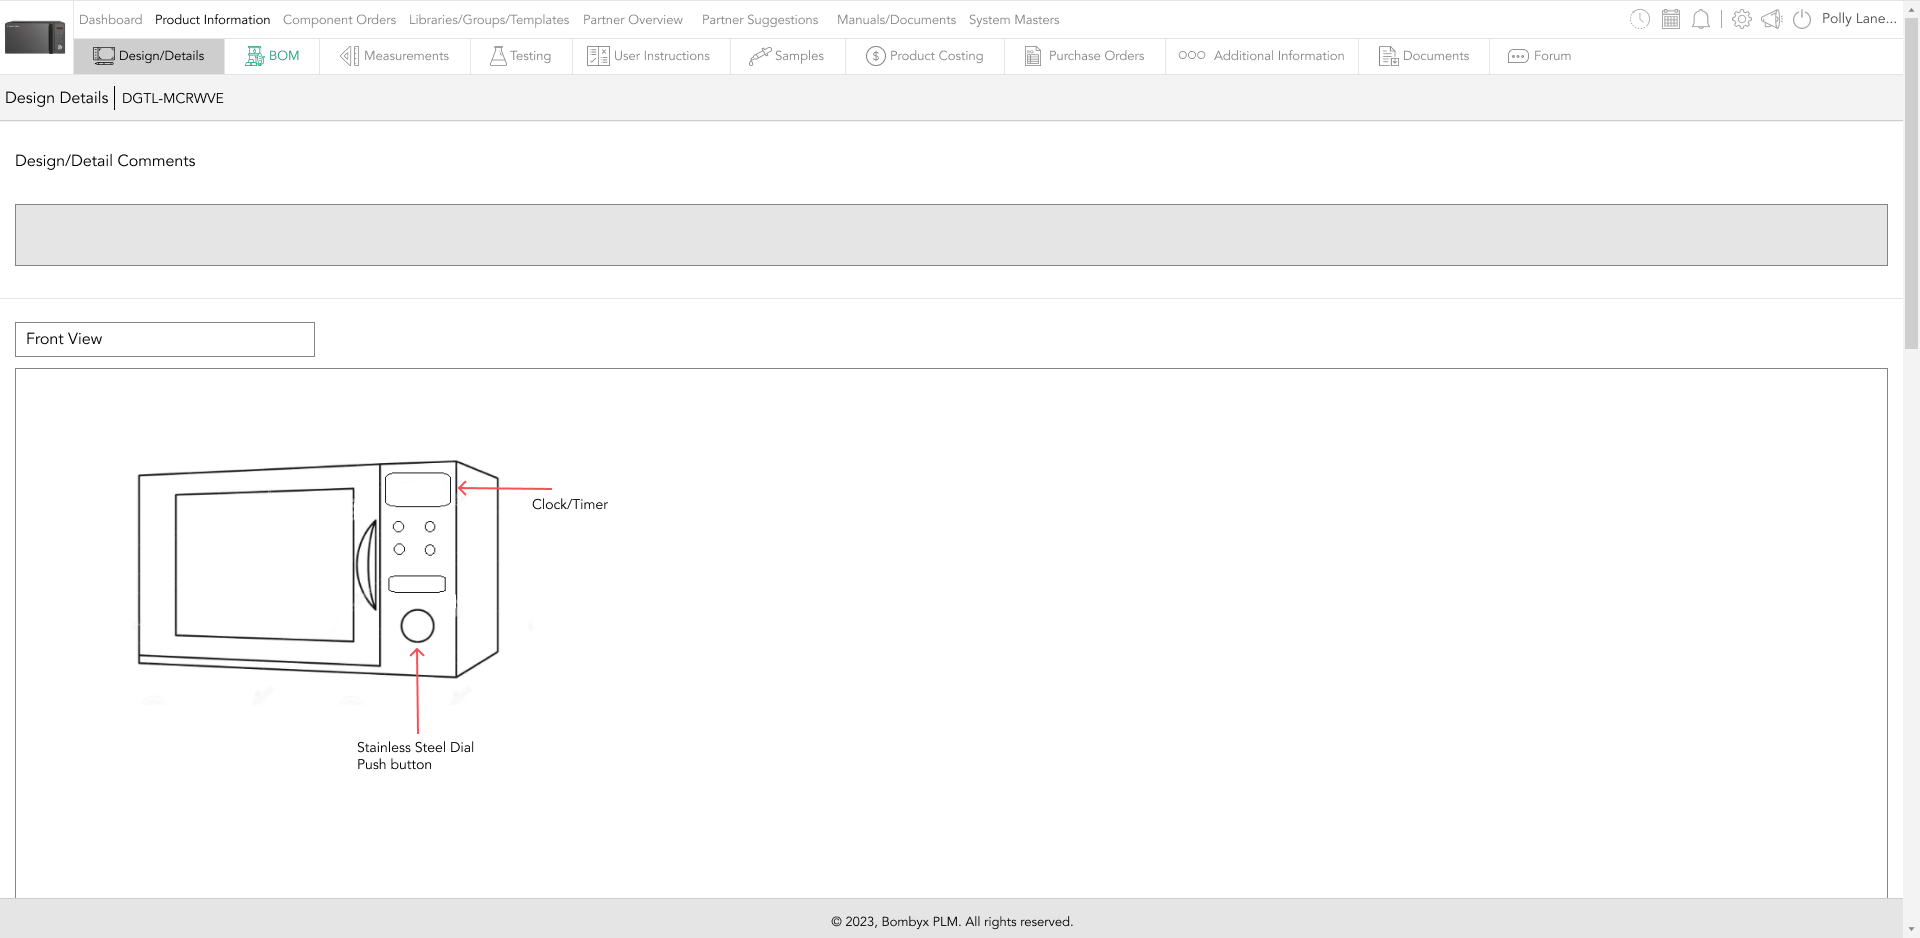
entering the product
To enter the archived product, this product will not be editable unless you unarchive this.
You will be able to view this only.
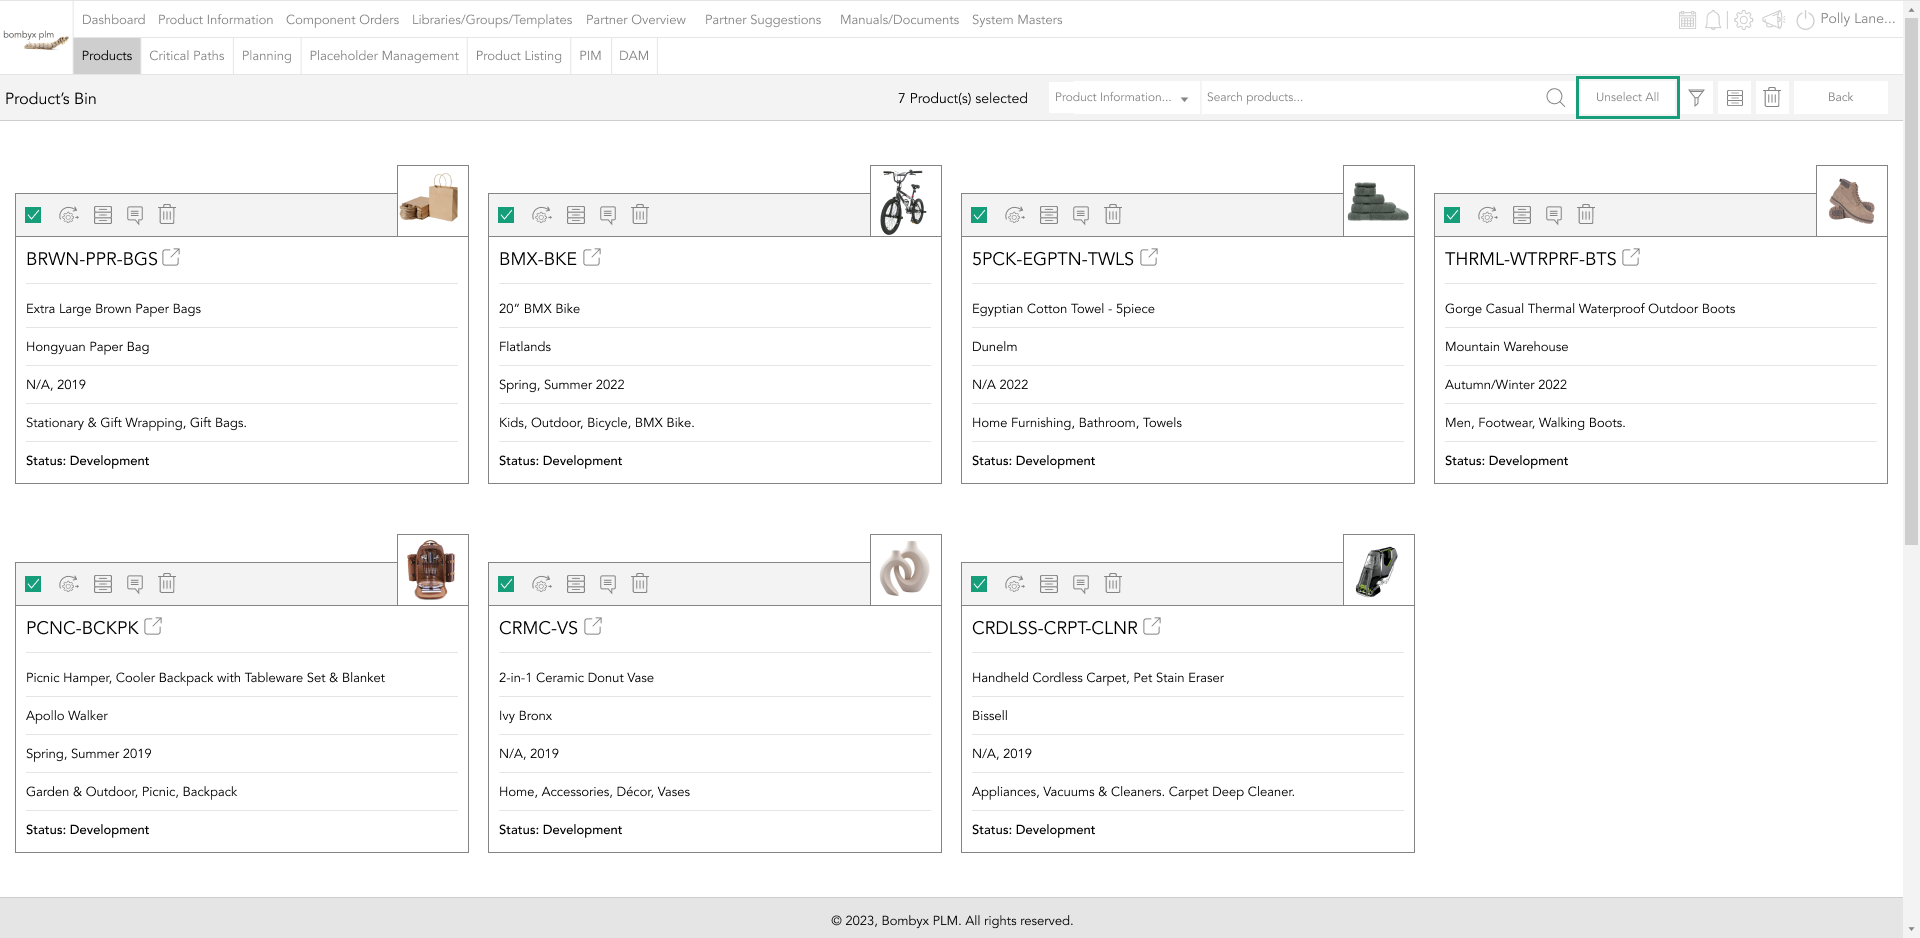
select/unselect all
By selecting all you are able to delete all the archived products selected, unarchive them all, or untick the data packs you want to keep.

You can unselect all by tapping the unselect all button which can be found in the same position as the select all button.
viewing products in the bin
To view the products in the bin, tap on the bin icon.
Here in the bin, you can view all product data packs that have been deleted.

Selecting the completion indicator will again take you to the popup of the product, and here you can enter the product to view only.
If you want to move a product from the bin back to the archived page, tap the archive icon, or to unarchive multiple follow the steps, from the archived section.
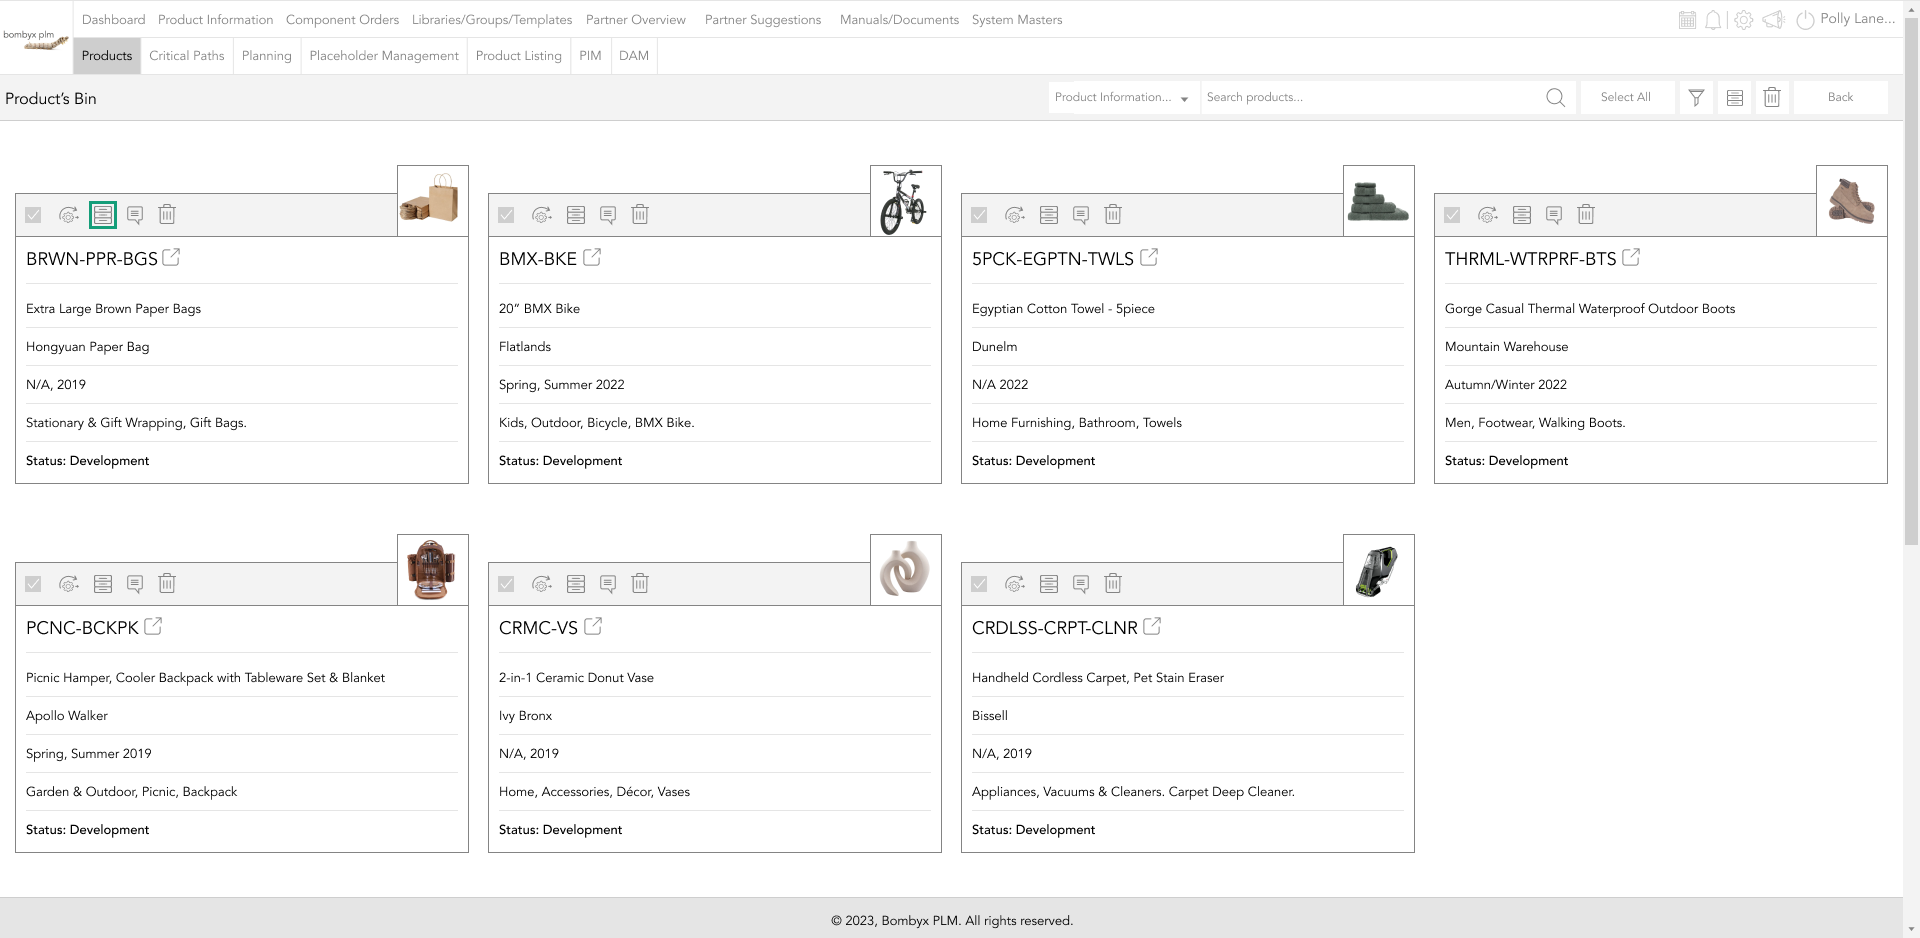
When the product was deleted from archived and moved into the bin, they had the option to leave a comment, to view that comment, hover over the comment icon.
To permanently delete product data packs from the system, tap the bin icon on the card of the selected data pack.
To permanently delete multiple packs, tap the checkbox of each card, and navigate your way to the delete icon next to the search bar.

Selecting all with you the option to delete all or archive all. To revert the select all you will need to unselect all by tapping the unselect all button positioned in the same area as the select all button.

Beyond the Label: Diving into the Sustainable Story with Digital Product Passports
Consumers today are increasingly concerned about the environmental and social impact of their purchases. From the food they eat.
Bombyx’s AI Integration: Advancing Business Excellence in PLM, PIM, and DAM Systems
Let's delve into the exciting realm of Artificial Intelligence (AI) undergoing a transformative evolution. As we Enter the year 2024.

Beyond Baubles: A Stylish Dive into Christmas Fashion Trends.
e explore the latest Christmas fashion trends, with a focus on achieving a harmonious balance between sophistication and comfort. From luxurious velvets to cosy knits

Streamlining Winter Fashion with PLM: Managing Seasonal Changes
Winter fashion production demands meticulous planning and execution. PLM serves as a guiding force in production management, aiding in resource allocation, scheduling

Christmas Experience through Digital Transformation
During the Autumn/Winter months in Europe and the USA, are marked by heightened activity. The festive season introduces an atmosphere of joy and unity. Amidst the era of digital in
Demanding Trends & The Transformative Power of Product Lifecycle Management
Explore how strategic Product Lifecycle Management (PLM) empowers fashion to navigate trends sustainably. This post delves into the symbiosis of trends and sustainability,
The Power of Product Information Management (PIM) With a PLM System.
In today's fast-paced business environment, effective product information management is crucial for success. Product Information Management (PIM) is a powerful tool.
Fashion and the Power of Product Lifecycle Management
In recent years, the fashion industry has witnessed a surge in fashion, a phenomenon characterised by the rapid production and consumption of inexpensive clothing... and a whole l

Supply Chain Management has Forever Changed
Brands make use of product lifecycle data analysis to help them work out price points, marketing and advertising strategies, packaging, growth and expansion… and a whole lot more