
navigating to testing in a product
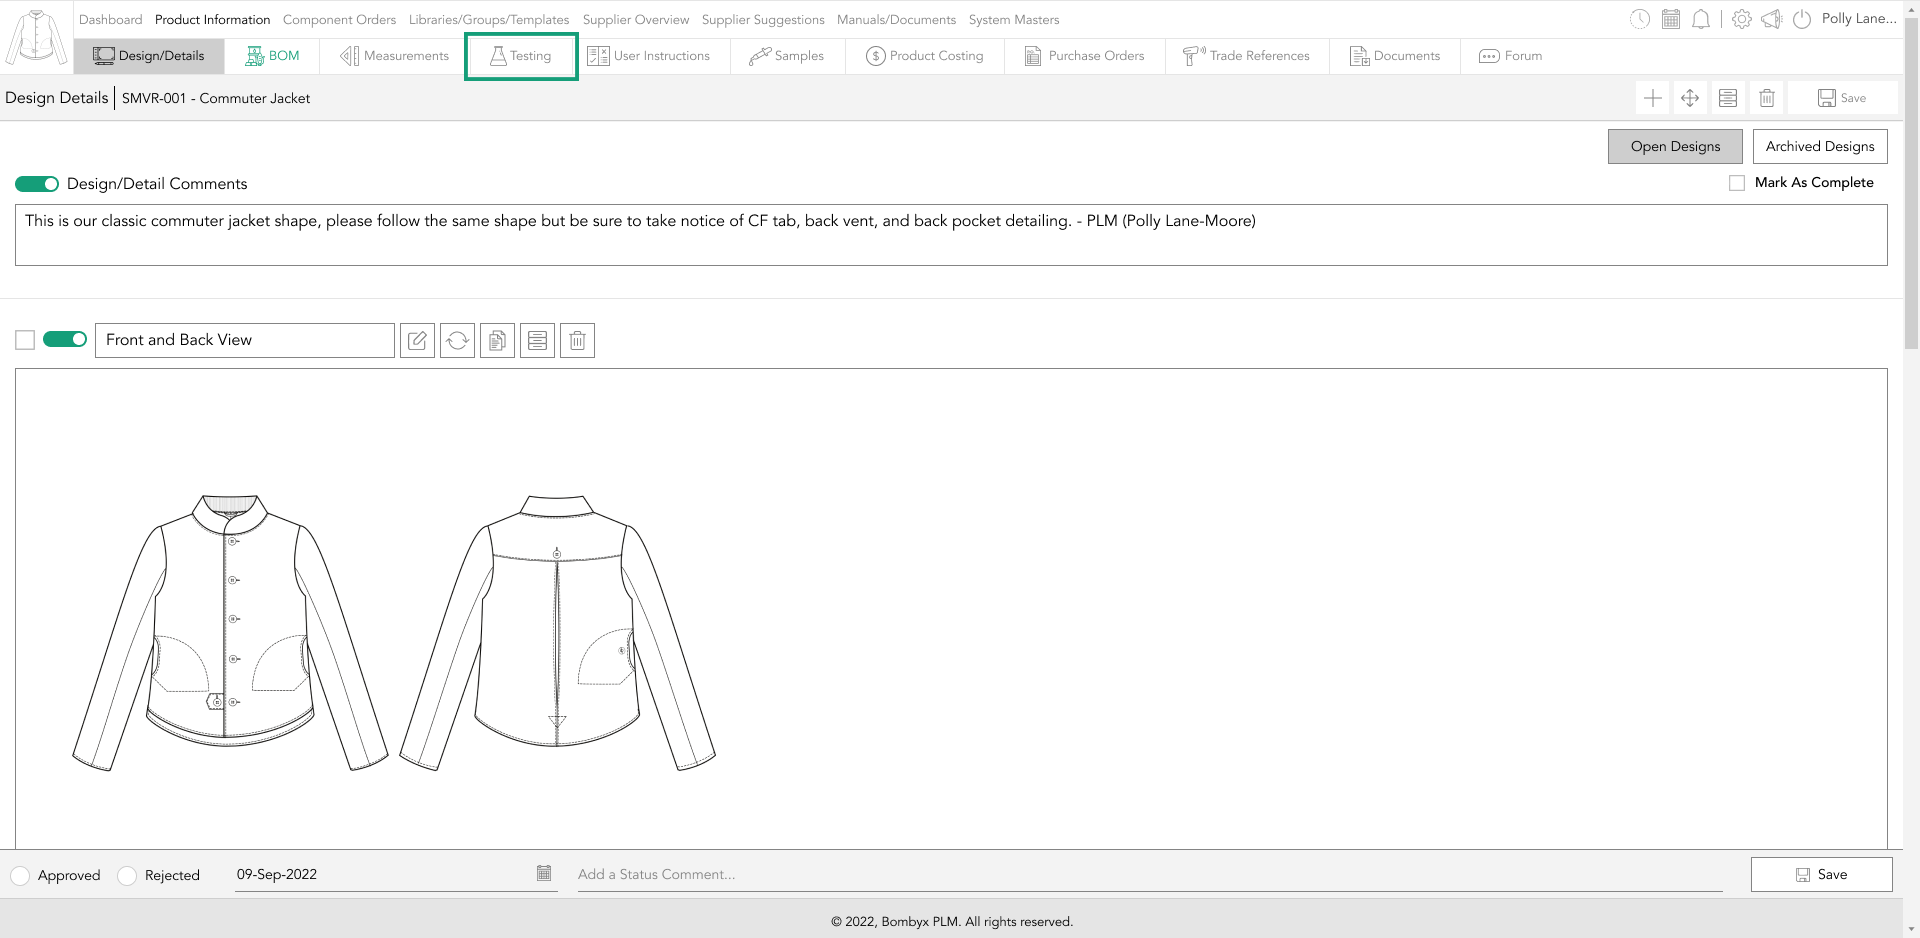
Firstly, navigate to 'Product Information where all your products will be located.

and select the product in which you wish to add your testing too.
If you’re yet to add a product, head over to ‘adding a product’ to learn how to add your product.
Once in the product, in the top grey bar, tap on the testing tab, this will take you to the testing section.
toggles
Toggles are for when you want something to be visible or not to external stakeholders and PDF’s.
The default mode for a toggle switch is off. To turn it on, just tap the toggle and it’ll turn to green indicating that it is switched on.
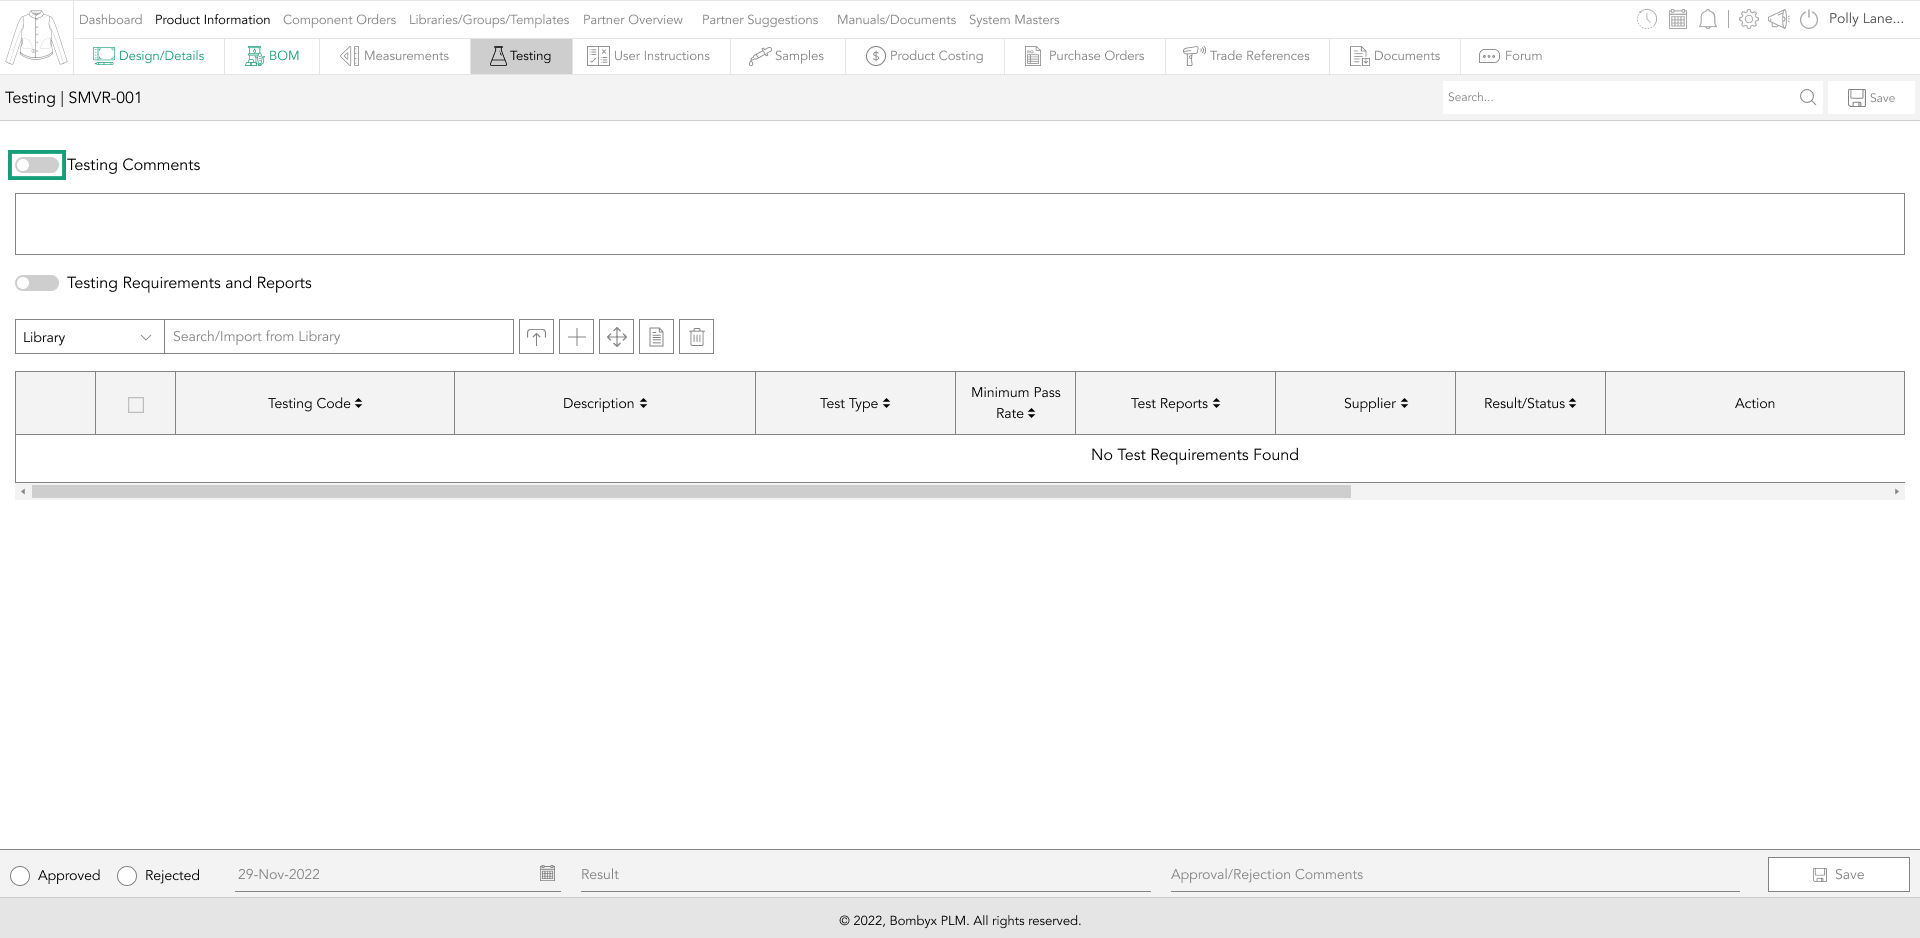
By switching it on, you’re allowing your integrated suppliers to see information in this section, as well as the information, that is visible in the documentation that is submitted to a supplier or downloaded.
testing comments
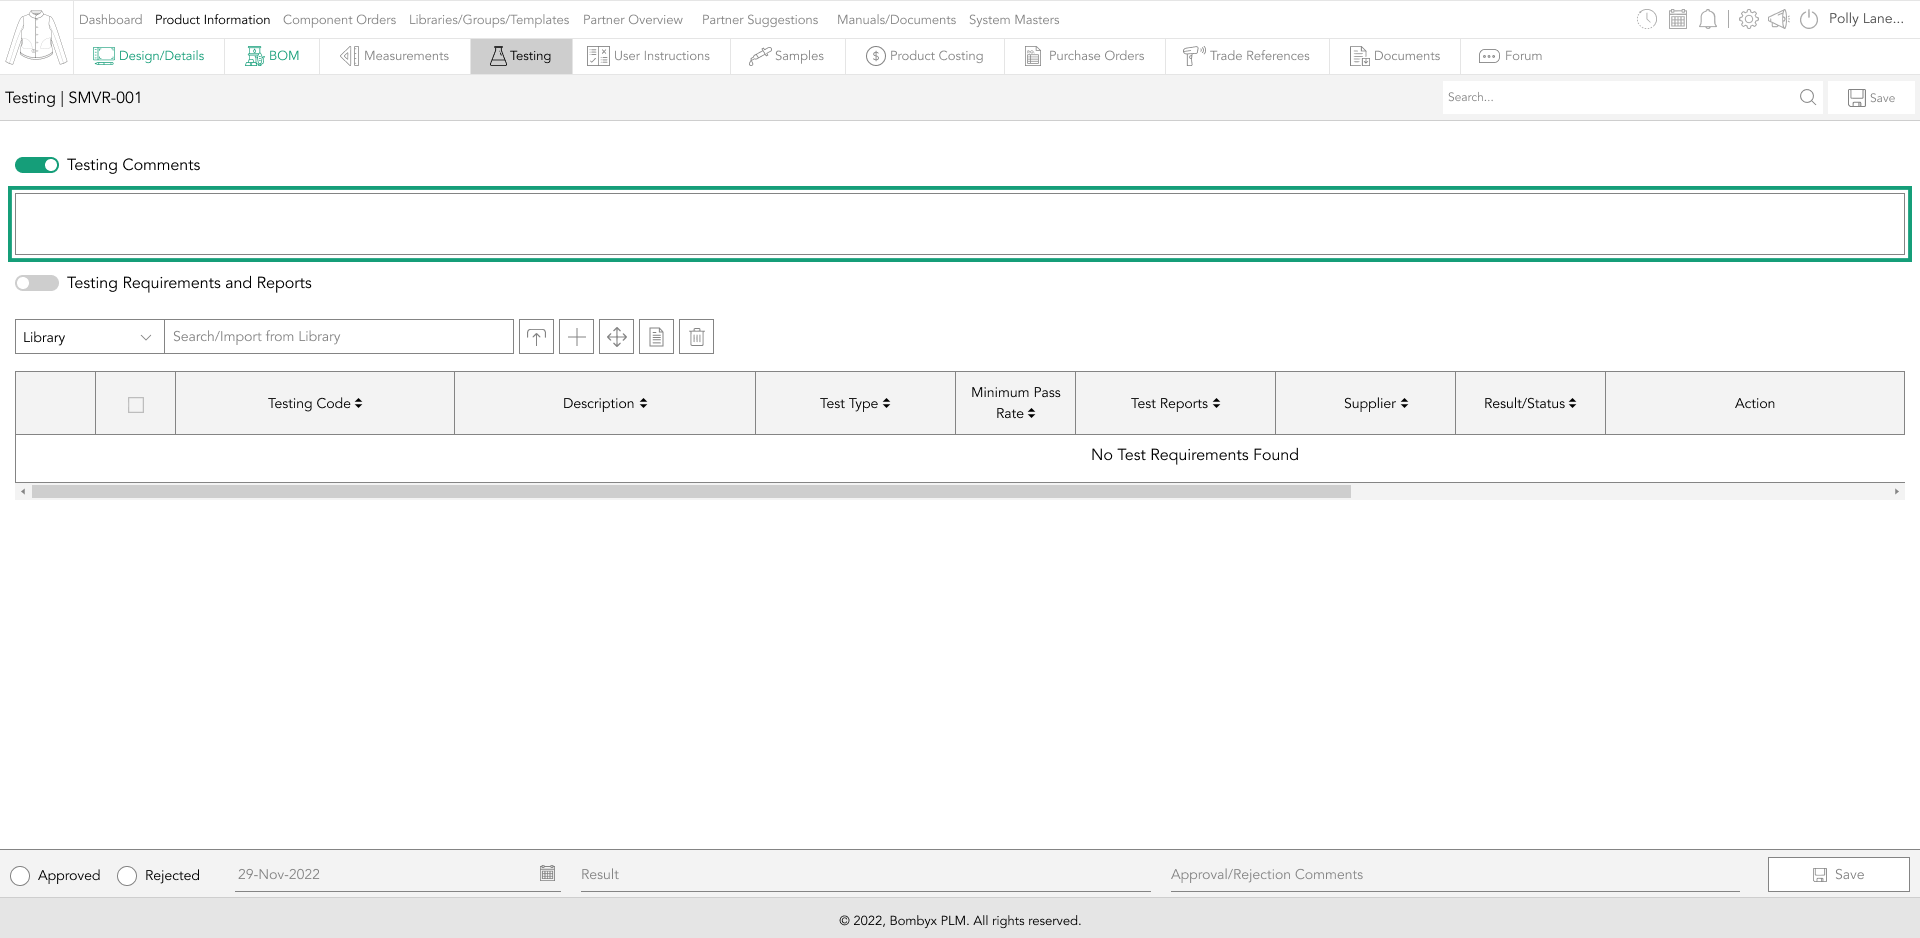
At the top of the page is a space for general comments you wish to share with your collaborators, whether that be your internal team or supply chain. All you have to do to make it visible outside of your organisation is to turn the toggle on, and your team and suppliers will also be able to see those comments.
import testing requirements and reports from the library
Import is a simple function, all you have to do is to start typing the Test code/description in the search bar, and Bombyx will start to filter through the Test Reports within the library for you.
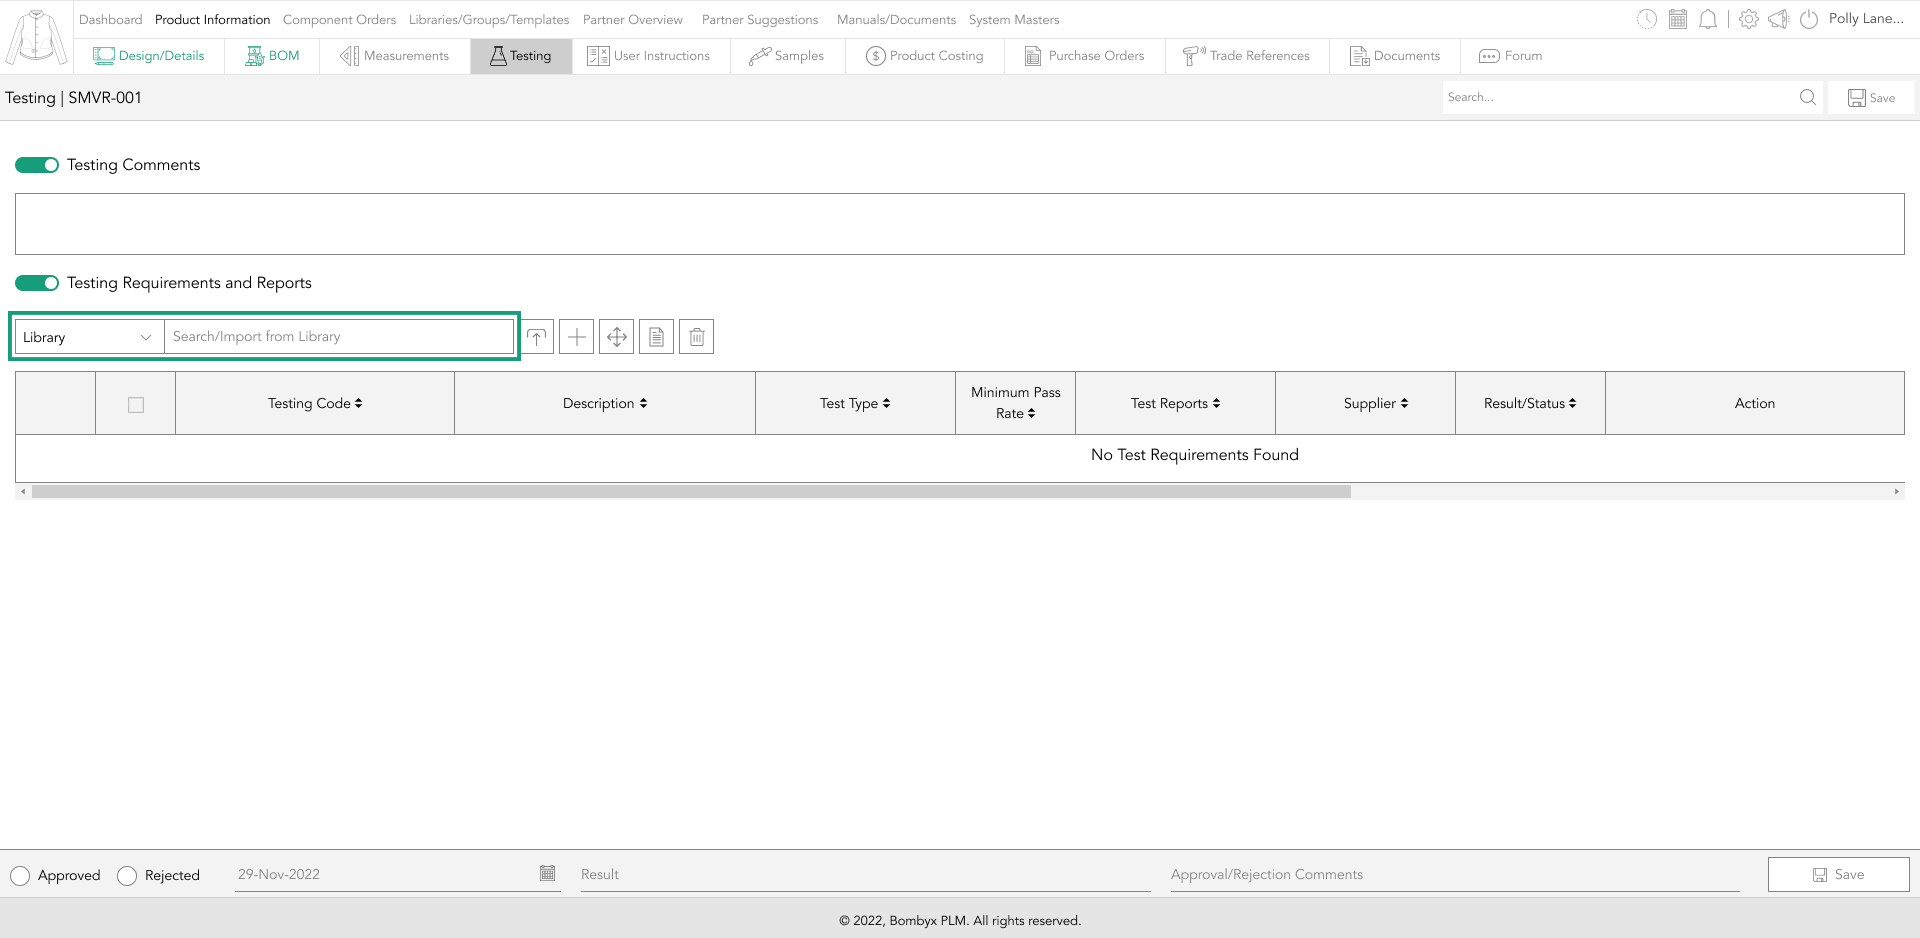
Once the required Test requirements appear in your search results, tap the item to import it
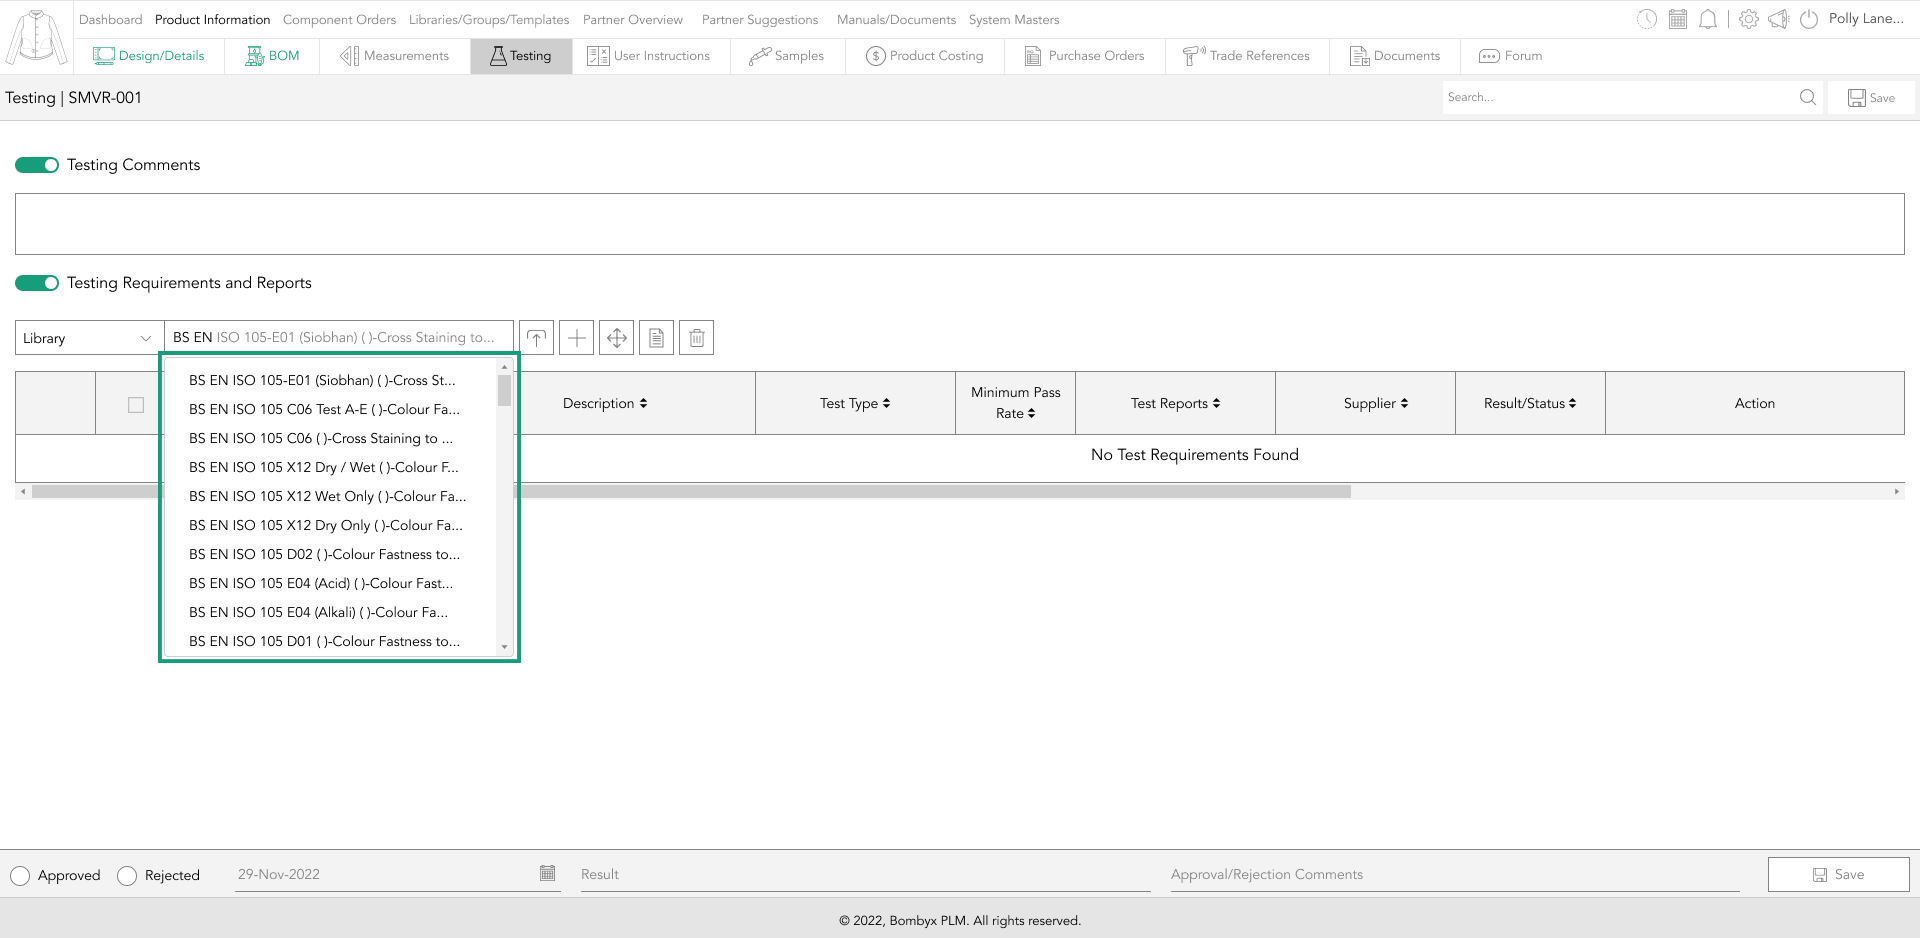 .
.
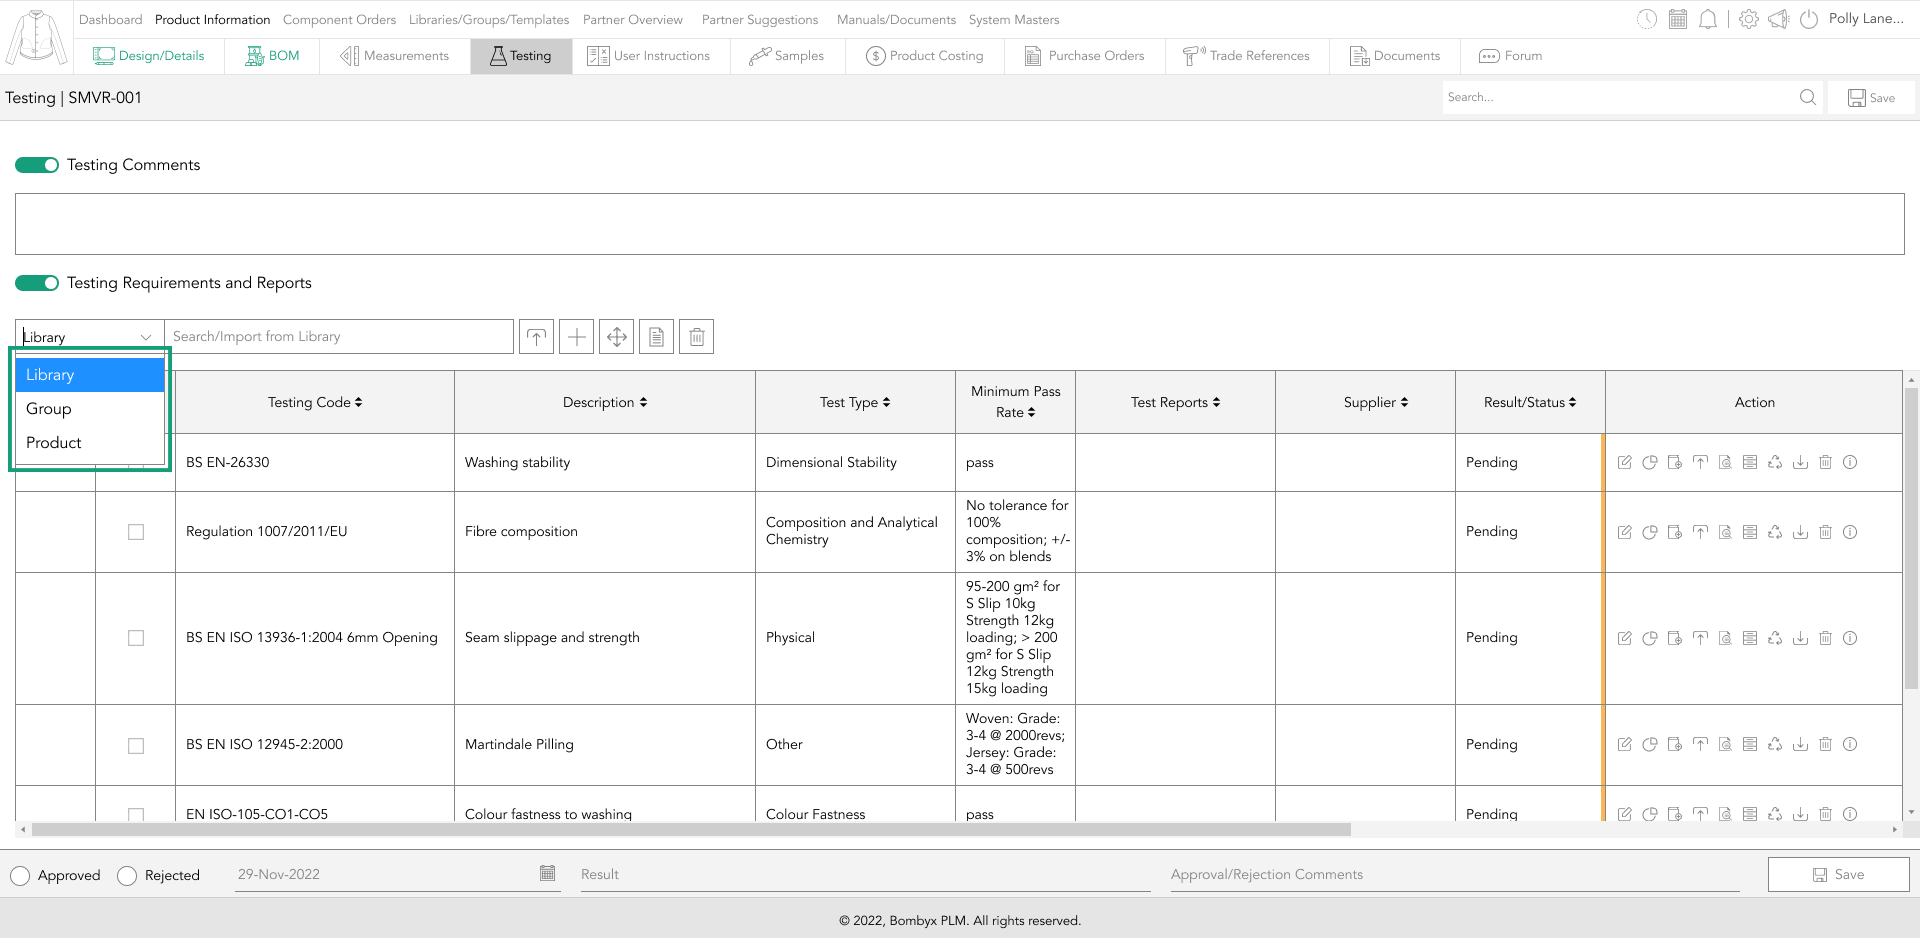
adding a test requirement
How you import your testing requirements, varies slightly on the location you wish to import your requirement from. The locations are; the testing library, testing groups, and the testing requirements of previously created products. The library is the default selection, meaning the item you’re importing comes from the library.
Selecting ‘product’ from the dropdown will drop in the Test reports already imported in another product. Once you’ve selected a product from the dropdown, another dropdown will appear in which you can then search for a product number/description, and as you type Bombyx will start to filter out the results based on your search.
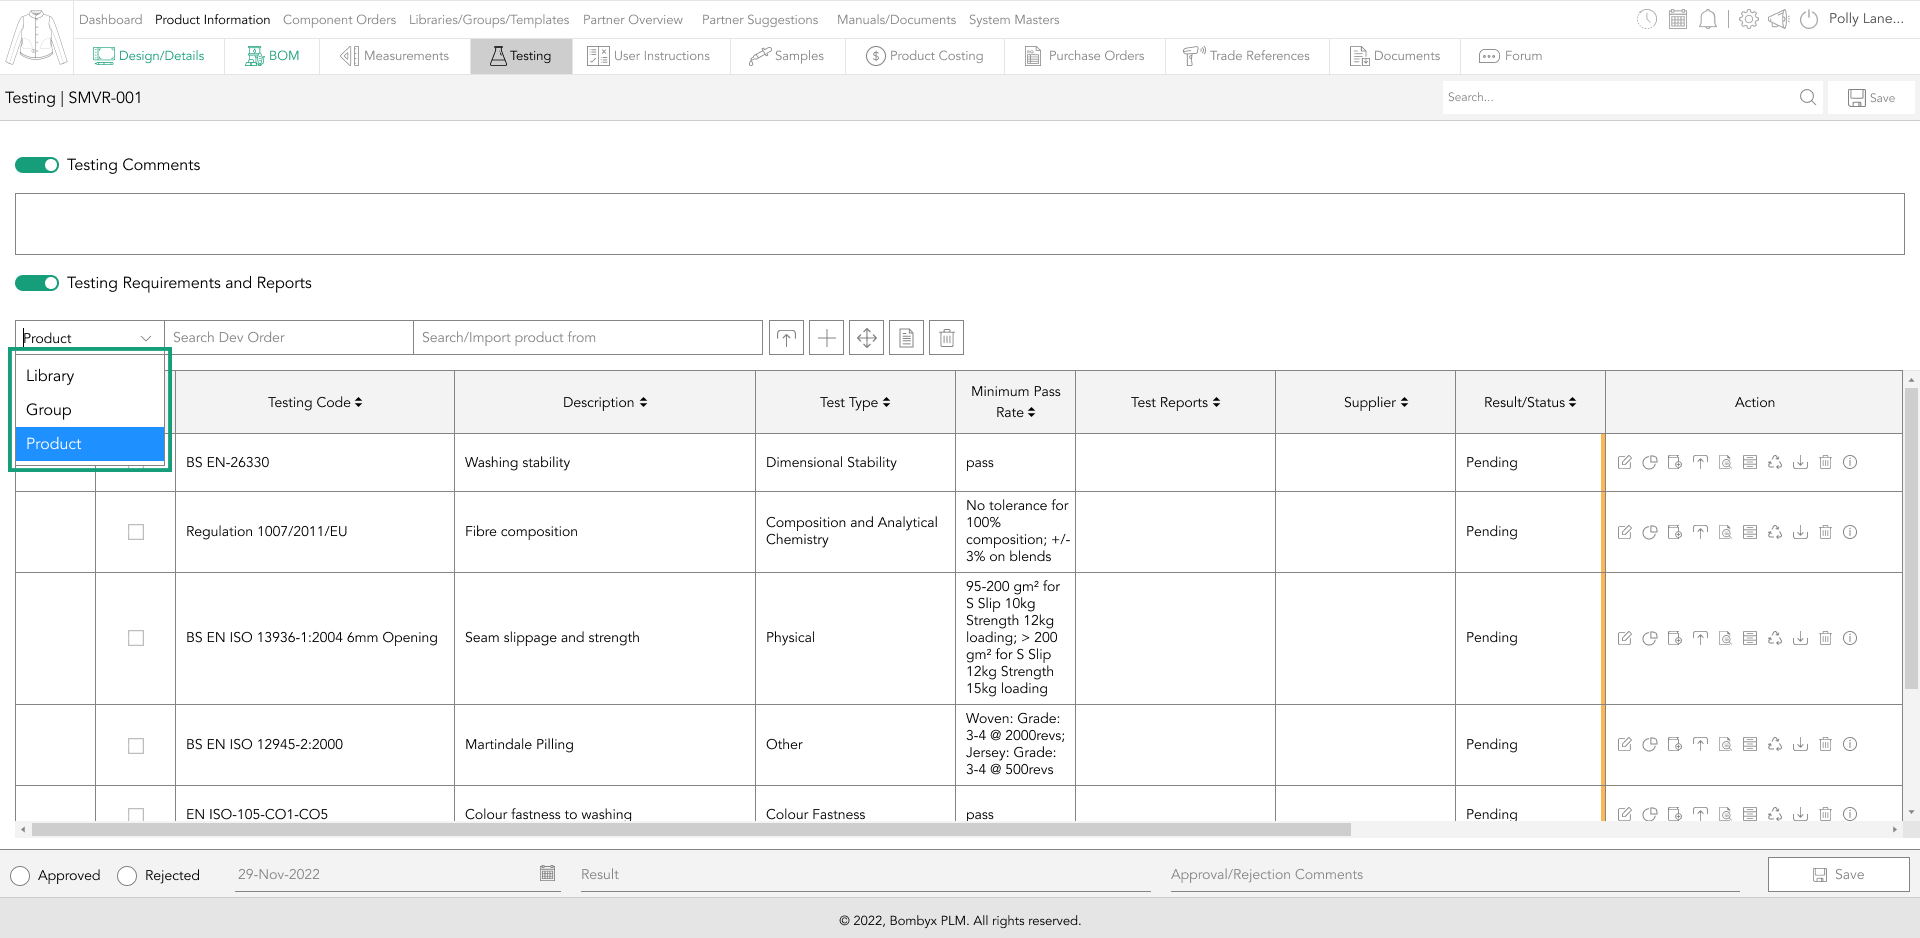
Once you’ve found the test requirements you want to bring into that specific product, tap the selection and all the items from that product will appear. Note that you can’t bring in a Test report from a different brand or category when importing a product. For example, If your brand for the previous product is Adidas, and your new product is Nike, the drop-down will only show Nike products. This rule applies in the same way to categories.
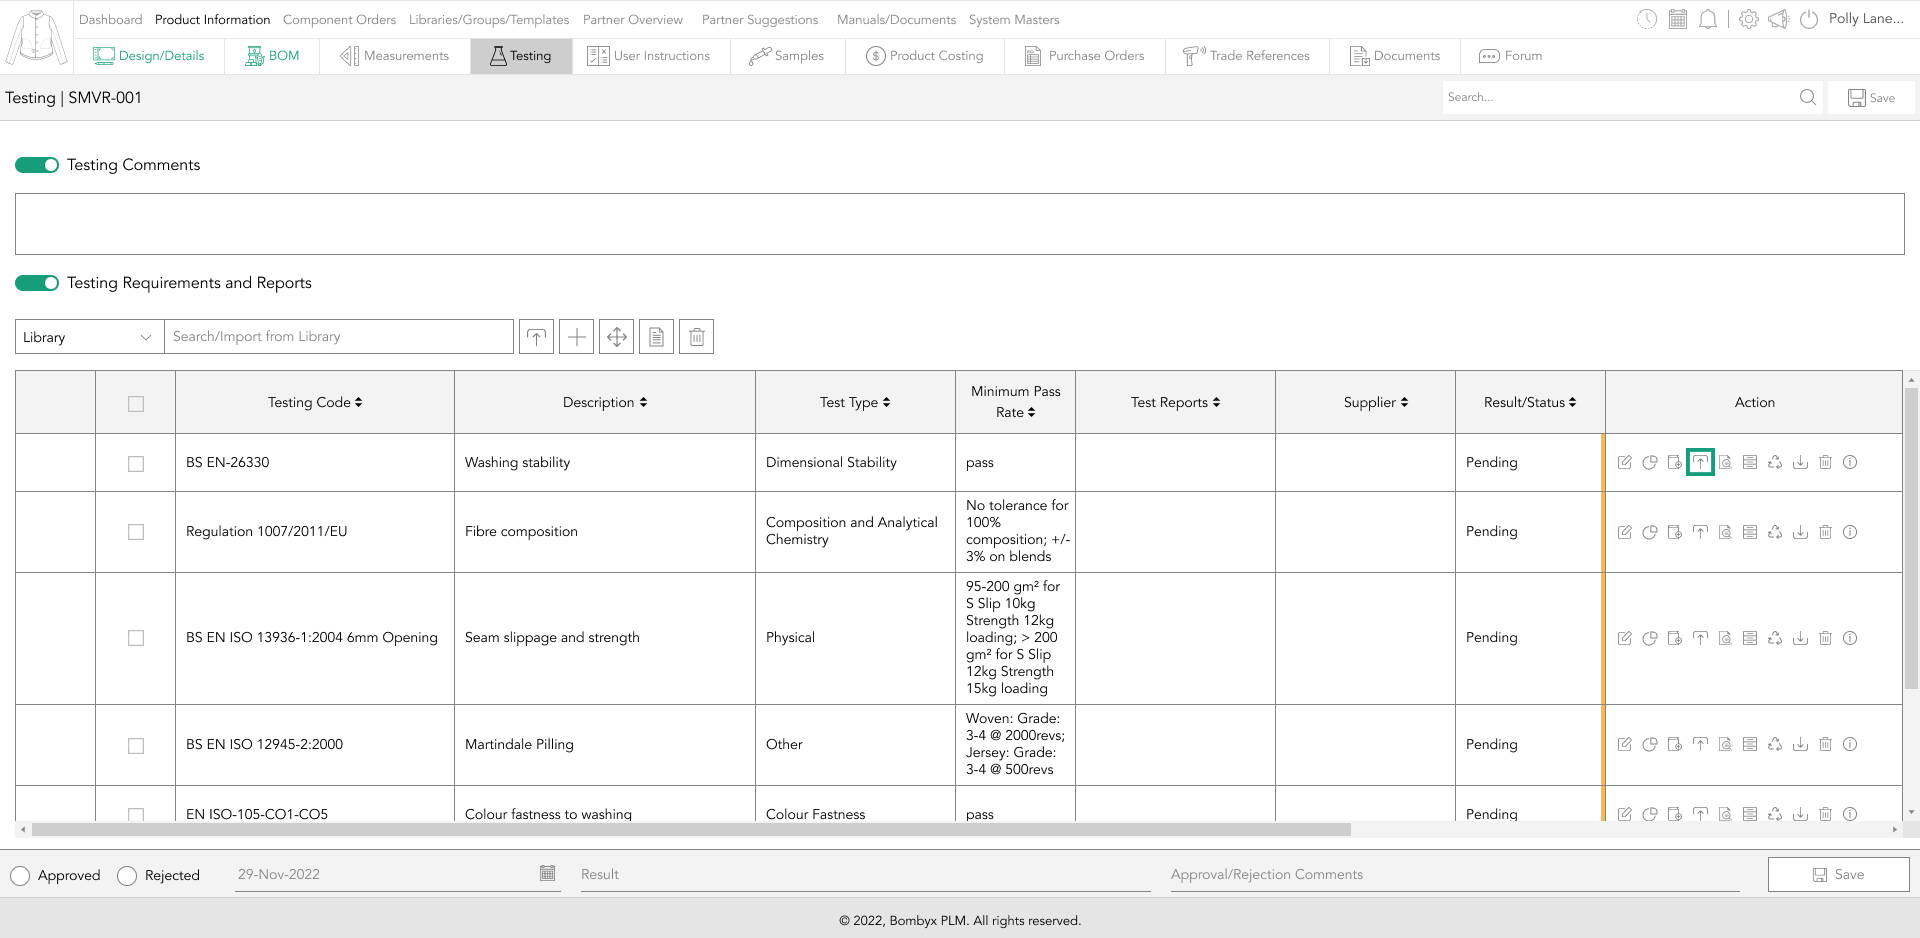
uploading a test report
There are two ways of uploading test reports, and that’s one-by-one, or multiple at once.
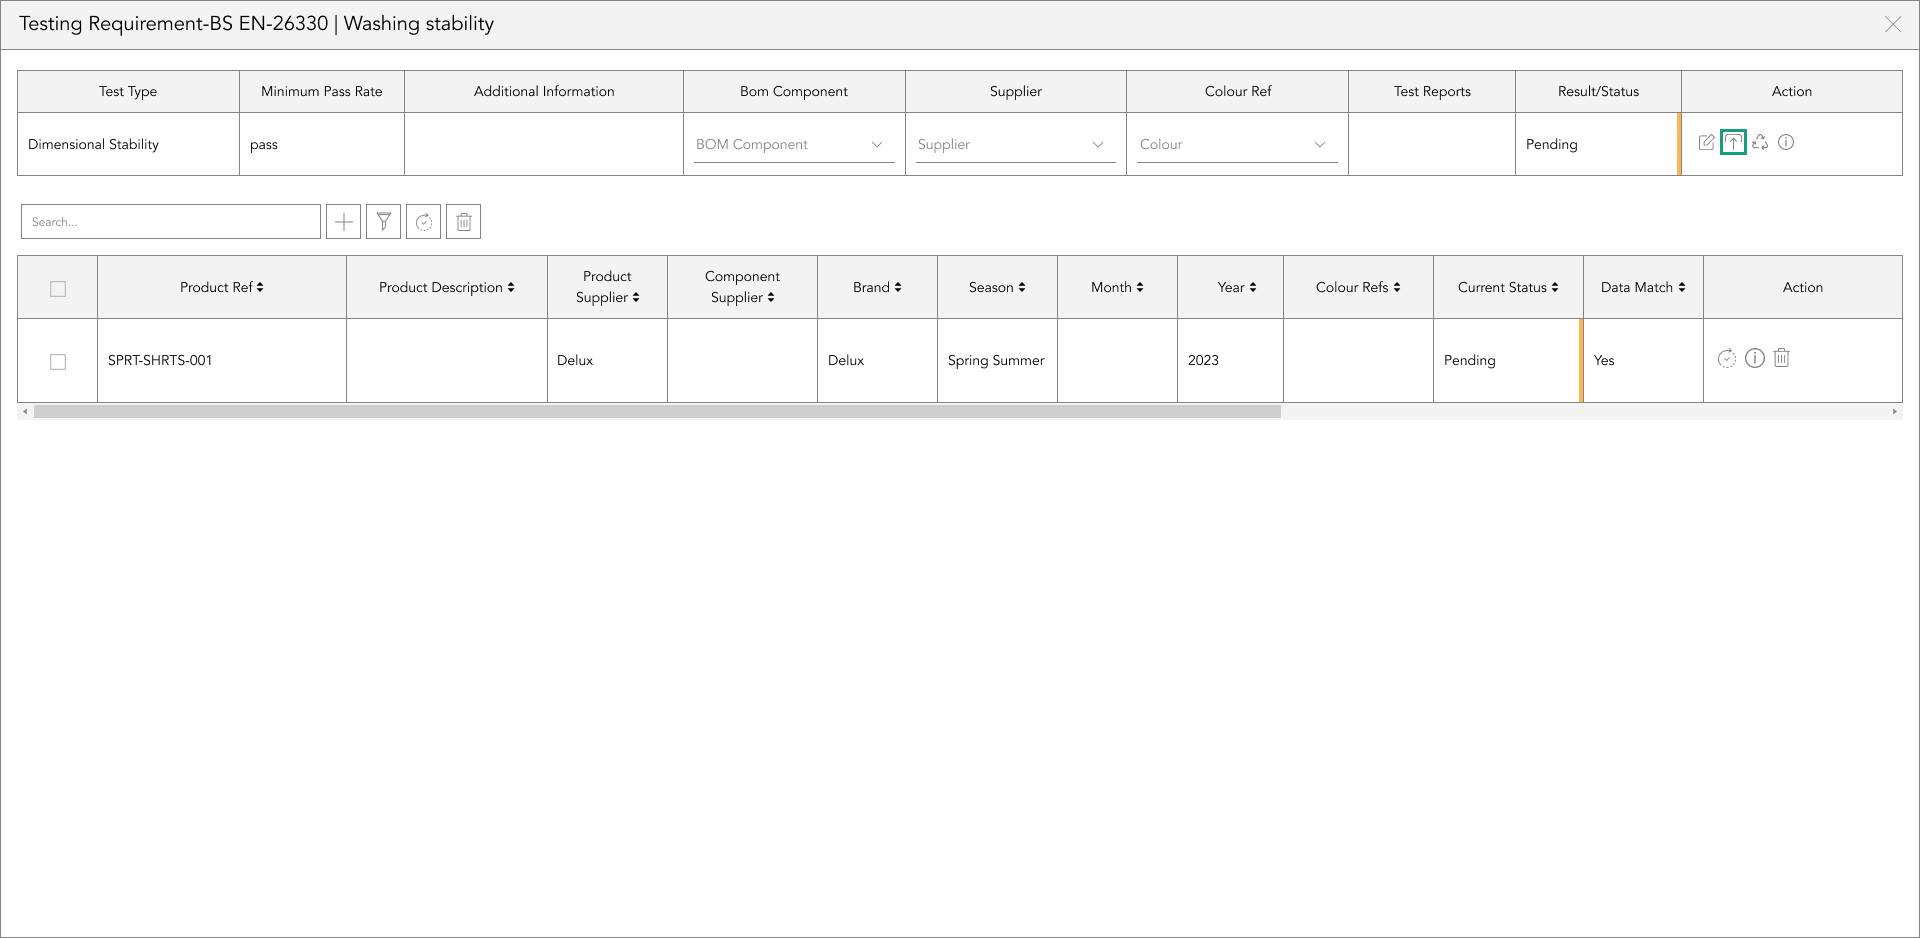
To upload a single report, on the far right-hand side of the testing requirement rows, there is an
Action column, locate the ‘upload’ icon, and tap it to upload the test report for this testing requirement.
A popup will appear where you can either drag and drop your report into the grey box or click on the upload icon.
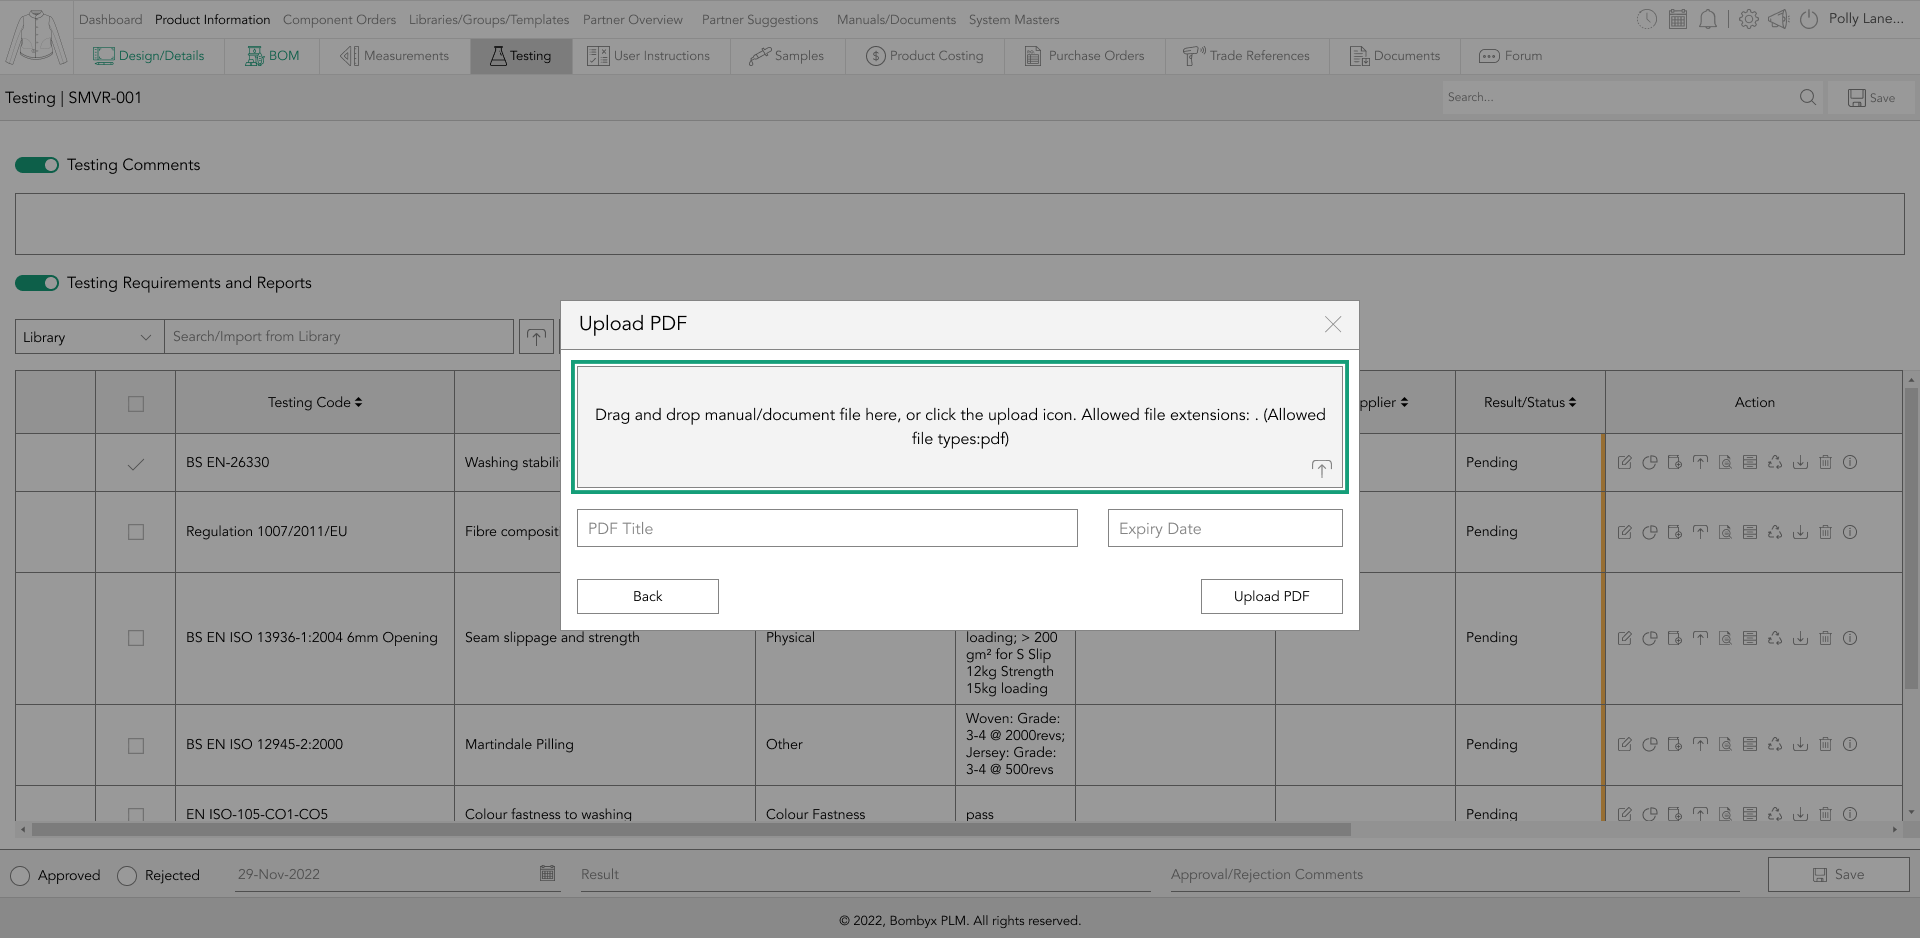
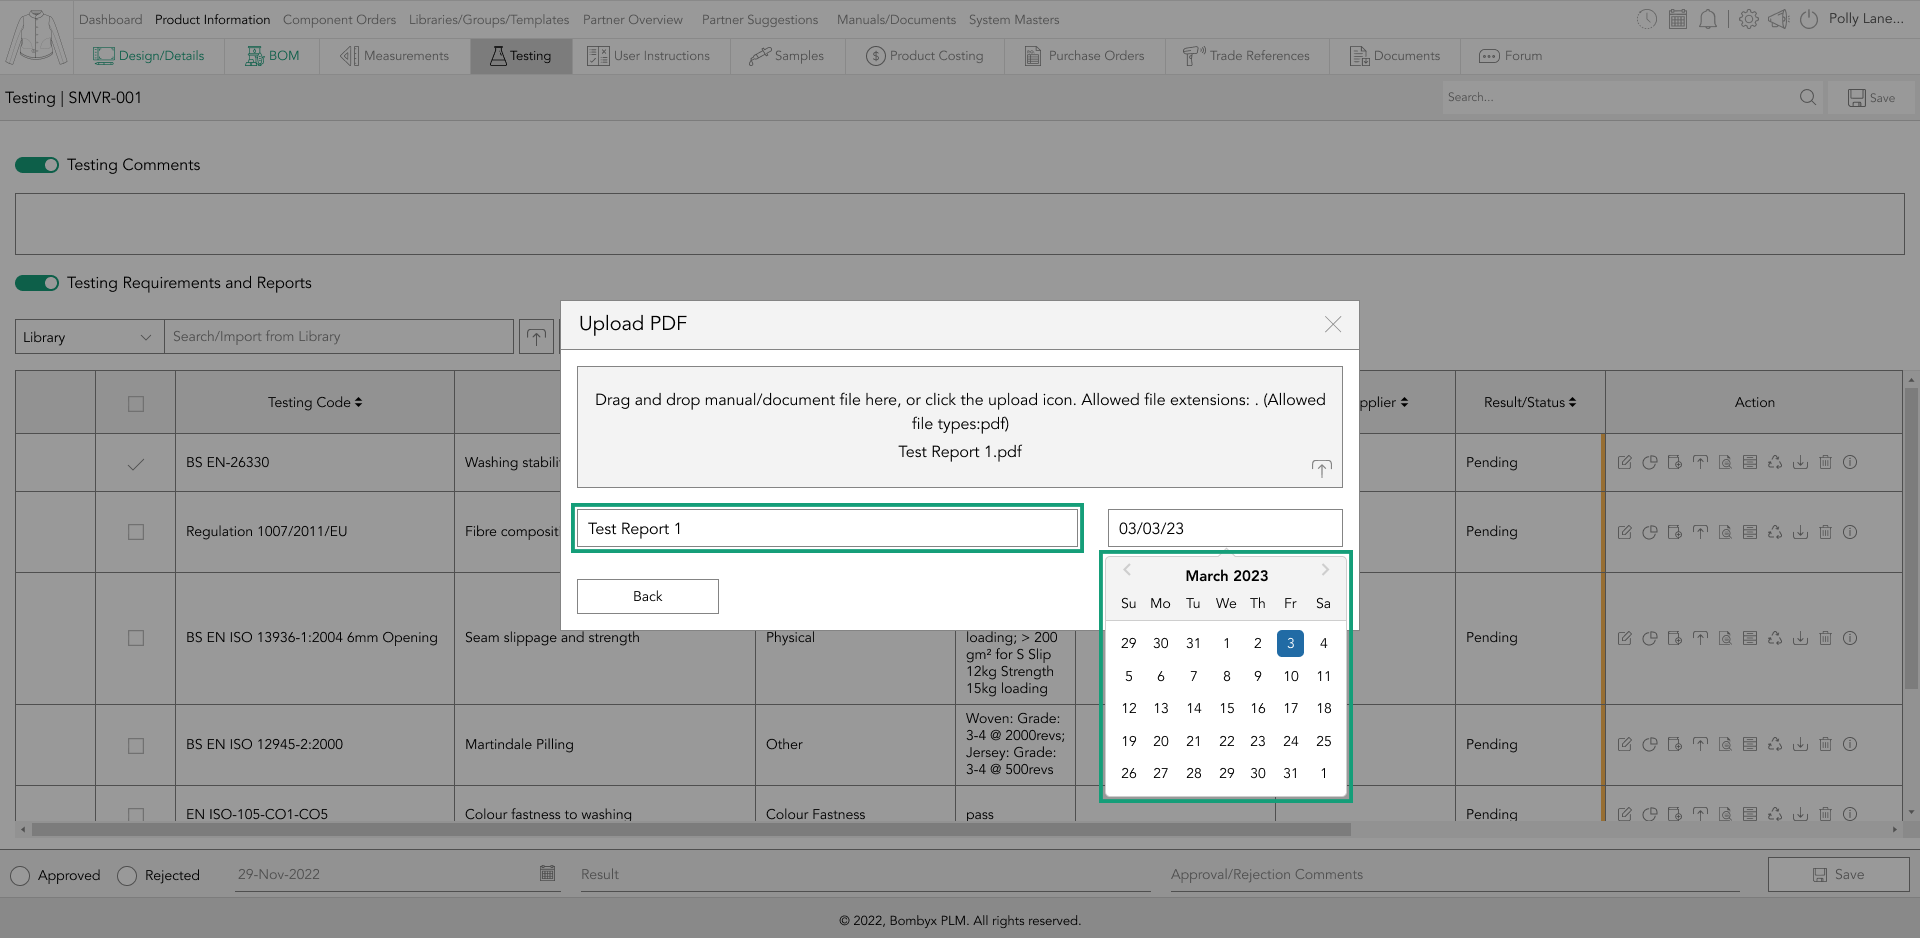
Now, just enter the title and select an expiry date, once done tap save/upload.
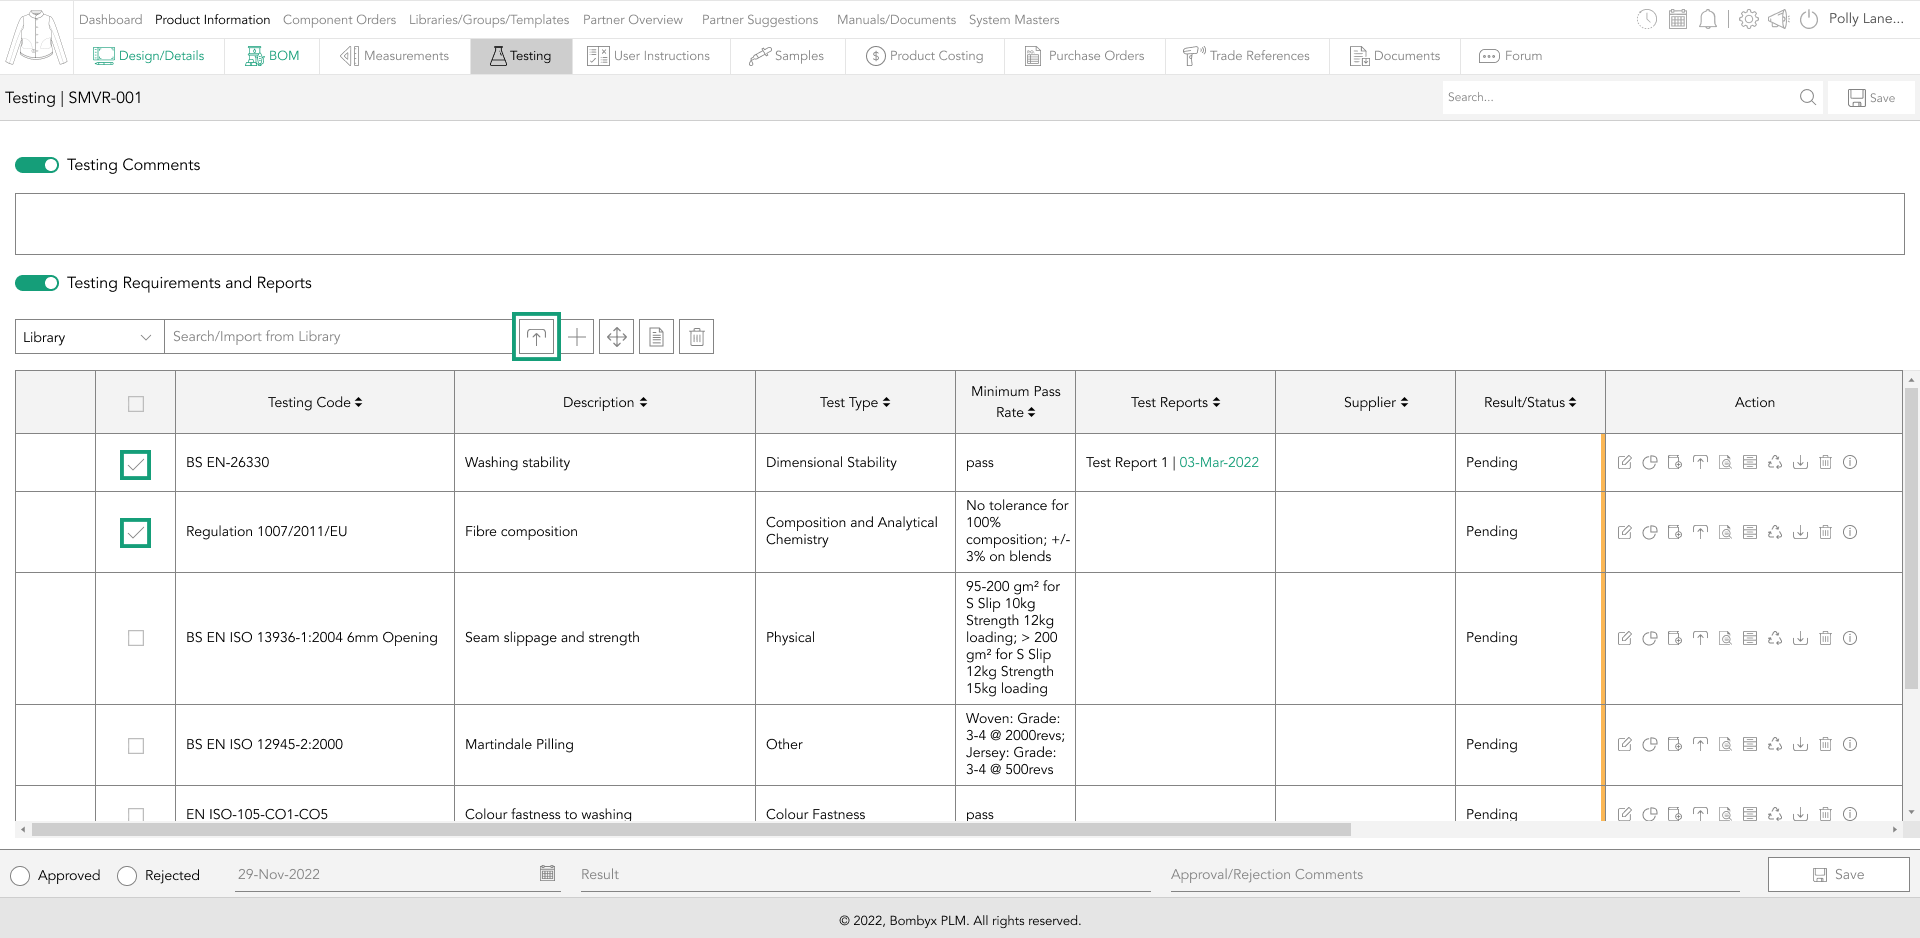
If you want to upload multiple test reports at once, select the checkboxes down the left side of the testing requirements, and tap the ‘upload’ button positioned to the right of the search bar function.
adding a completely new test requirement within a product
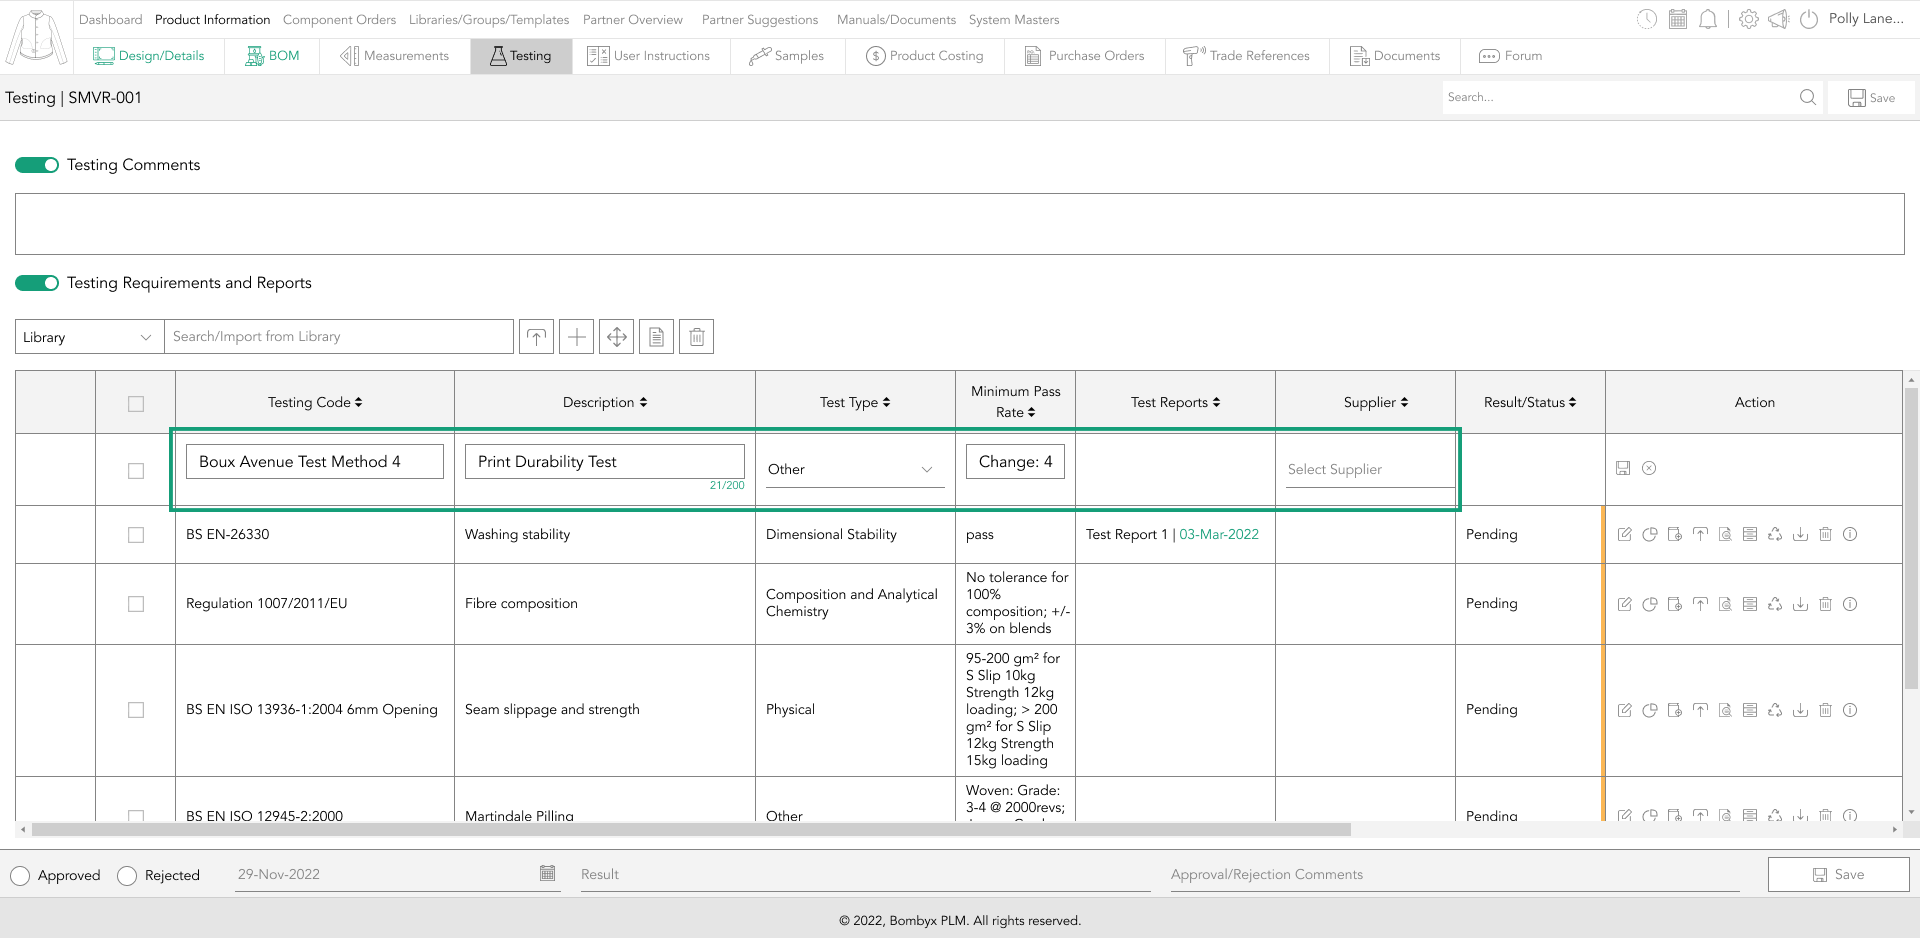
If you want to add a completely new test requirement that is not currently within the system in the library, or in a previous product, you can tap the ‘add’ button next to the search bar function.
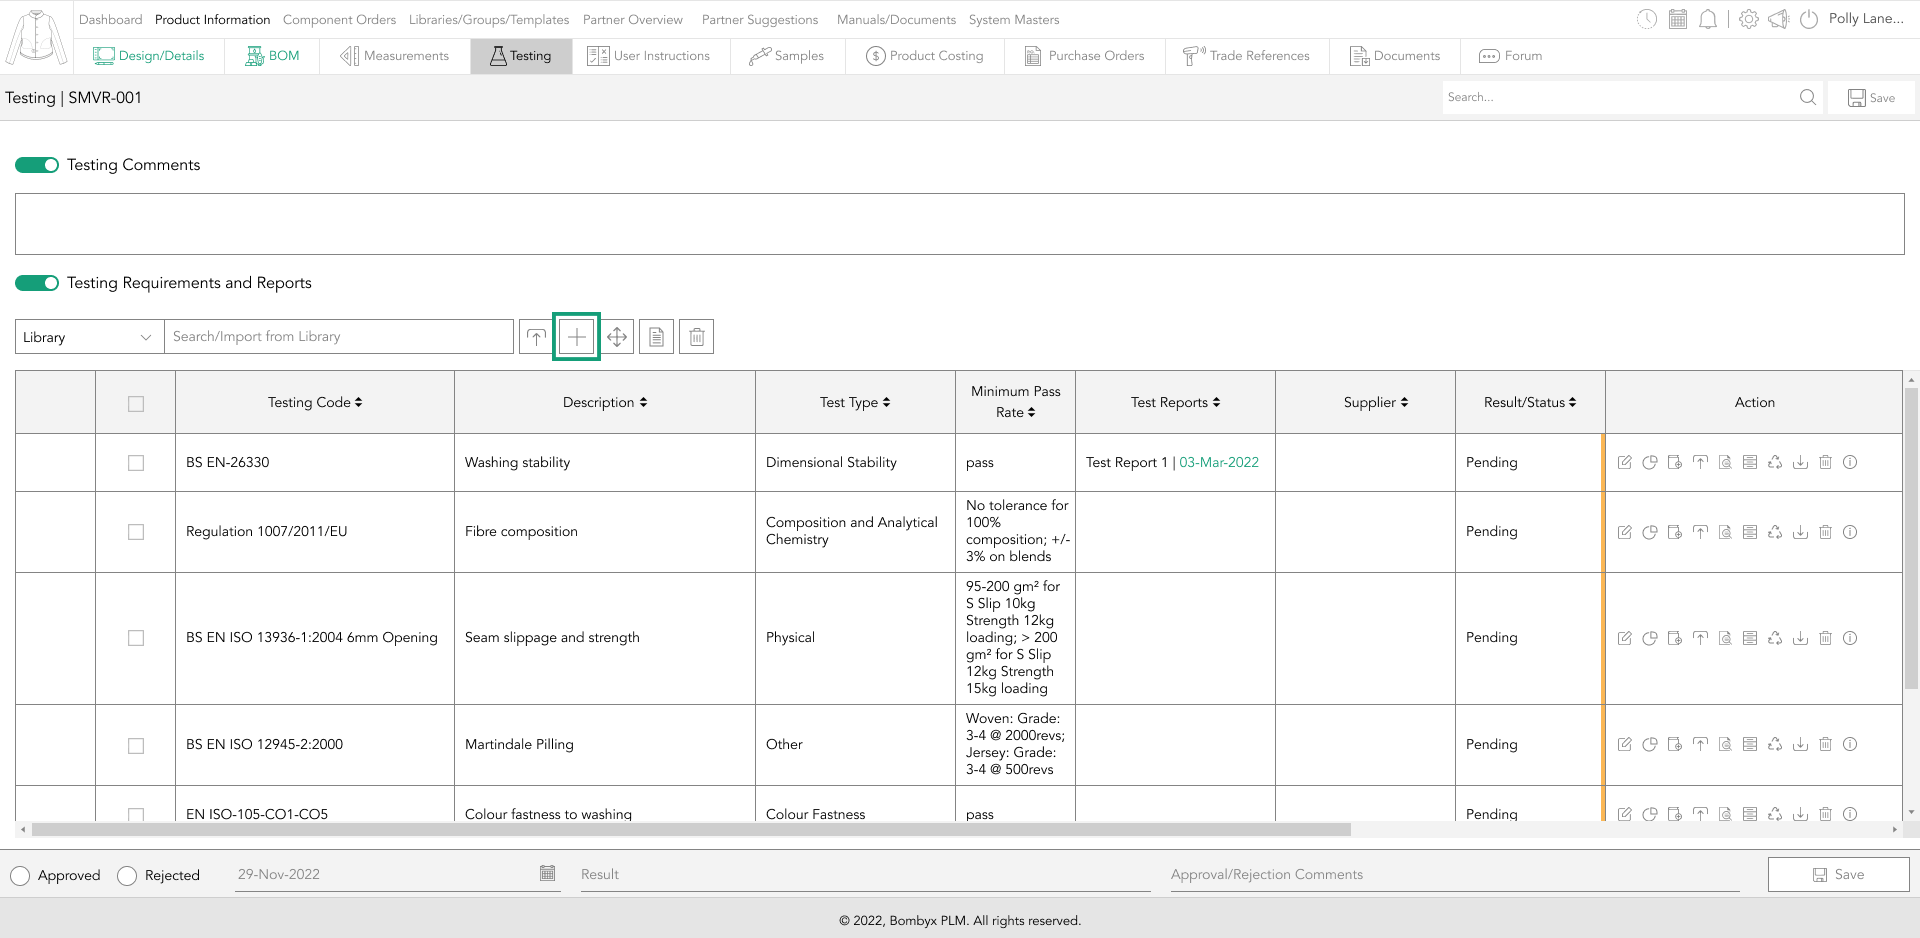
Once you’ve tapped the add button, a new row will appear with blank values that will then need to be entered/selected. The Testing Code, Description, Type, and Minimum Pass Rate are all required fields and will need to be filled in before you’re able to save the testing requirement.
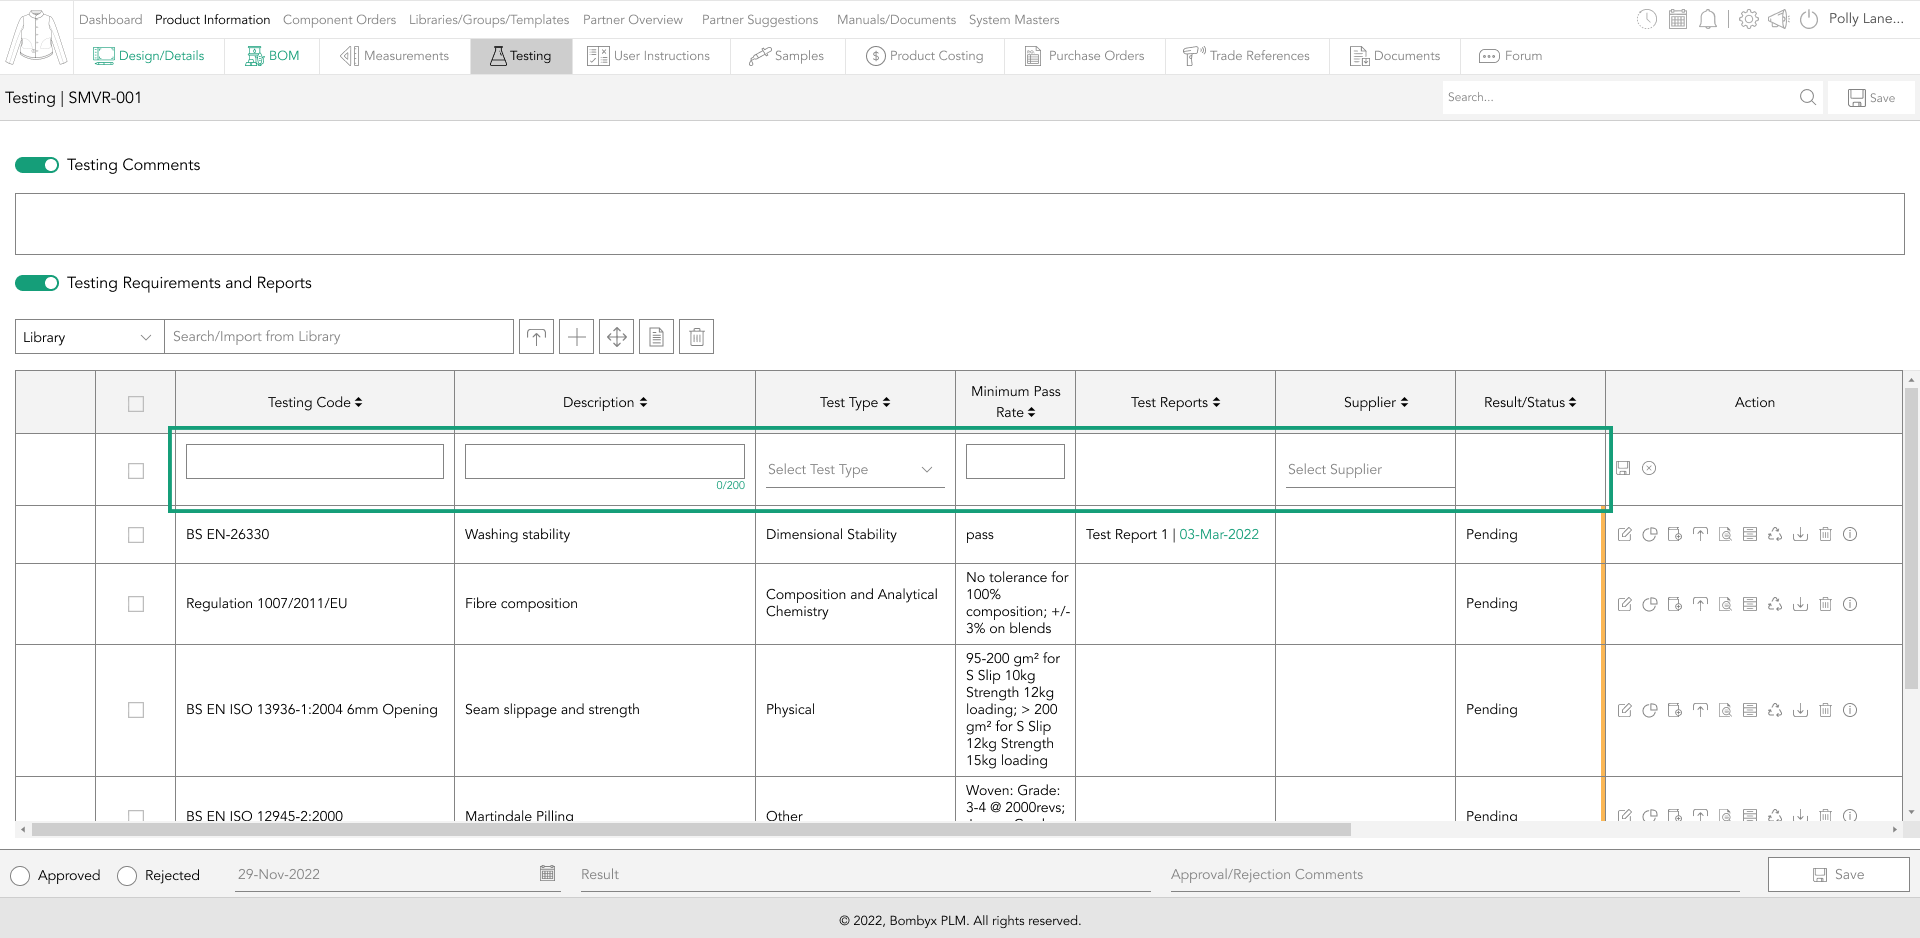
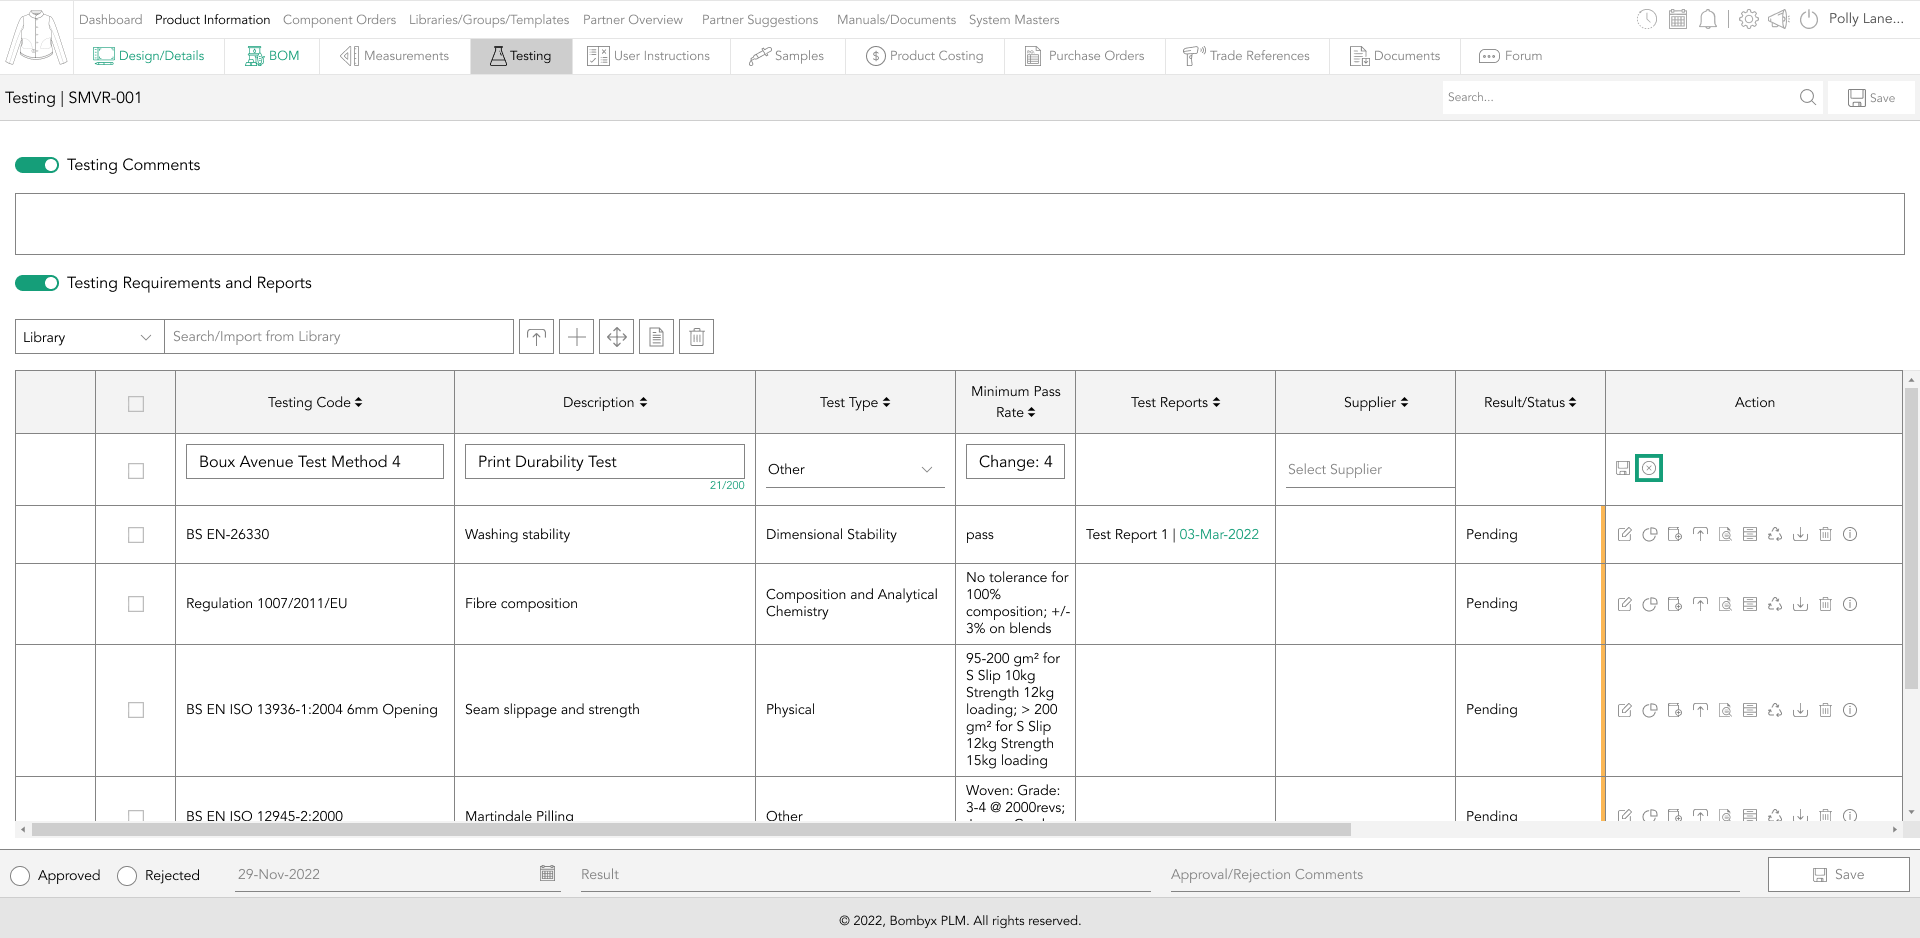
When in the edit mode of a new testing requirement, you can save or cancel your entry using the icons in the action column on the far right-hand side.
![]()
Test Report, Supplier, BOM Component, Colour Ref, and Additional Info are all optional fields that can be added in at a later time, or not at all if not required.
how to rearrange reports
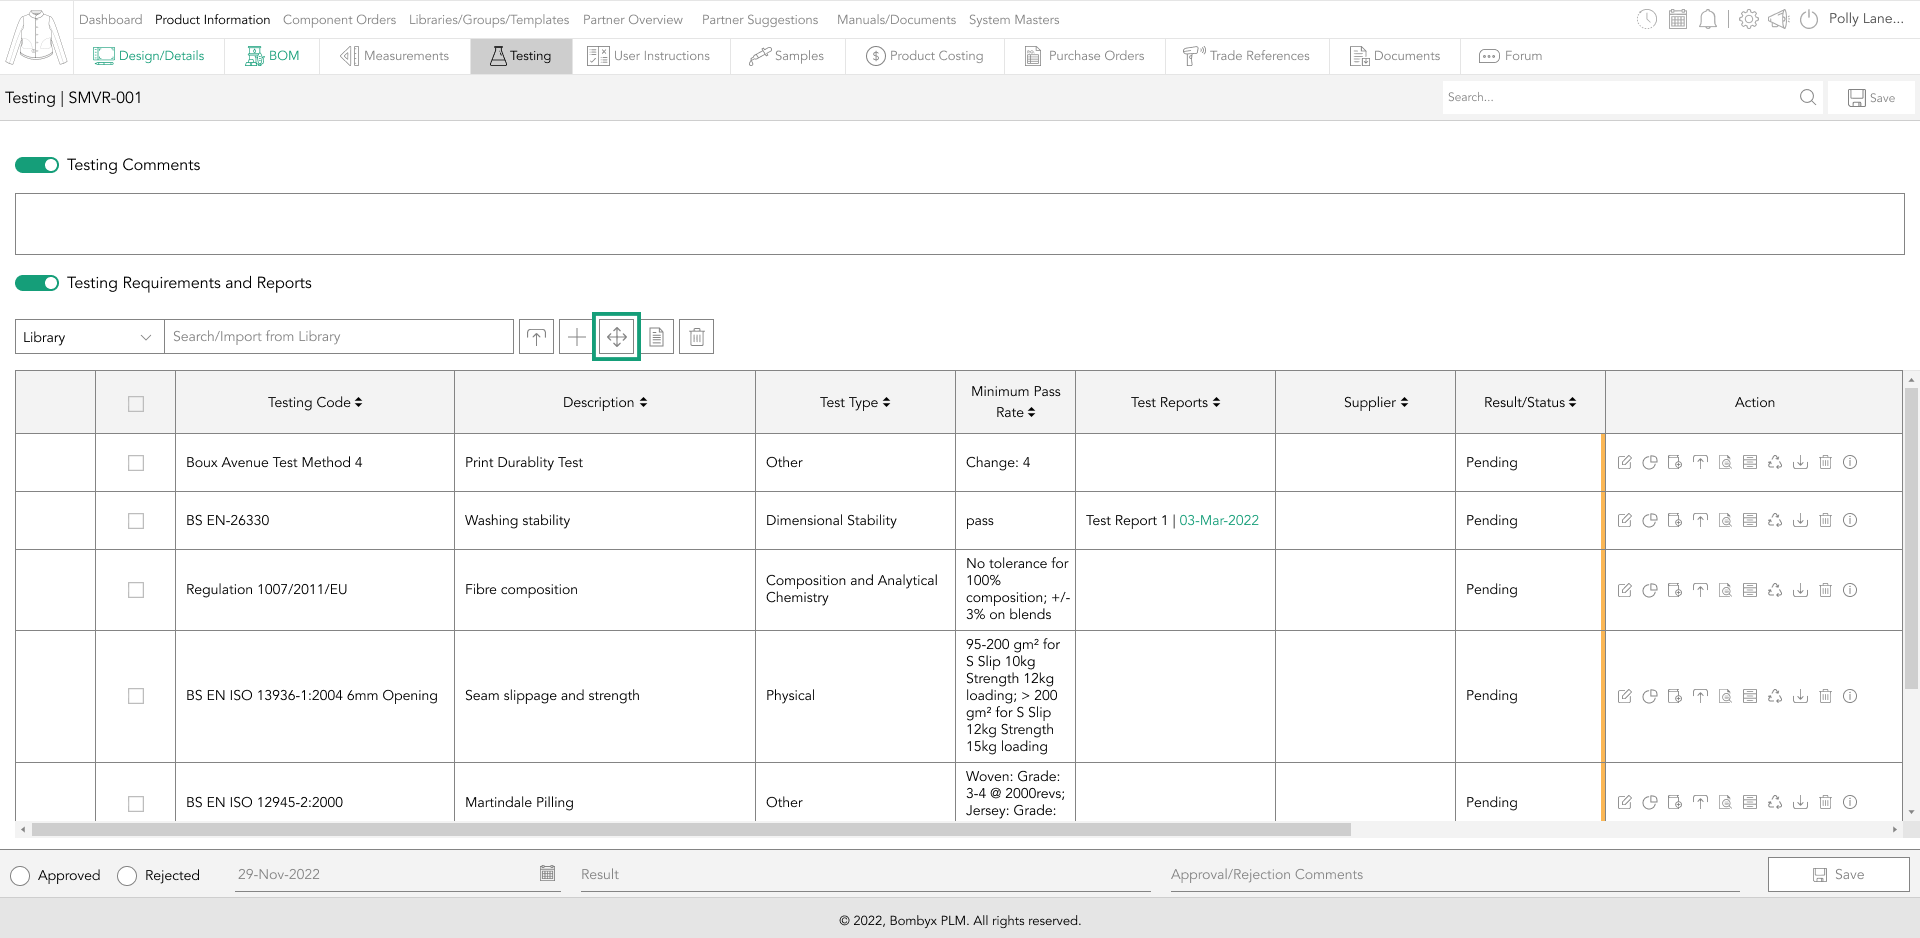
To rearrange the testing requirements into a preferred order, tap the re-arrange button, third from the search bar.
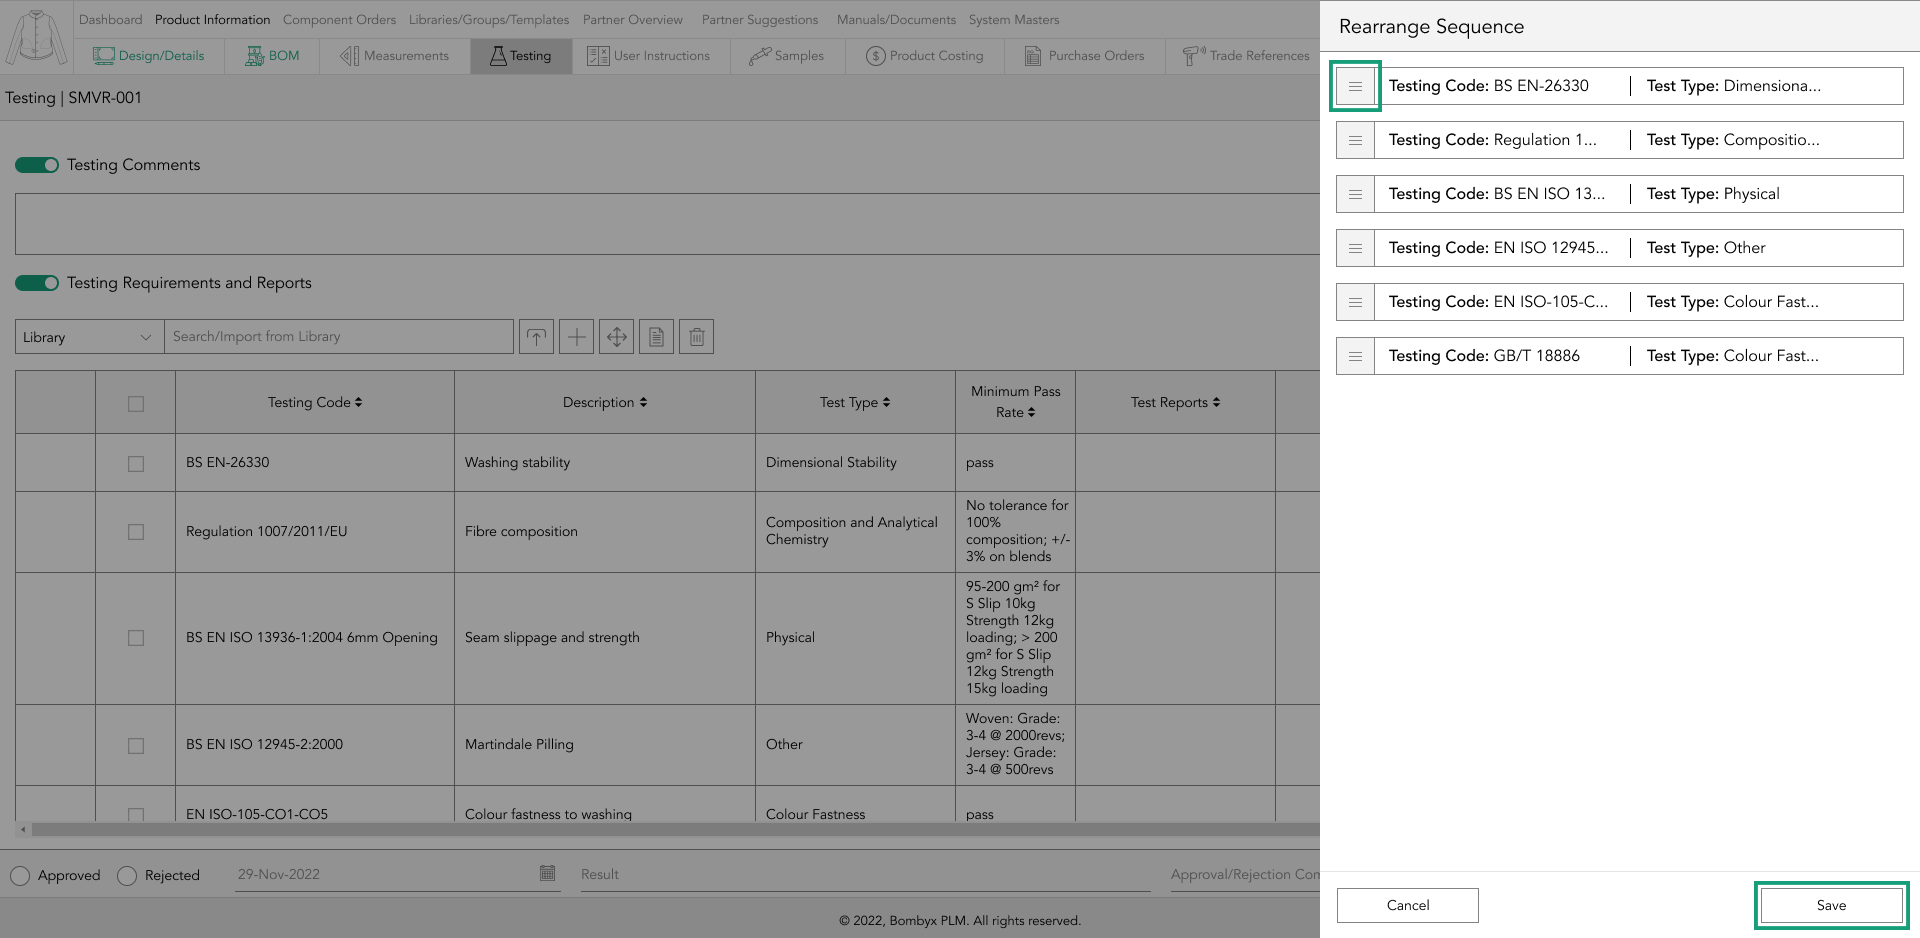
For rearranging the order of your uploads, tap and hold the re-arrange icon on the left-hand side of each requirement in the popup, and drag it into the order you’d like it to be displayed. To save this sequence tap ‘Save’ at the bottom of the popup.
deleting requirements and reports
There are two ways of deleting, and that’s one-by-one, or multiple at once.
To single delete, On the right-hand side of the testing requirement row, if you’d like to delete, tap the delete icon to remove this line from the testing requirements list.
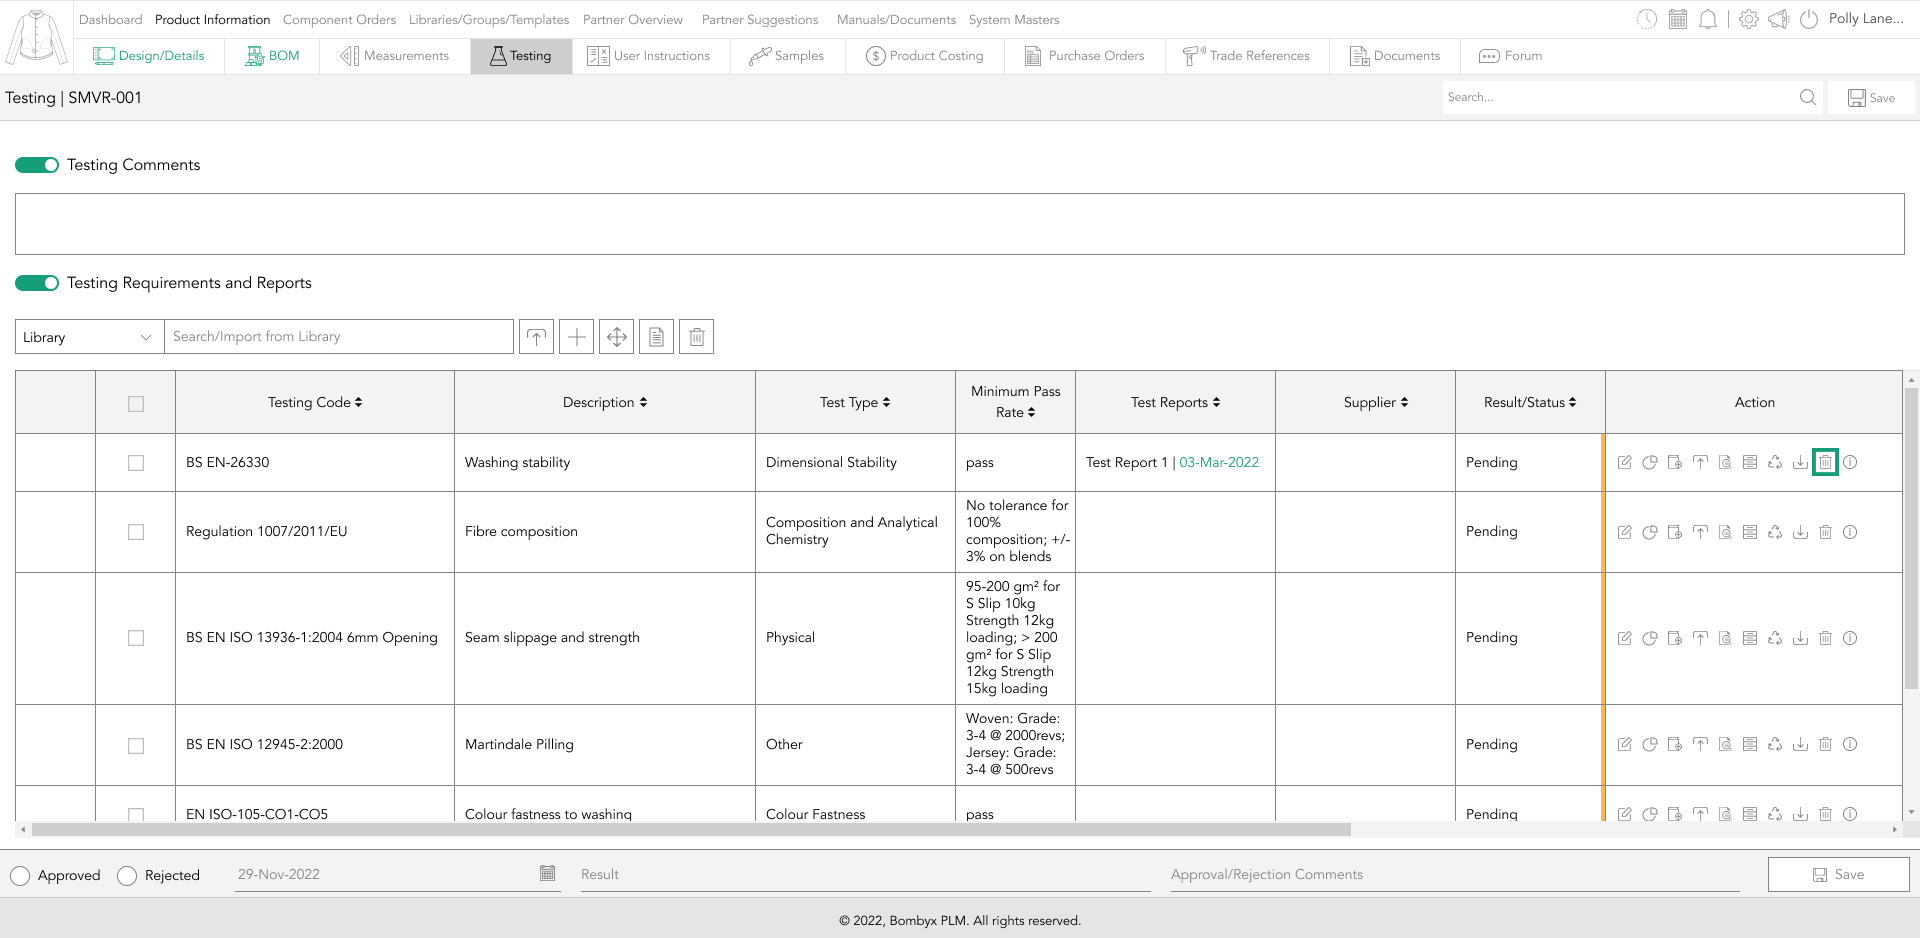
A popup message will appear to confirm that you’re sure. Selecting yes will remove the line, and selecting no will cancel the action.
If you’ve made a mistake, you can re-import it from the search bar function if it was imported from the library or a previous product. If it was newly created, and not added to the library, this information will need to be manually re-entered.
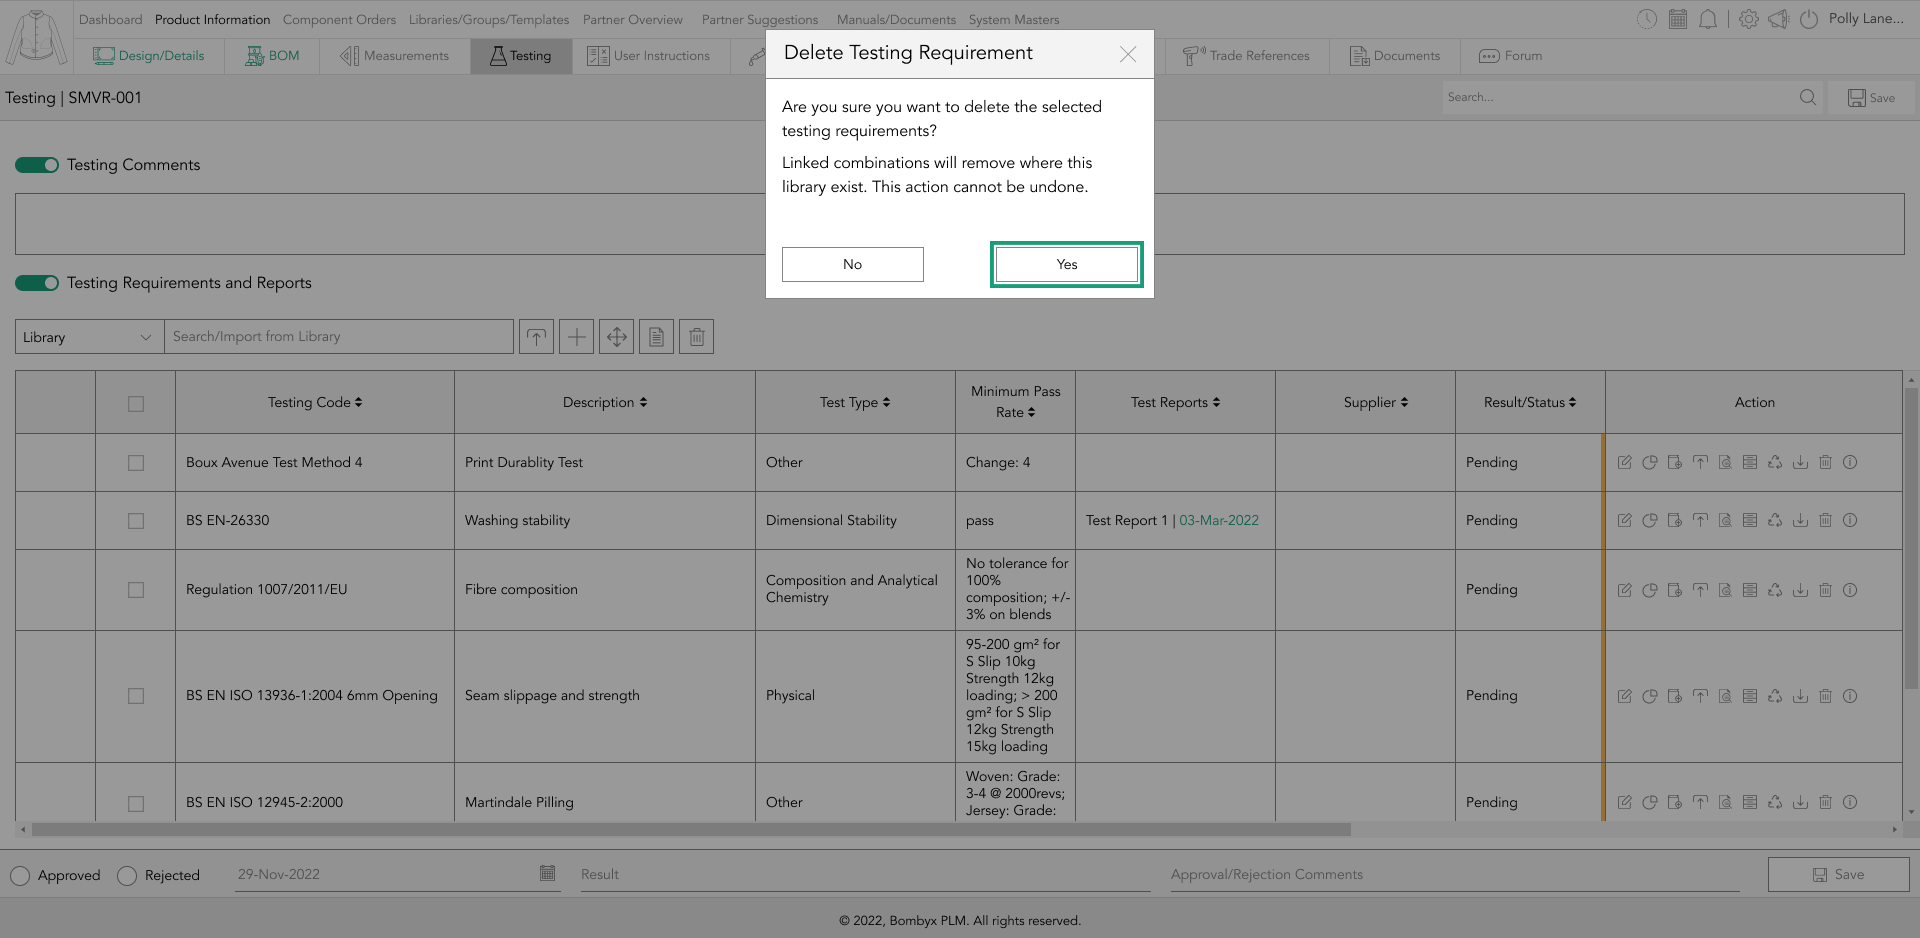
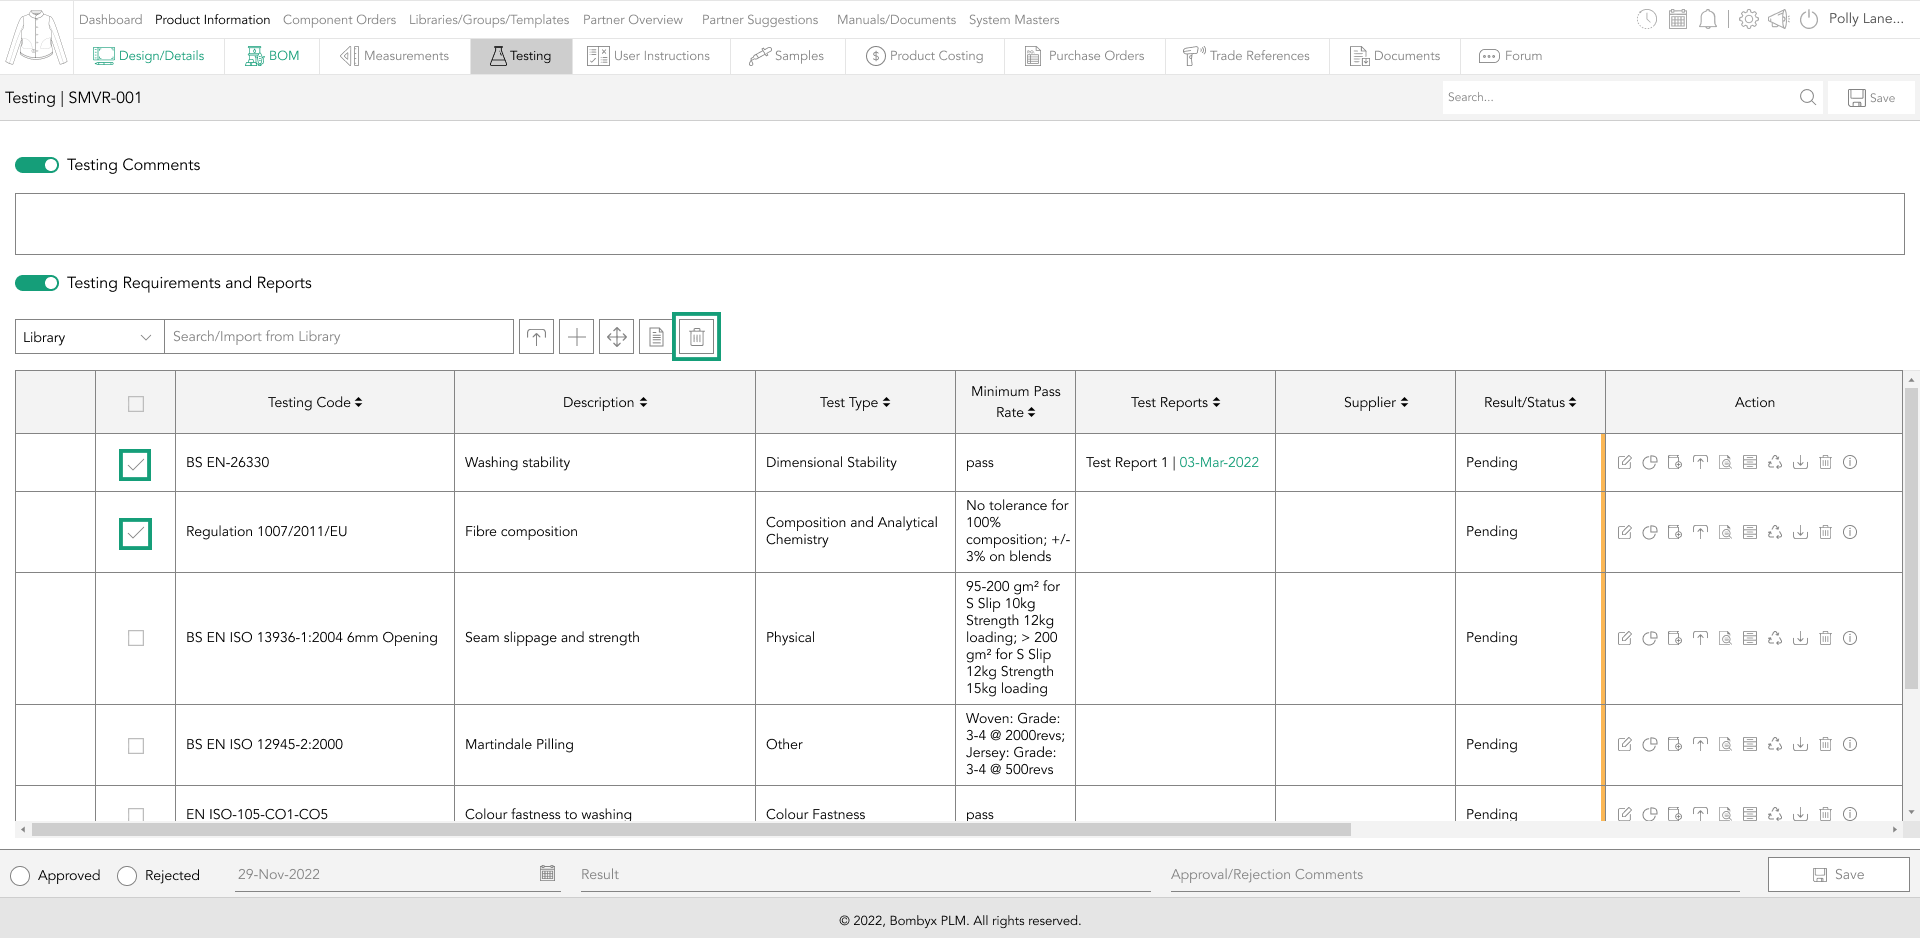
If you want to delete multiple testing requirements at once, select the checkboxes down the left side of the requirements, and tap the ‘delete’ button, positioned to the right of the search bar function.
A popup will appear asking you if you’re sure you’d like to delete the selected testing requirements, if you select ‘Yes’, those requirements will disappear, if you select ‘No’, this will cancel the action and your requirements will remain.

editing a testing requirement
To edit a testing requirement, locate the ‘edit’ icon within the action panel column and tap it to edit the data entered.

The cells will become editable and the original data can be overwritten. Once the data has been edited, tap the save icon that is in the same place as the edit icon in the action panel.
If you want to revert before you’ve saved the overwritten data, tap the cancel icon next to save.
adding/updating a testing requirement within a product to the library
If you’ve added a new testing requirement within a product that isn’t in the library, this feature will allow you to add this back to the library for reuse when importing from the library.
It is also useful when you’ve updated a library item within a product and want to save this update back to the library/groups for future use within other products.
To add back to the library, tap the ‘Add to Library’ icon in the action panel.

This will prompt a popup to appear with the testing code already entered asking if you’d like to add/update this to the library. By not editing the code, you’ll be allowing Bombyx to overwrite the data within the library, but if you amend the code to something new that isn’t already within the library, it will add the requirement as a new entry to the library.
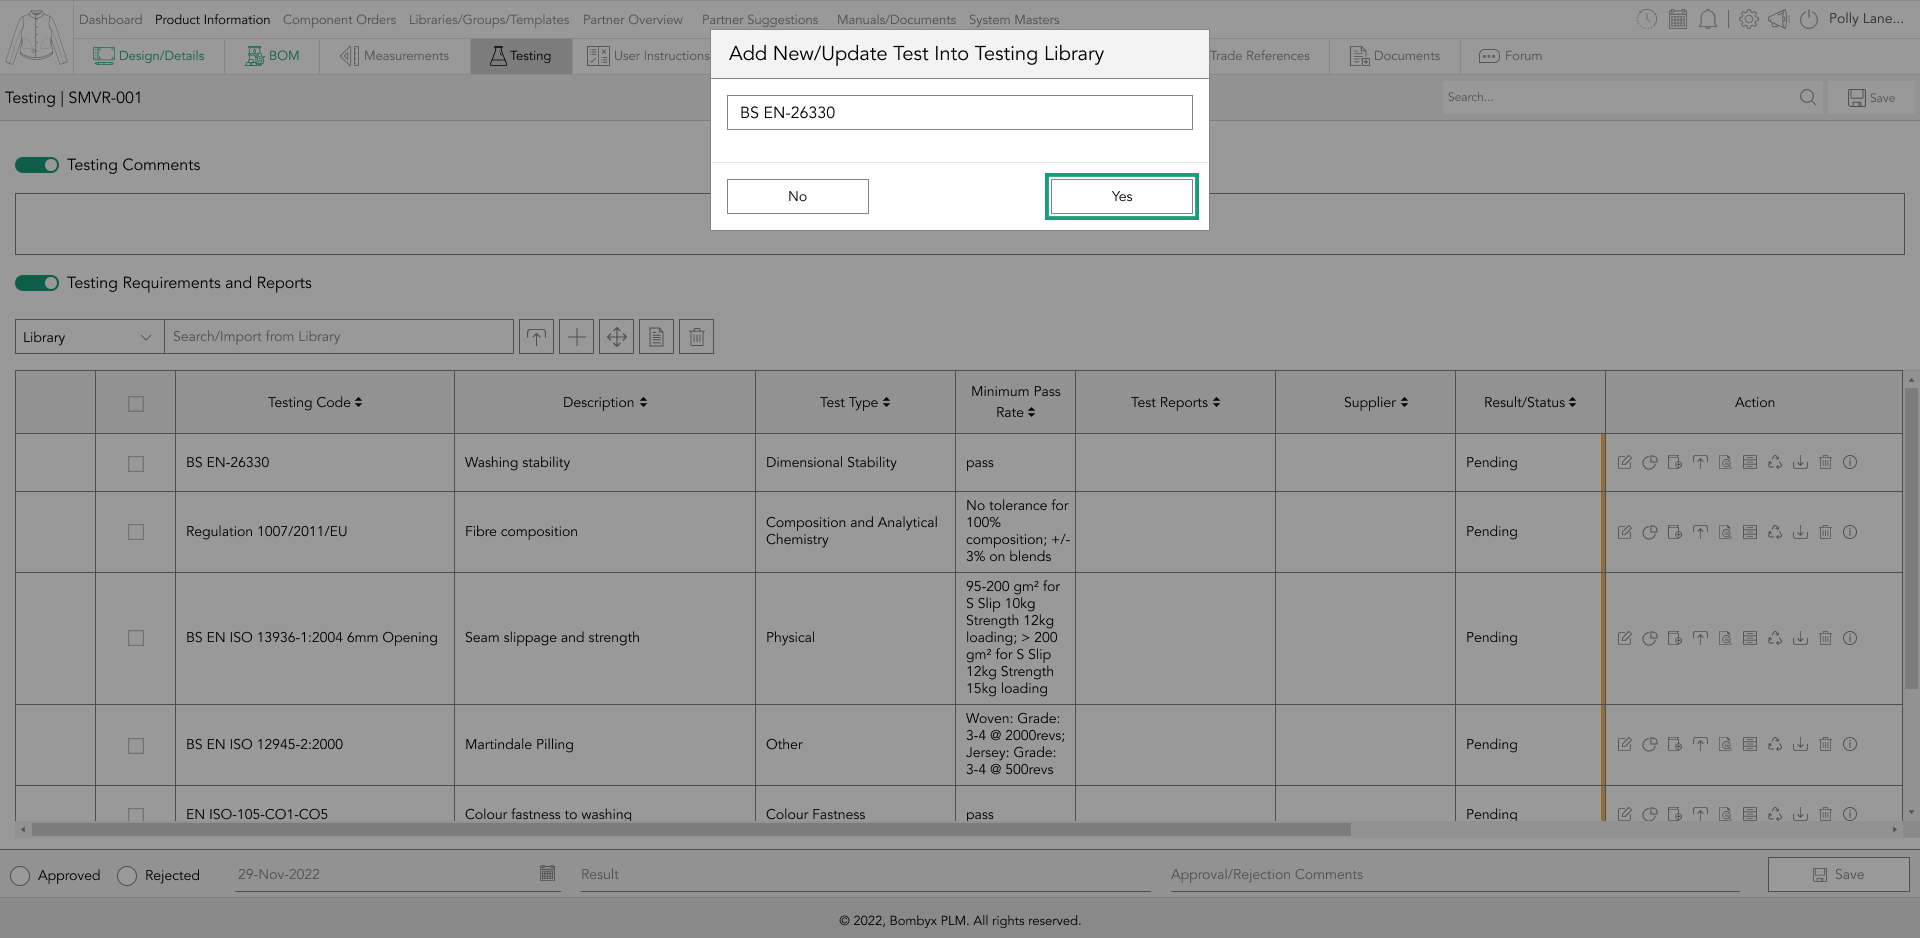
To add/update the item to the library with an existing or new code, tap yes. To cancel the action, tap no.
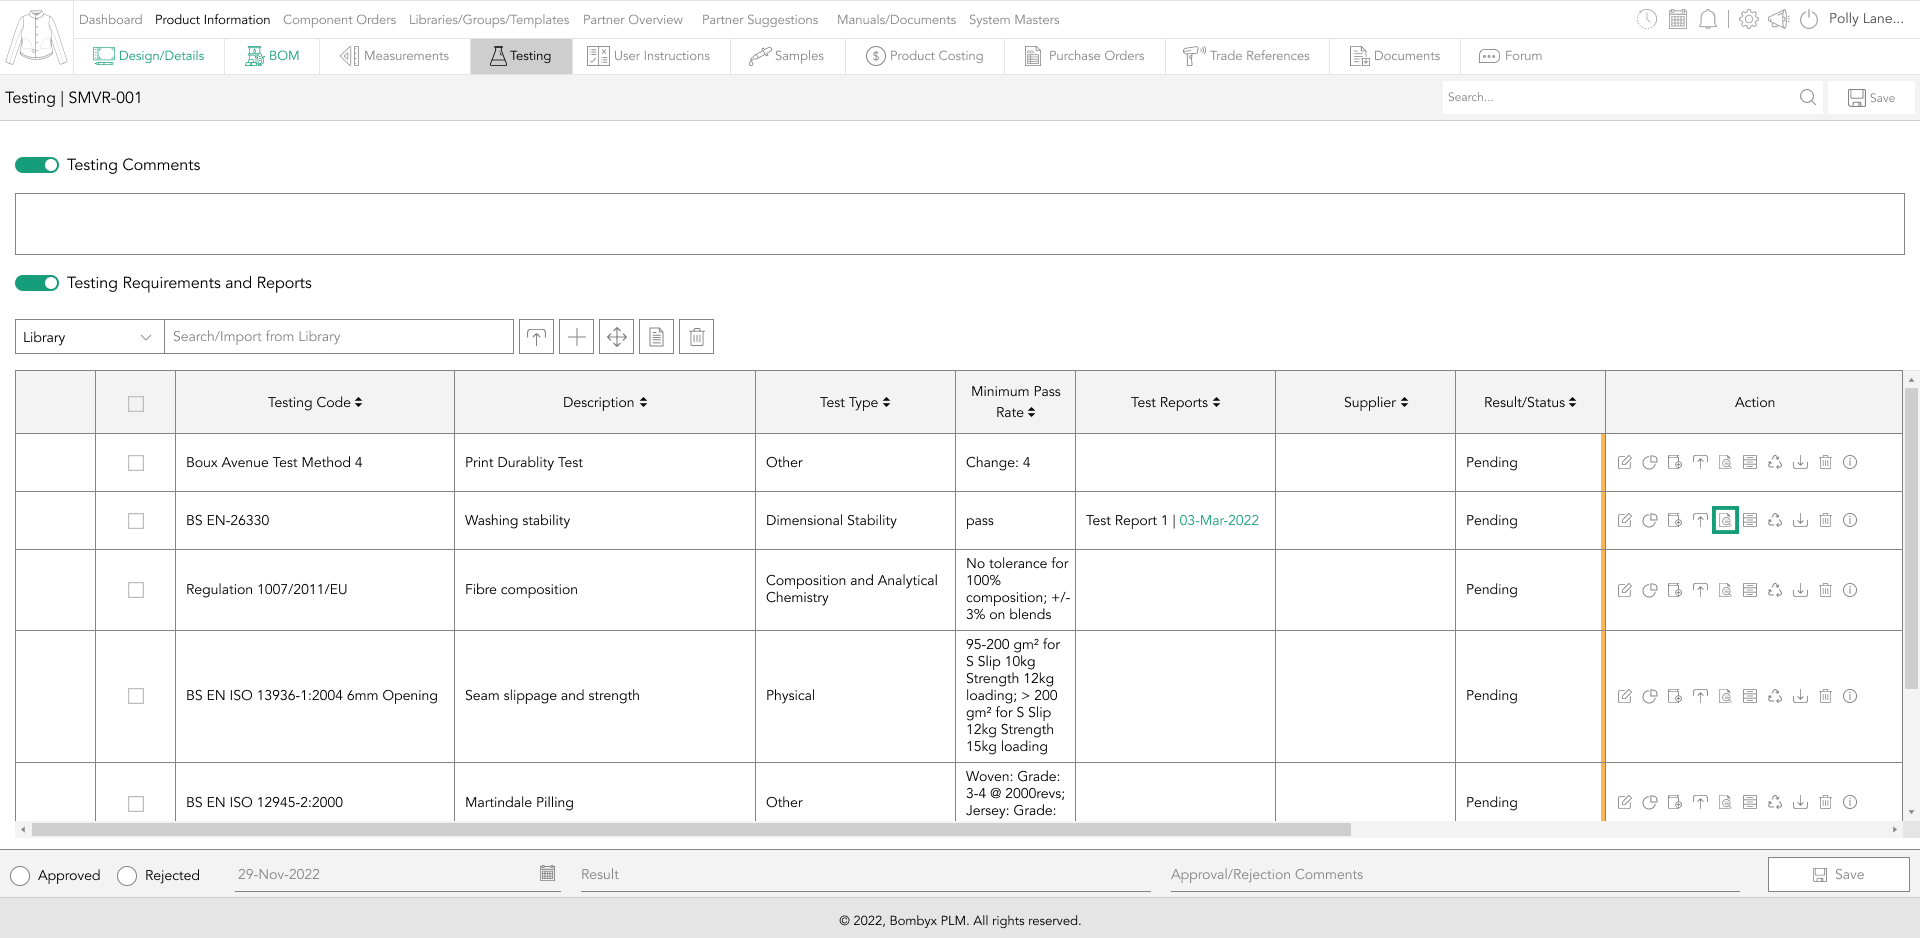
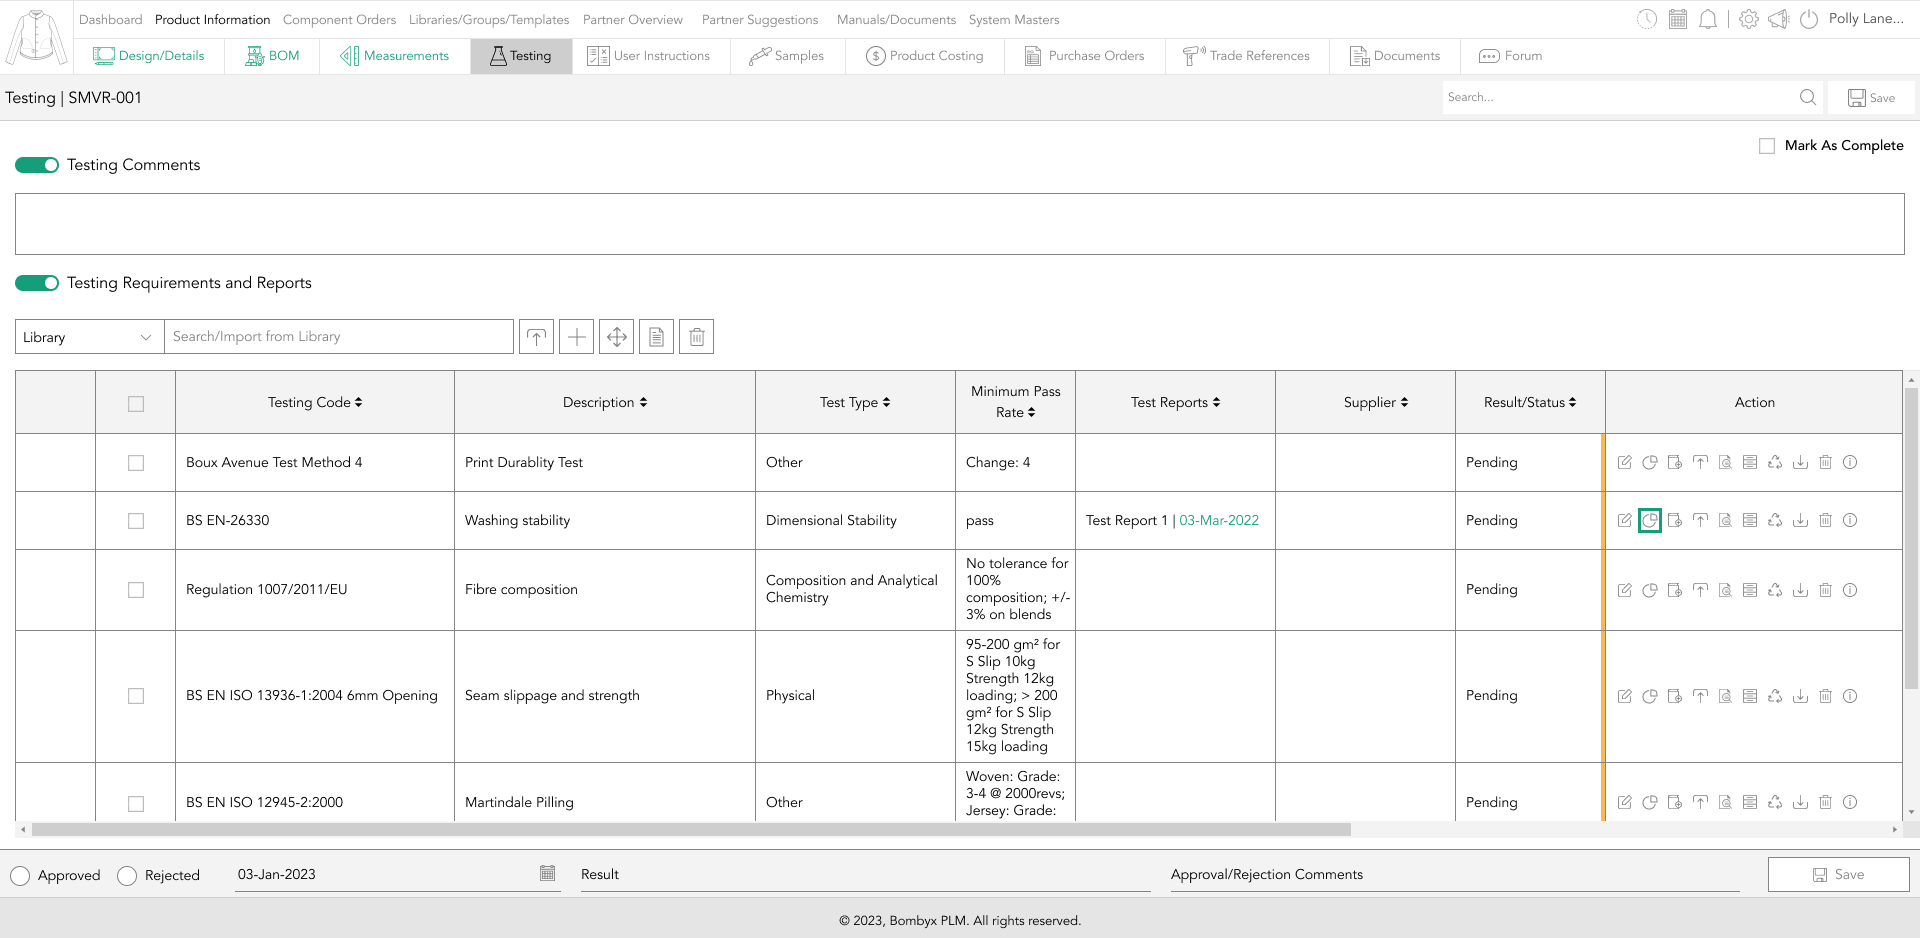
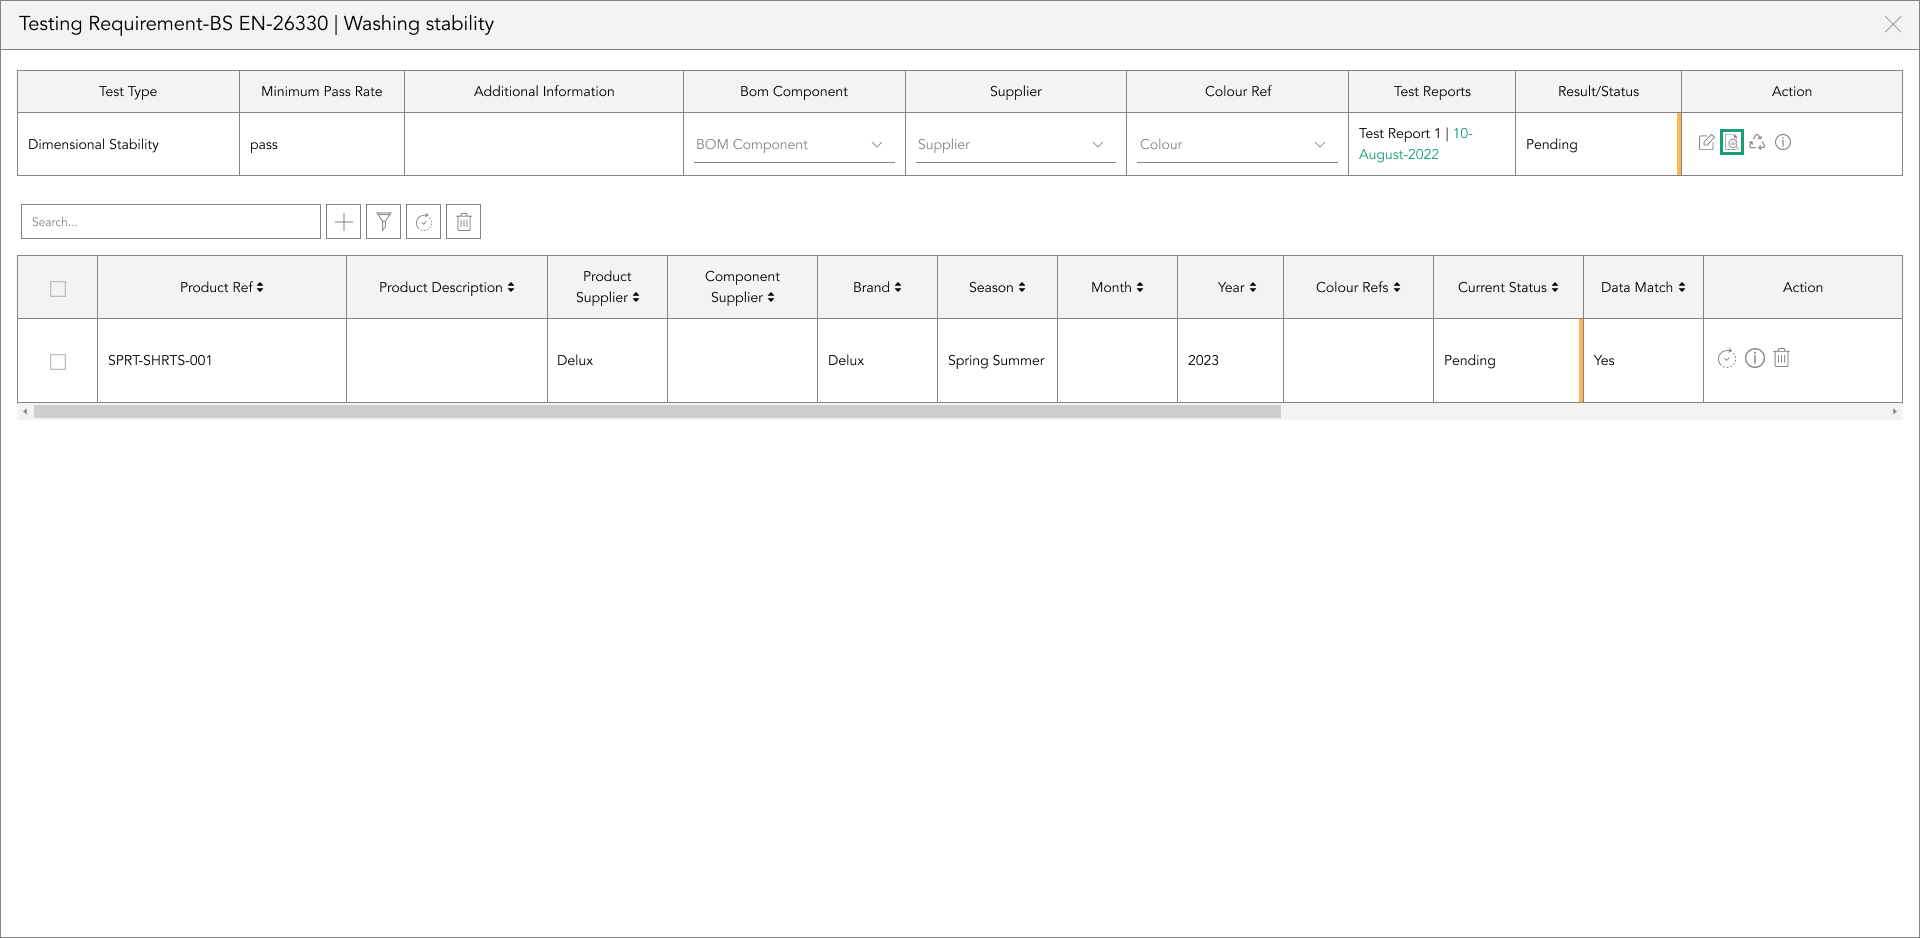
preview test reports
To preview an uploaded PDF test report, tap the preview icon in the action panel column. This will prompt a popup that will display the PDF for viewing.
renew/update test report
When a test report has expired and needs replacing for use on current or future products, the renew feature allows you to update the test report with an updated version that will last the duration of the time set out by the company, as well as archiving the previous version for your records.
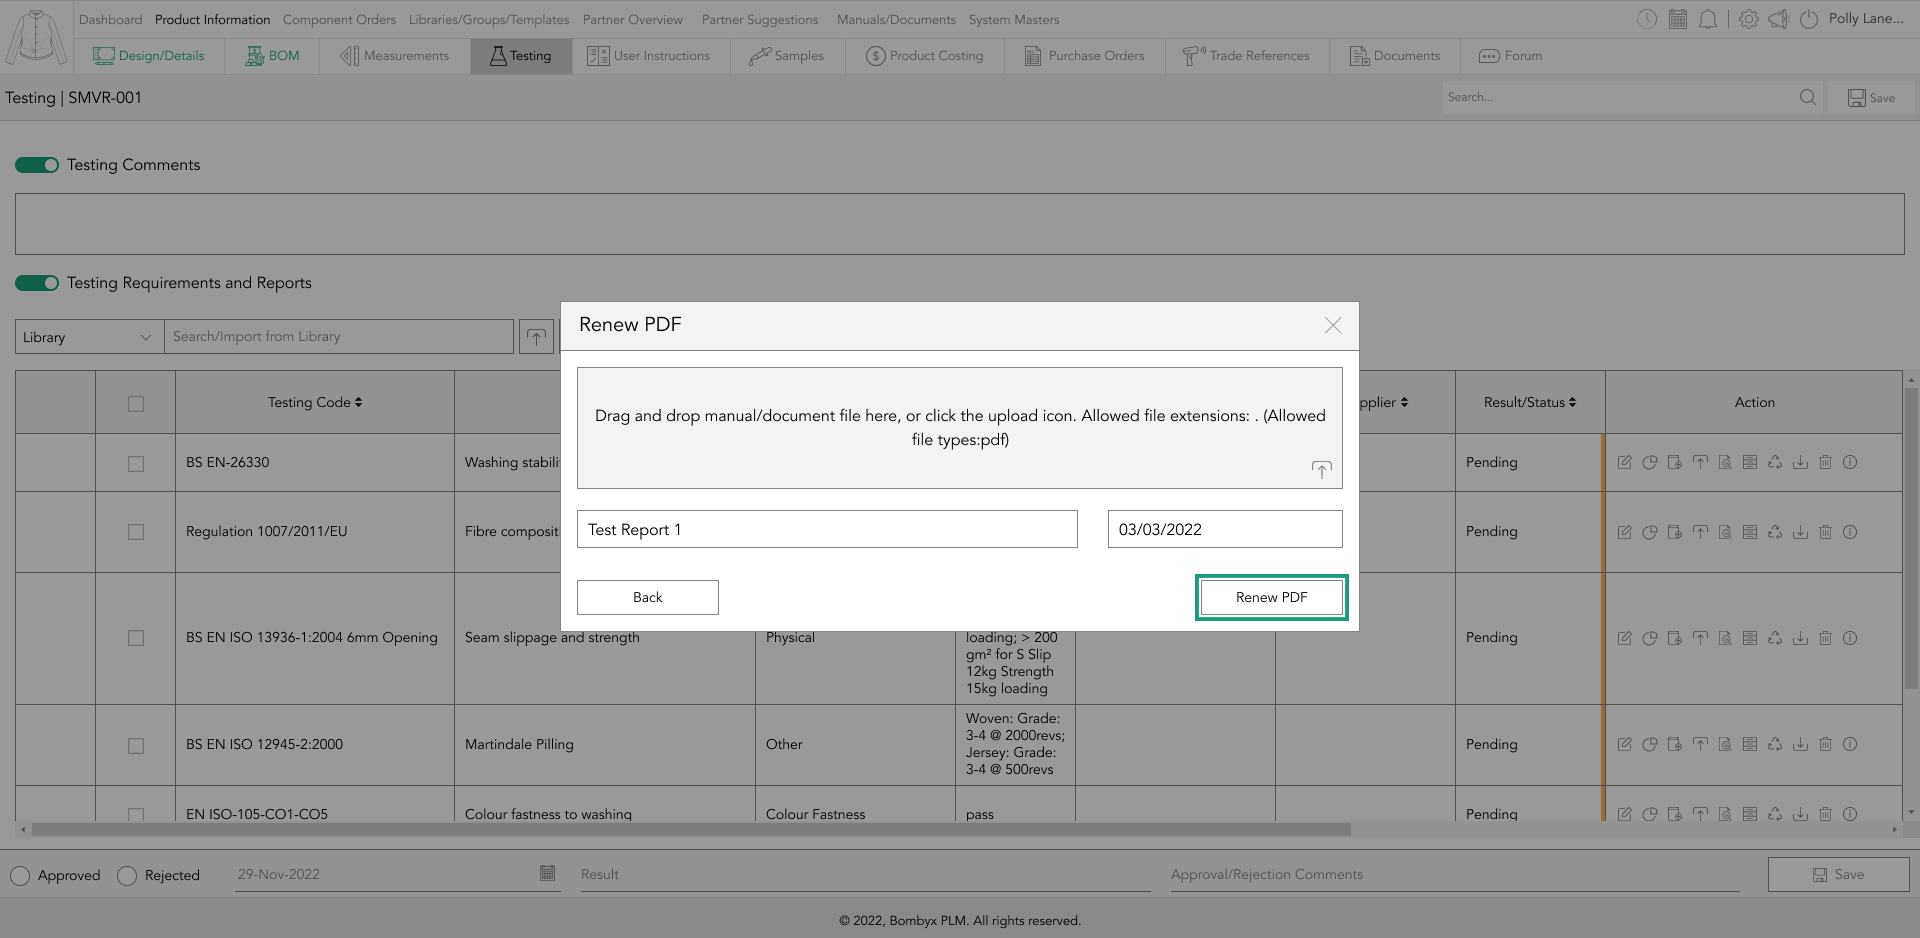
By tapping the renew icon in the Action column of the test requirement...
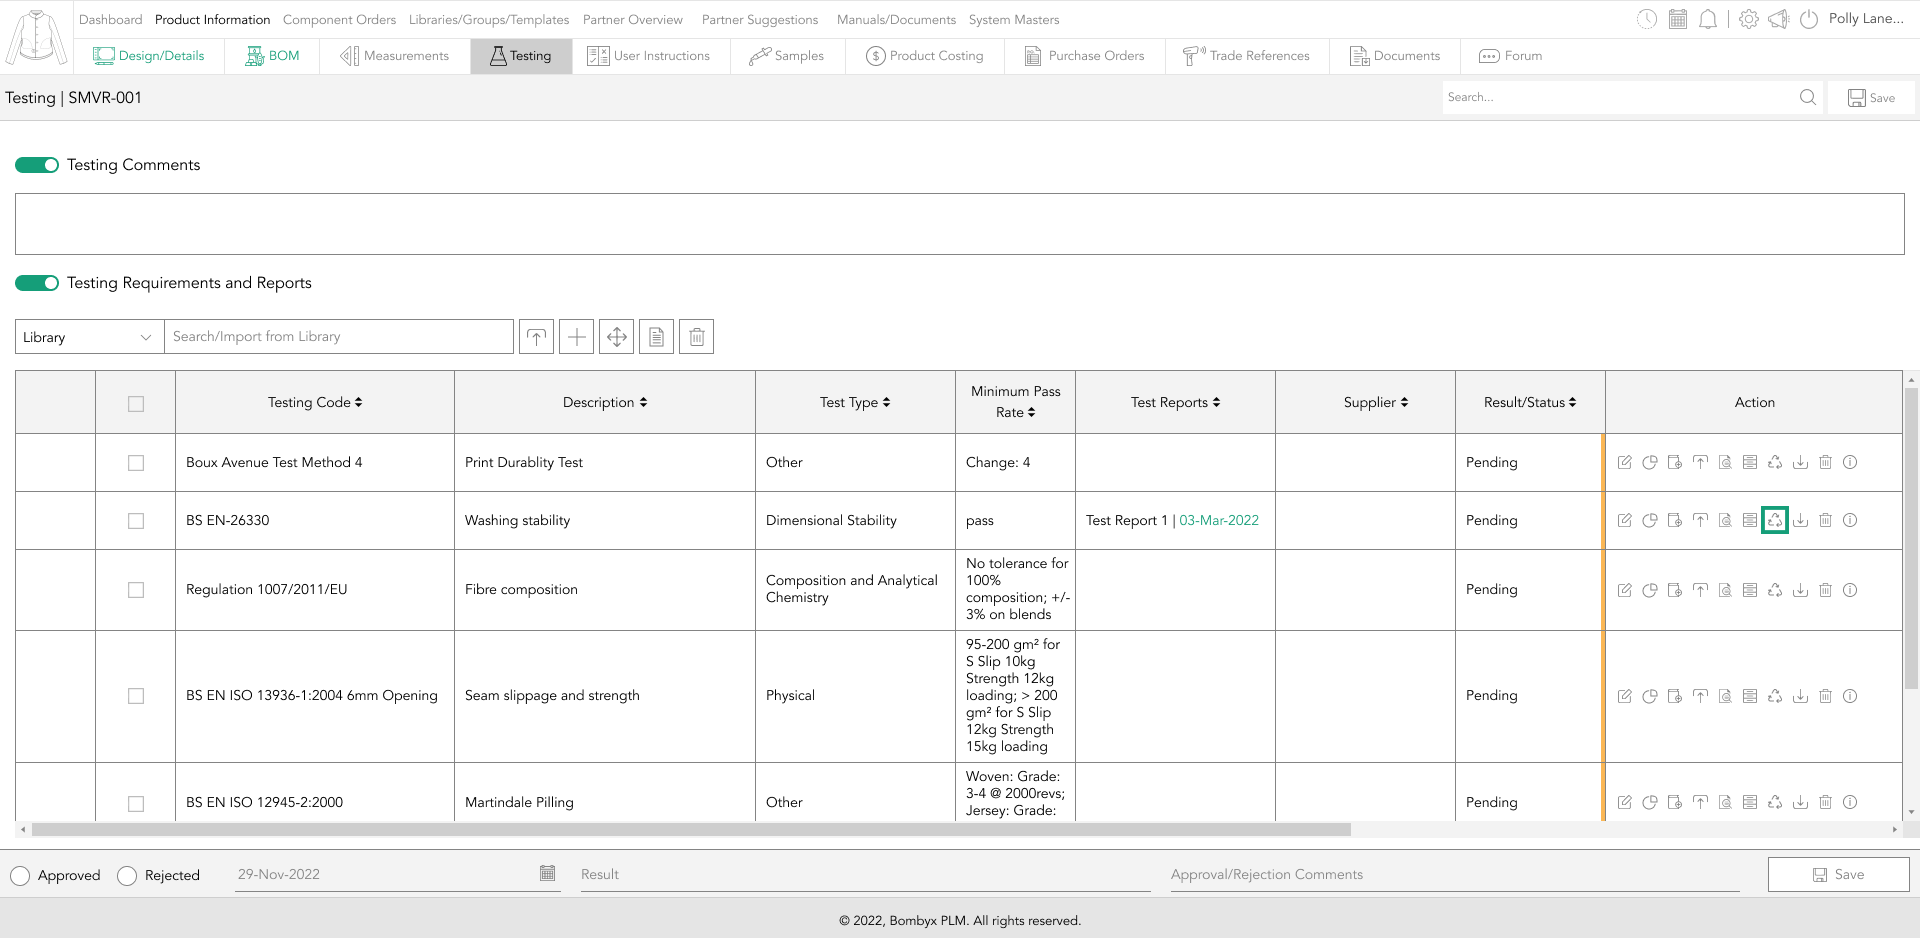
a popup will be prompted to appear in the same way you would upload an original test report. Once uploaded from your computer, and applying a new expiry day. Tap ‘Renew Report’ to renew and replace the test report for that requirement. If you want to cancel this action, just tap cancel.
Once you’ve renewed the test report, the previous version will be stored in the
Archive which can be located in the Action column on the far right of the table.
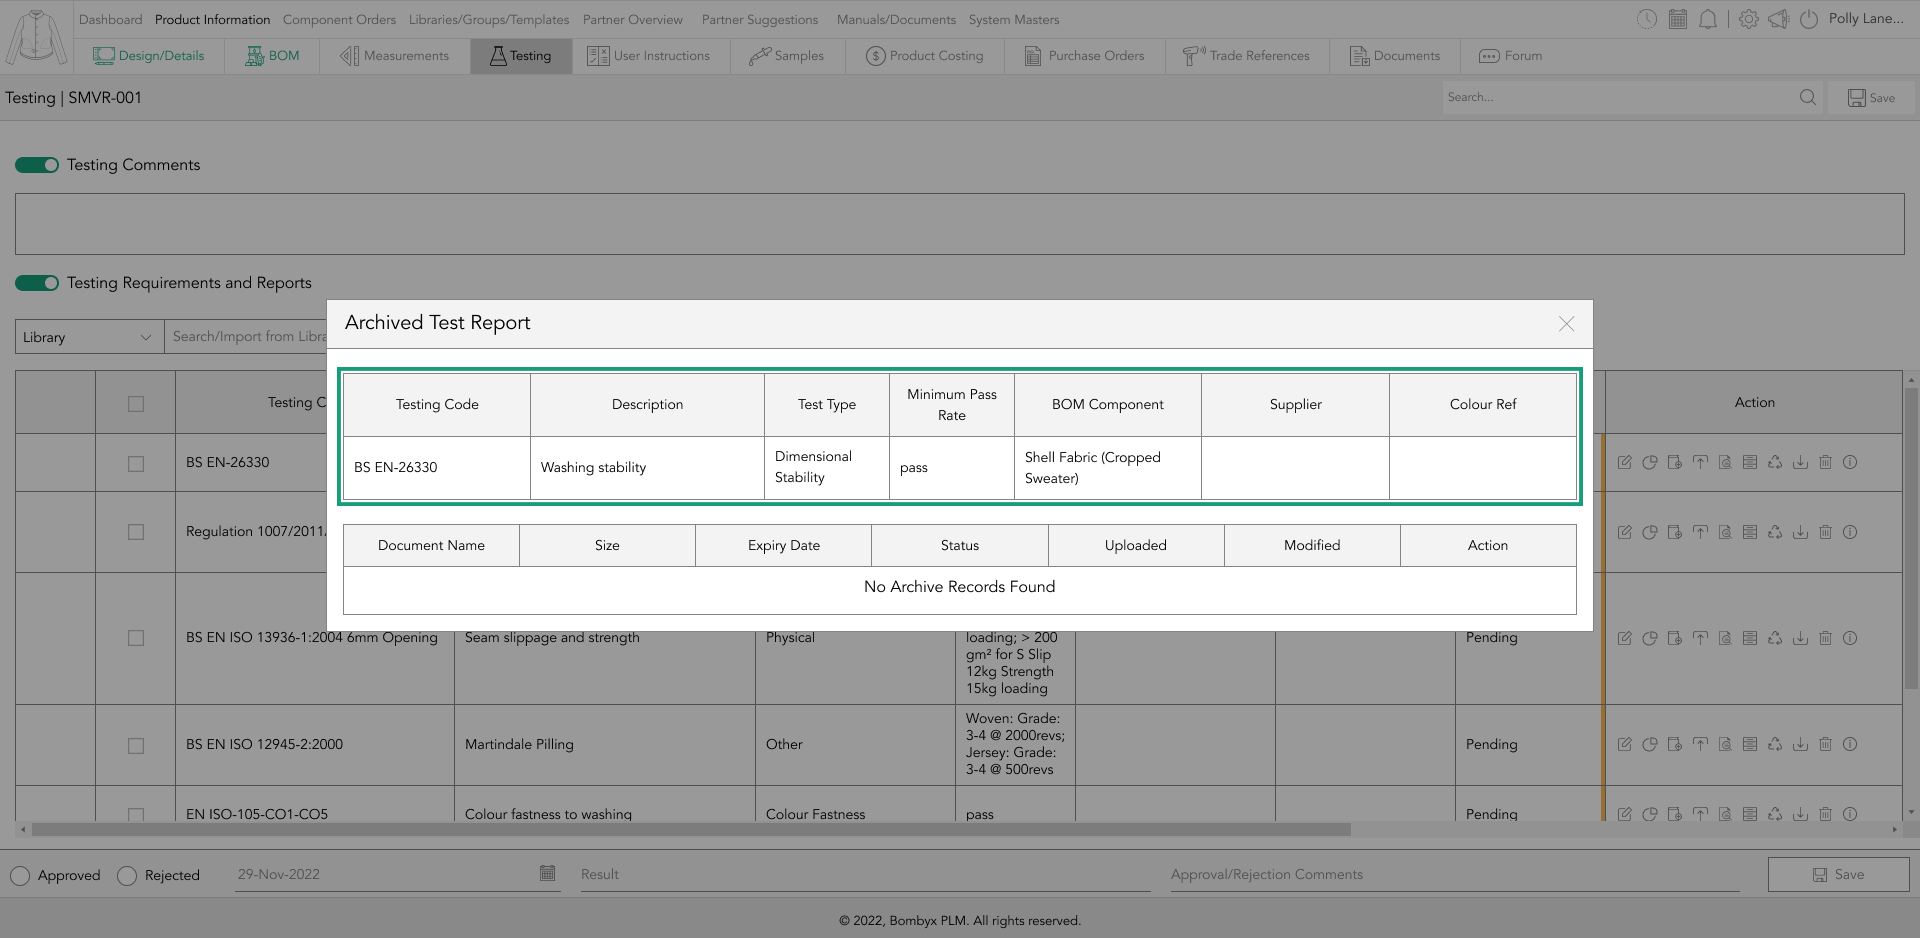
viewing historic/archived test reports
Any test reports that have been renewed will show the predecessor of that report in the archive.
To view the historical versions, tap the archive icon in the action panel.

A popup will appear with the core testing information at the top for reference and a list of any archived test reports that are automatically placed here when a user has renewed one.
Every time a user renews a test report, this will be added to the archive showing a list of all the test reports uploaded prior to the latest version.
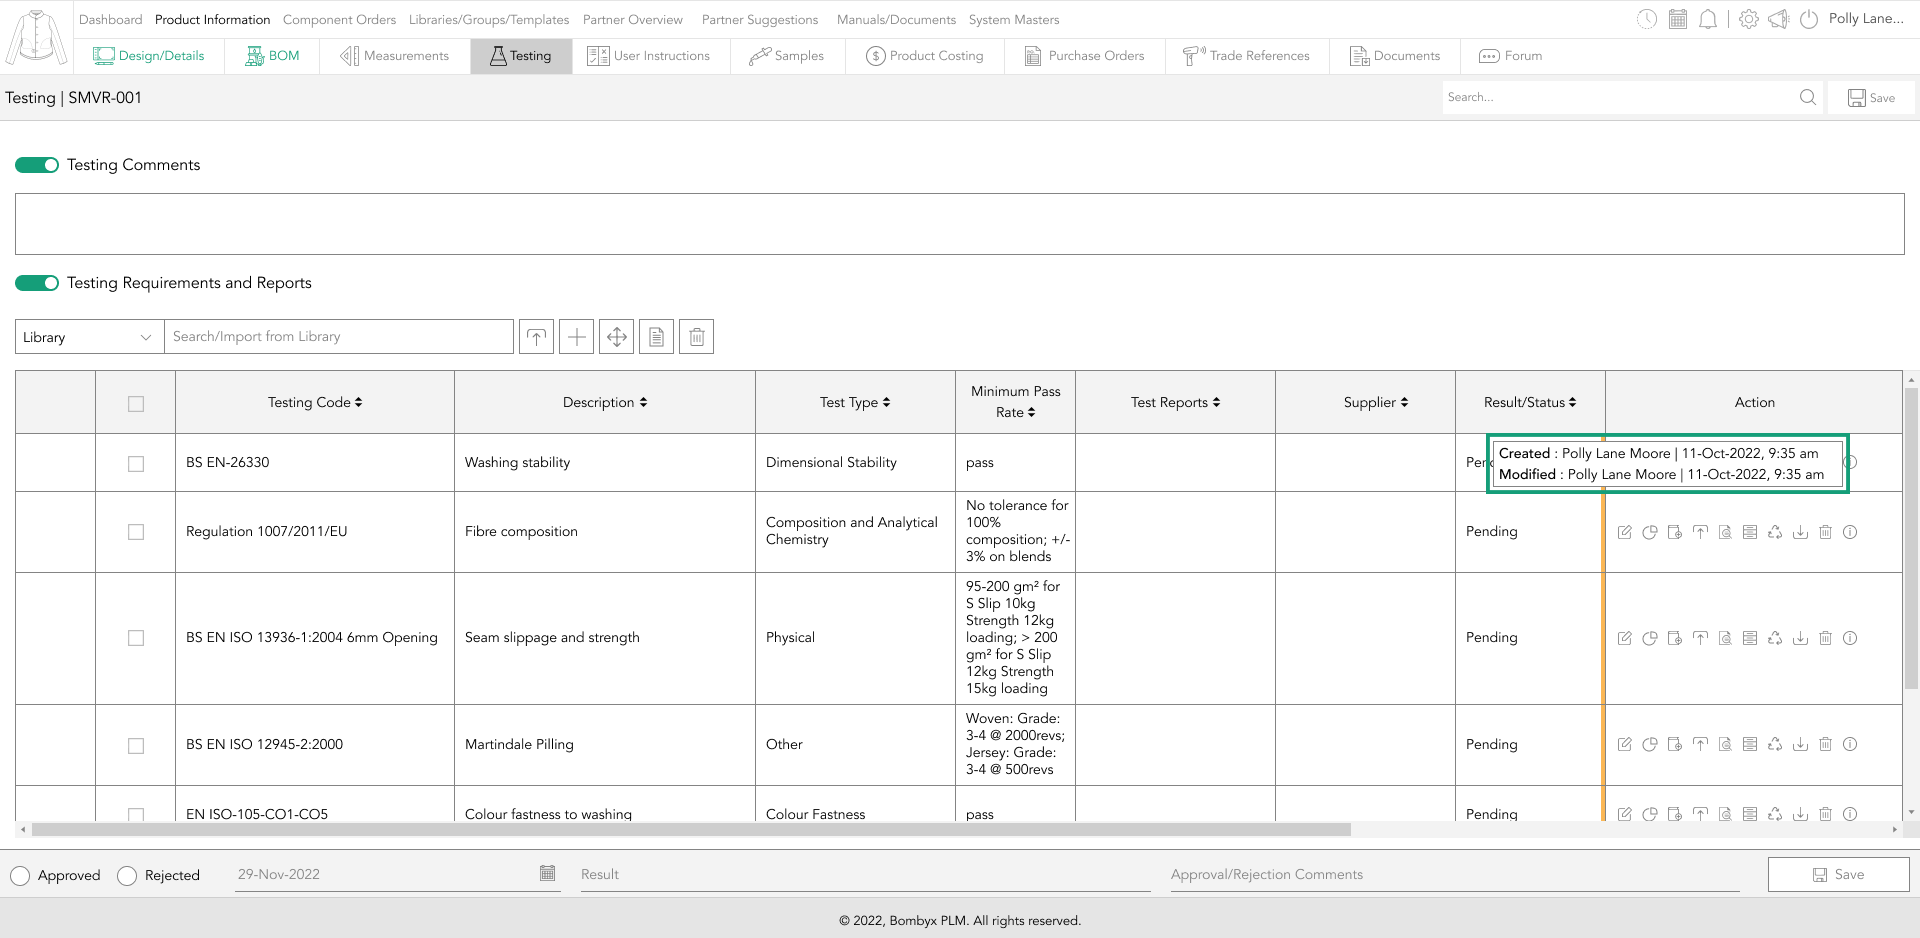
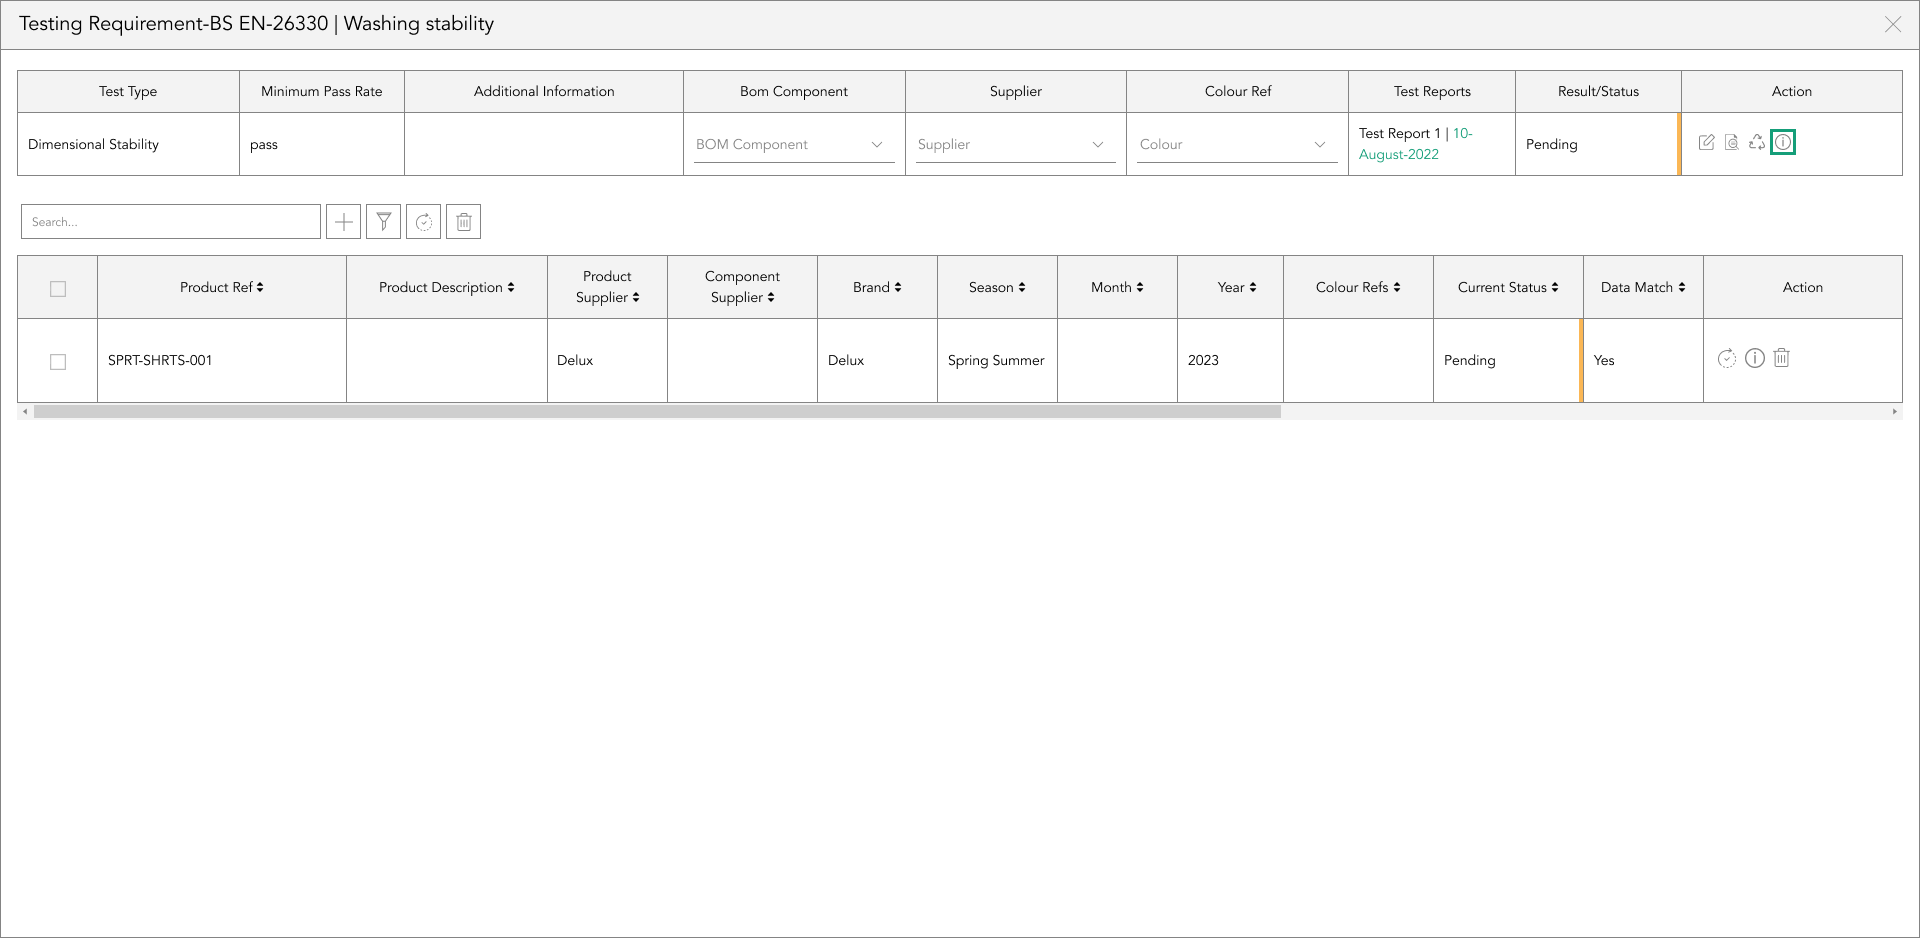
seeing who added/imported the test requirement, and who last modified it.
Sometimes it can be useful to know who added an entry, when it was last modified, and by who.
To see this information, tap the ‘i’ icon in the action panel.
![]()
Note: If it hasn’t been edited, no ‘modified’ view will show.
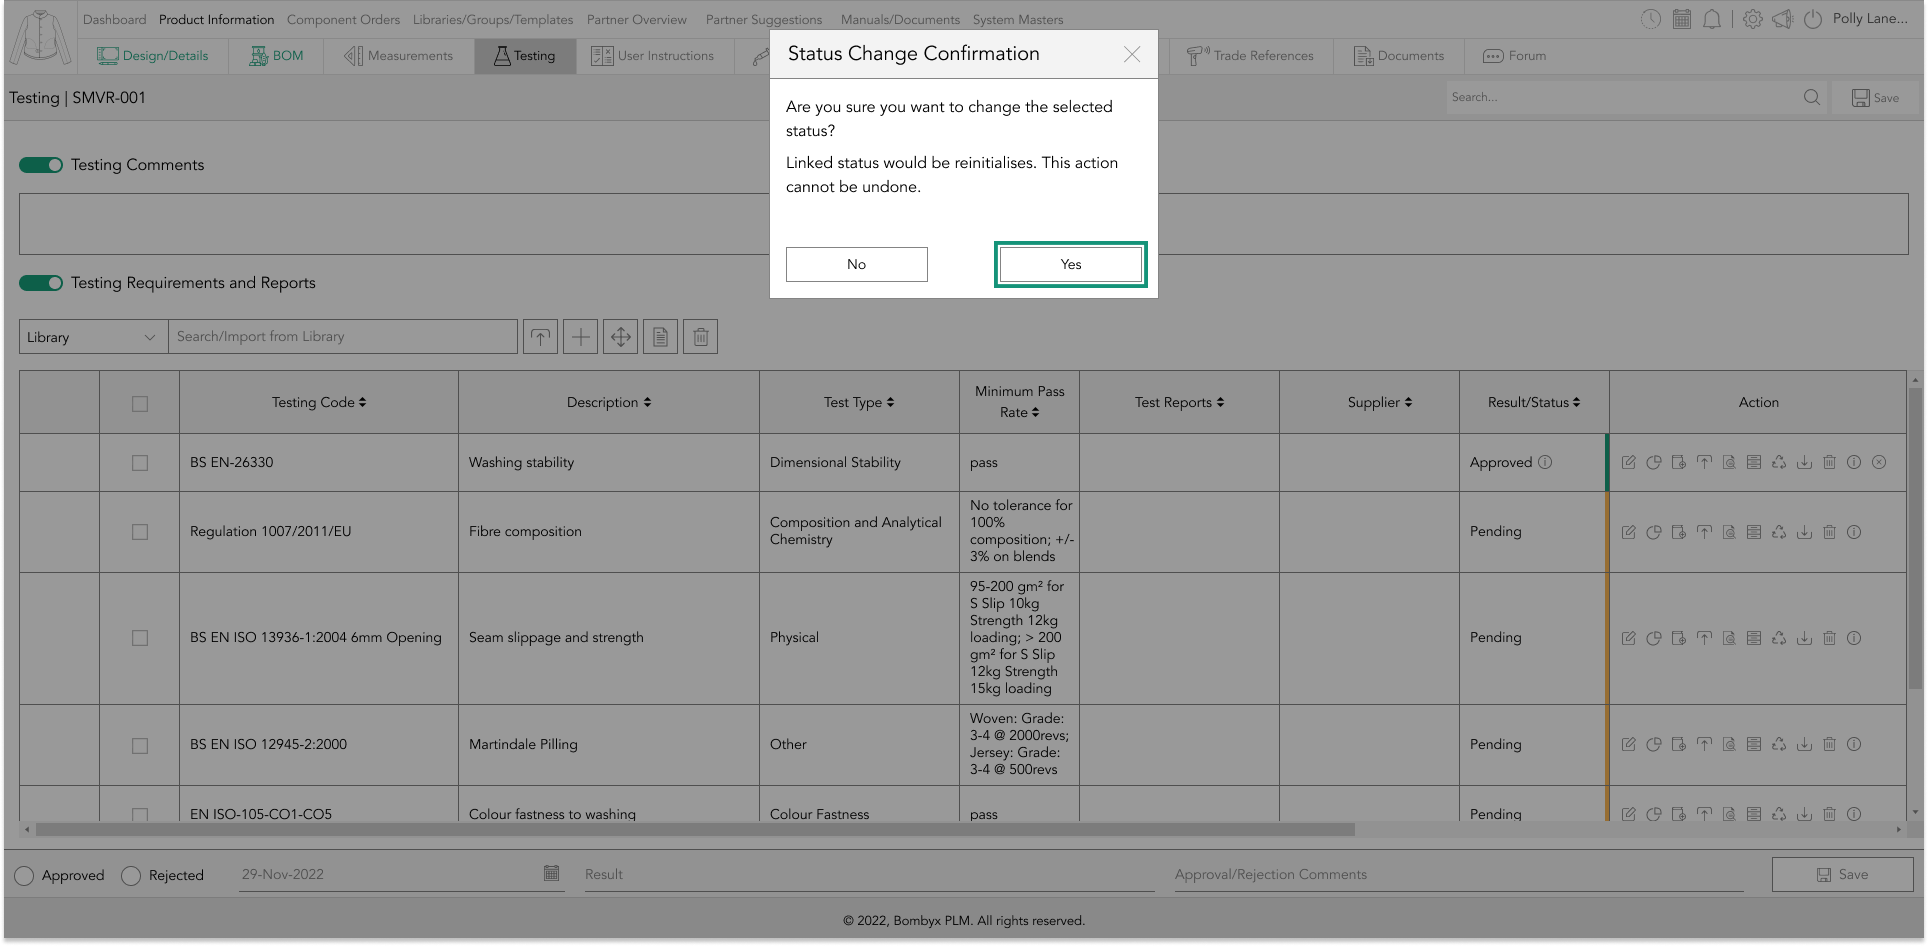
removing a testing requirement status
If you’d like to remove the status to revert it back to a pending state, you can do this by locating the ‘clear status’ icon in the action panel and tapping it.

A popup will appear asking if you’re sure you’d like to make this action, tapping ‘yes’ will clear the status back to pending, and tapping ‘no’ will cancel the action.
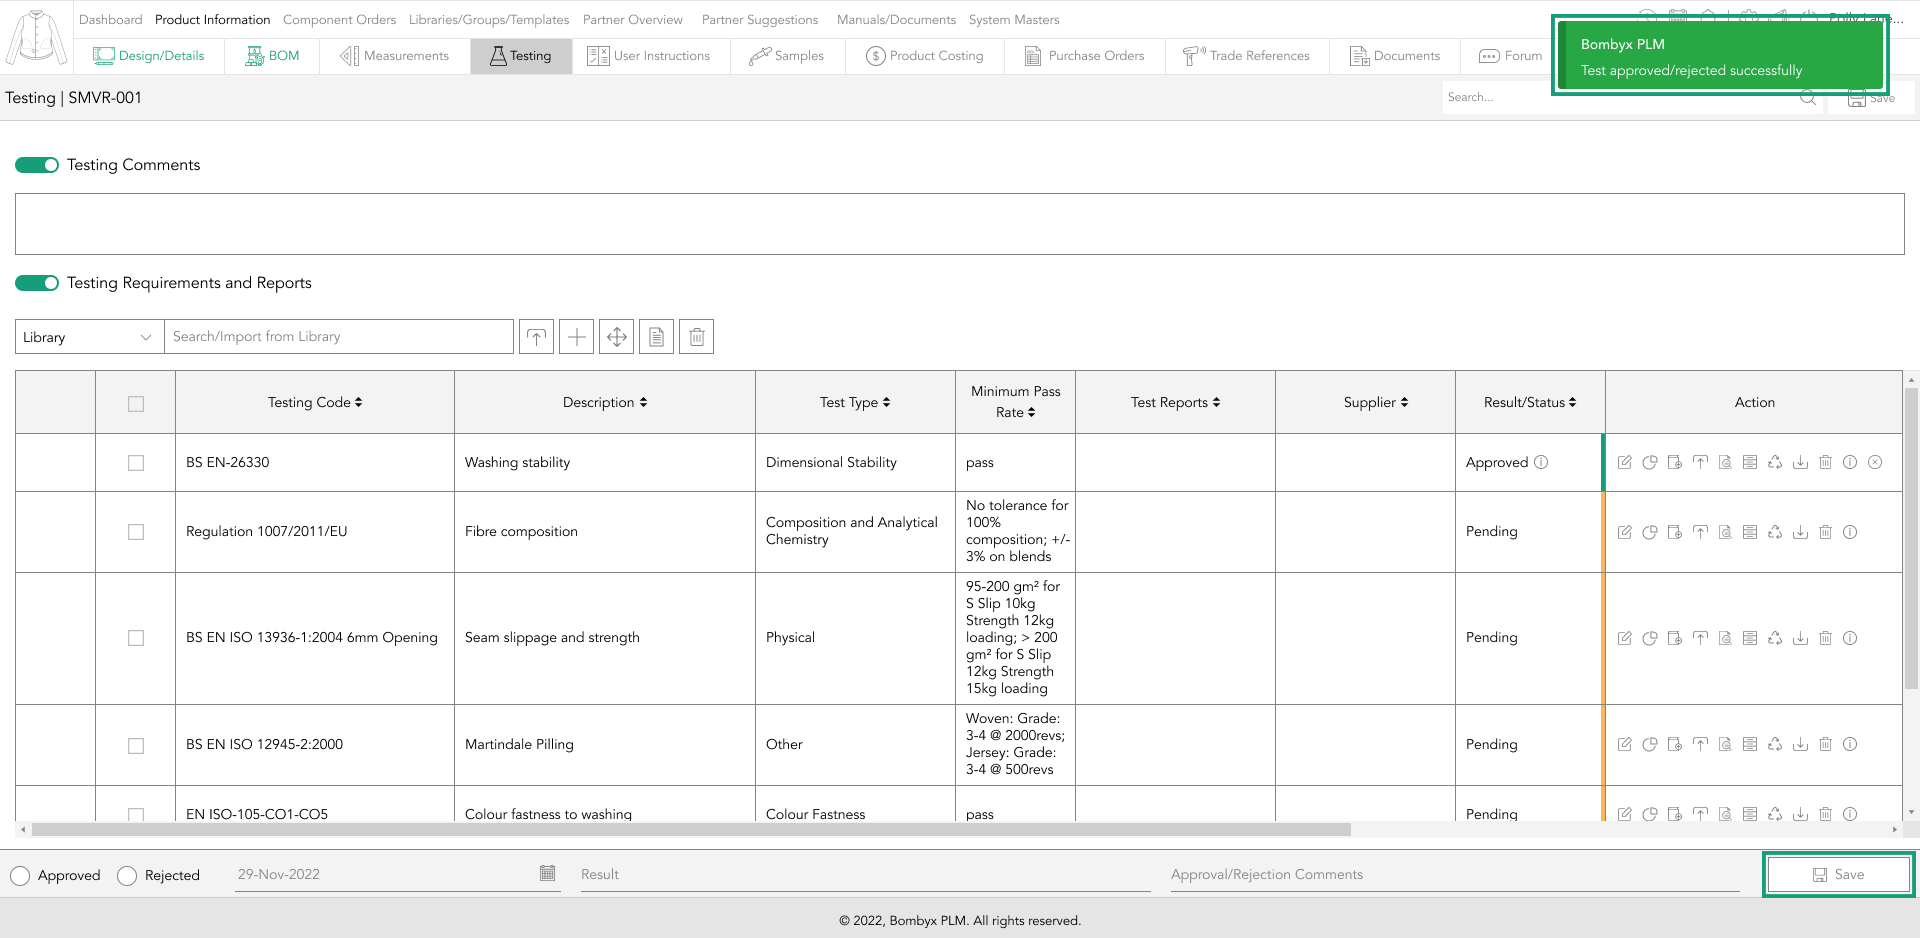
approving/rejecting a test requirement
Once a test report is uploaded by yourself, your team, or your suppliers, depending on the results, you will then be able to mark the test requirement as approved or rejected.
To do this you will need to navigate to the bottom of the page. You won’t need to scroll as the approval/rejection action is a stick item that will move with you as you scroll.
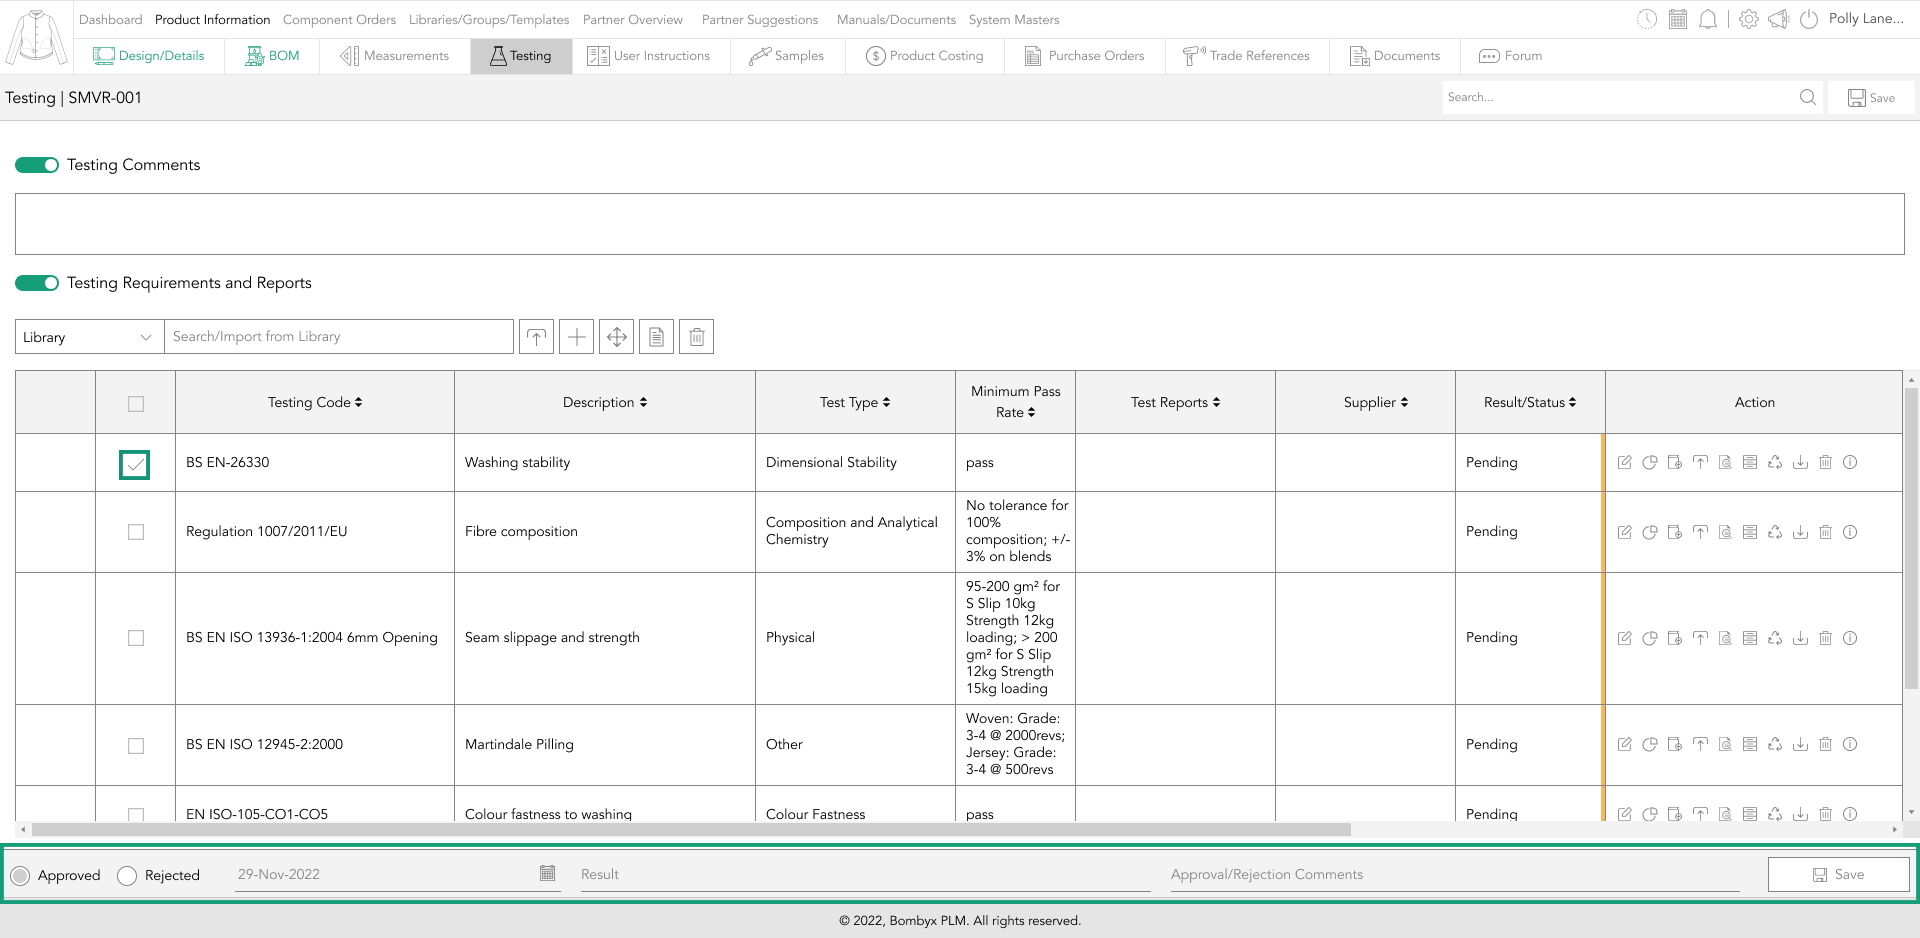
Select approved, or rejected, and enter the date you made this remark. The default date is today's date, but in instances where you’ve communicated this offline, and want the date to reflect when the decision was made, you can adjust the date by tapping on it.
You can then enter the result from the test report, and if you’d like to comment further there is an option comments field where you can communicate your comments to be seen by your team and supplier.
Once happy with the information, tap the update button on the right-hand side of the panel, and this will reflect in the table above on the item that you’ve applied for the new status too.
If you have made a mistake you can amend this by following the steps again and overwriting the original data input.
accessing testing usage
To access the testing usage page, to add, edit, or delete requirements, tap the usage icon in the action panel of the row of the selected testing requirement.
editing test type
If you want to add to the data within the testing requirements/reports or amend/update the testing data, tap the edit icon in the action panel on the right-hand side of the table.

add a testing requirement
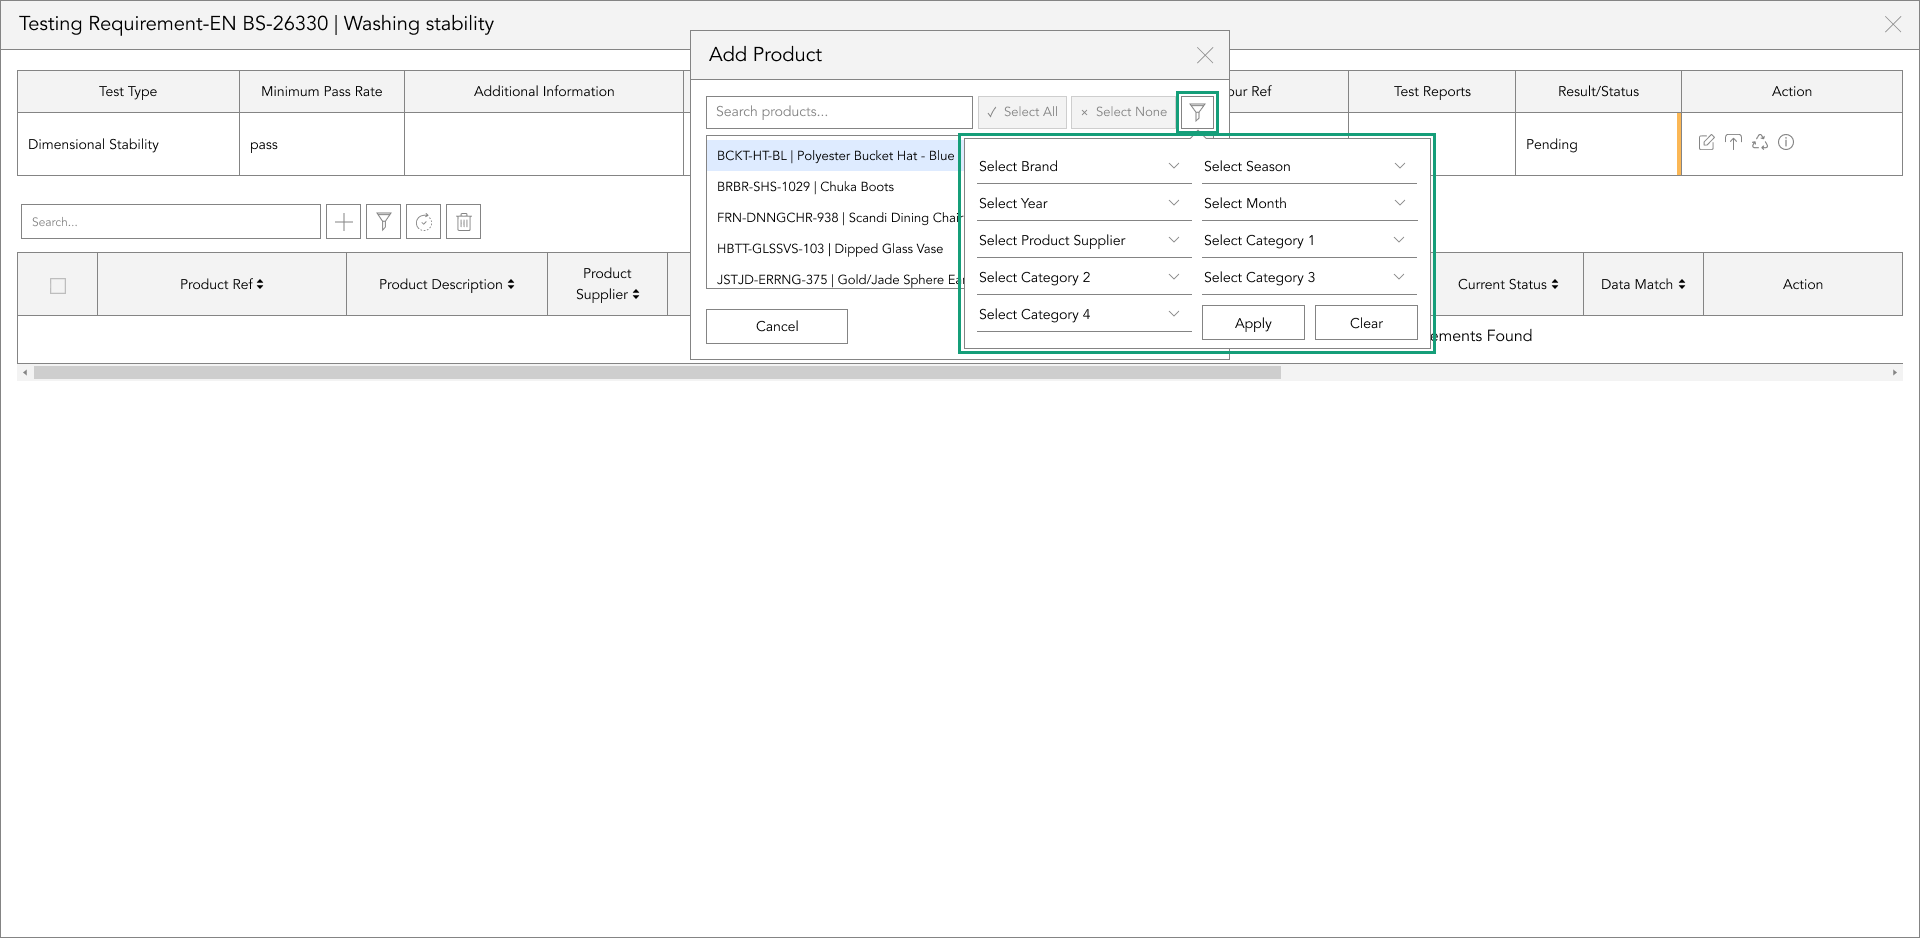
To add a new testing requirement, you will need to tap the plus icon that can be found next to the search bar.
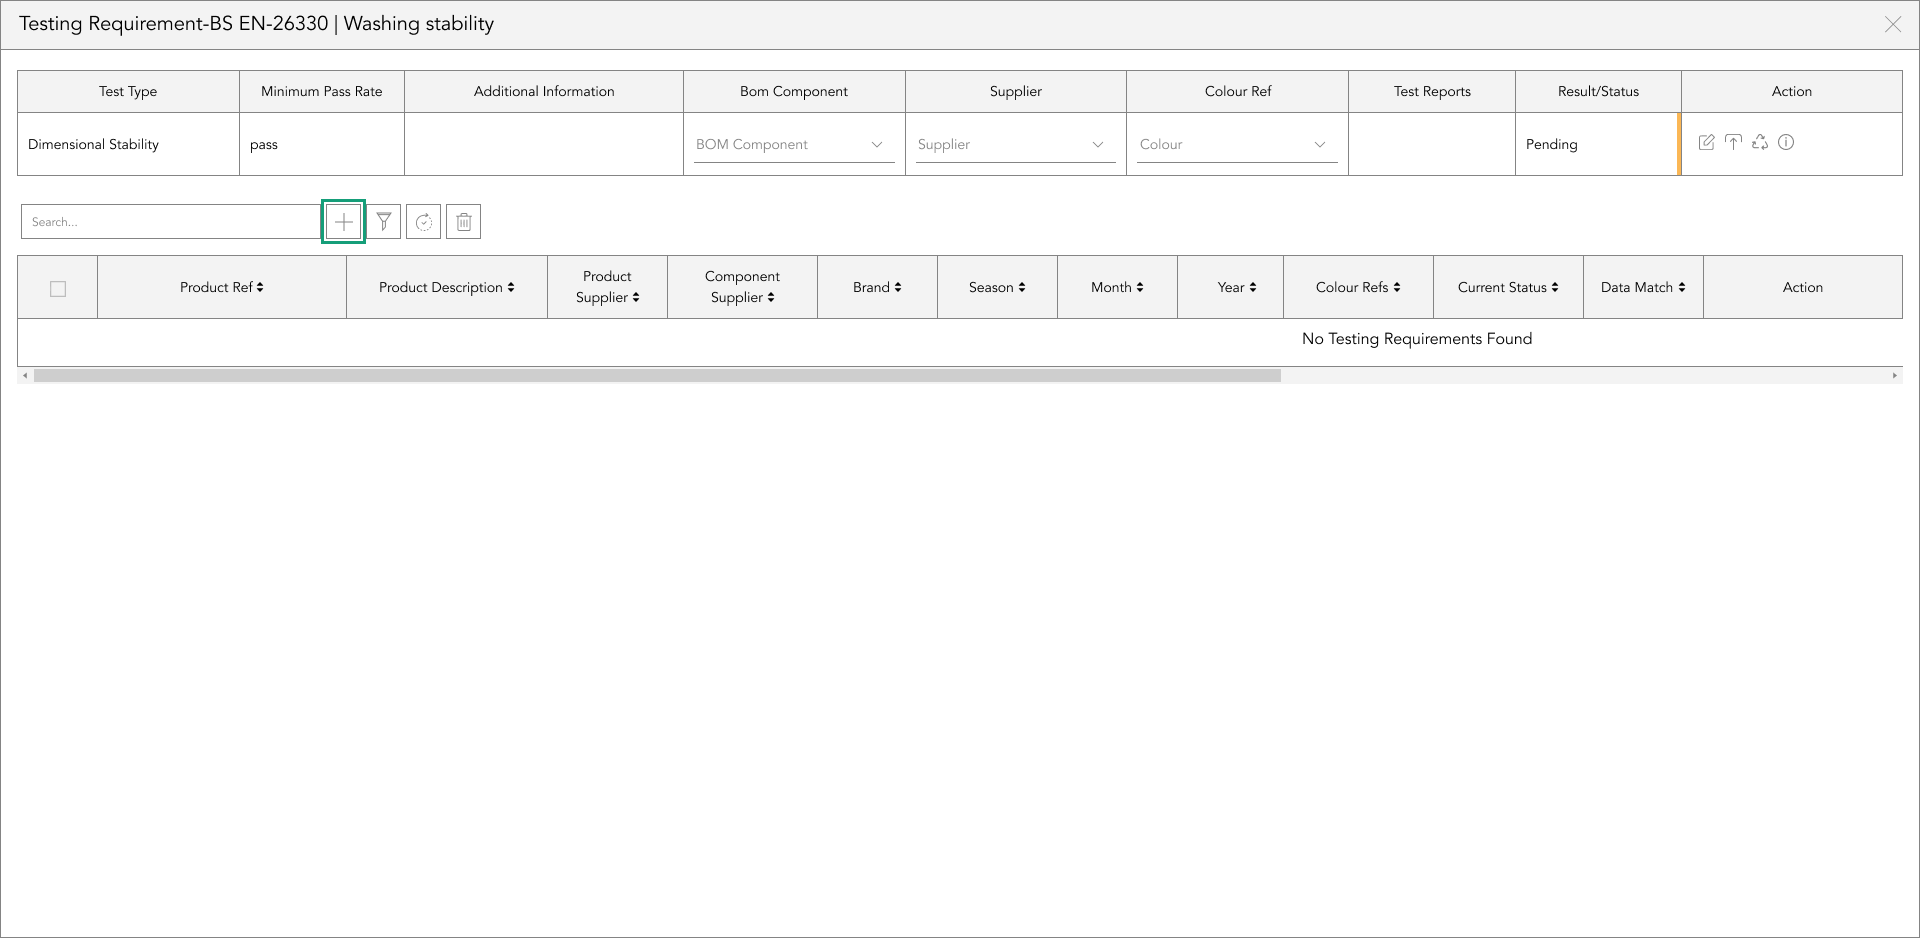
A box will appear, where you can select which product you wish to add, by using the scroll bar, or you can start searching by product code/description in the search bar.
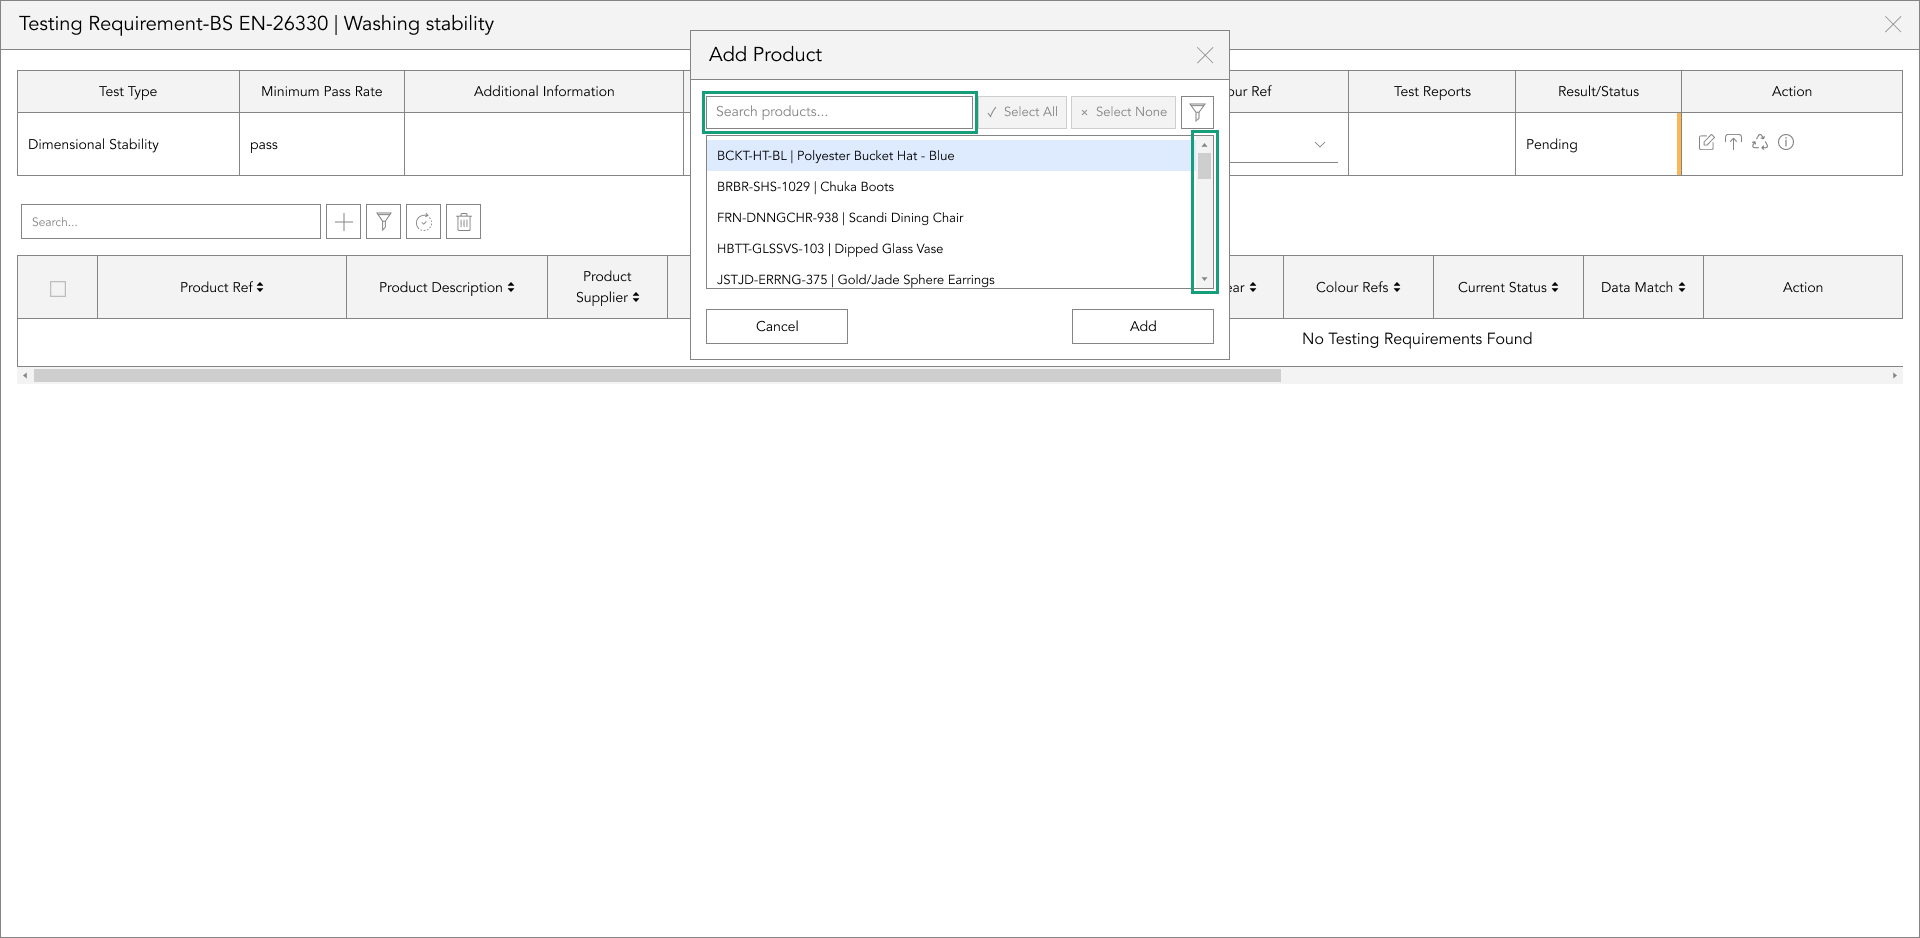
Or alternatively tapping the filter icon, will allow you to search by, year, season, brand, etc. Just select from the dropdowns and tap apply.
uploading a test report
To upload a test report, tap the upload icon in the action panel, and a popup will appear.
There are two ways of uploading a test report, you can either drag and drop the file into the grey box or tap the upload icon at the bottom right of the grey box.
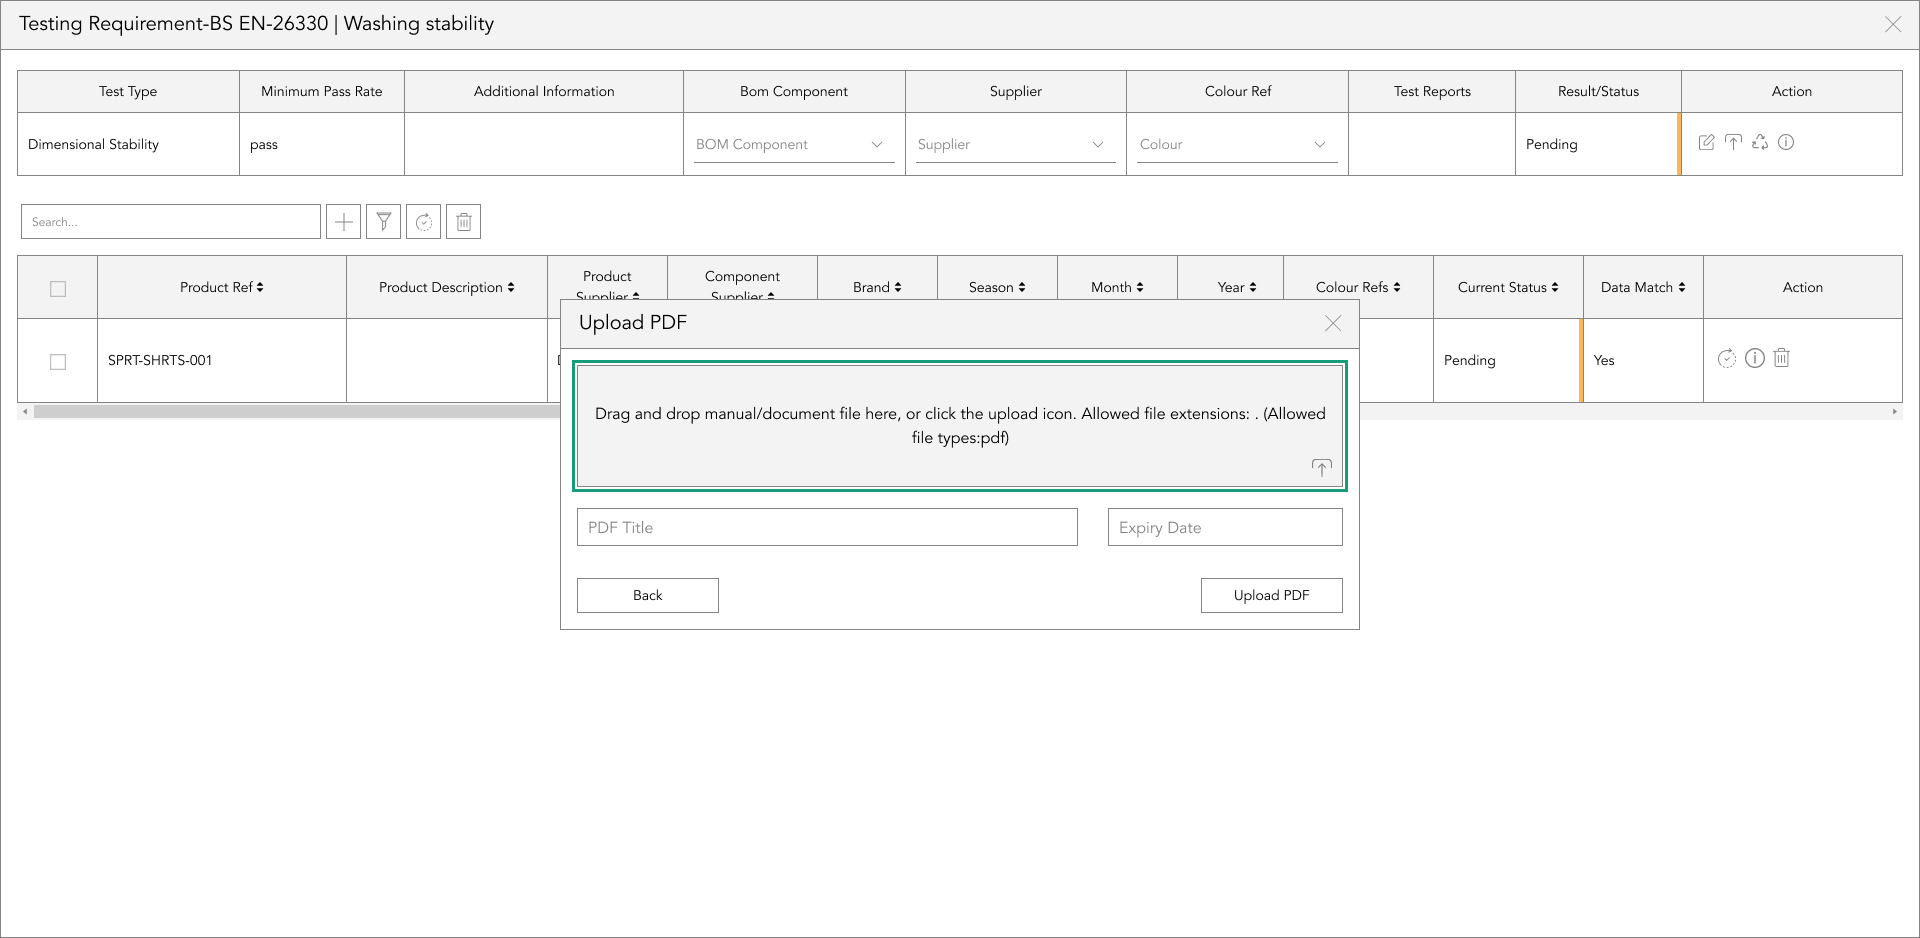
Once you’ve uploaded the report, the file name will automatically be used as the name. If you want to change the name, overwrite this in the document name text box. If the report has an expiration date, add this in the field next to the document name field, and tap ‘Add’.

Once you have uploaded a test report, you will now have the option to preview the report, to do this tap the preview icon.
renew a test report
To renew a test report, tap the renew icon in the action panel, and a popup will appear.
Follow the steps for uploading a test report.
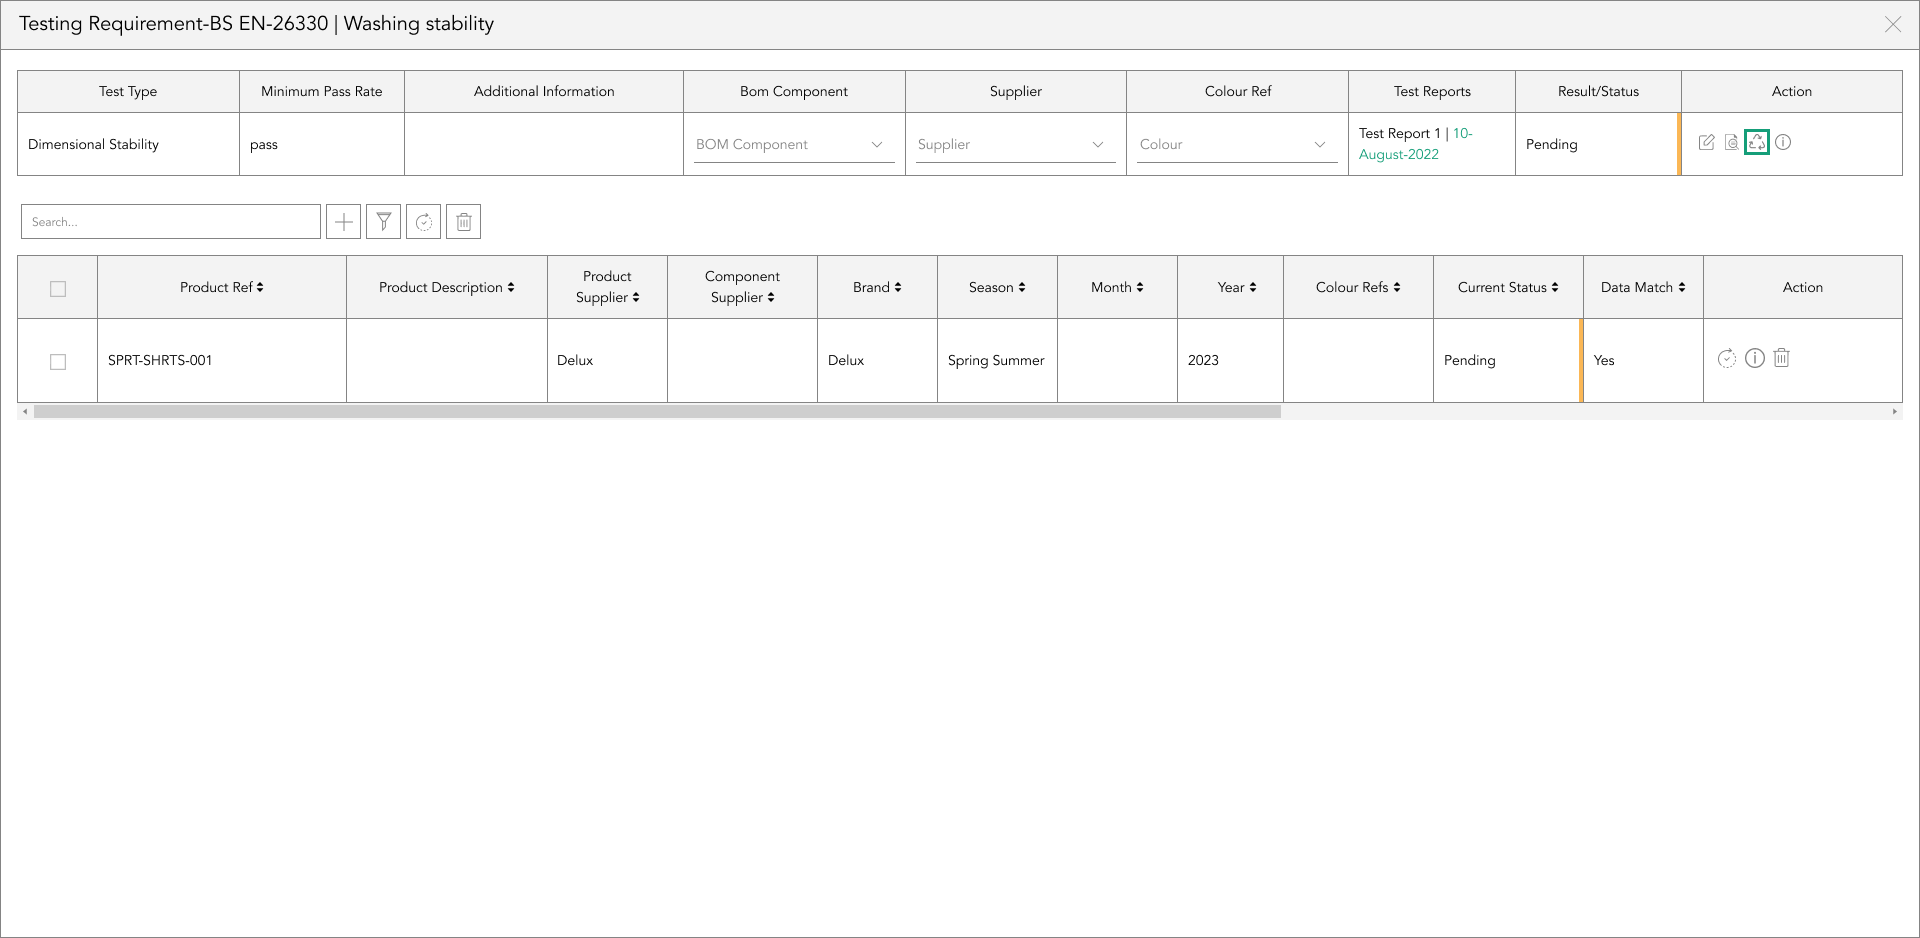
update a test requirement/report
To update a test requirement/report tap the update button in the action panel, or you can update multiple at once by selecting each test's checkbox and clicking the update button that is next to the search bar.
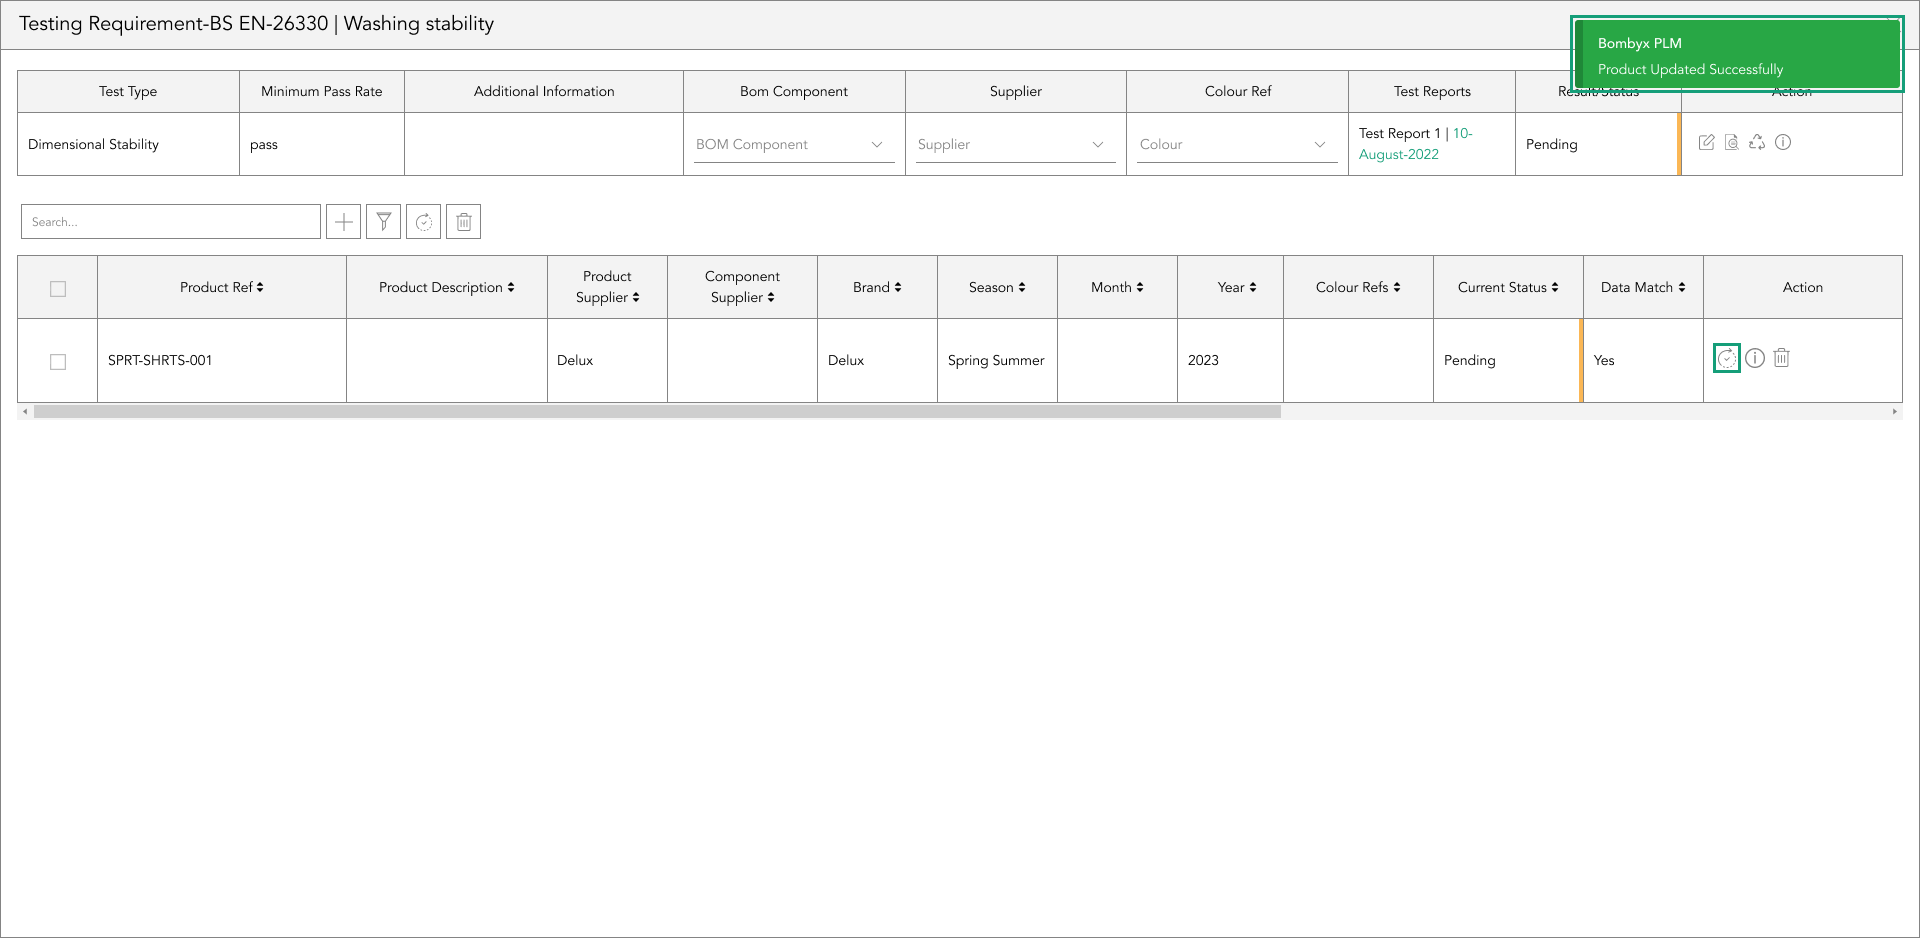
You will then be notified by Bombyx, with a green message if this is updated successfully.
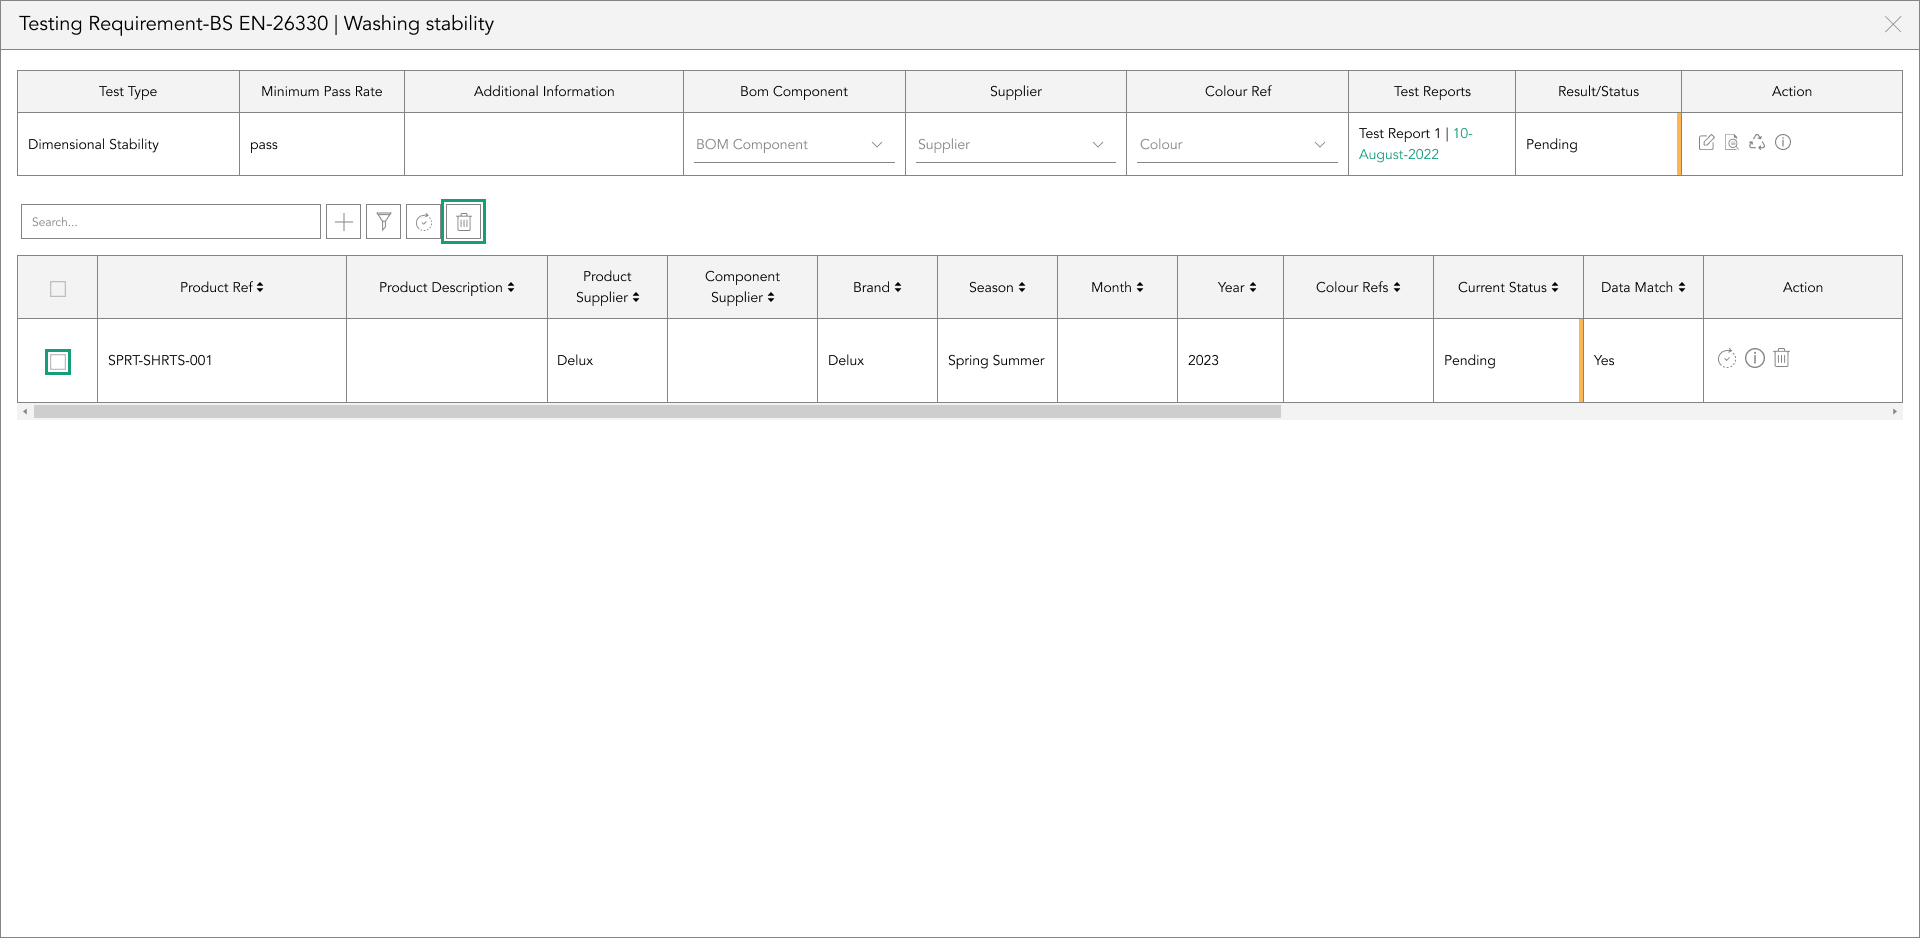
deleting test reports
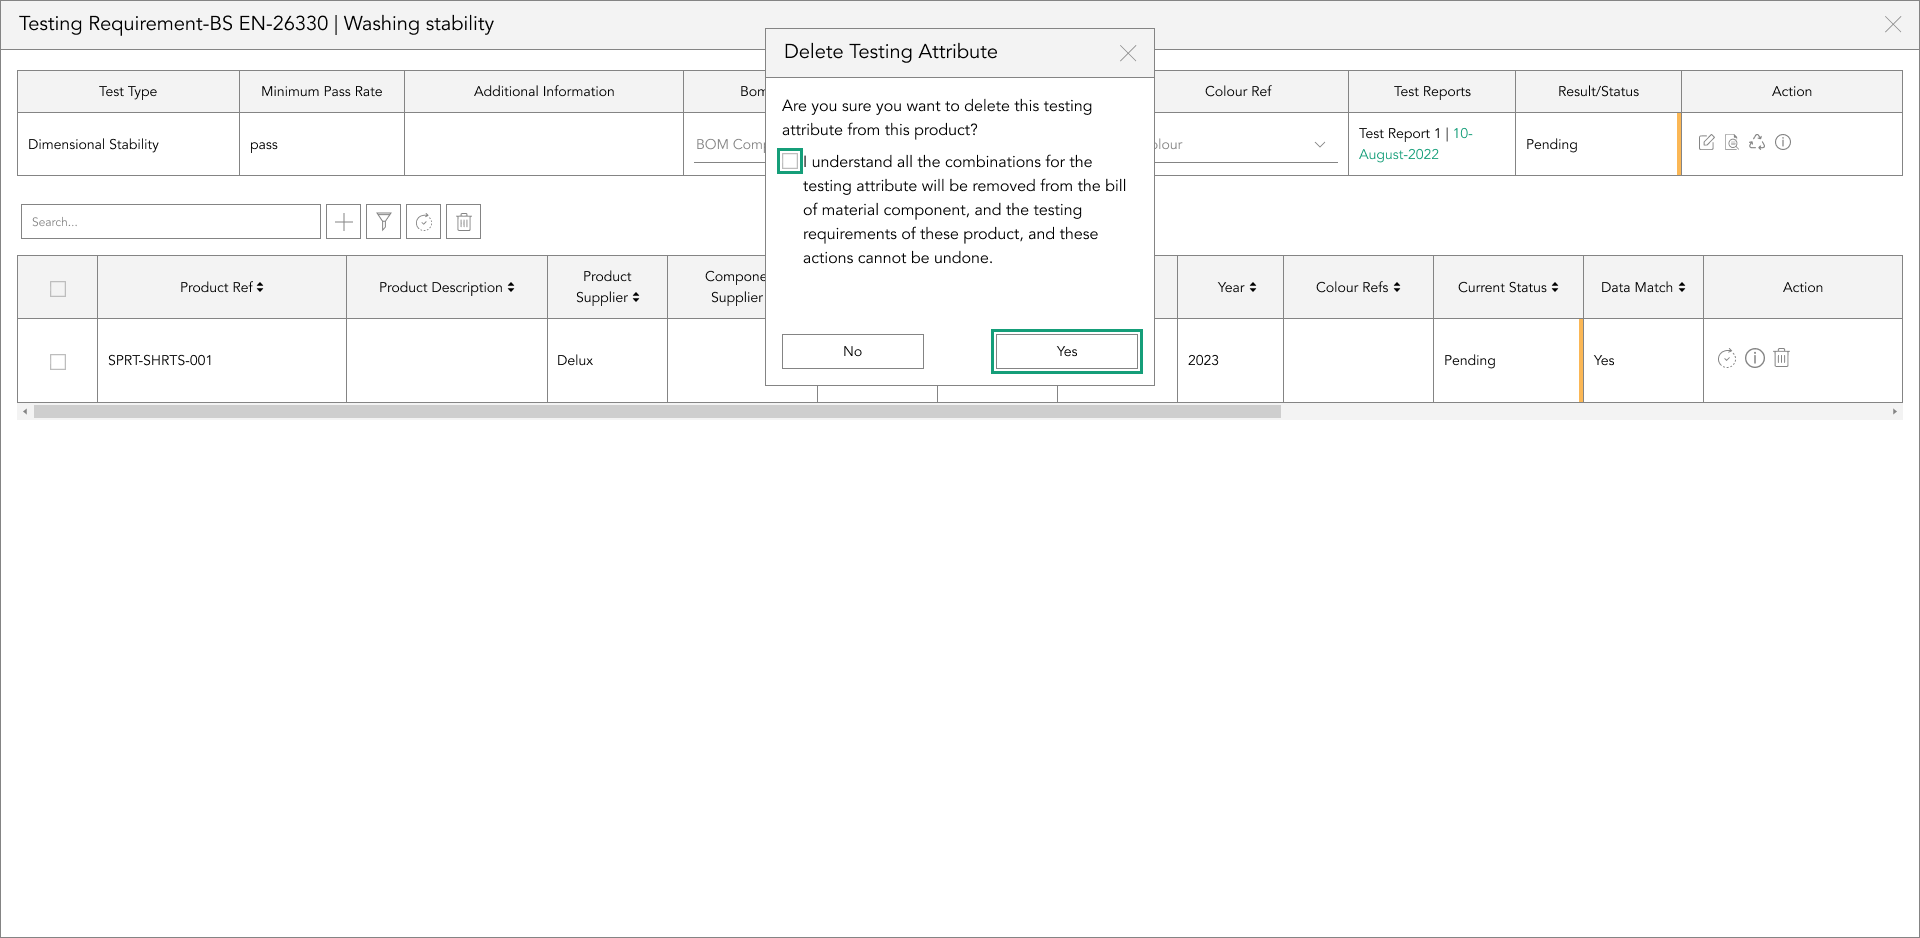
To delete a single requirement, tap the bin icon at the end of the selected row. Or to delete multiple, tap the checkboxes of each requirement and tap the bin icon that is positioned next to the search bar.
A popup will appear, asking if you are sure you wish to delete. To continue, tap the checkbox and proceed to yes to remove, or to cancel this action tap the no button.
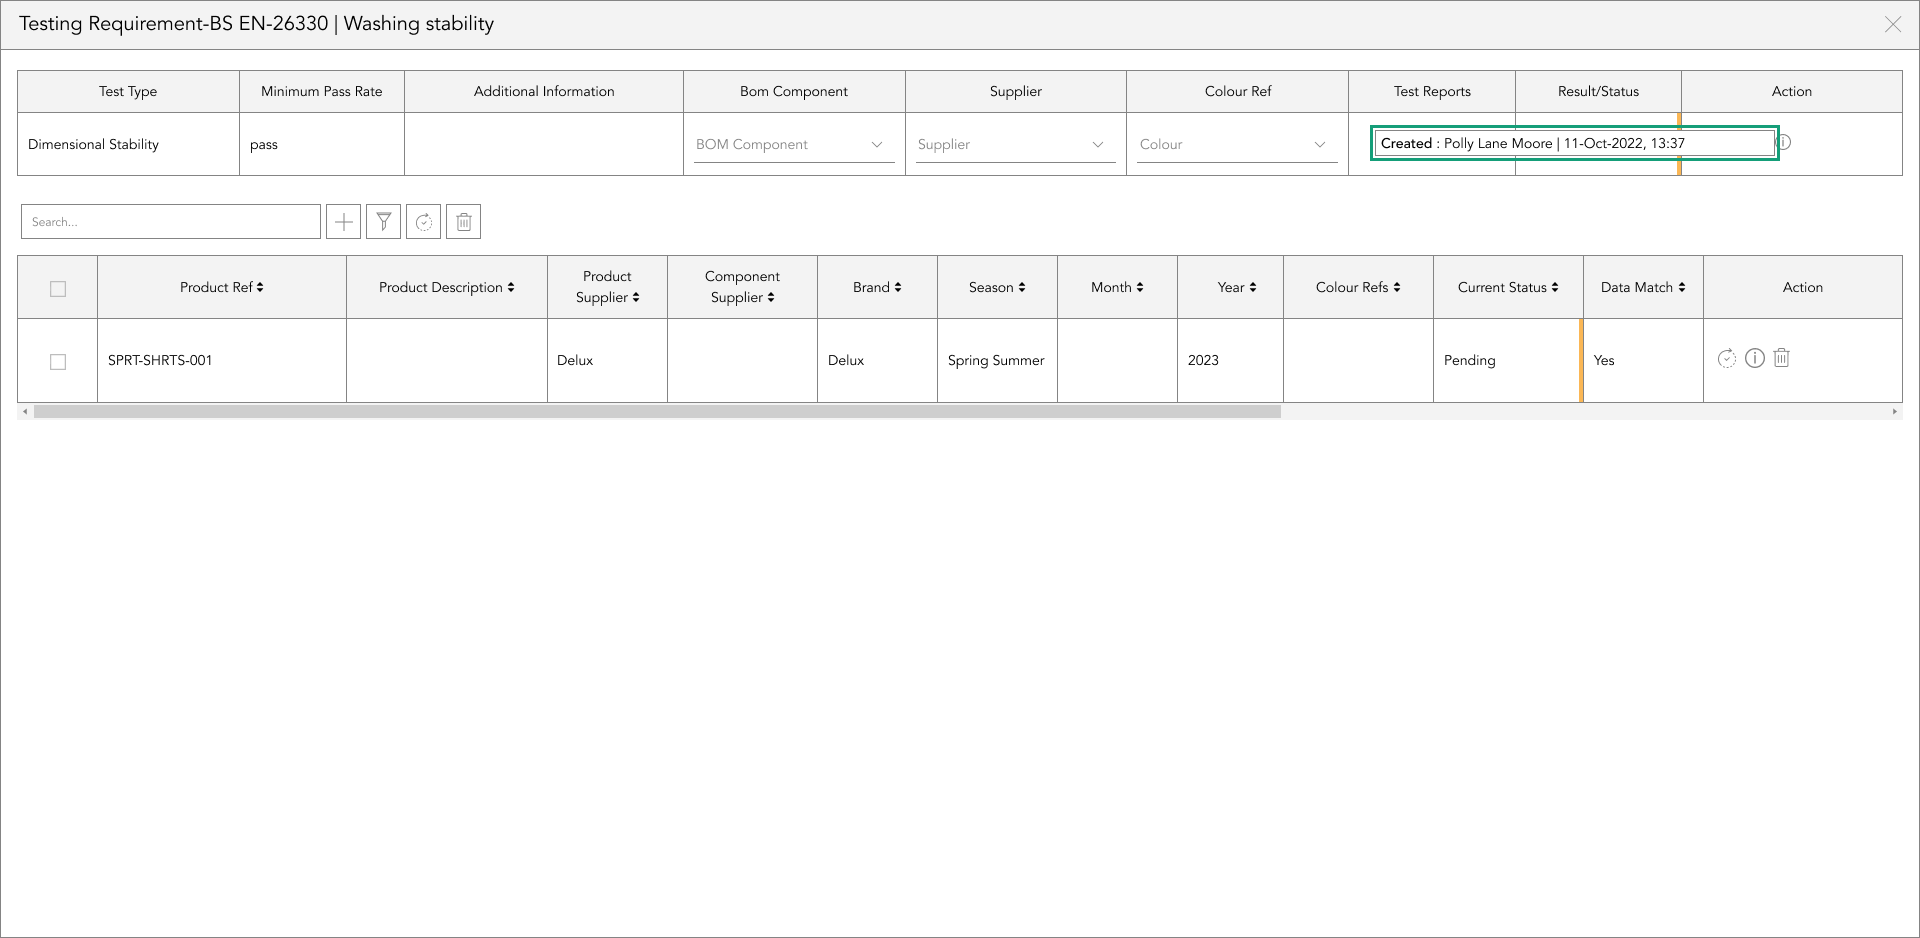
created/modified
To see who created the test type, hover over the information icon.
This will bring a popup of who created it and at what date and time.
filtering
The filter icon can be used, similarly to the search bar function, to narrow the list of tests already assigned. Select 1 or more filter options from the dropdowns, and tap ‘Apply’.
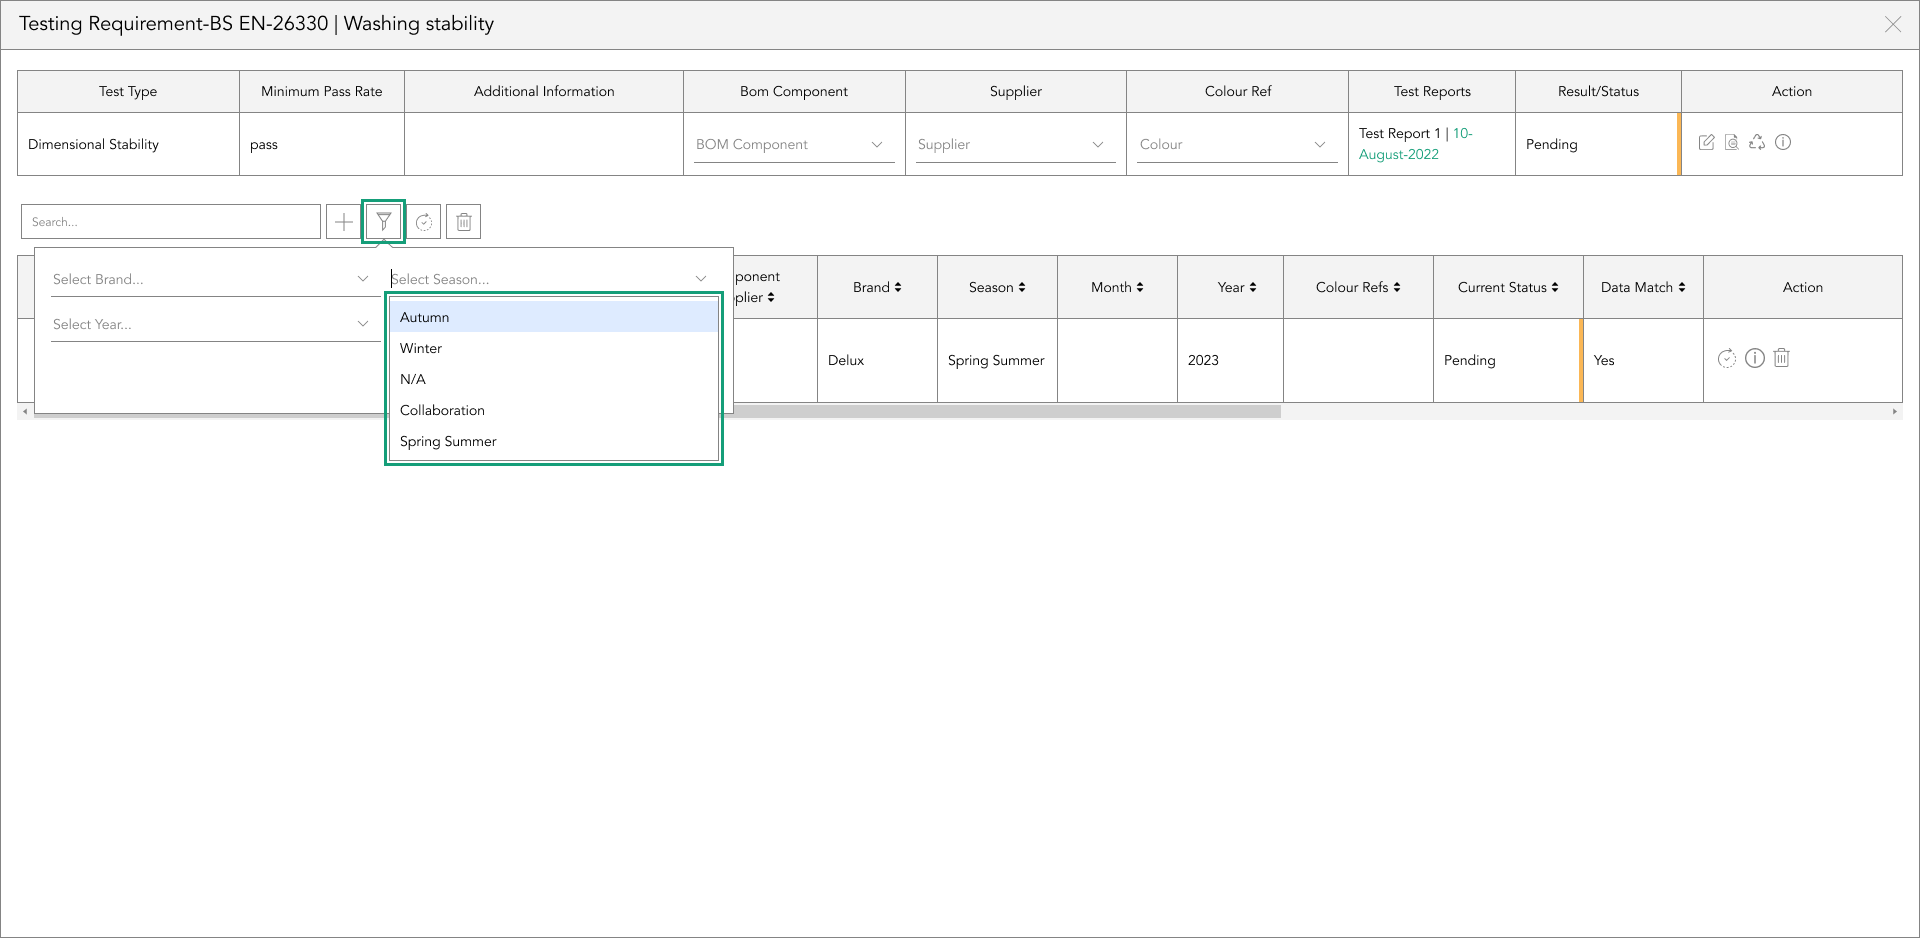
Tap clear on the filter popup to remove the filters applied.

Beyond the Label: Diving into the Sustainable Story with Digital Product Passports
Consumers today are increasingly concerned about the environmental and social impact of their purchases. From the food they eat.

Bombyx’s AI Integration: Advancing Business Excellence in PLM, PIM, and DAM Systems
Let's delve into the exciting realm of Artificial Intelligence (AI) undergoing a transformative evolution. As we Enter the year 2024.

Beyond Baubles: A Stylish Dive into Christmas Fashion Trends.
e explore the latest Christmas fashion trends, with a focus on achieving a harmonious balance between sophistication and comfort. From luxurious velvets to cosy knits

Streamlining Winter Fashion with PLM: Managing Seasonal Changes
Winter fashion production demands meticulous planning and execution. PLM serves as a guiding force in production management, aiding in resource allocation, scheduling

Christmas Experience through Digital Transformation
During the Autumn/Winter months in Europe and the USA, are marked by heightened activity. The festive season introduces an atmosphere of joy and unity. Amidst the era of digital in
Demanding Trends & The Transformative Power of Product Lifecycle Management
Explore how strategic Product Lifecycle Management (PLM) empowers fashion to navigate trends sustainably. This post delves into the symbiosis of trends and sustainability,

The Power of Product Information Management (PIM) With a PLM System.
In today's fast-paced business environment, effective product information management is crucial for success. Product Information Management (PIM) is a powerful tool.
Fashion and the Power of Product Lifecycle Management
In recent years, the fashion industry has witnessed a surge in fashion, a phenomenon characterised by the rapid production and consumption of inexpensive clothing... and a whole l

Supply Chain Management has Forever Changed
Brands make use of product lifecycle data analysis to help them work out price points, marketing and advertising strategies, packaging, growth and expansion… and a whole lot more